|
Butternut Squash Soup with Crispy Shallots and Sage Nothing screams autumn like butternut squash soup. The version shown in the video, from The Healthy Hedonist, is simple to prepare, yet velvety and delicious-tasting. I start with a 2 ½ to 3-pound butternut squash, slice it open down the middle, place it in a 375˚ oven and bake until it’s tender, about 45 minutes. With a soup as simple as this one, roasting the squash first to heighten its flavor is of the utmost importance. I then remove it from the oven, let it cool for a few minutes, and scoop out and discard the seeds. The seeds come out so much more easily after the squash is cooked. I then scoop out the flesh and set it aside. I start the soup by adding a splash of extra virgin olive oil to a medium pot. I stir in 1 cup of leeks, 6 cloves of garlic, and 1 ½ teaspoon ground cumin, and cook the mix over gentle heat until softened. I next add a couple cups of sliced sweet potatoes, the reserved squash flesh, a cup of apple cider, and 5 cups of water or stock. This is a good place to boost nutrient content and flavor with a homemade chicken or vegetable stock, but the soup is still delicious with water as the primary liquid. Add a teaspoon salt, and cook the soup partially covered at a gentle bubble for about fifteen minutes, until the sweet potatoes are tender. While the soup is simmering, I make the garnish. I slice shallots into thin rings and add them to ¼ cup extra virgin olive oil. At first, nothing seems like it is happening. Then the oil starts to sizzle, and slowly but surely the shallots start to fry around the edges of the pan. At that point, it’s important to stir continuously for the next three or four minutes, until the shallots are more or less evenly caramelized. At the final stage, some will be darker than others, but they should all have a golden hue. Have a strainer set over a bowl ready and close. When the shallots are colored as evenly as possible, you have to separate them from the hot oil quickly, to keep them from continuing to cook. About 15 seconds before the shallots are finished I add the sage, just to sizzle them in the oil. After I strain the oil, I remove the sage from the shallots and chop the leaves into small pieces. The sage, shallots, and oil are now ready lend flair to the soup. For simplicity’s sake, I blend the soup with a hand-held blender, also known as an immersion blender. I’m careful when using the immersion blender, to immerse it in the liquid before turning it on, as well as to turn it off before lifting the blender from the soup. At this last stage I always taste the soup, to see if it needs an extra dash of salt to pull up the flavors. I sprinkle in a dusting of black pepper as well. The soup has a delightful aroma and a rich taste. The silky texture is offset with the flourish of caramelized shallots and sage, and a drizzle of shallot oil.
Share on Facebook and Twitter | Kitchen Tips, Soups, techniques, Vegetables | No comments
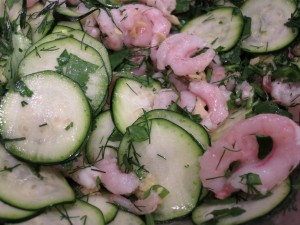
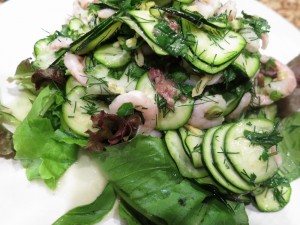
Zucchini Salads Until recently, too many bad memories of thick chunks of raw zucchini in crudité platters made me shy away from ever eating the vegetable raw. I had assumed that the best way to coax and concentrate the flavor of the watery squash was to cook it. Before cooking, I’d often salt the zucchini to draw out the water. If I had grated it, I would squeeze out the excess; if I had sliced it, I would blot it dry before sautéing. I gave raw zucchini a second chance recently. The difference was that I sliced the vegetable paper thin. I then added a fat sprinkling salt to draw out the water. The slices wilted into an appealing texture that changed my assessment of raw zucchini. I’ve been making many delicious salad all summer with this technique. I repeat: the key is to slice the zucchini thin. This is where a mandolin comes in handy. I don’t use anything fancy—a plastic one or the slicer that is on some flat metal graters works fine. I then sprinkle some salt on the zucchini, along with something acidic like lemon and lime juice as well as all of the other ingredients. Sometimes I hold back on adding the oil until after the salad is completely softened. I let the zucchini wilt for about an hour, turning every so often. These salads retain their good looks and flavor up to three days in the refrigerator. The salad pictured here includes lime juice, a few chopped anchovies, scallions, jalapeños, cilantro, dill, Thai fish sauce, and baby shrimp. I let it sit about an hour, mixing a couple of times, until the zucchini is wilted and tender. I then add some oil. Nowadays I’m using a blend of extra virgin olive oil, sesame oil, and filtered coconut oil. I serve this over a bed of mesclun for a delicious lunch.
The version I made the other day was with zucchini, salt, lemon juice, olives, mint, basil, and oil. If I had some cherry tomatoes I would have thrown those in as well. This humble vegetable (and use the yellow variety as well) lends itself to lots of possibilities for extraordinary dishes. Share on Facebook and Twitter | Kitchen Tips, Lunch, Main course, Vegetables | No comments
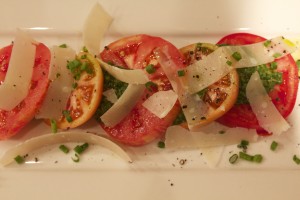
Herbed Pesto So many gorgeous herbs are available this time of year that I often get carried away and find myself with a refrigerator drawer full of beautiful choices. One of the ways that I like to have fun with these herbs as well as use up the extra is to make an out-of-the-ordinary pesto. In the demonstration video, I’m starting with a base of toasted pumpkin seeds, about ¾ of a cup. I toast them in a dry heavy-bottomed skillet just until they are plumped, about a minute or so. While I use pumpkin seeds in the video, you can use any nut or seed that you have in your pantry. Some favorites include walnuts, almonds, sunflower seeds, pine nuts, pecans and pistachios. I transfer the lightly toasted seeds to a food processor. I then add 2 cups packed mixed herbs. In this demo I work with a combination of cilantro, basil, chives, and mint. Some other herbs that are delicious for this technique include parsley, dill, watercress, arugula, and sorrel. I add extra virgin olive oil—about 1/3 cup—as well as a couple of tablespoons of fresh lemon juice, a garlic clove, and 1/2 teaspoon of a good mineral-rich salt. I also mix in a teaspoon of light miso—such as mellow white— which gives depth and complexity to the overall flavor. This dairy-free version allows for the greatest flexibility, and is delicious with fish, chicken, pasta, grains, and vegetables. You can always add cheese later if you like. I whirl all of the ingredients in the food processor for a couple of minutes, and that’s it. The pesto is ready to use immediately and it freezes well too. One delicious all-time favorite option, which I show on the video is to dollop some pesto between slices of fresh tomato, top with shaved parmesan, and drizzle with some good extra virgin olive oil and a sprinkling of black pepper and chives. Every mouthful is exciting.
Share on Facebook and Twitter | condiments, Kitchen Tips, nuts and seeds, Recipes, techniques | No comments
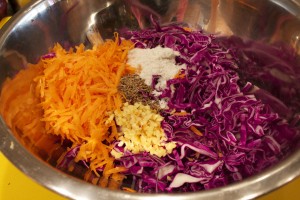
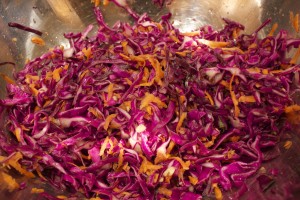
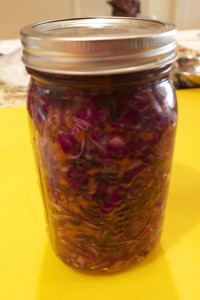
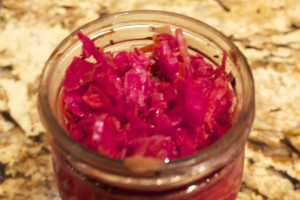
Red Cabbage Lacto-Fermented Sauerkraut Lately, I’ve been on a lacto-fermenting frenzy, fermenting everything from red cabbage to dill pickles to beet and fruit kvass. The lactobacilli, which are good bacteria, proliferate in fermented vegetables and fruit. The vegetables and fruit are easier to digest and the vitamin levels are increased as well. The main by-product of lacto-fermentation is lactic acid, which promote the growth of healthy flora throughout the intestine. What I like about these fruits and vegetables is that once they’re fermented, they last for a long time in the refrigerator. They’re an instant quick hit of super nutrition. Moreover, they are easy to produce. Here’s one of my favorites, a red cabbage ferment, that needs only salt to get the whole process of fermentation going. The salt inhibits any bacteria that could putrify the ferment until the lactic acid forms. I start with a head of finely shredded red cabbage. I add some shredded carrots, a piece of minced ginger, a tablespoon caraway seeds, and two tablespoons Celtic sea salt. After stirring everything together, I massage the mix with my hands to help the cabbage release its juices. There’s no need to add water to the brine when you make a cabbage ferment.. You can pound that cabbage with a mallet or just put a weight on the cabbage ( a bowl with a weight in it works well). and it will start sweating away in no time. I then stuff the mix into a jar (a one quart bell jar is perfect) pressing down to make sure that there’s liquid floating on top. I make sure to have an inch of space at the top. (This is quite important to avoid leaks.) I leave this on my kitchen counter for 3 to 5 days. With a bell jar, the piece in the middle is hard to press down when the ferment is complete. The red cabbage doesn’t look so bright in the beginning, but as it ferments it turns a beautiful magenta color. It’s best to transfer this to the refrigerator, where it can last a long time (up to a year) without opening. Once opened, it’s good for about three months. Share on Facebook and Twitter | condiments, Health Tips, Kitchen Tips, Side Dishes, techniques, Vegetables | No comments
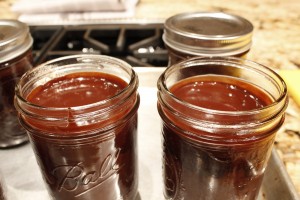
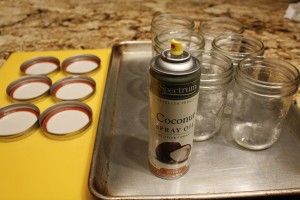
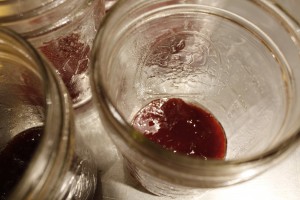
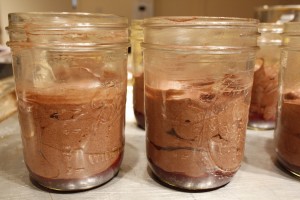
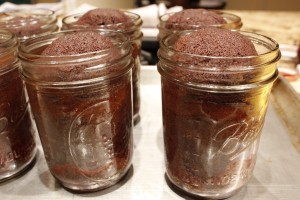
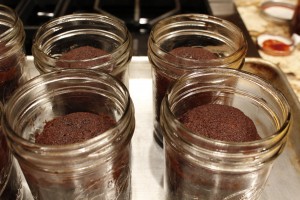
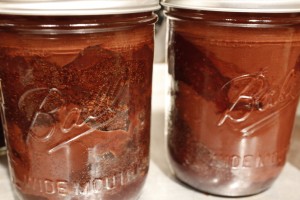
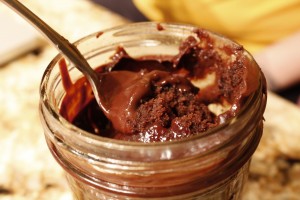
Cake-in-a-Jar Next week I am going to be making about 40 cakes-in-a-jar for a catering job, so I spent some time in the kitchen working out the technical challenges. I’ve been having a blast experimenting. These packed jars are not only adorable, they are delicious as well. My version here has chocolate cake, layers of raspberry or strawberry jam, and a thick layer of ganache. I’ve been using pint ball jars, which serve two, and are a good size for gifts. The smaller 1-cup ball jars are perfect for individual servings. First I coat the jars with spray. I rarely use spray fat, but since I’m about to make over 40 cakes, I’m looking to streamline the process. Plus, I just found a coconut oil spray from Spectrum. Next, I spoon a layer of jam on the bottom. I’ve used strawberry and raspberry jam, for the color as well as the flavor. It’s a treat to dig up with a long spoon the cooked jam under the baked cake. Use any favorite chocolate cake recipe and fill the containers half full. A cake recipe that makes two layer cakes is perfect for 6 pint-sized jars. I baked the cakes at 350˚ for about 25 minutes. Don’t worry, the jars won’t explode or anything — this is like baking in pyrex. The cakes do take a little less time than when they’re in cake pans, so check on them a little earlier than you might otherwise. The cakes emerge from the oven looking like they’ve risen too high, but they settle a lot after a few minutes. I then added a bit more jam around the top dome to fill in the gap (for 6 cakes you will need a 16-ounce jar) as well as a thick layer of ganache on top. (I flavored my ganache with Chambord.) Keep in mind that the weight of the ganache will eventually sink the cake about an inch. That makes the whole cake compress and taste extra fudgey. The whole concoction tastes like a trifle. Screw on the lid and refrigerate. These are tastiest if you refrigerate them for a couple of hours before eating to let the ganache settle. The cakes stay fresh for at least five days. Dig a long spoon in and get all of the layers in each bite. (I feel positively naughty eating these, kind of like I’ve been caught eating out of the jar.) The larger ones are fun to share. Pass the jar around, and dig in. At least it’s not illegal.
Share on Facebook and Twitter | Chocolate, desserts, Kitchen Tips, Musings, Recipes, techniques | No comments
Young Coconuts and How to Crack Them Coconut water is the liquid found inside a young coconut. Don’t mistake it for coconut milk, which comes from the meat of a mature coconut. In addition to natural sugars, which make it taste deliciously sweet, the water contains a complex array of vitamins and minerals. The nutritious beverage is high in potassium, chlorides, calcium, and magnesium. As a tree sap, coconut water is essentially the “blood” of the coconut palm. The electrolyte profile of coconut water is somewhat similar to human plasma and has been used by doctors as an intravenous solution and injected directly into the bloodstream to prevent dehydration. When freshly extracted from the coconut, the liquid is free from germs and parasites. Sure, you can buy the water in packs from the grocery store, but it’s great fun to whack open the fruit yourself. Not to mention that there’s no comparison in the flavor between the fresh and the bottled. Young coconuts are large and green off the tree, but come already shaved in this country, so thankfully, you don’t need a machete to open them. It is not difficult to open these neatly, so that you can drink the water and scoop out the soft gel-like meat. I use a serrated knife to shave around the top part of the coconut. Then I take the heel of a heavy knife. I use a cleaver and whack it a few times. I hold the coconut on an angle, which makes it really safe. The key is to whack the coconut with confidence. After three or four whacks, the lid just lifts off. I can put a straw in this and drink the liquid and use a spoon to scoop out the gel. This is the best sports drink, thirst quencher, and cooler around. The best brand of purchased young coconut products is from exoticsuperfoods.com. You can buy packs of the young meat and bottles of fresh coconut water, which is second only to the ones you crack open yourself.
Share on Facebook and Twitter | Fruit, Health Tips, ingredients, Kitchen Tips, Where To Buy (Sources) | No comments
Nuts and Seeds It is undeniable that when nuts and seeds are soaked – and dehydrated if you want them crunchy – they are more readily digestible, and the nutrients within are easier to absorb. Besides, they taste simply delicious. Nuts and seeds contain enzyme inhibitors, which are there as protection until they have what they need to grow, such as sunlight, water, or soil. The soaking water will have the enzyme inhibitors in it, so after you drain the nuts or seeds, make sure to give them a rinse. You can use the plumped nuts as is (perfect for smoothies and nut milks), since soaking makes them softer. You can store the soaked nuts for a few days in the refrigerator to use as needed. Alternatively, dehydrate them in a low oven (or dehydrator) to make crispy nuts. Either way, you can really feel the difference in your body between those nuts that have been properly treated and those that have not. For best results, start with organic and raw. The worst nuts to purchase are packaged varieties that have already been roasted and salted. Poor quality fat and salt are added and the roasting has damaged the fat inherent in the nuts and seeds. Here are appropriate soaking times for each variety: 0 to 2 hours: Brazil, macadamia, and pine nuts 2 to 4 hours: Cashews, pecans, and walnuts (pecans and walnuts can go up to 6 hours) 4 to 6 hours: Sunflower seeds 6 to 8 hours: Pumpkin seeds, sesame seeds, hazelnuts 8 to 12 hours: Almonds If the idea of soaking and dehydrated nuts is going to send you over the edge, consider purchasing from Wilderness family naturals. Wildernessfamilynaturals.com These folk already do all the soaking and dehydrating work for you. I first tasted their exceptional products at the Wise Traditions conference a couple of years ago. The folks from Wilderness Family Naturals had a large booth, and I was able to sample before buying. I was hooked, and returned home from the conference with quite a few bags. I’ve been ordering ever since; the box arrives on my doorstep fast, within just a few days. If you just want to get your feet wet before committing to a big order, try the mixed nuts. I guarantee you’ll be pleased. It’s good to know that there’s high quality choices available. Share on Facebook and Twitter | ingredients, Kitchen Tips, nuts and seeds, Where To Buy (Sources) | No comments
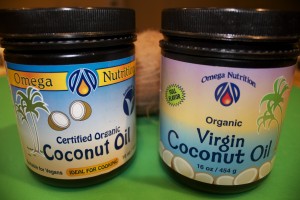
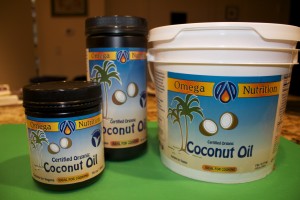
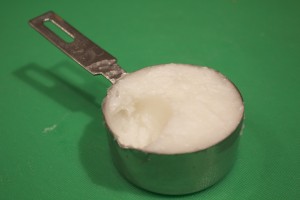
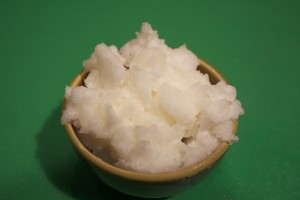
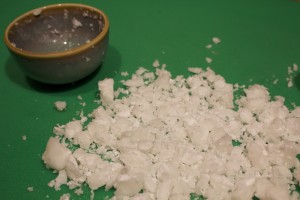
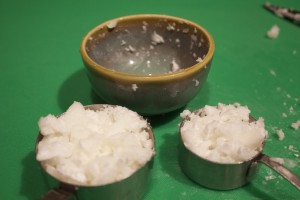
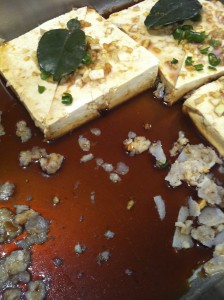
Working with Coconut Oil Young coconuts are large, green, and water-heavy. (Of course, by the time we see them in this country, the outer green shell has been shaved.) As a coconut matures, it becomes wizened, brown and hairy. The gel-like meat within becomes thicker and meatier. Coconut water is the sweet liquid inside the immature coconuts. Coconut milk is made from the pressed juice of grated coconut meat and water; coconut oil is the fatty oil that comes from the coconut meat. The oil, which used to have a bad reputation in this country, is now finally getting the attention it deserves for not only being a nutritional powerhouse but for its versatility in the kitchen. I have used coconut oil consistently for 12 years with great results. Coconut oil comes in two varieties: virgin, which has the flavor of a coconut, and an aroma-free filtered variety which is neutral-tasting. While I love the virgin coconut oil – and I use it frequently – there are many instances when I don’t want what I’m making to taste like a Thai dish. When I want the perfect oil to cook potato pancakes, for instance, I reach for the filtered aroma-free variety. This product still has all of the nutritional benefits of coconut oil without the predominant coconut flavor, which is removed in a vacuum process. Coconut and the oil come from tropical countries where they are exposed to high tropical temperatures. The oil can take the heat necessary to distill it and remove the coconut flavor without affecting the quality. There’s no trans fat byproducts either, so you don’t have to worry that you’re compromising your health. I love the oil from www.omeganutrition.com. I was first introduced to their products 12 years ago; they have the best filtered coconut oil that I’ve ever tasted; this is the brand that got me hooked . Their other products are of the highest quality as well, so you won’t go wrong with whatever you order. They ship fast; you’ll get your products within just a few days. You can order the oil in all different sizes, from a 1-pound canister to a 7-pound pail (my favorite). You don’t have to worry that the coconut oil will go bad; even after you open the jug, it lasts two years at room temperature! At room temperature, coconut oil is semi-solid. It melts at 76 degrees, so if your pantry is warm, you may notice how the consistency changes. Although the oil may have melted, this is not a problem. It can melt and solidify back and forth without damaging the oil in the least. If you’re baking with coconut oil and converting from butter to coconut oil, use 7 tablespoons coconut oil instead of 1 stick butter. Butter contains 20 per cent water, so you need to lessen the oil a bit. The easiest way to measure 7 tablespoons is to scoop ½ cup into a dry measure and then remove 1 tablespoon. Measure coconut oil in the form that you need it in. For example, say you’re making a cookie and you are going to cream the oil with sugar. You will need the oil in its semi-solid state. Measure it right out of the container. If you need it in liquid form, melt some coconut oil (it only takes a minute or two to melt) in a pan over a low flame, and then measure it. If you want to work coconut oil into a pastry crust and you need it super firm, place a glob in the refrigerator to harden it. Chop the hardened coconut oil first on a cutting board, then place the pieces in measuring cups. Pulse the oil into the dry ingredients in a food processor. There’s an easy and delicious coconut oil pastry crust recipe on p. 51 in my book The Healthy Hedonist Holidays. When you need a tablespoon or two to sauté something, it doesn’t matter whether or not the oil is melted or semi-solid. Just scoop some oil out of the container, add it to the skillet, and you’ll find that it will melt quite readily. Be concerned with exactitude only when baking. Furthermore, it’s best to have the other ingredients in your recipe at room temperature before mixing with the coconut oil. In contact with cold ingredients, the oil will start to seize; you’ll then have little clumps of hardened oil in your mix. A quick whirl in the blender will take care of any hardened bits. If your marinade looks like the following picture, just place the pan in the oven. A few seconds in the heat will melt the coconut oil just fine. You can also place your ingredients over a double boiler, and gently heat the mix. It doesn’t take long for everything to get up to 76˚F, the melting point of coconut oil. Coconut oil has a high smoke point, up to 375˚F, which makes it the ideal oil for frying, and your food won’t taste greasy. (Use the filtered variety when frying.) Hands down this is the best oil for making potato pancakes, cutlets, croquettes, falafel, or any recipe that calls for a substantial amount of oil. These are crispy, not greasy. Since you won’t want to waste this gorgeous oil, just put enough oil to go halfway up the side of whatever you are cooking. That’s enough to cook the first side; flip to finish cooking the other side. The virgin oil is the best choice when you want a hint of tropical flavor. It makes buttery-tasting popcorn, stellar roasted vegetables, and creamy root vegetable purées. One of my favorite vegetable combinations at the moment is puréed parsnips mixed with rutabagas or kohlrabi, enriched with virgin coconut oil and butter. Talk about a creamy, satisfying texture! The virgin oil makes a tasty spread on crackers, bread, muffins, and mocha as well. The flavorful virgin oil is also the better choice if you want to utilize the oil as a supplement to stabilize your blood sugar and keep your metabolism humming at high speed. You can use the virgin variety as a moisturizer for your face and body. Try slathering your entire body with the oil before taking a shower. You’ll come out of the shower clean and soft – not greasy – without having to use soap or moisturizer. You can also work coconut oil into a blend. This combination is inspired by Mary Enig’s blend of oils: mix 1/3 part extra virgin olive oil (or macadamia nut oil for a really subtle flavor), 1/3 part unrefined sesame oil (not the toasted variety), and 1/3 part aroma-free coconut oil. The resulting oil is mild-tasting and has a combination of healthful properties from all three oils. You can keep the oil at room temperature, and use it for sautéing and for salad dressings. It also make s a wonderful oil for mayonnaise. Deviled eggs, anyone? We’ll save that for another day. .
Share on Facebook and Twitter | Coconuts, Fats & Oils, Kitchen Tips, Pantry Items | No comments
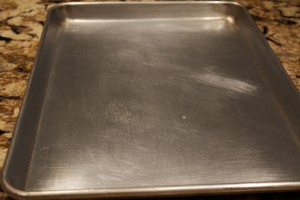
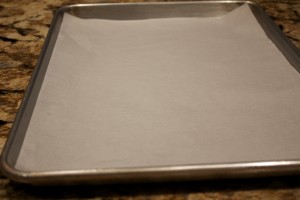
Parchment Paper I consider parchment one of the most indispensible supplies in the kitchen. I line my half sheet (18×13-inch) aluminum baking sheets every time I use them. These industry standard-sized trays are what I became used to working in professional kitchens. I do like the way aluminum distributes heat, but I don’t bake directly on the aluminum trays since I don’t want to run the risk of aluminum leaching out into my food. Aluminum trays, in combination with a protective layer of parchment paper, work exceptionally well.
The type of parchment available in grocery store is sold in rolls, and it is a nuisance: the unwieldly sheets torn from the roll never fit quite right or lie flat on a baking sheet. After getting used to snug, flat, professional parchment paper, I find the rolls nothing less than frustrating. After a bit of fumbling around and testing, I found a few good sources of professional parchment paper.
Some say they prefer silicon for its ability to withstand higher temperatures and longer cooking times than paper coated with quilon. They also maintain that silicon is a safer coating than quilon. Quilon-coated is the industry standard, since it’s substantially less pricey than the silicon-coated. It’s the type used in every establishment that I’ve ever worked in, and it’s the only one most professional cooks even know about. I’ve found it to be more than sufficient for all my culinary needs, from roasting vegetables to rolling pastry crusts. I’ve even cooked pizza on parchment at a temperature of 500˚F. Though the paper turns dark at such high heat, it still does the job perfectly well. You can purchase the sheets in 100 half sheets or 1,000 full sheets (16 x 24). Full sheets fit a large standard-sized baking sheet, which is twice the size of the half sheet pans. (You get a whopping 2,000 sheets when you halve them.) Or course, you save a lot of money buying the 1000 sheets. On the down side, you have to have room to store the box, or enough people to share it with. I purchased both silicon-coated and quilon-coated to compare. I now have enough parchment to last a very long time. The parchment was delivered quickly, within three days. I found it difficult to differentiate between the two varieties of coating. Henceforth, unless I were convinced otherwise, I would probably go with the quilon-coated. Here are good sources for both varieties, in two sizes each: Quilon-coated Parchment: http://www.webstaurantstore.com/16-x-24-quilon-parchment-paper-pan-liner-1000-case/433JR24Q.html http://www.webstaurantstore.com/12-x-16-quilon-parchment-paper-pan-liner-100-pk/99930005.html Silicon-coated parchment: http://www.webstaurantstore.com/16-x-24-silicon-pan-liner-1000-cs/433JR27SIL.html http://www.amazon.com/UltraBake-Parchment-Paper-Sheets-16½/dp/B000E7A6BM
Share on Facebook and Twitter | Kitchen Items/Gadgets, Kitchen Tips, Where To Buy (Sources) | No comments
Slow Sunday Cooking Last week I luxuriated in a solitary Sunday, a day devoted to complete hibernation. I stayed up impossibly late the night before, slept well into the day, and turned off my cell phone and computer. I spent the entire day perusing a hard copy of the New York Times, just budging off the couch from time to time to tend to the dishes that I was slow cooking. The day before, from my local lamb farmer I had purchased lamb necks , which looked to me a lot like osso bucco. This cut I had never cooked before; I knew that, like a lamb shank, a long slow cook in the oven would coax out the flavor and cook the meat to falling-off-the-bone tenderness. This dish was perfect for my Sunday state of mind. An added incentive was that I had made some lamb stock from 5 pounds lamb bones a few days before, although chicken stock would have been delicious as well. I sprinkled the necks with salt and pepper, then browned them in a film of oil. I removed the lamb to a plate and added to the skillet 3 cups sliced onions, 6 whole garlic cloves, a few sprigs fresh thyme and rosemary, and a bay leaf. I let the onions cook until softened, about 10 minutes. I added 2 ½ cups lamb broth and ½ cup red wine, and let the liquid come to a boil. I then added back the necks, covered the skillet, and put it in a 325˚F oven for 2 ½ hours. After uncovering the skillet, I raised the heat to 500˚F for half an hour to brown the meat. By this time the necks had beautiful color and were perfectly tender. I removed the pan from the oven, removed the pieces to a plate, set the skillet on a burner, and raised the heat to high. I threw in a handful sliced celery and carrots, and simmered the broth uncovered for 10 minutes, until it was the thickness of gravy; I then returned the lamb to the skillet. I served it accompanied by mashed yucca, Brussels sprouts and green beans. What a soothing and delicious meal for a lazy Sunday. While I was braising the lamb, I also had a big pot of chicken stock bubbling on a back burner. The next day I sautéed a large array of vegetables: onions, carrots. turnips, celery root, parsnips and sweet potatoes until softened. I skinned some chicken thighs and poached them gently in the stock until tender. I added the vegetables along with fresh ginger and dill to the soup and then seasoned it. Three quarts were packed off to a friend who, fresh from surgery, needed good nourishment. Share on Facebook and Twitter | Dinner, ingredients, Kitchen Tips, Lamb, Main course, Recipes | No comments
|

