|
Maple Sugar and Candied Nuts When I want to use a granulated sugar, I invariably reach for maple sugar as my first choice. This natural sweetener has a subtle maple taste, and works well in many recipes that call for granulated sugar. Maple sugar is simply maple syrup that has been cooked until the water in the syrup has evaporated off. The clumps that are left are ground into smaller pieces, then sifted according to size – powder, granules, or a combination of the two. Nothing is added during the processing.
Maple sugar is relatively expensive. However, when purchased from the source, shipping and all, it is considerably less expensive than purchasing it in a store. I get mine directly from Coombs family farms, a wonderful sugar plant based in Vermont. Their phone number is 888 266-6271 and their website is Coombsfamilyfarms.com. They ship quickly, and you can purchase a choice of maple granules, powdered maple sugar, or a combination or the two. I use the maple powder for all of my maple sugar recipes, since this grind is the most like granulated sugar.
This morning I made a couple batches candied nuts to give away. I love candied nuts. When you make them yourself, you can use just the right amount of high quality sweetener to enhance great nutty flavor. A sprinkling of these crunchy nuts add so much pizzazz to hot breakfast cereals, desserts, salads and soups. They stay fresh in the pantry for two to three months, making them wonderful hostess gifts and edible presents. Bundle them in festive party bags for a treat that everyone will enjoy.
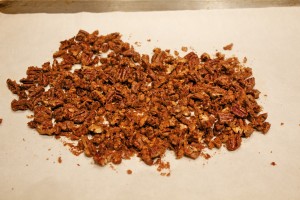
Here are a couple of my favorite combinations. These recipes both take a minimum of prep time and the oven does most of the work. Watch the video on how to make candied nuts. This first recipe is for candied pecans. I toss one cup roughly chopped pecans with 2 tablespoons maple syrup and 2 tablespoons maple sugar. I spread them on a parchment-covered baking dish and place them in the oven for 20 minutes. I stir the pecans one time during the baking, so that they caramelize evenly. The pecans are ready when they are dry all the way through. This technique works well with chopped walnuts, almonds, and blanched hazelnuts as well. When I remove the pecans from the oven, I let them cool before packing them. These pecans keep covered, at room temperature, for two to three months.
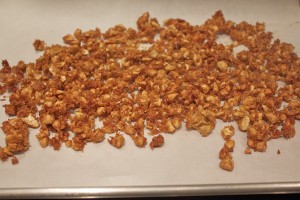
The second recipe is for coconut cashews, one of my favorites. The mix is an exciting combination of sweet, spicy, and crunchy, which makes, among other uses, an excellent garnish for a zesty carrot soup. I toss together in a medium bowl one cup of roughly chopped cashews, ½ cup unsweetened coconut, 1/3 cup maple sugar, ¼ teaspoon salt, and ¼ teaspoon cayenne. I then add one egg white to bind the whole mix together. Again, I’m spreading it on a parchment-covered baking sheet and baking it for 15 to 20 minutes at 325˚. I have to stir this mix twice during the baking session to ensure that the more delicate coconut colors evenly. (By the way, I pull out my tray to stir the mix, so I don’t lower the temperature of the oven. Then I return the tray to the oven to finish baking.) When the mix is evenly browned, I remove the tray from the oven and let it cool to room temperature. I break up the clumps into small clusters that are now ready to be stored or packed. Sweet holidays!
Share on Facebook and Twitter | Kitchen Tips, Natural Sweeteners, Recipes, Snacks, Where To Buy (Sources) | No comments
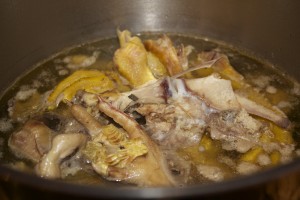
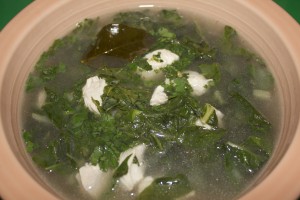
Chicken Soup I’ve been under the weather for the past few days with a full blown cold. This is unusual for me since I rarely get sick. When I feel the slightest bit of an impending sniffle, I have a coterie of preventative measures that I take, which usually work like a charm. I jump on my cellercizer (urban rebounder) to clean out my lymphatic system, I down Immune Response to strengthen my immune system, and I make an effort to get extra rest. This particular cold came on without much warning – it hit the throat first and then traveled to the lungs. I had a couple of energetic events to run, so there was no getting rest for a couple of days. Thus the full-blown cold landed Friday and ordered me to stop. It doesn’t make me feel better to know that colds are rampant this time of year, or that there is a particularly virulent strain going around. I am forced to finally and humbly surrender. I’m actually enjoying the enforced solitude and relaxation. Since my taste buds are depressed with the congestion, all I really feel like ingesting is hot soup. A good bone broth is just the elixir to drive away a fierce bug. So while I have been convalescing, I took out the stock pot, opened the freezer, and took out a big pile of poultry bones. I put up the simplest of stocks – bones, water, a splash of vinegar to draw out the calcium, and a bay leaf. That’s about as much effort as I could muster, and it took all of five minutes. The pot held backbones and wings from two chickens I had recently butchered, a turkey carcass, and a bag of chicken feet. I let this stock simmer about 6 hours, then I strained it, cooled it, and refrigerated it overnight. What made the stock especially gelatin rich was the bag of chicken feet I had purchased at the green market the other day. Chicken feet are hard for a lot of us to get used to, as yes, they are kind of creepy and freaky-looking bobbing around in your stock. Get over being squeamish, and you have a flavorful calcium-rich stock that’s great for your bones. Look at how gelatinous (translate: wobbly) this stock is after cooling. All I did was scrape away the top layer of fat. This is nutrient-dense goodness. For my soup today, I simmered a quart of the stock with some sliced shallots, some chopped ginger, and chopped lemongrass for about 15 minutes. I strained the stock, then added some coconut milk, boneless chicken breast cubes, and a small handful kaffir lime leaves that I had frozen. When the chicken was cooked after five minutes, I added a handful of Swiss chard, a splash of Thai fish sauce, couple of tablespoons lime juice, and a pinch salt. In my soup bowl I sprinkled chopped jalapeños and cilantro. The soup was delicious, and I’m feeling a lot better already. Share on Facebook and Twitter | Dinner, Kitchen Tips, Musings, Pantry Items, Soups | No comments
Getting the Seeds out of Berry Sauces Here’s a word on berries, and a video to show how to get the seeds out of berry sauces. Straining the Seeds out of Berry Sauces When you visit a local market in summer, you’ll see containers of colorful berries stacked high. Strawberries are the first to appear in early spring and have all but disappeared by mid summer. Tiny wild varieties, sweet as candy, will make an appearance in late summer. In the meantime, there are blueberries, blackberries, and raspberries of various colors: these nutritional powerhouses, packed with vitamins, antioxidants and fiber, appear in markets in July, and last all the way through September. The late harvest berries are often the most delicious. Combined with early harvested pears, raspberries can be the chief ingredient in tantalizing cobblers and compotes. First-of-the-season apples and blackberries make a succulent combination as well. Treat berries with care. Blueberries are sturdy and last a couple of weeks, but the other “seedier” types last only a couple of days in the refrigerator. It’s best to wash berries right before eating. Raspberries and blackberries are especially delicate; moisture makes them mold quickly. Rinse these berries very carefully and dry them gently on paper towels; you can even roll raspberries on a damp cloth to clean them and dislodge any insects. You can make your berries last longer by freezing or pureeing them. To freeze, lay them on a tray in a single layer and place in the freezer. After a couple of hours, pile the frozen pieces into a freezer bag. I love having a selection of frozen berries available to use when I please. When I don’t have a stash of berries that I have frozen myself, I purchase organic brands (Cascadian Farms, for example) that are readily available at you local store. Fresh sauces, or coulis, are especially delicious when made out of berries. These tasty sauces are wonderful to have on hand even when the temperatures have dropped outside. Once the berries are pureed, however, those little seeds found in strawberries, raspberries, and blackberries can seem quite prominent. There’s no need to put up with those pesky seeds when there’s a nifty little trick for quickly straining them out. Here’s what you do: If the berries are frozen, defrost them first. Blend them (with all the defrosted juice) with a little water, then pour the mix into a strainer set over a bowl. You’ll notice that, at first, the puree just sits in the strainer, not budging at all. With the bottom of a ladle, swirl the fruit in a circular motion against the strainer. The puree goes through the strainer in seconds, leaving the seeds caught in the basket. With a spatula, be sure to scrape all the good pulp that is caught on the underside of the strainer. To turn the pulp into a sauce, add a splash of maple syrup, a bit of vanilla and lemon juice. Now you’re got a berry sauce that is smooth and delicious. Share on Facebook and Twitter | Fruit, ingredients, Kitchen Tips | 5 comments
Getting the Water out of a Zucchini I’m on a market watch – greenmarket watch that is. Several times a week, I walk through my neighborhood farmer’s market and survey the new arrivals and take notice of what is no longer available. This journey is how I keep up with the changes in seasonal produce, and it’s how I stay inspired in my cooking. In early summer, local markets are brimming with delicious produce; even an average supermarket has a broader than usual selection of colorful vegetables and fruits. It’s still worth going out of your way to a venue where you can speak to the growers. The abundance and variety of eatables, the enthusiasm of the farmers, and the excitement of happy people shopping prompt me to load up my cart with local delights, and pile my dinner plate with a variety of fresh vegetables.
In a farmer’s market from July though October, besides the green zucchini, you can purchase the bright daffodil-yellow ones as well. Summer squash come in a wide variety of shapes and sizes – from round eight balls to yellow- and-green zephyr squashes, ruffle-edged patty pans to ridged romanescos. Even though summer squashes come in a variety of shapes and sizes, you can use them interchangeably in recipes. All varieties tend to be watery. If you want to coax the most flavor out of summer squashes, it’s best to get rid of a lot of that water. After all, few delight in a soggy squash dish. I use salt to extract the excess moisture. To sauté a pound of sliced zucchini, sprinkle about a teaspoon of salt over the pieces and let them rest for 20 minutes to half an hour. You’ll notice the zucchini start to sweat and glisten. Wipe off the surface moisture with a paper towel – which gets rid of the excess salt – and now you’re ready to sauté. Your slices will caramelize beautifully, leaving a golden color and rich flavor. The salting technique is especially effective with grated zucchini. For each pound, mix in 1 teaspoon salt. After about twenty minutes, grab a handful at a time of the grated vegetable and start squeezing – over a bowl, of course. I’m always amazed at just how much water comes pouring out. After you’ve gone through the first round, go back and squeeze the whole lot one more time. Again, any excess salt gets squeezed out with the water, and your grated zucchini is ready to be turned into delicious pancakes, fritatas, or whatever else you’re cooking. Share on Facebook and Twitter | Greenmarket Bits, Kitchen Tips, Vegetables | No comments
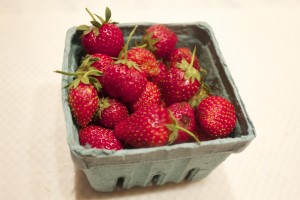
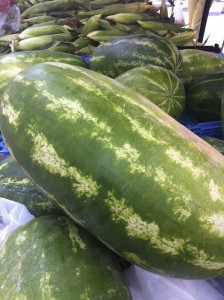
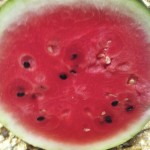
August Report from the Union Square Greenmarket Saturday was my first day back at Union Square greenmarket after a period of traveling. I had to restrain myself from buying everything in sight. Here’s some notes and a record of what I made from my purchases: These late New York season strawberries were irresistible – super sweet, the best strawberries of the year. I was thrilled to see piles of watermelons. It’s melon season, of course. A note to purchasing just the right ripe melon: Please make sure to knock on the melon, as if you were knocking on someone’s door. If it’s ripe and sweet, it will sound hollow. I scored with this one.
The extra went into these popsicle molds.
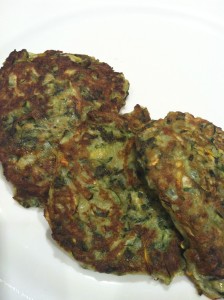
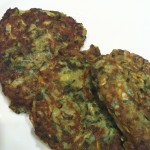
The sight of these elephant-sized zucchini stopped me in my tracks. I was assured that once the seedy middle was cut out, the remaining part would be sweet. While I am intrigued by the thought of stuffing one of these, I refrained from purchasing them . Instead I came home with a large bunch basil, some yellow and green zucchini, a few ears of corn, and a couple of racks of lamb riblets. When I got home, I picked the leaves off of the basil and pureed it with extra virgin olive oil to keep it fresh. I knew I had little time to make dinner today, but nonetheless I wanted a delicious meal. I got home in the late afternoon, and had a lot to do besides make dinner. I decided to construct a meal that would cook slowly (lamb riblets take over 2 hours) but would require minimal active time. I had defrosted the lamb riblets overnight in the refrigerator. I had some barbecue spice rub (from The Healthy Hedonist, which consisted of a mix of salt, maple sugar, cumin, chili powder, black pepper, cayenne, and paprika) in a little container, so rubbing the mix on the riblets and placing them in the oven on a parchment-covered baking sheet took only a matter of minutes. An hour later, I turned down the heat from 325˚to 225˚. An hour after that (by this time it was 6:45) I started the rest of the dinner. I grated the zucchini (one yellow and one green) and mixed it in a bowl with ½ teaspoon salt. I let it sit for fifteen minutes. Meanwhile, I filled a medium pot with water, placed it on the stove, and husked the corn. Fifteen minutes later, I cranked up the heat on the burner under the pot. I squeezed the water out of the zucchini, and placed it back in the bowl, and mixed it with a couple of tablespoons unbleached white flour, a scoop of the basil puree made the day before, and one egg. I dropped the corn in the boiling water and a tablespoon or so of coconut oil to heat in a large non-stick skillet. I dolloped spoonfuls of pancake batter into the skillet (two zucchini yielded 7 medium- sized) and cooked the pancakes for 2 to 3 minutes per side, until golden.
Share on Facebook and Twitter | Dinner, Fruit, Greenmarket Bits, Kitchen Tips, Main course | No comments
Tip: Removing Chile Oils From Your Hands Last night I taught a class on South Indian cuisine at The Natural Gourmet. Included in the recipes were a variety of types of chiles: Thai, serranos, jalapeños, and dried Indian red. The usual “heated” issue surfaced. How do you quell the burning sensation that invariably comes up after your hands have come in contact with chiles? Chiles add wonderful flavor to dishes; the down side is that the volatile oils cling to one’s hands and fingers. Called capsaicin, these oils are mainly concentrated in the seeds and ribs. A universal recommendation is to avoid touching eyes or any other body parts after handling the peppers. Since I’ve had first-hand experience at how irritating even a jalapeño can be, I’ll second that advice. One common way out of the problem is to wear kitchen gloves to prevent cuts or sores on the hands from contacting the volatile oils. If I don’t have any major abrasions to protect, I just can’t be bothered donning gloves, especially if I’m working with just a few chiles. I try instead to touch the seeds and ribs as little as possible. Then – and THIS is the exciting tip – when I’m finished, I rub a little fat (any type of oil will do) all over my hands, then wash them with soap and water. The fat pulls the irritants right off the skin, and all of the volatile oils are removed. What a straightforward solution to a literally irritating cooking issue! Share on Facebook and Twitter | Kitchen Tips | No comments
Homemade Washing Powder On a recent trip to Kalustyan’s, I was pleased to find orange rind powder, which I purchased to mix into my homemade face washing mix. The recipe that I use for homemade face washing mix is from Pratima Raichar’s book Absolute Beauty. The approach to skin care in this book is Ayurvedic, the ancient Indian science of life. I recommend the book if you have an interest in Ayurveda and/or concocting you own natural skin-care products. Among other things, the book has wonderful recipes for creams, moisturizers, lip balms, and cleansing powders. You first have to determine your skin type, which is easily done after taking an extensive questionnaire. For my skin type – which is sensitive – a good cleansing powder mix is a combination of orange rind powder, almond meal, and dry milk powder. I make up a couple of cups at a time, a big enough batch to last for months. The combination smells pleasantly orangey, and leaves my skin clean and soft. I purchased the milk powder at Little India, around the corner from Kalustyan’s on 28th street between Park and Lexington. As the name implies, this little gem of a store specializes in Indian groceries. You can purchase unusual produce such as methi (fenugreek) leaves, dudhi (zucchini-like squash) and kerala (knobbly bitter melon) here, as well as a wide variety of Indian legumes, flours, and dry goods. Share on Facebook and Twitter | Books, Kitchen Tips, Recipes, Where To Buy (Sources) | No comments
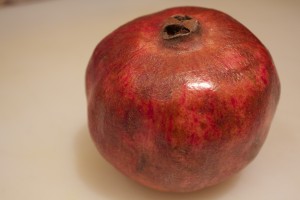
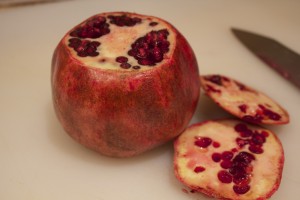
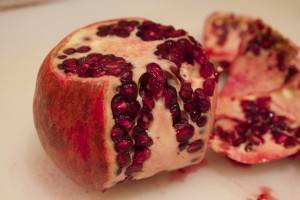
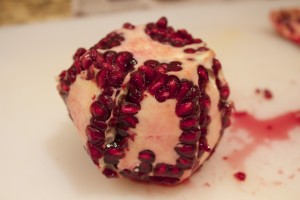
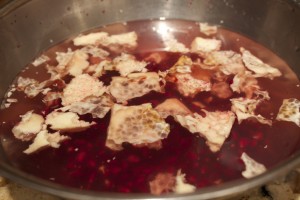
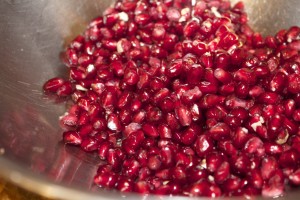
Last Pomegranate of the Season It’s the end of pomegranate season. Although the peak season for the heavy red fruit is autumn, pomegranates store well in the refrigerator for up to a couple of months. Even at the end of February there are usually a few stragglers that can be found. I happen to have one such red beauty left in my refrigerator that I plan on making the most of. Here’s some direction on how to open a pomegranate easily and neatly:
The white pith floats to the top, where it can be strained out along with the water. Enjoy them sprinkled on a salad, or over cooked greens or dessert. Or simply eat the juicy arils, seeds and all, as a delicious snack. While pomegranates won’t make another appearance for a good eight months or so, you can continue to enjoy pomegranate juice and pomegranate molasses or syrup, which are available year round. Share on Facebook and Twitter | Fruit, ingredients, Kitchen Tips | No comments
Welcome to Myra’s Kitchen blog Welcome to Myra’s Kitchen blog. Check in for frequent posts that will include cooking tips and greenmarket ingredients; notes on favorite products; commentary on books and articles; and health tips and musings. We’d love to hear from you, so please e-mail us with comments or queries. Share on Facebook and Twitter | Books, Greenmarket Bits, Happenings/Events, ingredients, Kitchen Items/Gadgets, Kitchen Tips, Musings | No comments
|
