|
Preserved Lemons
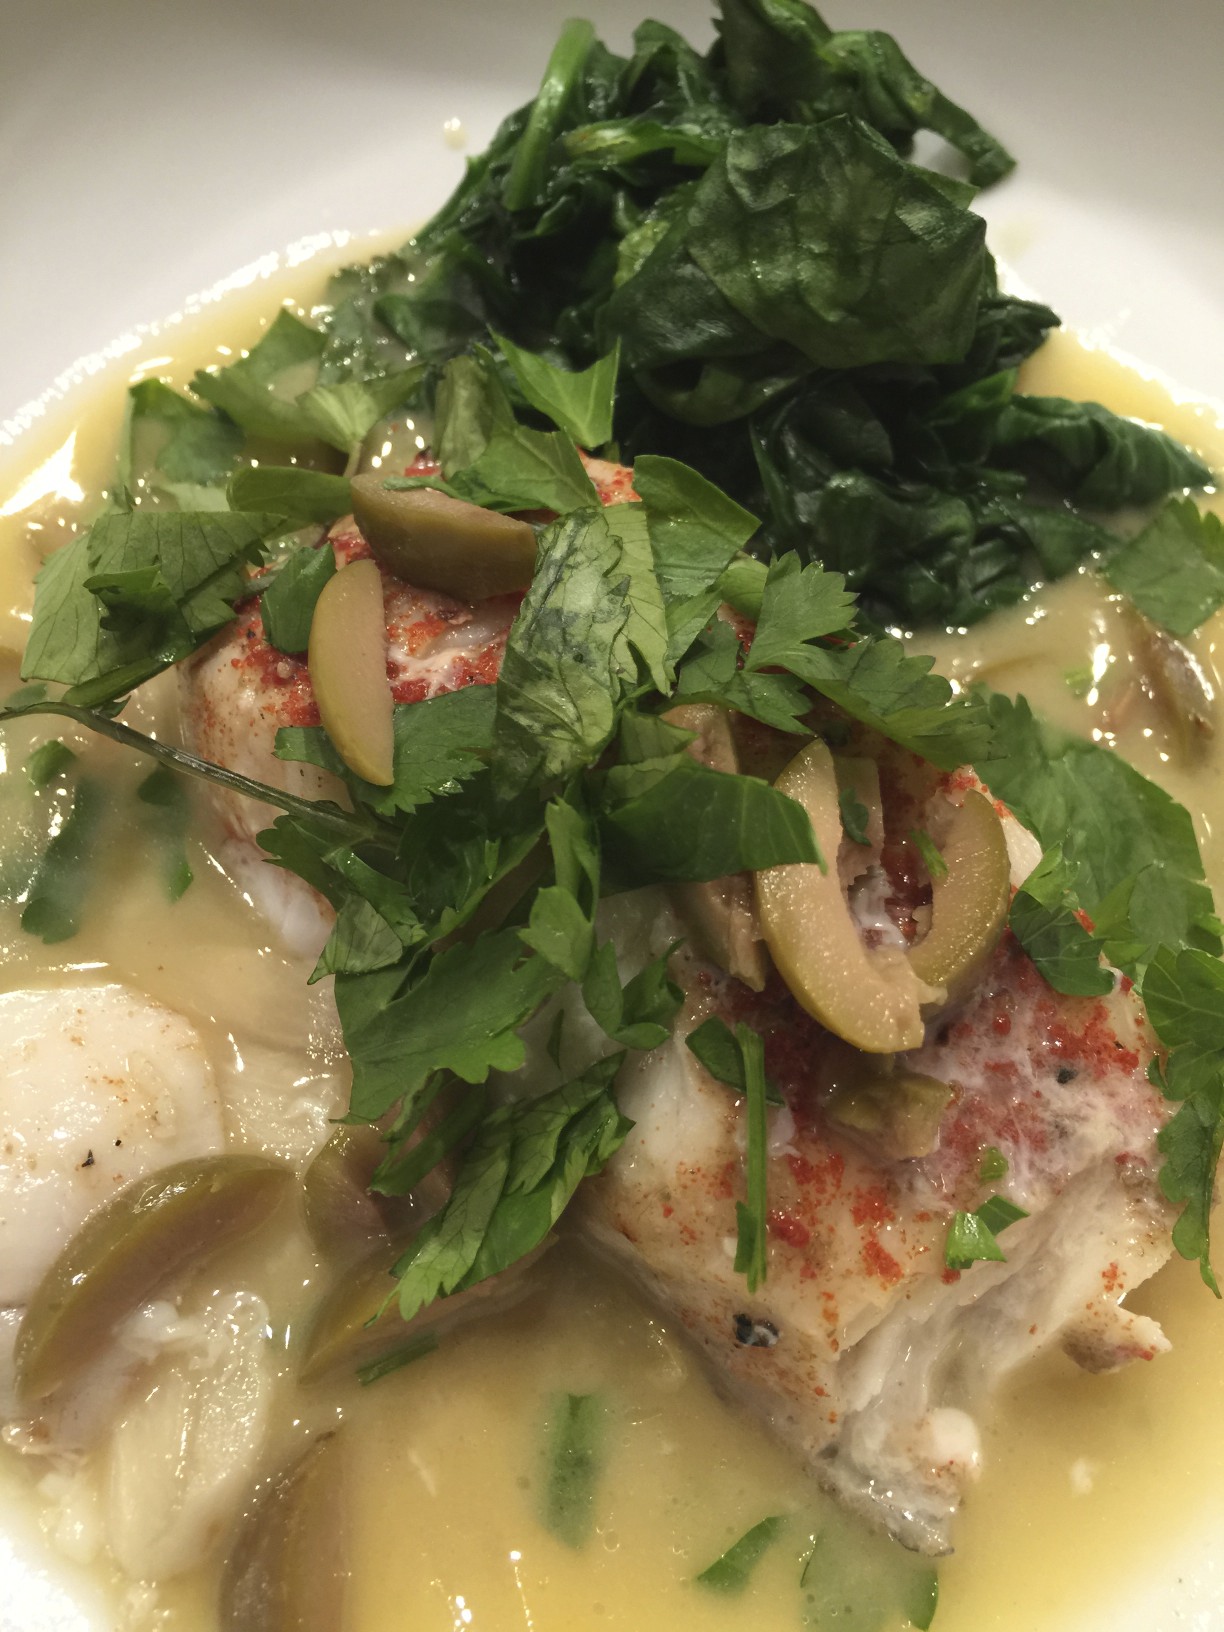
In today’s video on preserved lemons, I show how to make a condiment that can brighten so many of your dishes: preserved lemons. Best of all, they have real lasting power, remaining fresh in the refrigerator for an impressive six months or so. After I put up the lemons, I go on to demonstrate one way to use them in a delicious and easy dish of steamed black cod. Sure, you can purchase a jar of ready-made preserved lemons, but nothing beats the fresh taste of ones that you cure yourself. You’ll see from the video that they take only about five minutes of prep. Use organic lemons for the best results; after all, you’ll be eating the softened rinds. The only other ingredient you need is salt (I recommend a good sea salt). You also need a very clean jar. You can sterilize your jar by immersing it in boiling water for a couple of minutes. Make sure to scrub and dry the lemons as well. How many you use depends on the size of your jar. In the demo, I use a pint-sized jar, but you can certainly use a larger one. To prep the lemons, cut a sliver (a dime-sized piece) off of each end. Set the lemon on one end and, starting from the top, make a vertical cut three quarters of the way into the fruit, so that the two halves remain attached at the base: do not cut it in half. Turn the lemon upside down and make a second vertical cut at a 90-degree angle to the first, again three quarters of the way into the fruit. Fill each cut with as much salt as it will hold. Place a little salt at the bottom of the jar, then squish and push the lemons in. You’ll notice that lemon juice will rise to the top. Since the preserved lemons need to be covered in lemon juice, you may need to squeeze a couple of extra lemons to fill the jar. Screw on the lid, and turn the jar upside down a few times over the first few days to make sure that lemon juice is always covering the lemons. After four to six weeks, your lemons will be pliable and ready to use. It’s the softened rind that is the most exciting part to add to your dishes. Its flavor is tangy, slightly fermented, with that unmistakable brightness that is associated with Moroccan and Middle Eastern cooking. I also demo two servings of steamed black cod. To make the steaming liquid, add 1/2 cup chicken stock, 1/4 cup white wine, 2 cloves sliced garlic, a splash olive oil, and a couple tablespoons thinly sliced preserved lemon to a 4-quart pot. The steaming liquid will become the sauce, to which the preserved lemon in the steaming liquid will lend a bright citrus finish. Sprinkle each piece of cod with a dusting of salt, paprika, cayenne, and ground cumin. When the steaming liquid is bubbling and steam starts wafting through the steam holes, lay the fish on top of the basket and cover. It will be steamed to perfection in a mere 7 minutes. Plate the fish, pouring the steaming liquid (which now reduced, has become the sauce) over the fish. A sprinkling of chopped green olives, parsley, and cilantro complements the other flavors. Marvel at how this zesty and convenient condiment can add such lively flavor to a dish that is simple enough for weeknight dining, yet celebratory enough for entertaining company. Share on Facebook and Twitter | condiments, Fish, Main course, Pantry Items | No comments
Eating for Radiant Skin: part 3 A Word about Fat: Fat is important for skin health. It’s a mistake to be on a low-fat or no-fat diet. You need fat in order to digest, transport, and absorb Vitamin A,D,E, and K. It’s soothing to the nervous system. Every cell in the body has a surrounding membrane – which is where communication between cells take place – that is made up of fat. You need an array of fats. You need saturated fats to maintain structure; mono and polyunsaturated fats to maintain elasticity. All fats and oils that we consume are made up of a combination of monounsaturated, polyunsaturated, and saturated fats. Polyunsaturated fats, also know as omega 3’s and 6’s, are the ones your body does not make. These are called essential fatty acids because you have to get them from food sources. Omega 3’s are good for countering inflammation in the body. Good sources for omega 3’s are fatty fish such as sardines, anchovies, tuna, and salmon; nuts, seeds, and organic eggs. Because of the standard American highly refined diet, most people have far too many Omega 6’s and not enough Omega 3’s. The ideal ratio is somewhere between 1 to 4 times as much omega 6’s as 3’s. Most Americans get 20 times more omega 6’s than 3’s. Poor quality oils and feed lot meat contribute to an excess of Omega 6 fatty acids in the body. It is easy to get good quality Omega 6’s from whole nuts and seeds, where they are less likely to be rancid. Refined polyunsaturated oils are unstable; they are exposed to high temperatures, chemical solvents, light and oxygen. The essential oils in them are destroyed, and they are rancid and oxidized. They suppress the immune system and cause inflamation. Eating a lot of polyunsaturated oil increases cholesterol in the tissues and cell membranes. The best fats for cooking, which can take the heat without becoming rancid or oxidized, are butter, ghee (clarified butter), olive oil, coconut oil, and sesame oil. To get a good supply of omega 3’s, I turn to the tinned fishes that I keep in my pantry. From these pantry staples I have developed nutritious, delicious meals that I can get on the table in minutes.  Wild Salmon, Mackerel, and Sardines from Vital Choice A couple of years ago I met the folks at Vital Choice when I was at the wise traditions conference. They had a lot of samples of their fish, including everything from the tinned mackerel, sardines, and salmon to the wild king salmon. They were by far the most delicious tinned fish I had ever tasted, and I was impressed with the flash frozen salmon as well. We were served smoked cod from them as a first course as well, another delicious fish they sell. I returned home from the conference with multiple tins of each pantry staple and I ordered a lot more stuff when I returned home. Now I make sure to keep a supply of the flash-frozen salmon as well in my freezer. (By the way, the Vital Choice catalogue is extensive, and among other products includes macadamia nut oil, dark chocolate, and a variety of different kinds of fish oil.) One of my super quick go-to lunches is either the mackerel (or sardines) mashed with avocado, lemon, and salt on a bed of greens. I eat it on a bed of greens. Here’s a quick video on how to make it: Here’s a composed salad made with the sardines:  Composed Sardine Salad Here’s a quick video on how to make it: Another quick dish that I make a lot is with the flash-frozen wild salmon.  Salmon in Dashi Here’s the video on how to make this: This last dish is made with the canned salmon and fresh salmon roe.  Salmon Frittata with Salmon Roe and Avocado Salmon roe is a nutritional powerhouse, loaded with anti inflammatory omega 3’s as well as Vitamin A and D. Here’s how to make it: Delicious, nutritious, fast, and easy!
Share on Facebook and Twitter | Breakfast, Dinner, Eggs, Fats & Oils, Health Tips, Lunch, Main course, Pantry Items | No comments
Working with Coconut Oil Young coconuts are large, green, and water-heavy. (Of course, by the time we see them in this country, the outer green shell has been shaved.) As a coconut matures, it becomes wizened, brown and hairy. The gel-like meat within becomes thicker and meatier. Coconut water is the sweet liquid inside the immature coconuts.  Young Coconuts on the Tree Coconut milk is made from the pressed juice of grated coconut meat and water; coconut oil is the fatty oil that comes from the coconut meat.  Oil Comes from the Mature Coconut The oil, which used to have a bad reputation in this country, is now finally getting the attention it deserves for not only being a nutritional powerhouse but for its versatility in the kitchen. I have used coconut oil consistently for 12 years with great results. Coconut oil comes in two varieties: virgin, which has the flavor of a coconut, and an aroma-free filtered variety which is neutral-tasting.  Virgin and Filtered Coconut OIl While I love the virgin coconut oil – and I use it frequently – there are many instances when I don’t want what I’m making to taste like a Thai dish. When I want the perfect oil to cook potato pancakes, for instance, I reach for the filtered aroma-free variety. This product still has all of the nutritional benefits of coconut oil without the predominant coconut flavor, which is removed in a vacuum process. Coconut and the oil come from tropical countries where they are exposed to high tropical temperatures. The oil can take the heat necessary to distill it and remove the coconut flavor without affecting the quality. There’s no trans fat byproducts either, so you don’t have to worry that you’re compromising your health. I love the oil from www.omeganutrition.com. I was first introduced to their products 12 years ago; they have the best filtered coconut oil that I’ve ever tasted; this is the brand that got me hooked . Their other products are of the highest quality as well, so you won’t go wrong with whatever you order. They ship fast; you’ll get your products within just a few days. You can order the oil in all different sizes, from a 1-pound canister to a 7-pound pail (my favorite). You don’t have to worry that the coconut oil will go bad; even after you open the jug, it lasts two years at room temperature!  1-pound, 2-pound, and 7-pound Containers At room temperature, coconut oil is semi-solid. It melts at 76 degrees, so if your pantry is warm, you may notice how the consistency changes. Although the oil may have melted, this is not a problem. It can melt and solidify back and forth without damaging the oil in the least. If you’re baking with coconut oil and converting from butter to coconut oil, use 7 tablespoons coconut oil instead of 1 stick butter. Butter contains 20 per cent water, so you need to lessen the oil a bit. The easiest way to measure 7 tablespoons is to scoop ½ cup into a dry measure and then remove 1 tablespoon.  7 Tablespoons Coconut Oil Measure coconut oil in the form that you need it in. For example, say you’re making a cookie and you are going to cream the oil with sugar. You will need the oil in its semi-solid state. Measure it right out of the container. If you need it in liquid form, melt some coconut oil (it only takes a minute or two to melt) in a pan over a low flame, and then measure it. If you want to work coconut oil into a pastry crust and you need it super firm, place a glob in the refrigerator to harden it.  Refrigerator-hardened Coconut Oil Chop the hardened coconut oil first on a cutting board, then place the pieces in measuring cups.
 Measured Oil for a Pastry Crust Pulse the oil into the dry ingredients in a food processor. There’s an easy and delicious coconut oil pastry crust recipe on p. 51 in my book The Healthy Hedonist Holidays. When you need a tablespoon or two to sauté something, it doesn’t matter whether or not the oil is melted or semi-solid. Just scoop some oil out of the container, add it to the skillet, and you’ll find that it will melt quite readily. Be concerned with exactitude only when baking. Furthermore, it’s best to have the other ingredients in your recipe at room temperature before mixing with the coconut oil. In contact with cold ingredients, the oil will start to seize; you’ll then have little clumps of hardened oil in your mix.  Bits of Coconut Oil Because of Cold Ingredients A quick whirl in the blender will take care of any hardened bits. If your marinade looks like the following picture, just place the pan in the oven. A few seconds in the heat will melt the coconut oil just fine.  The Ingredients Were Cold You can also place your ingredients over a double boiler, and gently heat the mix. It doesn’t take long for everything to get up to 76˚F, the melting point of coconut oil. Coconut oil has a high smoke point, up to 375˚F, which makes it the ideal oil for frying, and your food won’t taste greasy. (Use the filtered variety when frying.) Hands down this is the best oil for making potato pancakes, cutlets, croquettes, falafel, or any recipe that calls for a substantial amount of oil.  Crispy Miniature Potato Pancakes These are crispy, not greasy.  Crispy Rice Noodles Fried in Coconut Oil Since you won’t want to waste this gorgeous oil, just put enough oil to go halfway up the side of whatever you are cooking. That’s enough to cook the first side; flip to finish cooking the other side. The virgin oil is the best choice when you want a hint of tropical flavor. It makes buttery-tasting popcorn, stellar roasted vegetables, and creamy root vegetable purées. One of my favorite vegetable combinations at the moment is puréed parsnips mixed with rutabagas or kohlrabi, enriched with virgin coconut oil and butter. Talk about a creamy, satisfying texture! The virgin oil makes a tasty spread on crackers, bread, muffins, and mocha as well. The flavorful virgin oil is also the better choice if you want to utilize the oil as a supplement to stabilize your blood sugar and keep your metabolism humming at high speed. You can use the virgin variety as a moisturizer for your face and body. Try slathering your entire body with the oil before taking a shower. You’ll come out of the shower clean and soft – not greasy – without having to use soap or moisturizer. You can also work coconut oil into a blend. This combination is inspired by Mary Enig’s blend of oils: mix 1/3 part extra virgin olive oil (or macadamia nut oil for a really subtle flavor), 1/3 part unrefined sesame oil (not the toasted variety), and 1/3 part aroma-free coconut oil. The resulting oil is mild-tasting and has a combination of healthful properties from all three oils. You can keep the oil at room temperature, and use it for sautéing and for salad dressings. It also make s a wonderful oil for mayonnaise. Deviled eggs, anyone? We’ll save that for another day. .
Share on Facebook and Twitter | Coconuts, Fats & Oils, Kitchen Tips, Pantry Items | No comments
Chicken Soup I’ve been under the weather for the past few days with a full blown cold. This is unusual for me since I rarely get sick. When I feel the slightest bit of an impending sniffle, I have a coterie of preventative measures that I take, which usually work like a charm. I jump on my cellercizer (urban rebounder) to clean out my lymphatic system, I down Immune Response to strengthen my immune system, and I make an effort to get extra rest. This particular cold came on without much warning – it hit the throat first and then traveled to the lungs. I had a couple of energetic events to run, so there was no getting rest for a couple of days. Thus the full-blown cold landed Friday and ordered me to stop. It doesn’t make me feel better to know that colds are rampant this time of year, or that there is a particularly virulent strain going around. I am forced to finally and humbly surrender. I’m actually enjoying the enforced solitude and relaxation. Since my taste buds are depressed with the congestion, all I really feel like ingesting is hot soup. A good bone broth is just the elixir to drive away a fierce bug. So while I have been convalescing, I took out the stock pot, opened the freezer, and took out a big pile of poultry bones. I put up the simplest of stocks – bones, water, a splash of vinegar to draw out the calcium, and a bay leaf. That’s about as much effort as I could muster, and it took all of five minutes. The pot held backbones and wings from two chickens I had recently butchered, a turkey carcass, and a bag of chicken feet. I let this stock simmer about 6 hours, then I strained it, cooled it, and refrigerated it overnight.  chicken stock with feet and bones What made the stock especially gelatin rich was the bag of chicken feet I had purchased at the green market the other day. Chicken feet are hard for a lot of us to get used to, as yes, they are kind of creepy and freaky-looking bobbing around in your stock. Get over being squeamish, and you have a flavorful calcium-rich stock that’s great for your bones. Look at how gelatinous (translate: wobbly) this stock is after cooling. All I did was scrape away the top layer of fat. This is nutrient-dense goodness.
For my soup today, I simmered a quart of the stock with some sliced shallots, some chopped ginger, and chopped lemongrass for about 15 minutes. I strained the stock, then added some coconut milk, boneless chicken breast cubes, and a small handful kaffir lime leaves that I had frozen. When the chicken was cooked after five minutes, I added a handful of Swiss chard, a splash of Thai fish sauce, couple of tablespoons lime juice, and a pinch salt. In my soup bowl I sprinkled chopped jalapeños and cilantro.  Thai Chicken Soup with Swiss Chard The soup was delicious, and I’m feeling a lot better already. Share on Facebook and Twitter | Dinner, Kitchen Tips, Musings, Pantry Items, Soups | No comments
Pomegranate Molasses As I mentioned in the last blog, pomegranate juice and the cooked-down version, called pomegranate molasses or syrup, are always available. Pom juice is one of the more common brands of American pomegranate juices but there are others. Like most fruit juices, it is best used as a flavor enhancer or as an ingredient in cooking. It is too naturally loaded with sugar to chug by the glass. Store the juice in the refrigerator. The thickened syrup is traditionally used in Middle eastern cooking in salad dressings, sauces, and desserts. It is readily available in gourmet stores or middle eastern markets. You can also make your own by boiling down juice until much of the water has evaporated. Try mixing a tablespoon or two of the syrup into a glass of sparkling water for a refreshing healthful “soft” drink. Pomegranate molasses store well in the pantry, and do not need refrigeration, even after opening. Here is a sampling of ones that are commonly sold:
Try this simple dessert: Cut off the tops and bottoms of a couple of oranges. Drizzle the oranges with pomegranate molasses and a sprinkling of chopped pistachios. It’s attractive, easy and refreshing.
Share on Facebook and Twitter | ingredients, Pantry Items | No comments
|