|
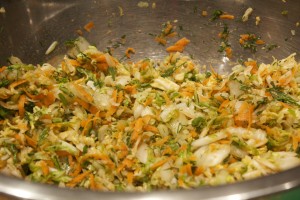
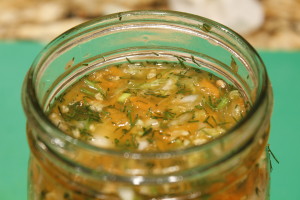
Lacto-fermented Sauerkraut In today’s video, I show how to make traditional sauerkraut, one of the popular dishes that Eastern Europeans of yore would put up in storage in November so that they could have vegetables that would last the entire winter. Cabbage is especially amenable to culturing. While giving it a delightfully tangy flavor, the time-honored fermentation process turns pedestrian cabbage into an uber-raw natural probiotic. Lactobacilli are delightful microorganisms already present on the leaves and roots of plants. With a little encouragement, they convert the starches and sugars in the leaves to lactic acid—thus the term “lacto-fermentation.” Salt initiates the process; it inhibits the growth of undesirable bacteria long enough for the lactic acid to start forming. Enzymes break down the cabbage into more digestible molecules, and the lactic acid preserves it by eliminating unwanted organisms and increases the level of Vitamin C. In the end, “predigested” fermented cabbage also promotes the growth of healthy flora throughout the intestines, making harder-to-digest foods much more digestible. Here’s how you make the ferment: In the video I demonstrate the process with a medium head of green cabbage, shredded finely; you should have 10 cups or so. Stir in a couple of grated carrots and four teaspoons salt, a good amount for a quart-worth of packed kraut. Use a good quality unadulterated salt that has trace minerals, such as celtic sea salt. To help get the juices of the cabbage flowing, massage the cabbage with your hands; get in there and squeeze hard. You can also pound the cabbage with a mallet to help it start to sweat. Once you have a lot of shiny, juicy cabbage in the bowl, stir in the other ingredients. In today’s ferment, I’m adding a tablespoon each of minced ginger and garlic, about ½ cup of sliced scallions, and a minced red Fresno chile, a mild and colorful chile which I found at my local grocer. Stuff the juicy cabbage mixture into a 1-quart bell jar, pressing down hard to make sure that there is liquid floating on the top. (A blunt, wooden, club-like instrument called a “kraut-pounder” is quite helpful for pressing down the vegetables, but you can improvise with the end of a tapered rolling pin as well.) Leave a generous inch of space at the top of the jar in order to prevent liquid from seeping out the top. Let your imagination reign when it comes to the variations. Start with a base of cabbage: red, savoy, or nappa. I’ve enjoyed all kinds of additions to my slaws, including onions, fennel, daikon, fennel seed, juniper berries, chiles, and curry powder (but not all in the same slaw, of course). Leave the ferment on the counter from 5 days to 2 weeks. The insert in the middle of the bell jar will be hard to press down once the ferment really gets going. Start tasting the kraut at that point. It will be fermented after a few days; but, if you can leave the kraut for the full two weeks, you’ll have a tangier, richer flavor. (After tasting, make sure that the cabbage is still tightly packed and submerged in liquid.) Transfer the jar to the refrigerator; it’s ready to eat, but it tastes even better if you can leave it for a couple of additional weeks before opening. Once opened, the ferment stays fresh at least a good three months refrigerated. Start off slow; a few tablespoons added to your meals is sufficient. You can increase the amount as your belly becomes acclimated to all the additional probiotic flora. It’s deeply satisfying to make your own krauts; you might just find yourself with a refrigerator full of delicious varieties.
Share on Facebook and Twitter | condiments, Health Tips, Kitchen Tips, Side Dishes, Vegetables | No comments
Chicken Bone Broth In the video presented here, I show how to make a nutrient-dense bone broth. There’s a South American proverb that goes “good broth will resurrect the dead.” If only that were true. What is true is that slow-cooked stocks that are made from bones aid in healing the chronically compromised as well as in keeping the healthy robust. What’s more, good broths—something which every chef knows—are the basis for delicious soups and sauces. What distinguishes a nutrient-dense broth from a mediocre stock is the gelatin. Gelatin is what is found in the joints of animal bones. A word first about Dr. Weston A. Price, author of the tome Nutrition and Physical Degeneration. Price was a Cleveland dentist who, in the 1920’s and 30’s, traveled the world to find existing cultures that had not yet been exposed to the processed foods of Western civilization. Over the course of ten years, he visited a dozen isolated healthy peoples around the world. Without fail, all of the people with these isolated food traditions not only had robust health, but straight gorgeous teeth without dental decay—and none of the societies had modern dentistry. Price meticulously recorded his findings and observed that, although each culture’s diet varied tremendously, they had in common ten times higher levels of fat soluble vitamins and four times higher level of minerals than those of the mainstream American diet. All of the peoples he visited consumed soups or stews based on bone broths made from fish, fowl, or meat. In the video shown here, I focus on chicken broth. There are so many ways to make chicken broth; the method can be varied every time, depending on what you have around. I generally use about five pounds of bones. These invariably include a raw carcass, a few feet, a few necks, and any backs or cooked carcasses that I have around. I’ve made chicken bone broth from several raw carcasses or from just necks and feet as well. Chicken feet are perhaps the most important, underrated element in a great broth. Even using two can add so much gelatin to your brew. If you use a bagful, your chilled stock will be so gelatinous that you can stand a spoon straight up in it! Place all of the bones in a tall stockpot and cover them with water. Then add two tablespoons of apple cider vinegar to draw out the minerals. Let the stock sit for half an hour before turning on the flame. You can add an onion, a couple of carrots and celery if you like, but it’s not necessary. The next step is to bring the stock up to a boil. At that point you have to spend a few minutes skimming the scum that rises to the surface. You really do want to get rid of the scum, since it will compromise and muddy your stock. Next, lower the heat until there is barely any movement on the surface of the liquid; let the stock cook anywhere from six to twenty four hours. You can turn off the stock at any point if you need to go out. You can leave it untouched for up to nine hours at a stretch. When you start the broth again, simply bring the liquid to a boil again, skim off the scum, lower the heat, and let it roll. When you’ve cooked the broth for as long as you like, strain the liquid through a sieve, then transfer it to containers. I favor one-quart heavy-duty food-grade plastic. Next, chill the stock, and scrape off the fat that has risen to the top. Notice how wobbly and gelatinous your stock is after it’s been chilled. Now you can keep the stock refrigerated for up to five days, or longer if you reboil it; or, you can freeze it for months, keeping it ready to turn quickly into a delicious dish whenever you like. The gelatin in meat broths has the unusual property of attracting liquid (the term is hydrophilic) even after it has been heated. Gelatin acts as an aid to digestion. Furthermore, it acts as a protein sparer, allowing the body to more fully utilize complete proteins that are ingested. It is useful in the treatment of many chronic disorders, including but not restricted to anemia, diabetes, hyperacidity, colitis, and Crohn’s. Again, to emphasize: in order to make a stock truly nutrient-dense, it’s important to use some joint bones along with some of the other bones that provide minerals. Truly, bone broth is one of the mainstays of my kitchen—a real life saver. Share on Facebook and Twitter | Health Tips, Kitchen Tips, Soups, techniques | No comments
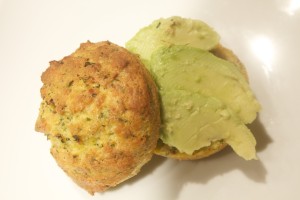
Savory Salmon-Coconut Muffins Breakfast can be a challenge, especially during those hectic mornings when there’s limited time. I find it helpful to have on hand ready-made items that require no more time to prepare than it takes to pop a piece of toast in the toaster oven. That kind of healthy instant breakfast does requires a bit of planning. Today’s video features one of my favorite such breakfasts: savory salmon muffins. Most of the time we associate muffins with a sugary high carbohydrate load, but these muffins are different. They are nutrient-dense little parcels, full of protein and great fat, but low on carbohydrates. They’re filling, but they don’t weigh you down. To start, I whisk together ½ cup of coconut flour, 1 teaspoon baking power, and ¼ teaspoon salt in a medium bowl. Half a cup of coconut flour is not very much; but coconut flour—made from the flesh of the mature coconut after all of the liquid has been squeezed out—really absorbs liquid, so a little goes a long way. In another bowl, I whisk together 6 eggs, along with ½ cup of melted coconut oil. I use the aroma-free variety of coconut oil since I don’t want any coconut flavor coming from the oil. Aroma-free coconut oil still has the great nutritional benefits of the virgin variety: the short list is that it’s good for the thyroid, good for the digestive tract, and great for the metabolism. It keeps the muffins moist as well. Then I pour the wet ingredients into the dry, and whisk the two together. I stir in a large (7.5 ounce) can of salmon. I favor the kind with bones (these are soft enough to eat), which provide a good dose of calcium along with vitamin D, the omega three fatty acids DHA and EPA, and astaxanthin, the antioxidant that gives wild salmon its red-orange color. I add some walnuts, which, besides adding flavor and texture, have a whole host of great health properties, including the omega three fatty acid ALA. I also add ¼ cup of chopped fresh herbs. In the video, I use a combination of dill, tarragon, and chives; but other herbs, such as parsley, sorrel or cilantro, are delicious as well. I’m now ready to add my batter to the muffin tins. Instead of “tins,” I favor silicon muffin holders. This way, there’s no need to grease the tins, and the coconut muffins pop right out. I bake the muffins at 400˚ for 20 minutes, just until springy and lightly browned. It’s best not to over bake these or they run the risk of drying out. This recipe makes 7 large muffins, enough for seven full breakfasts. They keep refrigerated for up to a week, and you can freeze them (slice in half first) as well. I savor them toasted with a few slices of avocado, which lend more good fat, folic acid, vitamin E, and of course, deliciousness. These muffins are truly convenient for those busy mornings when you need to take breakfast on the run. Most importantly, they will keep you humming along all the way until lunch. Share on Facebook and Twitter | Breakfast, Health Tips, Uncategorized | No comments
Culinary Roulette Peppers The first time I tried a shishito pepper, I thought that they were unbearably hot. I didn’t know at the time that only about one in ten is hot, while the rest are mild and flavorful. This experience kept me away from these delicious peppers for a good couple of years, until I was seduced by the gorgeous overflowing bins at the Union Square greenmarket. Fortunately, I finally gave them another try, and have been happily eating them ever since. Not only do shishito peppers abound right now, there are another two varieties similar enough that they can be treated the same way. Here’s the rundown on the different types: There’s the shishito pepper, which are very aromatic. They have little ridges. A pepper that competes with the shishitos is the Fushimi pepper. They have an even crispier skin and texture. You can eat these raw as well as cooked. Another squatter horn-shaped pepper with similar characteristics is the Pimento de Padrón, the heirloom variety from Spain. All of the peppers have a lot of health benefits: high levels of vitamin A and C and carotenoids like lutein, which is helpful for maintaing healthy hair and skin, as well as providing resistance to colds. These retain their vitamins when they are pickled as well. My favorite way to cook all of these peppers is to toss them into a hot skillet that is filmed with oil and simply blister them. I then toss them with a course salt. Lately, I’ve been tossing them with lapsong souchong salt, so they have a delicious smokey tea flavor. For more ideas on exciting salts, visit The Filling Station in Chelsea Market, where you can choose from a variety of flavored coarse salts. All of these peppers make for an exciting game of culinary roulette. I like to serve these to guests sitting around the table and watch their faces as they eat them. Since most of the peppers are sweet and mild, it’s a bit of a surprise when you get that one zinger in ten that is picante. Proceed with caution, and take a small first bite! Share on Facebook and Twitter | Health Tips, Side Dishes, Vegetables | No comments
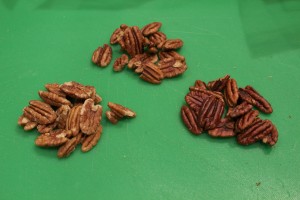
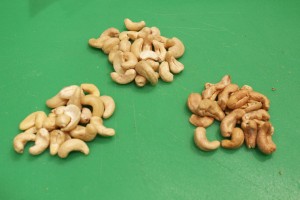
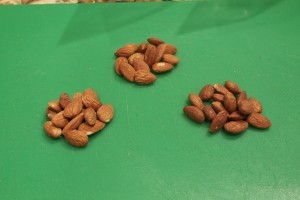
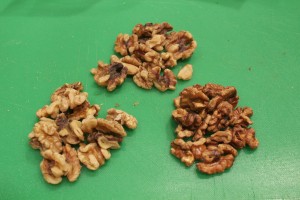
A Comparison of Soaked and Dehydrated and Toasted Nuts Soaking nuts serves to inactivate the phytates and enzyme inhibitors that make the minerals in them (zinc, magnesium, iron, and calcium) difficult to absorb. You can drain the nuts and leave them in the refrigerator for a couple of days. This is good if you wish to make nut milks, or if you don’t have time to dry them out immediately. If you want to have delicious nuts to munch on or add to your recipes, however, you need to dehydrate or toast them. There are a number of ways to do this, and it’s a matter of preference as to which ones suit your taste best. Yesterday, I compared the times and tastes of nuts that had been soaked then dried at 3 different temperatures. I did this for almonds, cashews, pecans, walnuts, and pumpkin seeds. I soaked them all over night–with the exception of the cashews, which got a four hour soak. It’s not good to soak cashews over seven hours: the texture changes for the worse. I drained the cashews, refrigerated them, and dried them with the other nuts. I included 1 tablespoon celtic salt in the the soaking water for each pound of nuts. The three comparisons included: a dehydrator at 115˚, an oven at 200˚, and an oven at 300˚. The nuts at 200 degrees took 3 hours for a beautiful light toast with delicious flavor. The nuts at 300 degrees should have come out at about 45 minutes. I left them in an hour; and while tasty, they were slightly over-toasted. The dehydrated nuts took about six hours. In a previous post I had listed the minimum times for soaking nuts. Nonetheless, I find it’s easiest to simply soak most of the nuts for about the same amount of time, about six hours. To repeat, cashews should not go longer than seven. Almonds need a minimum of six hours, but they are even better soaked longer. Here are the different nuts at different degrees of toasted. They range from light (dehydrator) to darkest (300 degree oven). My conclusion is that for eating nuts out-of-hand I prefer those toasted at the higher temperature. For a neutral nut that will later be used in cooking or baking, I would go with the lower temperature oven or the dehydrator. These delicious nuts stay fresh at room temperature for minimum of a month. Once exception is walnuts, which should be refrigerated. For super oily nuts like pine nuts, store them in the refrigerator or freezer. No need to toast them first. If this is too much for you, there is always Wilderness Family Naturals, which promptly delivers to your door already soaked and dehydrated nuts.
Share on Facebook and Twitter | Health Tips, ingredients, nuts and seeds, techniques, Uncategorized | No comments
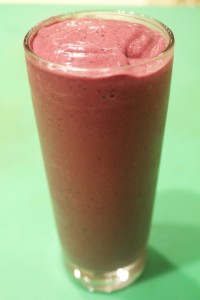
Very Berry Power Smoothie Sometimes an antioxidant, nutrient-dense smoothie makes a quick and powerful meal. The one in this video is rich and filling enough to keep your energy and blood sugar stable for hours. Best of all, it tastes delicious. It’s a combo of mixed frozen berries, yogurt, avocado, raw honey, coconut oil, egg yolks from pastured eggs, and coconut water. I also added a splash of macadamia nut oil because I like the nutty flavor. I made this video for Vital Choice, a company whose products I love. Not only do they have the finest wild Alaskan seafood, but they also have some other choice products such as frozen berries and macadamia nut oil, an oil that has similar nutritional properties to extra virgin olive oil. They presented the video on their newsletter, and I received the question from a viewer of why I don’t use the egg whites in the smoothie. Here is my answer: I don’t use the raw egg white because it contains a protein called avidin that interferes with the body’s absorption of biotin (Vitamin B7). It also contains a protein called “conalbumin,” which binds to iron (making it not biologically available to the body.) Also, trypsin inhibitors make digestion of the protein in the raw egg white more difficult. All of these is deactivated when the white is cooked. That being said, I still may use a raw egg white in a classic Caesar salad dressing or–once in a great white, a mousse–but I don’t make a practice of it, especially for something like a breakfast smoothie. The raw yolk, on the other hand, is great to eat raw or barely cooked. It’s great to have a lot of quick breakfast ideas in your repertoire. Share on Facebook and Twitter | Breakfast, Eggs, Fats & Oils, Fruit, Health Tips, ingredients, Natural Sweeteners | No comments
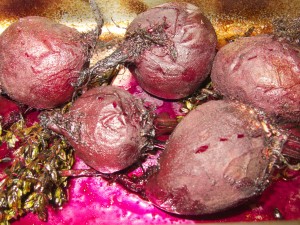
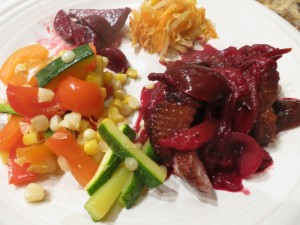
Savory Plum Dishes Now that the summer has transitioned into autumn, I am thrilled to resume my favorite cooking method: braising. I love the way that the prep for a braise is usually short; the oven does all of the hard work. A cut of meat that starts out tough slowly cooks for hours until it is meltingly tender. Best of all, braises taste better the following day, making them ideal dishes for gatherings. A few weeks ago I was inspired by a New York times article by Melissa Clark on braising a brisket with Italian plums and port wine. Because of the wonky weather in New York this year, peaches and plums were mealy and unappealing to eat raw, but I envisioned cooked plums melting down into a beautiful regal sauce. I purchased a second cut grass-fed brisket, which is the fattier of the two possible brisket cuts. Since grass-fed meat tends to be extra lean, this is the better of the two cuts to use. I salted and peppered the six-pound piece, seared it on both sides in a little oil for about 7 minutes per side in a large skillet, then transferred it to a plate. I added a few cups sliced onions and a few cloves minced garlic to the pan, and gently sweated the onions until softened. I then added a cup of port and a cup of rich chicken stock, and scraped up the brown bits on the bottom of the pan. To a baking dish that would fit the brisket, I added a couple pounds of halved Italian plums along with a couple cinnamon sticks, a few stars of star anise, some bay leaves and a handful of fresh thyme branches. I poured the onion-wine mix over the plums, lay the brisket on top, and spooned some of the liquid over the brisket. I covered the pan with foil and placed it in a 325 degree oven for about 5 hours. Every half hour or so I flipped the brisket. The last half hour I uncovered the brisket to thicken the liquid. I let the meat cool to room temperature, then chilled it overnight in the refrigerator. I sliced it while cold and shared the dish with friends. I reheated the sliced pieces in the oven in the sauce. The brisket was succulent and delicious. Since I was not yet over plums, I made a quick plum sauce to go over duck breasts. While my duck breasts were searing, I added a bit of the rendered duck fat to an adjacent skillet and sweated some sliced onions. I then added a cup of chicken stock, a cup of port, a cinnamon stick, some star anise pods, a few sprigs thyme, a bay leaf and 2 pounds of halved plums. I let the whole sauce reduce while the duck breasts cooked. The duck and the sauce were finished around the same time, in about 15 minutes. Earlier in the day I had roasted some whole beets in a pan with thyme, olive oil, and water for a couple of hours. When they were ready, I slipped off the skin, cut them into wedges, and drizzled a bit of pomegranate molasses over them. I served the meal with a mélange of corn, peppers, and zucchini and a few spoonful’s of lacto-fermented carrots. This bright and colorful meal took only 30 minutes of labor.
Share on Facebook and Twitter | Beef, Dinner, duck, ingredients, Main course, Sauces | No comments
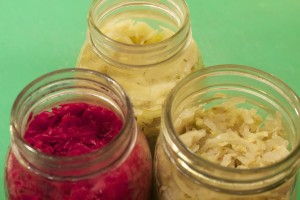
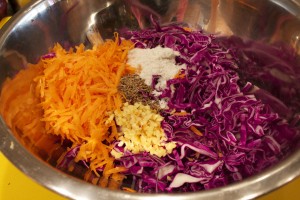
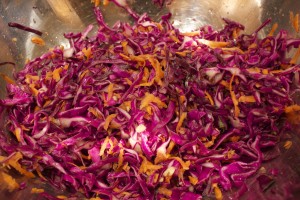
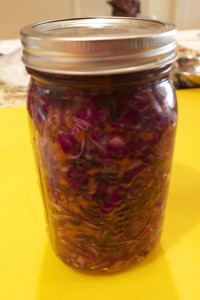
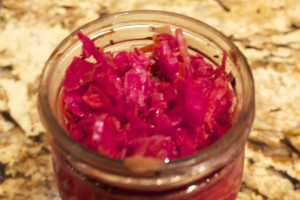
Red Cabbage Lacto-Fermented Sauerkraut Lately, I’ve been on a lacto-fermenting frenzy, fermenting everything from red cabbage to dill pickles to beet and fruit kvass. The lactobacilli, which are good bacteria, proliferate in fermented vegetables and fruit. The vegetables and fruit are easier to digest and the vitamin levels are increased as well. The main by-product of lacto-fermentation is lactic acid, which promote the growth of healthy flora throughout the intestine. What I like about these fruits and vegetables is that once they’re fermented, they last for a long time in the refrigerator. They’re an instant quick hit of super nutrition. Moreover, they are easy to produce. Here’s one of my favorites, a red cabbage ferment, that needs only salt to get the whole process of fermentation going. The salt inhibits any bacteria that could putrify the ferment until the lactic acid forms. I start with a head of finely shredded red cabbage. I add some shredded carrots, a piece of minced ginger, a tablespoon caraway seeds, and two tablespoons Celtic sea salt. After stirring everything together, I massage the mix with my hands to help the cabbage release its juices. There’s no need to add water to the brine when you make a cabbage ferment.. You can pound that cabbage with a mallet or just put a weight on the cabbage ( a bowl with a weight in it works well). and it will start sweating away in no time. I then stuff the mix into a jar (a one quart bell jar is perfect) pressing down to make sure that there’s liquid floating on top. I make sure to have an inch of space at the top. (This is quite important to avoid leaks.) I leave this on my kitchen counter for 3 to 5 days. With a bell jar, the piece in the middle is hard to press down when the ferment is complete. The red cabbage doesn’t look so bright in the beginning, but as it ferments it turns a beautiful magenta color. It’s best to transfer this to the refrigerator, where it can last a long time (up to a year) without opening. Once opened, it’s good for about three months. Share on Facebook and Twitter | condiments, Health Tips, Kitchen Tips, Side Dishes, techniques, Vegetables | No comments
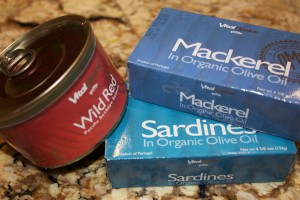
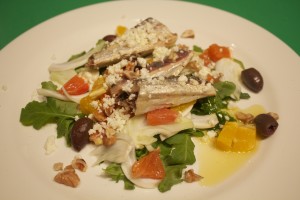
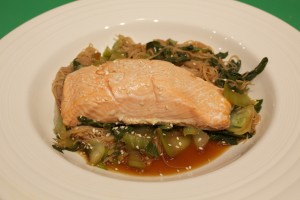
Eating for Radiant Skin: part 3 A Word about Fat: Fat is important for skin health. It’s a mistake to be on a low-fat or no-fat diet. You need fat in order to digest, transport, and absorb Vitamin A,D,E, and K. It’s soothing to the nervous system. Every cell in the body has a surrounding membrane – which is where communication between cells take place – that is made up of fat. You need an array of fats. You need saturated fats to maintain structure; mono and polyunsaturated fats to maintain elasticity. All fats and oils that we consume are made up of a combination of monounsaturated, polyunsaturated, and saturated fats. Polyunsaturated fats, also know as omega 3’s and 6’s, are the ones your body does not make. These are called essential fatty acids because you have to get them from food sources. Omega 3’s are good for countering inflammation in the body. Good sources for omega 3’s are fatty fish such as sardines, anchovies, tuna, and salmon; nuts, seeds, and organic eggs. Because of the standard American highly refined diet, most people have far too many Omega 6’s and not enough Omega 3’s. The ideal ratio is somewhere between 1 to 4 times as much omega 6’s as 3’s. Most Americans get 20 times more omega 6’s than 3’s. Poor quality oils and feed lot meat contribute to an excess of Omega 6 fatty acids in the body. It is easy to get good quality Omega 6’s from whole nuts and seeds, where they are less likely to be rancid. Refined polyunsaturated oils are unstable; they are exposed to high temperatures, chemical solvents, light and oxygen. The essential oils in them are destroyed, and they are rancid and oxidized. They suppress the immune system and cause inflamation. Eating a lot of polyunsaturated oil increases cholesterol in the tissues and cell membranes. The best fats for cooking, which can take the heat without becoming rancid or oxidized, are butter, ghee (clarified butter), olive oil, coconut oil, and sesame oil. To get a good supply of omega 3’s, I turn to the tinned fishes that I keep in my pantry. From these pantry staples I have developed nutritious, delicious meals that I can get on the table in minutes. A couple of years ago I met the folks at Vital Choice when I was at the wise traditions conference. They had a lot of samples of their fish, including everything from the tinned mackerel, sardines, and salmon to the wild king salmon. They were by far the most delicious tinned fish I had ever tasted, and I was impressed with the flash frozen salmon as well. We were served smoked cod from them as a first course as well, another delicious fish they sell. I returned home from the conference with multiple tins of each pantry staple and I ordered a lot more stuff when I returned home. Now I make sure to keep a supply of the flash-frozen salmon as well in my freezer. (By the way, the Vital Choice catalogue is extensive, and among other products includes macadamia nut oil, dark chocolate, and a variety of different kinds of fish oil.) One of my super quick go-to lunches is either the mackerel (or sardines) mashed with avocado, lemon, and salt on a bed of greens. I eat it on a bed of greens. Here’s a quick video on how to make it: Here’s a composed salad made with the sardines: Here’s a quick video on how to make it: Another quick dish that I make a lot is with the flash-frozen wild salmon. Here’s the video on how to make this: This last dish is made with the canned salmon and fresh salmon roe. Salmon roe is a nutritional powerhouse, loaded with anti inflammatory omega 3’s as well as Vitamin A and D. Here’s how to make it: Delicious, nutritious, fast, and easy!
Share on Facebook and Twitter | Breakfast, Dinner, Eggs, Fats & Oils, Health Tips, Lunch, Main course, Pantry Items | No comments
Eating for Radiant Skin: Part 2 Free radicals – we hear that word thrown around a lot – are electromagnetic unbalanced molecules that are internally generated in our bodies. They are created through the process of burning oxygen. Your own metabolism naturally does this, so you make your own free radicals just by living, breathing, and metabolizing. A free radical’s mission is to find an electron it can steal and make its own. Free radicals are produced as a byproduct of normal metabolism, so your body has ways of dealing with them. Inflammation in the body also causes free radicals. Exposure to toxicity produces free radicals. That includes too many environmental pollutants and radiation, including too much sun exposure. Sometimes you hear the term oxidative stress, because oxygen is initially involved in the process of free radical creation. Unfortunately, a victim of free radical damage is collagen, which keeps skin looking plump and elastic. The good news is that skin cells are always dying off and are being replaced by new cells. You do have the opportunity to improve your skin by enhancing your overall health, so that when you replace your old cells, your new cells will be healthy cells. (In a nutshell, that’s why when you start to eat better, your skin looks better as well.) Include foods that contain antioxidant nutrients. A diet rich in antioxidants helps you to have healthy, glowing skin. Antioxidants travel around the body and donate one of their electrons to each free radical that is seeking one. When they do this, the free radicals stop tissue damage. The best known antioxidants are Vitamins A and Betacarotene, Vitamin C, and Vitamin E. Also, there are phytochemicals in plant foods. These are various plant chemicals that contain antioxidants, even though they’re not vitamins and minerals. Phytochemicals are protective against cancer and other degenerative diseases, and are related to pigments in fruits and vegetables. So that is why you often hear that’s it’s good to eat a rainbow of vegetables:
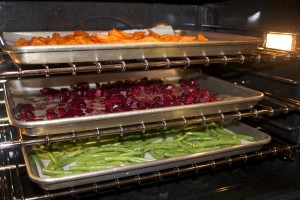
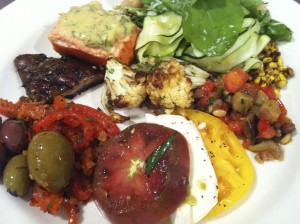
Orange: carrots, apricots, pumpkins, red: tomatoes and cherries, green: avocados, leafy greens, brown; nuts and seeds, blue: blueberries and blackberries. A lot of these not only contain phytochemicals but Vitamin A, C, and E as well. One example of a phytochemical is a flavonoid, which is found in the pulp of foods containing Vitamin C, which is WHY it is better to have food in the whole food source than in a juice. Foods with Vitamin A and Betacarotene:
By the way, food with too much beta-carotene can turn your skin orange, which is what happened to me in my youth. This is not a harmful condition, but it does indicate that one is not converting all of the beta-carotene to Vitamin A. Foods with Vitamin E:
Foods with Vitamin C:
Share on Facebook and Twitter | Health Tips | No comments
|
