|
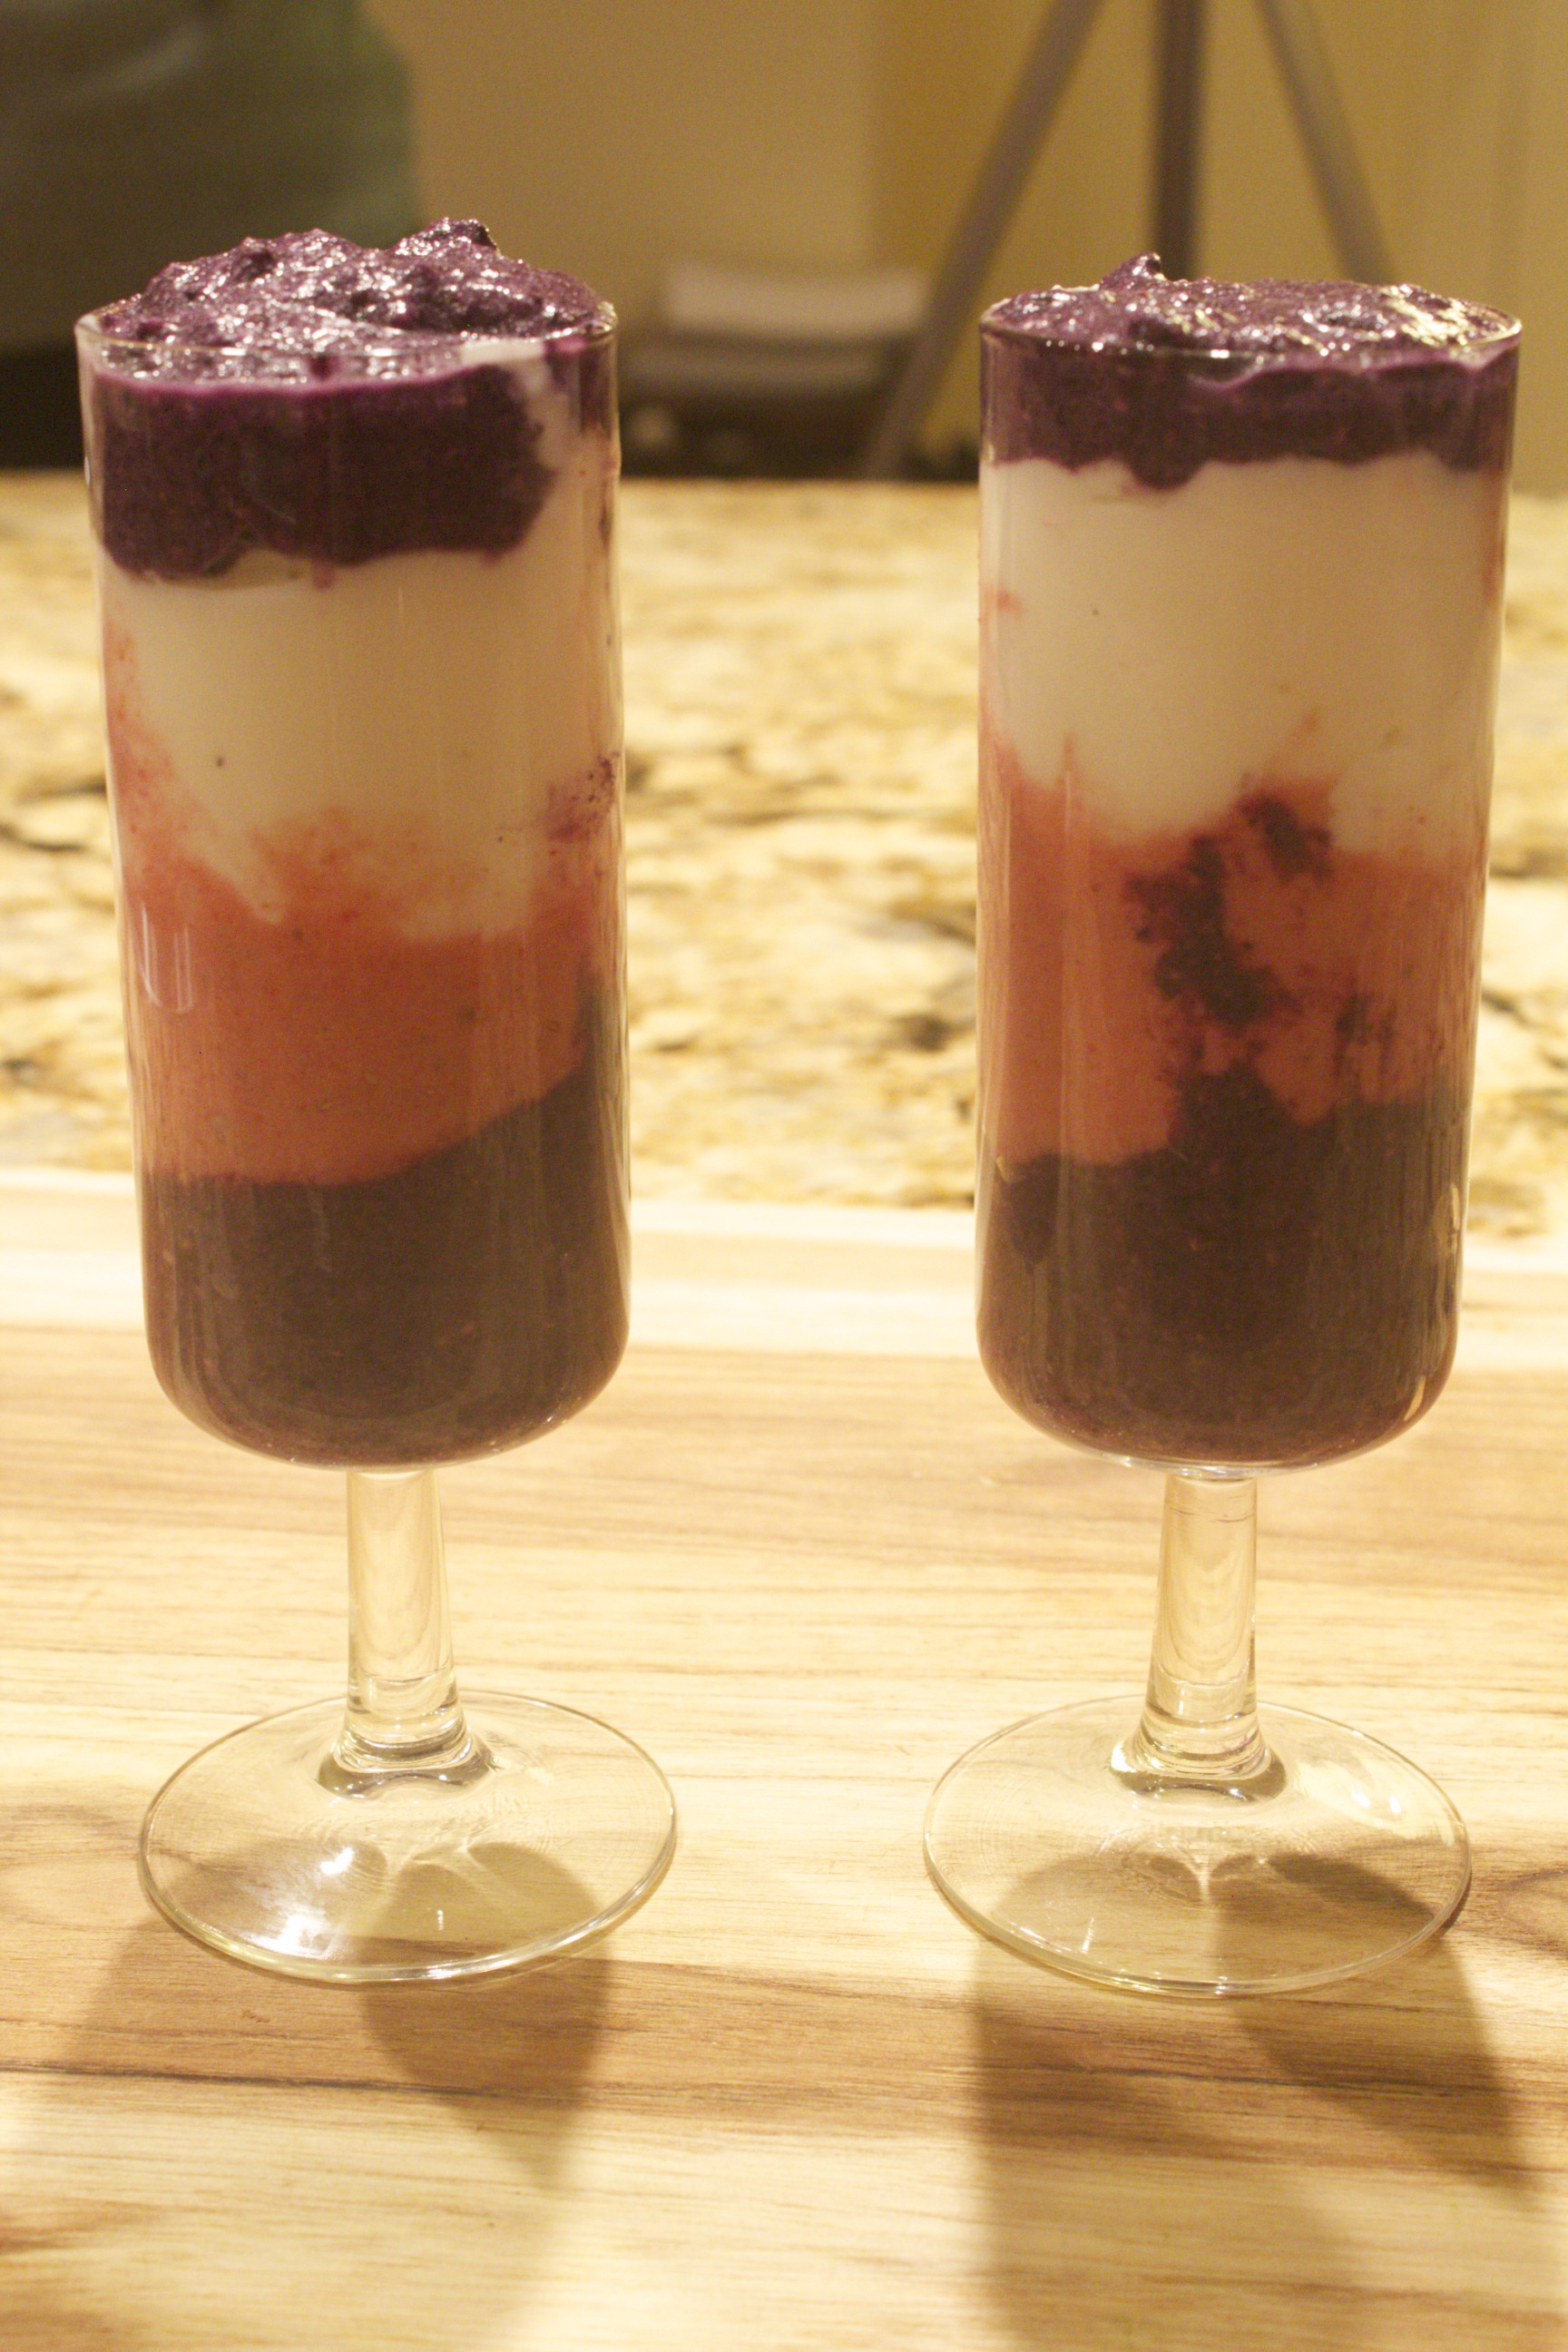
Chia Seed Puddings
In today’s video of chia seed puddings, I show how to make two delicious chia seed puddings. Chia seeds are touted for their powerful salutary benefits: Included among their vital nutrients are protein, fiber, antioxidants, and ALA (alpha-linoleic acid), a type of omega-3 fatty acid. It seems that nowadays people are shaking these micro-seeds into everything from cereals to salads, from baked goods to beverages. I’m not a fan of the dry chia sprinkle: Chia seeds are most digestible when allowed to soak and swell. Therefore, I favor adding them to blended concoctions, then leaving enough time for the tiny powerhouses to plump. The result is thickened puddings with luscious pebbly beads, reminiscent of tapioca. The procedure for making chia seed pudding is quick, simple, and consistent. Whiz together a flavorful blend, stir in some chia, and refrigerate for at least 30 minutes to allow the seeds to thicken. The array of potential flavor permutations are vast. In the video, I demonstrate two berry-based puddings, each one ideal to savor alone or to layer into a colorful parfait. You’ll need a stand blender to pulverize the ingredients; a high-powered blender is the gold standard, but it’s not essential. The first purée that I show has a base of blueberries. Start with 2 cups of the fruit, either fresh or frozen. If you’re using frozen, let the berries rest a few minutes to defrost. Add 1/2 cup cashews, ideally after having soaked them for 2 hours before draining. Soaking the cashews allows for maximum nutrient absorption and digestibility. The sweetener in this pudding is a mere 4 dates. Any variety of date (make sure to remove the pit!) is fine, but the medjool variety is the softest and sweetest. This resulting pudding is sweet enough without being cloying. A couple tablespoons coconut oil—virgin or aroma-free—will also help keep your blood sugar stable as well as ensure that the pudding has a luxurious texture. One tablespoon vanilla and a generous sprinkling of cinnamon complete the flavorings. A cup of liquid is necessary for proper blending. In the video, I use coconut water, but plain water would be fine as well. Give the ingredients a good whiz until well combined. Transfer the purée to a bowl or container, then stir in 6 tablespoons chia. The micro seeds need a bit of time to work their magic and swell. Transfer the pudding to the refrigerator and leave for 30 minutes minimum, preferably longer. The next strawberry chia delight that I show in the video is simplicity itself. Blend well 3 cups strawberries (if frozen, defrost a bit), 1/4 cup raw honey, and 3/4 cup coconut milk, which lends the needed richness and body to the finished dish. Add a splash vanilla, and give a long enough whiz in the blender until the base is smooth. Transfer to a bowl or container, and stir in 1/4 cup chia. Refrigerate for a minimum of 30 minutes, but longer is even better to allow for the seeds to expand as much as possible. The puddings last refrigerated for at least a week, and they each yield 4 to 6 luscious servings. Either of them alone—or the two in combination—can make a great snack or low-sugar dessert. You can also leave them refrigerated for a convenient grab-and-go breakfast. One favorite breakfast of mine is the combination of puddings layered in a parfait or martini glass with sheep’s milk yogurt. The blend tastes tart and sweet, looks gorgeous, and contains just enough fat, fiber, and fruit to keep you happily sated until lunch. Share on Facebook and Twitter | Breakfast, desserts, Gluten Free, Gluten Free, Snacks | No comments
Fermented Tomato Salsa
In today’s Video, I show how to ferment a tomato salsa; making this lactoferment is a great way to celebrate and enjoy the luscious tomatoes available right now. You may not be familiar fermented salsa: but it is truly delicious and you get to reap the benefits of your labor quickly. Just 24 to 48 hours of fermentation results in a salsa with a delightfully tangy flavor and a long-lasting life. Salt (or a mixture of salt and whey) initiates the fermentation process; it inhibits the growth of undesirable bacteria long enough for the lactobacilli, the delightful microorganisms already present on plants, to be converted to lactic acid. The nutrient content of the salsa is increased; the versatile condiment turns into a healthy probiotic. I demonstrate the two versions in the video: one made with salt, and one made with a combination of salt and whey. Fresh whey is simple to make. You place a cheesecloth-lined strainer over a bowl and add a couple cups of yogurt to the strainer. Within an hour or so, you’ll have a decent amount of liquid in the bowl: that’s the whey. You can transfer it to a covered jar and keep it stored in the refrigerator for up to six months. The longer you strain the yogurt, the more whey you’ll have and the thicker your yogurt will be. You can strain it for a few hours to produce thick, rich Greek-style yogurt, or you can strain it overnight to produce even thicker yogurt cheese. Whey gives the ferment a jumpstart, and the version with whey is usually ready within one day. Alternatively, you can leave out the whey and just add salt; you’ll still get wonderful results within two days. For either version, start with 1 ½ pounds tomatoes, diced small. The salsa is especially vibrant with a mélange of colorful tomatoes; a quart’s worth of quartered cherry tomatoes is also suitable. Next add a couple cloves minced garlic and 1 or 2 minced jalapeños to the tomatoes. It’s also good to add something oniony: I favor a mix of red onion and scallions, about ½ cup of each. No salsa is complete without a mound of chopped cilantro, so add at least ½ cup. To this, add ¼ cup lime juice. Now it’s up to you either to add 2 teaspoons salt or 1 teaspoon salt plus ¼ cup whey. Either way, make sure to push the salsa down into your 1-quart jar so that the liquid covers the top. Cover tightly; then leave the jar out on the counter for 1 to 2 days. Within a day or two, you’ll notice bubbles in the liquid. At that point, transfer your ferment to the refrigerator, where it will stay fresh for a few months. Use it to add zest to your meals and snacks.
Share on Facebook and Twitter | Fruit, Gluten Free, Kitchen Tips, Side Dishes | No comments
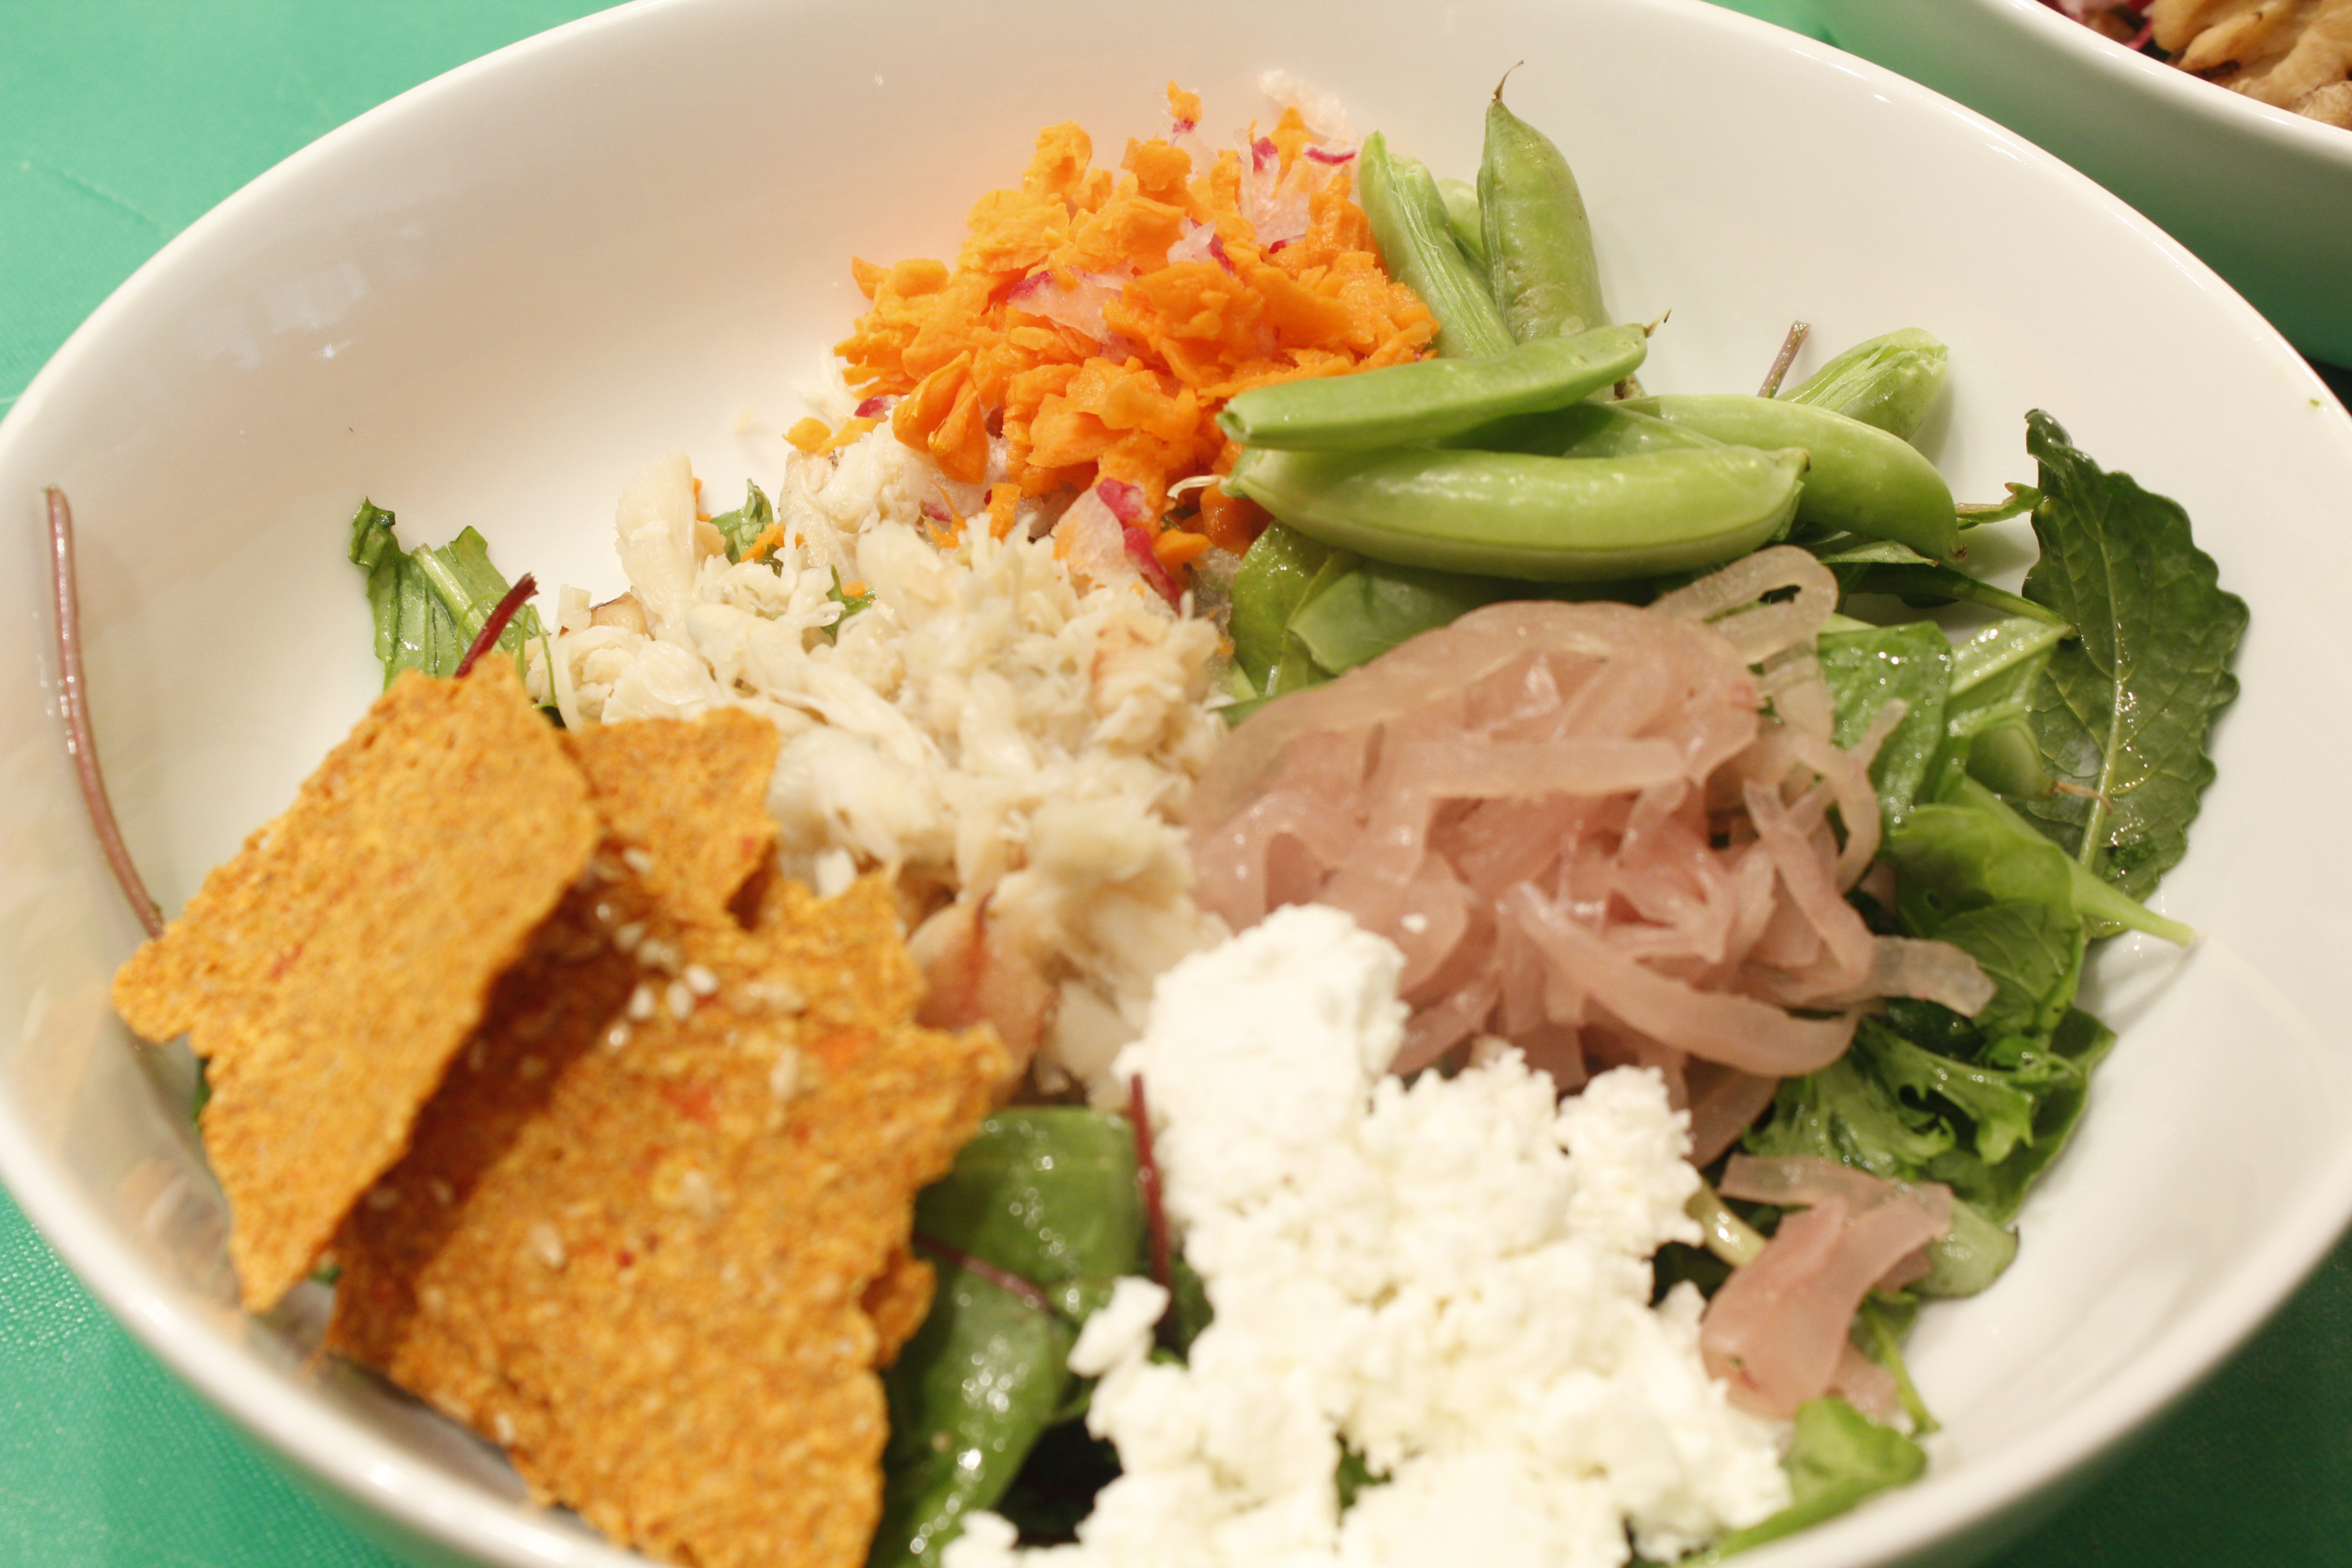
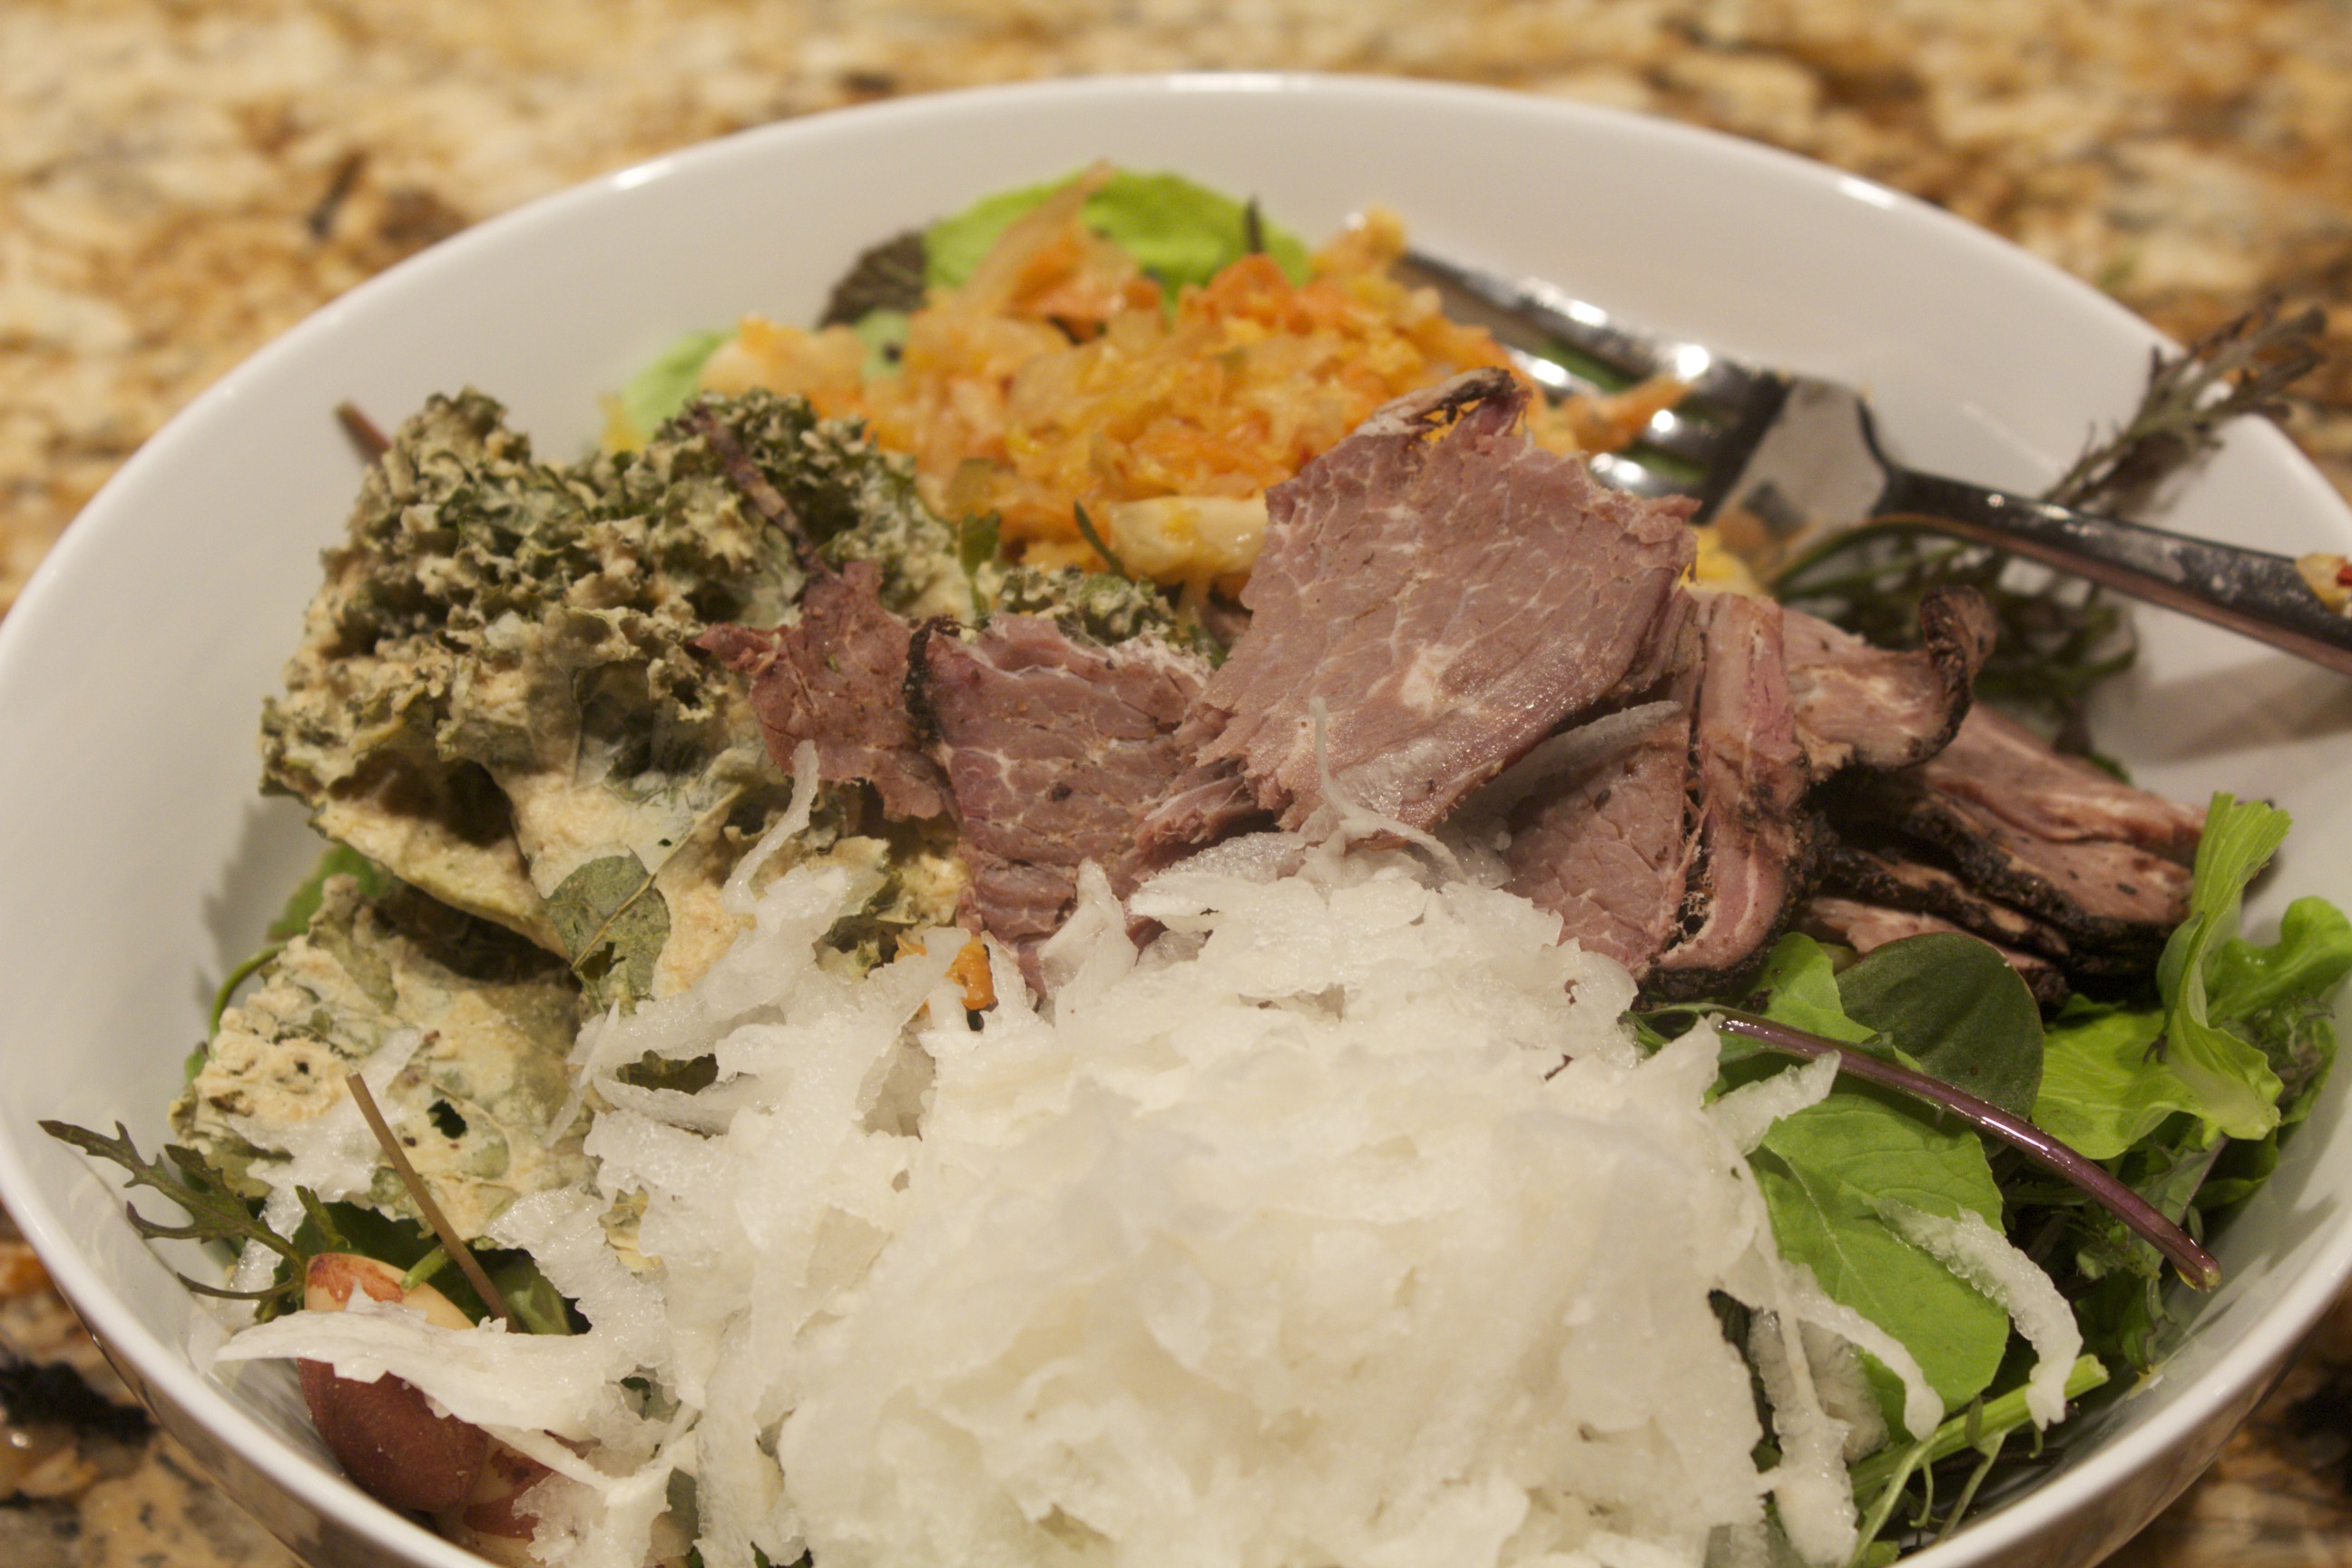
Building a Satisfying Salad In today’s video, I demonstrate one of my favorite summer lunches, a beautiful light yet substantial main course salad. The focus of the video is on the components that make up a satisfying salad. My ideal summer salad has a homemade dressing, a gorgeous mix of greens, a protein, a raw vegetable or two, a fermented vegetable, a sprinkling of something fatty, and some kind of crunchy, dehydrated vegetable or sprouted chip. This composed salad lends itself to infinite variations, and I explore three. Happily, all of these colorful, multi-textured salads take only minutes to assemble, and they are hearty enough to keep you going strong until dinner.
The most important factor in a salutary salad is the dressing. Bottled salad dressings are not healthy; they all contain inflammatory polyunsaturated oils, such as soybean oil, as their primary ingredient. Making your own dressing, however, is quick and cost-effective as well as healthy and delicious. Here’s how to make a basic vinaigrette: First, place a damp dishtowel in a ring shape on your counter to hold your bowl steady. Doing this will free both hands. Place a dab of mustard in the bowl, then add a tablespoon of minced shallots. Next, pour in a couple tablespoons of your favorite vinegar (the dressing used in the video is golden balsamic), then whisk in about 6 tablespoons of extra virgin olive oil. You can also add a splash of flax seed oil to boost the omega-3 content. Stir in a few tablespoons of fresh herbs, and make sure to include a generous sprinkling of salt and black pepper. Transfer the dressing to a jar, and refrigerate it for up to two weeks. You now have a delicious dressing available whenever you want to enjoy a salad.
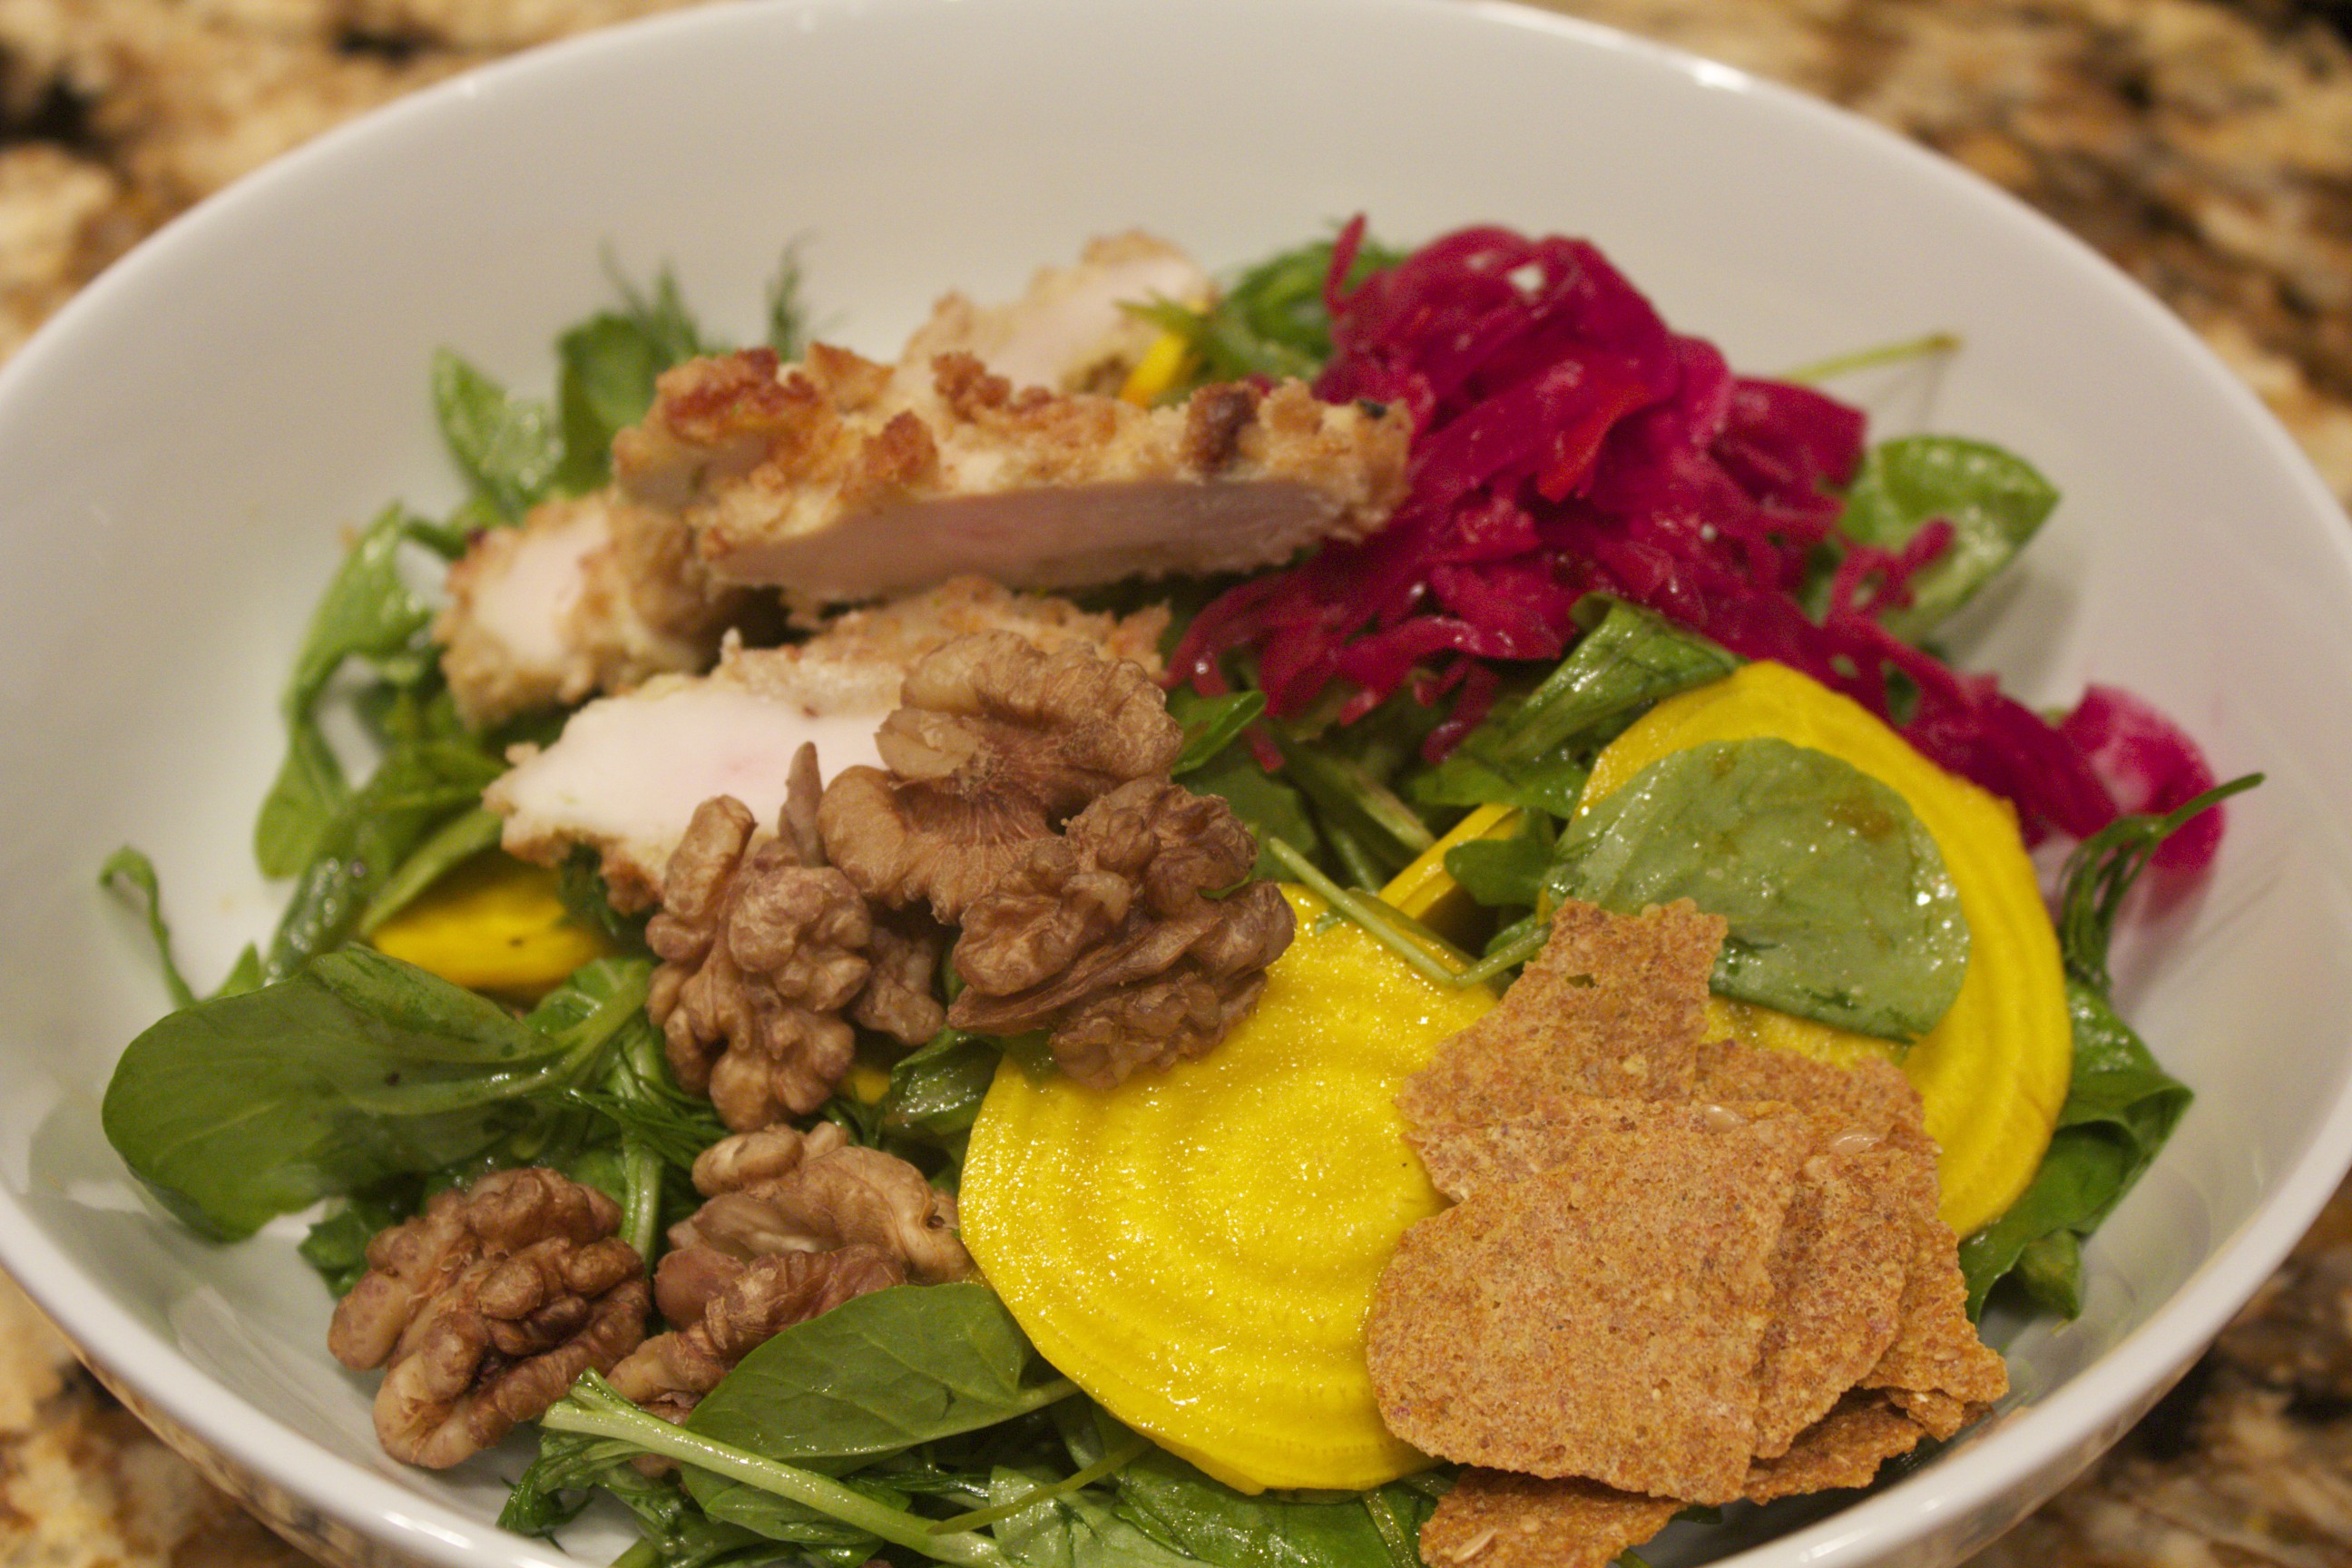
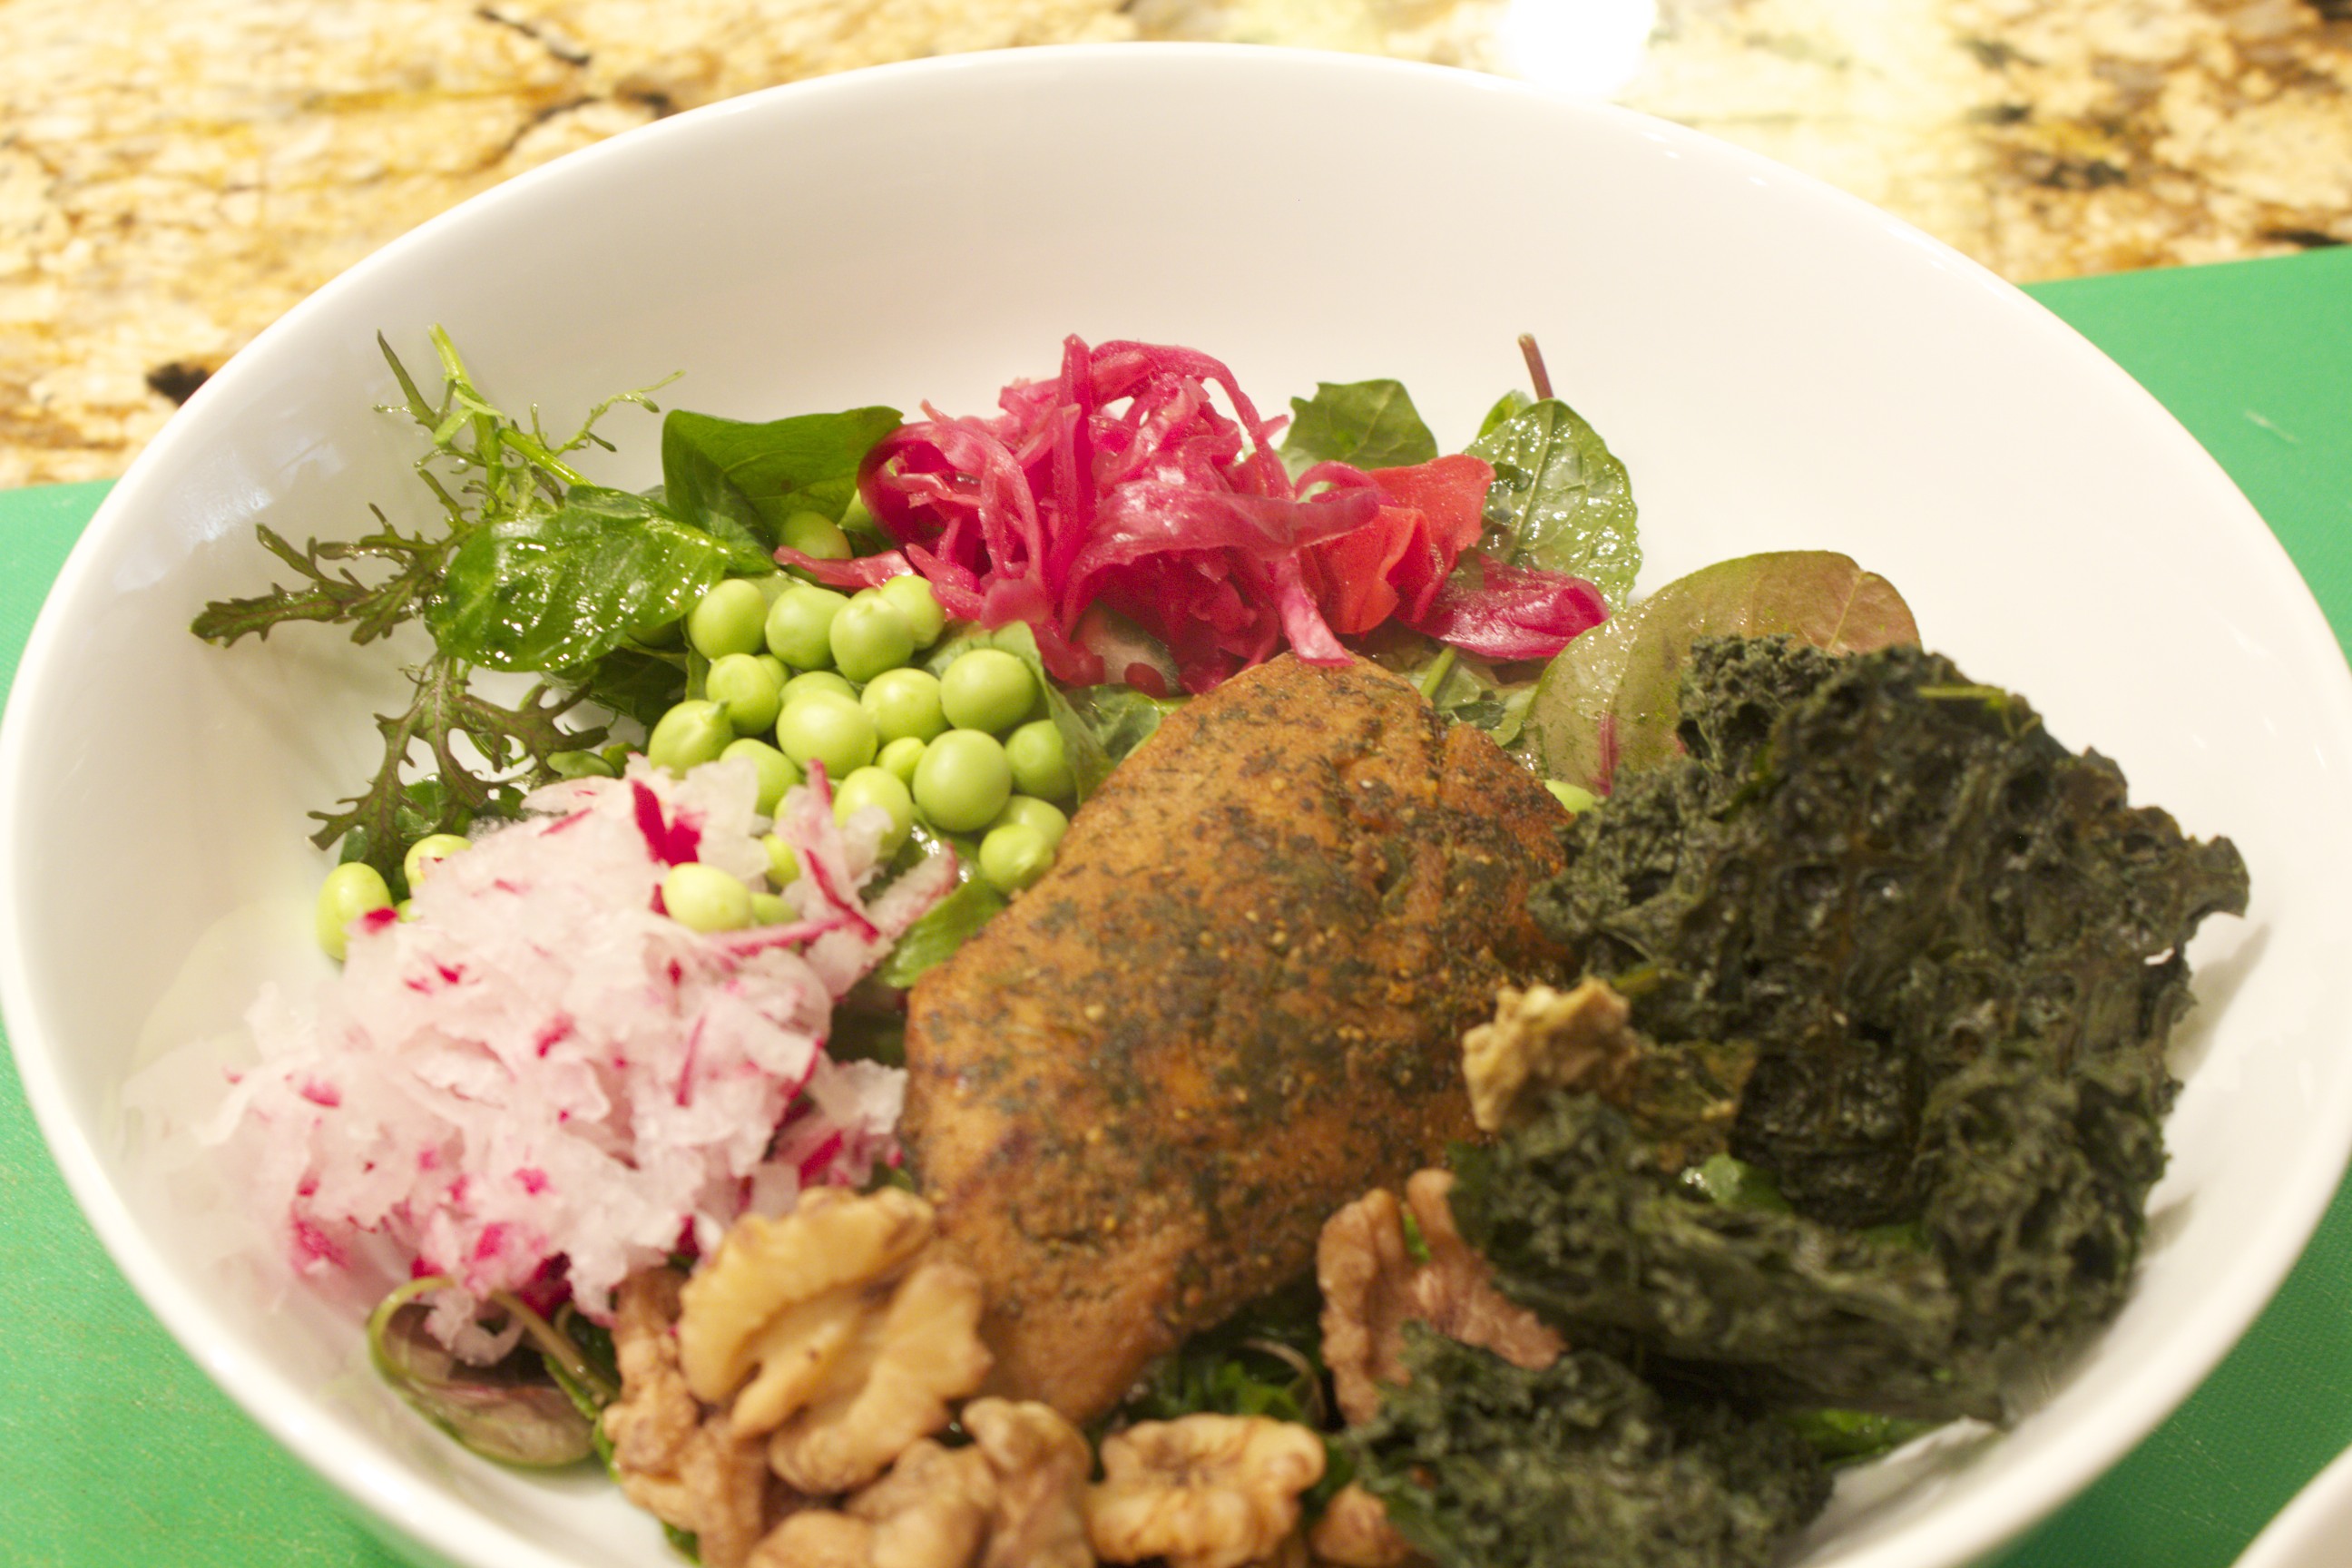
Next, pick a selection of delectable greens. Bins at your local greenmarket contain the most exciting varieties; but mesclun, arugula, and watercress are readily available in most grocery stores. Toss the greens with just enough dressing to coat, and place in your salad bowl. Now for the composed part: Top the greens with a serving of protein. The three examples in the video feature tinned crab, smoked mackerel, and lamb pastrami. Other delicious pantry staples or ready-to-use proteins include tinned sardines, salmon, tuna, smoked oysters, and shrimp. Cold proteins, such as poached fish, chicken, turkey, or beef from a previous meal can be used as well.
Since so many fine fresh vegetables are available in the summer, be sure to add a fresh raw vegetable or two. In the video, I show grated radishes and carrots, thinly sliced beets, sliced snow peas, shelled English peas, and whole sugar snap peas, which, when fresh, are delicious eaten raw. I recommend also including a fermented vegetable; not only are fermented vegetables refrigerator staples, but they lend a wonderful tangy flavor to the salad, and they make the proteins in the salad easy to digest.
Next, sprinkle over your salad a “fatty” component such as nuts, olives, or crumbled cheese. A little of these go a long way. The last essential ingredient—again, something that keeps well in the pantry—is some kind of a crunchy vegetable chip. There are so many tasty dehydrated vegetable chips on the market now: kale chips, onion chips, arugula chips, and dehydrated vegetable crackers, to name a few. A little mound adds a fun element to the salad. Mix and match and come up with all kinds of salad variations. I hope that you develop your own hot weather favorite combinations and that you turn out to be as excited about these salads as I am!
Share on Facebook and Twitter | Gluten Free, Lunch, Main course, techniques, Uncategorized | No comments
Toffee-Ginger Nut Squares Delicious treats are part of the joy of any celebration. In this video, I show you how to make one of my absolute favorite delectables: toffee-ginger nut squares. These melt-in-your-mouth bars are nutty, buttery, gingery, and salty—a taste combination that lingers tinglingly on your palette. Even a small square is satisfying. You can make up a batch and freeze them. You can even make these gluten-free, by replacing the pastry flour with sorghum flour. Best of all, these bite-sized morsels make special edible holiday gifts your loved ones will really appreciate. Start by buttering an 8×8 baking dish, then line it with parchment that overhangs the edges on two sides; these handles are convenient for when you transfer the finished bars to the cutting board. Begin with the crust. Sift together one cup of whole wheat pastry flour with ¼ teaspoon each baking powder and salt, and set it aside. Use an electric or hand mixer to beat 6 tablespoons butter with 1/3 cup of maple sugar (or any other unprocessed granulated sugar) for a couple of minutes, until well-combined. Then beat in the sifted flour mixture, followed by ¼ cup finely chopped nuts. In the video, I make the squares with pecans, but cashews and macadamia nuts are delicious as well. Press the crust (which looks crumbly at first) into the prepared baking dish, and bake it for 10 minutes in a 350˚F preheated oven, just until lightly colored. While the crust is baking, make the topping. Melt 6 tablespoons butter and ¾ cup chopped pecans (use the same variety of nuts that you added to the crust) in a small pot. Cook for a couple of minutes over medium-high heat, stirring constantly, until the butter is foamy and the nuts are fragrant. Then stir in the rest of the ingredients: ¼ cup maple sugar (or the same sugar that you used for the crust), 2 tablespoons brown rice syrup, and ½ cup finely chopped crystallized ginger. Let the mixture simmer for a couple of minutes. Whisk two eggs in a medium bowl. Add the hot liquid slowly at first to temper the eggs, then faster as the eggs warm. Stir in 2 tablespoons pastry flour (or sorghum flour). Pour this mix, spreading evenly with a spatula, over the crust; bake for 20 to 25 minutes, until the top sets and develops a luscious caramel color. Let the squares cool to room temperature in the pan, then sprinkle the top with coarse sea salt; lightly press the salt granules into the top. Using the flaps of the parchment as handles, lift the bars out of the pan and transfer them to a cutting board. Cut into squares: sixteen if they are for a full dessert, and twenty-five if they are tea treats or holiday gifts. Keep the squares covered, at room temperature, for up to five days, refrigerate them for up to two weeks, or freeze to have on hand any time. This way, you’ll have an exciting delight ready for when you have guests over, or for when you want a little extra pleasure. Happy holidays!  Toffee-Ginger Nut Squares
Share on Facebook and Twitter | desserts, Gluten Free, Natural Sweeteners, nuts and seeds, Snacks | No comments
Amaretti Cookies Amaretti cookies are chewy Italian cookies studded with pine nuts. These are festive enough for your holiday gift-giving but simple enough to make any time. This video shows the ins and outs of making these gluten-free cookies. I start with 2 cups almond flour, then add 1½ cups natural sugar. My favorite sweetener for these is maple sugar, but succanat ™ and rapadura™ work as well. Keep in mind that different natural sugars affect the flavor and moisture and can alter the texture slightly. I then stir in a pinch of salt and a couple teaspoons almond extract to heighten the almond flavor. The next step is to whip three egg whites in a separate bowl until they form peaks. You can do this by hand or with a hand-held or stand mixer, but my tool of choice to make the job efficient is an immersion blender. I then stir the fluffy egg whites into the flour mix. Finally, I brown the butter. I melt half a stick of butter, and cook it until it is copper-colored and fragrantly nutty. I keep a watchful eye on the pot after the butter melts—the process takes only a few minutes, and I want to make sure to stir the butter into the batter when it is browned, not burnt. At this point, I’m ready to form cookies. The batter is sticky, so using 2 spoons is the easiest way to drop the batter onto a parchment-covered baking tray. In order to leave enough room for these cookies to spread, I use 2 trays and drop the batter 1 ½ inches apart, making about 30 cookies. I sprinkle each cookie with pine nuts before it goes into a 300˚F oven to bake. Halfway through the cooking, after ten minutes, I rotate the trays to help them to color evenly. They smell heavenly while they bake. Once I’ve let the cookies cool, I store the extras in the refrigerator for up to two weeks, or I freeze them for up to two months. What a wonderful way to start off the holiday season.
Share on Facebook and Twitter | desserts, Gluten Free, Natural Sweeteners | No comments
Day Before Thanksgiving Feast This time of year I get a hankering to cook a Thanksgiving meal, even if I’m not the one having the guests over. My local traditional foods club has farmers that bring in stunning pasture-raised Turkeys, so I couldn’t resist buying a couple. I invited a friend over to cook a no-stress pre-Thanksgiving meal with me and split the bounty. (We cooked the 13-pound Turkey. I still have a wee 7-pound turkey in the freezer.) This is what we made, based on what looked good at the greenmarket when I went shopping that morning: Cranberry glazed turkey: I planned this one. I made a glaze by simmering cranberries, maple syrup, thyme, orange zest, garlic, and brown rice vinegar in a small pot. When the cranberries had burst, I pushed everything through a strainer. I served this same glaze for a recent lunch party on duck breasts.  Cranberry Glaze in the Pot I received the turkey Tuesday night and did a little prep. I dry-brined it with salt (basically just rubbed it all over) and slipped some thyme-rosemary-sage butter under the skin to keep the breast moist. I laid the turkey on a rack in the roasting pan and refrigerated it overnight. Wednesday I baked it breast-side down at 325˚F. for an hour, then flipped it, and cooked the turkey about another 2 hours. I glazed the bird the last 40 minutes. Next time I won’t be lazy, and I’ll tie the turkey legs together.  Cranberry-Glazed Turkey Gravy was the pan drippings with a roux made from chickpea flour and butter (the whole meal was gluten free), with some gelatinous chicken stock. (I had simmered a whole chicken with a bunch of extra feet overnight to make a gelatinous chicken stock.) Stuffing: I made a gluten-free cornmeal with cornmeal and sorghum flour (soaked the flours in buttermilk overnight, then proceeded with the recipe), then sautéed onions with cranberries, dates, and prunes. I added some wine, apple cider, and a smidge of maple sugar to deglaze, and cooked this until the cranberries burst. I added the mix to a bowl with some sage, chopped pecans, toasted cornbread cubes, a pound of turkey sausage (I cooked it first), and a splash of sherry vinegar (and salt and pepper of course) and a couple eggs. I baked this separately in an 8×11 roasting pan at 350 for about 20 minutes. Next time I’ll have the stuffing ready in advance and I’ll fill the bird with it.
 Stuffing in Progress Celery root-apple-sage pancakes: recipe from The Healthy Hedonist Holidays. I used chickpea flour instead of unbleached white flour to make these gluten-free. Chard with cipolline onions: We cooked cipolline onions in olive oil and balsamic vinegar and added a couple bunches of wilted chard. Buttered Green Beans with anchovies, garlic, and sage: We crushed the anchovies with salt so that they disappeared, and finished the green beans off with a splash of lemon juice. Brussels Sprouts with leeks and shiitake mushrooms: We sweated the leeks and mushrooms with olive oil and a splash of tamari, until shrunken and tender. We removed them from the pan. We then added the Brussels Sprouts with butter, water, thyme, and salt, and cooked them until tender. We uncovered the lid and added balsamic vinegar and mustard, stirred the mushroom mix back in, and finished with a sprinkle of fresh tarragon. Squash-Chestnut soup: We cooked hubbard squash soup with chestnuts, and added a splash of scotch. Served it with a swirl of yogurt, although crème fraiche would have been even more luscious.  Hubbard Squash and Chestnut Soup Russet apples: Roasted in ginger-cinnamon mulled cider. Then we feasted, and divided the spoils. No room for dessert, but it wasn’t necessary. Had leftovers of this one (espresso pudding with pumpkin whipped cream).
 Chocolate-Espresso Pudding with Pumpkin Cream and Whipped Cream I’ll admit that on Thanksgiving I had salmon, since I didn’t want to exhaust my enthusiasm for Turkey. The next night I was into Turkey again. This is my second night of leftovers, and it’s so good.  The whole plate: Turkey, Stuffing, Chard with Cipollines, Brussels Sprouts, Russet Apples, and Celery Root Pancakes Share on Facebook and Twitter | Dinner, Gluten Free, Main course, Side Dishes, Uncategorized | No comments
|