|
The Myriad Uses of Cooked Squash ‘Tis the season to be savoring sweet squash. In today’s video, I demonstrate the richness and versatility of cooked squash. With a tub of the bright orange flesh on hand, you can quickly whip up any number of autumnal dishes. You can keep cooked squash refrigerated for up to a week, or you can freeze it. Although there are all kinds of wonderful varieties of squash and pumpkin available in farmers’ markets, in the video I demonstrate with butternut: the smooth, flavorful workhorse of the squash world. To prep the squash—use a 21/2 to 3-pound butternut—slice it down the middle, and place it face down on a parchment-covered baking sheet. Roast it at 325˚F to 375˚F (the temperature depends on what’s already in the oven cooking; anything within this range is good!) until very tender, about 45 minutes. Rest the squash until cool enough to handle, then scoop out and discard the seeds, which is much easier to do after the squash is cooked. Scoop the flesh into a bowl and reserve. The first recipe in the video is for a speedy soup. To begin, in a medium pot sauté 1/2 cup of chopped leeks along with a tablespoon or so of minced ginger in a couple tablespoons fat (coconut oil, ghee, or extra virgin olive oil are all good) over medium heat. When the vegetables are softened, add a quart of stock—this is a great place to use a homemade chicken or vegetable broth—a can unsweetened coconut milk, the reserved squash flesh, and 1 1/2 teaspoons salt. Let the soup cook a few minutes to marry the flavors, then finish with a flick of cayenne and a splash of lime juice. Voilà: a delicious soup! Serve up a hearty bowl dusted with chopped cilantro. The second recipe is for a light yet substantial pumpkin pie-spiced breakfast pancake. The recipe makes 2 servings, but you can easily scale it up. Start with a couple tablespoons coconut flour in a bowl. Add a mix of spices: 1/2 teaspoon cinnamon powder; and a pinch of nutmeg, ginger, and allspice. Add a large pinch baking soda and salt, and whisk together the dry ingredients. Then add 1/2 cup squash flesh, a couple of lightly beaten eggs, a tablespoon maple syrup, 1/2 teaspoon vanilla extract, and 1 tablespoons melted fat (butter or coconut oil). Mix vigorously, and you’re ready to make pancakes. To cook, film a griddle or nonstick skillet with oil until your hand held 1 inch above the pan is uncomfortable. This batter is a little more delicate than a typical flour-based batter; for best results, opt for medium-size pancakes, and above all, resist crowding the pan. Drop the batter—a tablespoon at a time—into the sizzling skillet until you have four swelling hotcakes. Leave the pancakes alone until browned and toasty on the bottom, then flip and cook a few more minutes on the second side. Transfer to a plate, and repeat with the remaining batter. Serve these airy cakes with butter, fruit, or a drizzle more sweet syrup. These are just two of the many wonderful dishes that you can make with squash flesh. Yes, it takes 45 minutes or so to cook the squash, but the oven does the work, so it’s not your time. With cooked squash on hand, you can whip any number of delectables together in minutes. Share on Facebook and Twitter | Breakfast, Kitchen Tips, Soups, Uncategorized, Vegetables | No comments
Chicken Bone Broth In the video presented here, I show how to make a nutrient-dense bone broth. There’s a South American proverb that goes “good broth will resurrect the dead.” If only that were true. What is true is that slow-cooked stocks that are made from bones aid in healing the chronically compromised as well as in keeping the healthy robust. What’s more, good broths—something which every chef knows—are the basis for delicious soups and sauces. What distinguishes a nutrient-dense broth from a mediocre stock is the gelatin. Gelatin is what is found in the joints of animal bones. A word first about Dr. Weston A. Price, author of the tome Nutrition and Physical Degeneration. Price was a Cleveland dentist who, in the 1920’s and 30’s, traveled the world to find existing cultures that had not yet been exposed to the processed foods of Western civilization. Over the course of ten years, he visited a dozen isolated healthy peoples around the world. Without fail, all of the people with these isolated food traditions not only had robust health, but straight gorgeous teeth without dental decay—and none of the societies had modern dentistry. Price meticulously recorded his findings and observed that, although each culture’s diet varied tremendously, they had in common ten times higher levels of fat soluble vitamins and four times higher level of minerals than those of the mainstream American diet. All of the peoples he visited consumed soups or stews based on bone broths made from fish, fowl, or meat. In the video shown here, I focus on chicken broth. There are so many ways to make chicken broth; the method can be varied every time, depending on what you have around. I generally use about five pounds of bones. These invariably include a raw carcass, a few feet, a few necks, and any backs or cooked carcasses that I have around. I’ve made chicken bone broth from several raw carcasses or from just necks and feet as well. Chicken feet are perhaps the most important, underrated element in a great broth. Even using two can add so much gelatin to your brew. If you use a bagful, your chilled stock will be so gelatinous that you can stand a spoon straight up in it! Place all of the bones in a tall stockpot and cover them with water. Then add two tablespoons of apple cider vinegar to draw out the minerals. Let the stock sit for half an hour before turning on the flame. You can add an onion, a couple of carrots and celery if you like, but it’s not necessary. The next step is to bring the stock up to a boil. At that point you have to spend a few minutes skimming the scum that rises to the surface. You really do want to get rid of the scum, since it will compromise and muddy your stock. Next, lower the heat until there is barely any movement on the surface of the liquid; let the stock cook anywhere from six to twenty four hours. You can turn off the stock at any point if you need to go out. You can leave it untouched for up to nine hours at a stretch. When you start the broth again, simply bring the liquid to a boil again, skim off the scum, lower the heat, and let it roll. When you’ve cooked the broth for as long as you like, strain the liquid through a sieve, then transfer it to containers. I favor one-quart heavy-duty food-grade plastic. Next, chill the stock, and scrape off the fat that has risen to the top. Notice how wobbly and gelatinous your stock is after it’s been chilled. Now you can keep the stock refrigerated for up to five days, or longer if you reboil it; or, you can freeze it for months, keeping it ready to turn quickly into a delicious dish whenever you like. The gelatin in meat broths has the unusual property of attracting liquid (the term is hydrophilic) even after it has been heated. Gelatin acts as an aid to digestion. Furthermore, it acts as a protein sparer, allowing the body to more fully utilize complete proteins that are ingested. It is useful in the treatment of many chronic disorders, including but not restricted to anemia, diabetes, hyperacidity, colitis, and Crohn’s. Again, to emphasize: in order to make a stock truly nutrient-dense, it’s important to use some joint bones along with some of the other bones that provide minerals. Truly, bone broth is one of the mainstays of my kitchen—a real life saver. Share on Facebook and Twitter | Health Tips, Kitchen Tips, Soups, techniques | No comments
Butternut Squash Soup with Crispy Shallots and Sage Nothing screams autumn like butternut squash soup. The version shown in the video, from The Healthy Hedonist, is simple to prepare, yet velvety and delicious-tasting. I start with a 2 ½ to 3-pound butternut squash, slice it open down the middle, place it in a 375˚ oven and bake until it’s tender, about 45 minutes. With a soup as simple as this one, roasting the squash first to heighten its flavor is of the utmost importance. I then remove it from the oven, let it cool for a few minutes, and scoop out and discard the seeds. The seeds come out so much more easily after the squash is cooked. I then scoop out the flesh and set it aside. I start the soup by adding a splash of extra virgin olive oil to a medium pot. I stir in 1 cup of leeks, 6 cloves of garlic, and 1 ½ teaspoon ground cumin, and cook the mix over gentle heat until softened. I next add a couple cups of sliced sweet potatoes, the reserved squash flesh, a cup of apple cider, and 5 cups of water or stock. This is a good place to boost nutrient content and flavor with a homemade chicken or vegetable stock, but the soup is still delicious with water as the primary liquid. Add a teaspoon salt, and cook the soup partially covered at a gentle bubble for about fifteen minutes, until the sweet potatoes are tender. While the soup is simmering, I make the garnish. I slice shallots into thin rings and add them to ¼ cup extra virgin olive oil. At first, nothing seems like it is happening. Then the oil starts to sizzle, and slowly but surely the shallots start to fry around the edges of the pan. At that point, it’s important to stir continuously for the next three or four minutes, until the shallots are more or less evenly caramelized. At the final stage, some will be darker than others, but they should all have a golden hue. Have a strainer set over a bowl ready and close. When the shallots are colored as evenly as possible, you have to separate them from the hot oil quickly, to keep them from continuing to cook. About 15 seconds before the shallots are finished I add the sage, just to sizzle them in the oil. After I strain the oil, I remove the sage from the shallots and chop the leaves into small pieces. The sage, shallots, and oil are now ready lend flair to the soup. For simplicity’s sake, I blend the soup with a hand-held blender, also known as an immersion blender. I’m careful when using the immersion blender, to immerse it in the liquid before turning it on, as well as to turn it off before lifting the blender from the soup. At this last stage I always taste the soup, to see if it needs an extra dash of salt to pull up the flavors. I sprinkle in a dusting of black pepper as well. The soup has a delightful aroma and a rich taste. The silky texture is offset with the flourish of caramelized shallots and sage, and a drizzle of shallot oil.
Share on Facebook and Twitter | Kitchen Tips, Soups, techniques, Vegetables | No comments
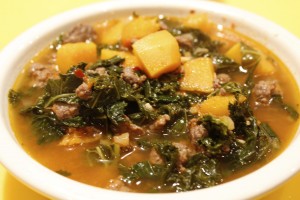
Lamb Merguez Stew I have been making lots of soups and stews this week to give to a friend who is recovering from surgery. The upside is that I’ve had a lot of delicious warming food around as well. This lamb merguez stew was a snap, since I had lamb bone broth in my freezer. Chicken stock, however, would work as well. I purchased the sausage from my favorite lamb farmer, 3-corner-Field farm at the Union Square greenmarket.
I first browned the sausage (about a pound) in a large pot, then removed it and cooked down the liquid. I added ½ cup shallots and sweated those in the small amount of lamb fat left in the pot for about 5 minutes. I then added a 2 ½ pound butternut squash that I had cut into 1-inch cubes, a jar of roasted red peppers, the cooked sausage and about 4 cups stock. I added some salt, covered the pot, and let the stew simmer for about 20 minutes, until the squash was soft. I added a whole head of chopped kale, then cooked the stew another 10 minutes until the kale was tender. Meanwhile, on another burner, in a small skillet, I sautéed some garlic, ginger, and harissa powder for a couple of minutes, then added that to the stew. At the end, I smashed some of the cooked squash against the sides of the pot to thicken the stew. Simple, quick, delicious meal-in-a-pot. Share on Facebook and Twitter | Dinner, Lamb, Lunch, Main course, Soups, Where To Buy (Sources) | No comments
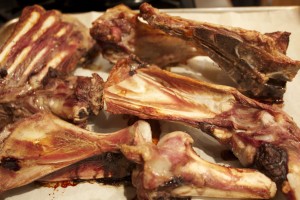
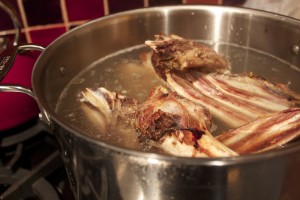
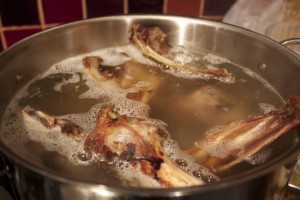
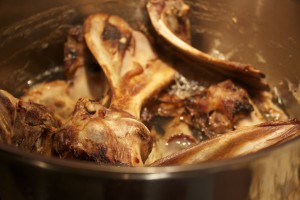
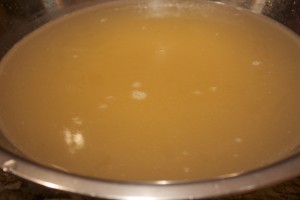
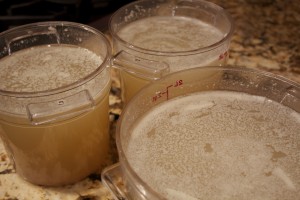
Lamb Bone Broth I purchased 5 pounds of lamb bones the other day at the booth of 3 Corner Field Farm (one of my favorite stalls) at Union square Greenmarket. The large and impressive bag of bones prompted another customer to inquire why I was buying them. What followed was a discussion on how to make lamb broth. I’m detailing the process here since lamb broth is not a stock that many make. After all, you can certainly use chicken stock with great success for any lamb dish that requires a flavorful liquid. A lamb broth, on the other hand, will make your lamb stew or braise incredibly rich and deep-flavored. You can make a stew so satisfying that it tastes as nurturing as a giant hug. (Those are the words a friend of mine used to describe a lamb stew I had recently made for her with lamb broth.) Plus, this dish is seriously easy to put together. It requires about five minutes of active participation to get the stock going, and just a few minutes work straining it when finished. First roast the bones: Arrange them on a parchment-covered baking tray (see the last post if you need a good resource for getting the flat professional type of parchment) and place the trays (you’ll need 2 trays for five pounds bones) in a 375˚ oven for about 45 minutes (actually any temperature from 350˚F to 400˚F is fine) to roast until they are browned. The aroma as the lamb roasts is intoxicating. Transfer the bones to a large stockpot (12 quart is perfect) and fill with water to just about the top of the bones. I used about 6 quarts water. Add ¼ cup vinegar (I used apple cider) to draw calcium from the bones into the stock. Bring the liquid slowly to a boil, then lower the heat to a gentle simmer. A few bubbles breaking the surface now and again is what you want to see. From time to time, skim off the impurities (skum) that form on the surface of the stock when it first starts to bubble. Don’t skip this step; it’s important to a great-tasting stock. Besides, the scum is unappealing! Now just let it go. I left my stock to cook overnight. I put it on the lowest heat so that I wouldn’t have to concern myself that it would reduce too quickly. I had started the stock at 3 p.m. in the afternoon Wednesday, and I strained it at 7 a.m. on Thursday morning – a total of 17 hours in the pot. Let a lamb or beef stock cook for at least 12 hours; they can go much longer, even days! After 17 hours, the stock had reduced by about one third. I let it sit on the countertop until it was cool enough to refrigerate. After it was refrigerated and thoroughly chilled – about three hours later – I removed the fat layer on top with a skimmer. I’ll freeze half and use the rest within the week. The yield was 4 quarts of nourishing bone broth that will be delicious for any lamb dish. Share on Facebook and Twitter | Lamb, Recipes, Soups, Where To Buy (Sources) | No comments
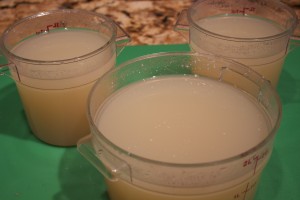
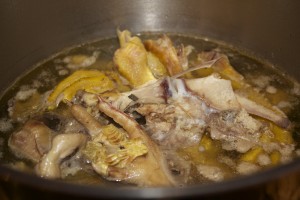
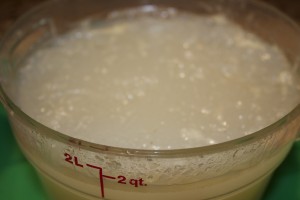
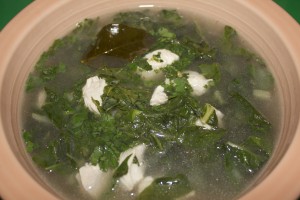
Chicken Soup I’ve been under the weather for the past few days with a full blown cold. This is unusual for me since I rarely get sick. When I feel the slightest bit of an impending sniffle, I have a coterie of preventative measures that I take, which usually work like a charm. I jump on my cellercizer (urban rebounder) to clean out my lymphatic system, I down Immune Response to strengthen my immune system, and I make an effort to get extra rest. This particular cold came on without much warning – it hit the throat first and then traveled to the lungs. I had a couple of energetic events to run, so there was no getting rest for a couple of days. Thus the full-blown cold landed Friday and ordered me to stop. It doesn’t make me feel better to know that colds are rampant this time of year, or that there is a particularly virulent strain going around. I am forced to finally and humbly surrender. I’m actually enjoying the enforced solitude and relaxation. Since my taste buds are depressed with the congestion, all I really feel like ingesting is hot soup. A good bone broth is just the elixir to drive away a fierce bug. So while I have been convalescing, I took out the stock pot, opened the freezer, and took out a big pile of poultry bones. I put up the simplest of stocks – bones, water, a splash of vinegar to draw out the calcium, and a bay leaf. That’s about as much effort as I could muster, and it took all of five minutes. The pot held backbones and wings from two chickens I had recently butchered, a turkey carcass, and a bag of chicken feet. I let this stock simmer about 6 hours, then I strained it, cooled it, and refrigerated it overnight. What made the stock especially gelatin rich was the bag of chicken feet I had purchased at the green market the other day. Chicken feet are hard for a lot of us to get used to, as yes, they are kind of creepy and freaky-looking bobbing around in your stock. Get over being squeamish, and you have a flavorful calcium-rich stock that’s great for your bones. Look at how gelatinous (translate: wobbly) this stock is after cooling. All I did was scrape away the top layer of fat. This is nutrient-dense goodness. For my soup today, I simmered a quart of the stock with some sliced shallots, some chopped ginger, and chopped lemongrass for about 15 minutes. I strained the stock, then added some coconut milk, boneless chicken breast cubes, and a small handful kaffir lime leaves that I had frozen. When the chicken was cooked after five minutes, I added a handful of Swiss chard, a splash of Thai fish sauce, couple of tablespoons lime juice, and a pinch salt. In my soup bowl I sprinkled chopped jalapeños and cilantro. The soup was delicious, and I’m feeling a lot better already. Share on Facebook and Twitter | Dinner, Kitchen Tips, Musings, Pantry Items, Soups | No comments
|

