|
Preserved Lemons
In today’s video on preserved lemons, I show how to make a condiment that can brighten so many of your dishes: preserved lemons. Best of all, they have real lasting power, remaining fresh in the refrigerator for an impressive six months or so. After I put up the lemons, I go on to demonstrate one way to use them in a delicious and easy dish of steamed black cod. Sure, you can purchase a jar of ready-made preserved lemons, but nothing beats the fresh taste of ones that you cure yourself. You’ll see from the video that they take only about five minutes of prep. Use organic lemons for the best results; after all, you’ll be eating the softened rinds. The only other ingredient you need is salt (I recommend a good sea salt). You also need a very clean jar. You can sterilize your jar by immersing it in boiling water for a couple of minutes. Make sure to scrub and dry the lemons as well. How many you use depends on the size of your jar. In the demo, I use a pint-sized jar, but you can certainly use a larger one. To prep the lemons, cut a sliver (a dime-sized piece) off of each end. Set the lemon on one end and, starting from the top, make a vertical cut three quarters of the way into the fruit, so that the two halves remain attached at the base: do not cut it in half. Turn the lemon upside down and make a second vertical cut at a 90-degree angle to the first, again three quarters of the way into the fruit. Fill each cut with as much salt as it will hold. Place a little salt at the bottom of the jar, then squish and push the lemons in. You’ll notice that lemon juice will rise to the top. Since the preserved lemons need to be covered in lemon juice, you may need to squeeze a couple of extra lemons to fill the jar. Screw on the lid, and turn the jar upside down a few times over the first few days to make sure that lemon juice is always covering the lemons. After four to six weeks, your lemons will be pliable and ready to use. It’s the softened rind that is the most exciting part to add to your dishes. Its flavor is tangy, slightly fermented, with that unmistakable brightness that is associated with Moroccan and Middle Eastern cooking. I also demo two servings of steamed black cod. To make the steaming liquid, add 1/2 cup chicken stock, 1/4 cup white wine, 2 cloves sliced garlic, a splash olive oil, and a couple tablespoons thinly sliced preserved lemon to a 4-quart pot. The steaming liquid will become the sauce, to which the preserved lemon in the steaming liquid will lend a bright citrus finish. Sprinkle each piece of cod with a dusting of salt, paprika, cayenne, and ground cumin. When the steaming liquid is bubbling and steam starts wafting through the steam holes, lay the fish on top of the basket and cover. It will be steamed to perfection in a mere 7 minutes. Plate the fish, pouring the steaming liquid (which now reduced, has become the sauce) over the fish. A sprinkling of chopped green olives, parsley, and cilantro complements the other flavors. Marvel at how this zesty and convenient condiment can add such lively flavor to a dish that is simple enough for weeknight dining, yet celebratory enough for entertaining company. Share on Facebook and Twitter | condiments, Fish, Main course, Pantry Items | No comments
Lacto-fermented Sauerkraut In today’s video, I show how to make traditional sauerkraut, one of the popular dishes that Eastern Europeans of yore would put up in storage in November so that they could have vegetables that would last the entire winter. Cabbage is especially amenable to culturing. While giving it a delightfully tangy flavor, the time-honored fermentation process turns pedestrian cabbage into an uber-raw natural probiotic. Lactobacilli are delightful microorganisms already present on the leaves and roots of plants. With a little encouragement, they convert the starches and sugars in the leaves to lactic acid—thus the term “lacto-fermentation.” Salt initiates the process; it inhibits the growth of undesirable bacteria long enough for the lactic acid to start forming. Enzymes break down the cabbage into more digestible molecules, and the lactic acid preserves it by eliminating unwanted organisms and increases the level of Vitamin C. In the end, “predigested” fermented cabbage also promotes the growth of healthy flora throughout the intestines, making harder-to-digest foods much more digestible. Here’s how you make the ferment: In the video I demonstrate the process with a medium head of green cabbage, shredded finely; you should have 10 cups or so. Stir in a couple of grated carrots and four teaspoons salt, a good amount for a quart-worth of packed kraut. Use a good quality unadulterated salt that has trace minerals, such as celtic sea salt. To help get the juices of the cabbage flowing, massage the cabbage with your hands; get in there and squeeze hard. You can also pound the cabbage with a mallet to help it start to sweat. Once you have a lot of shiny, juicy cabbage in the bowl, stir in the other ingredients. In today’s ferment, I’m adding a tablespoon each of minced ginger and garlic, about ½ cup of sliced scallions, and a minced red Fresno chile, a mild and colorful chile which I found at my local grocer. 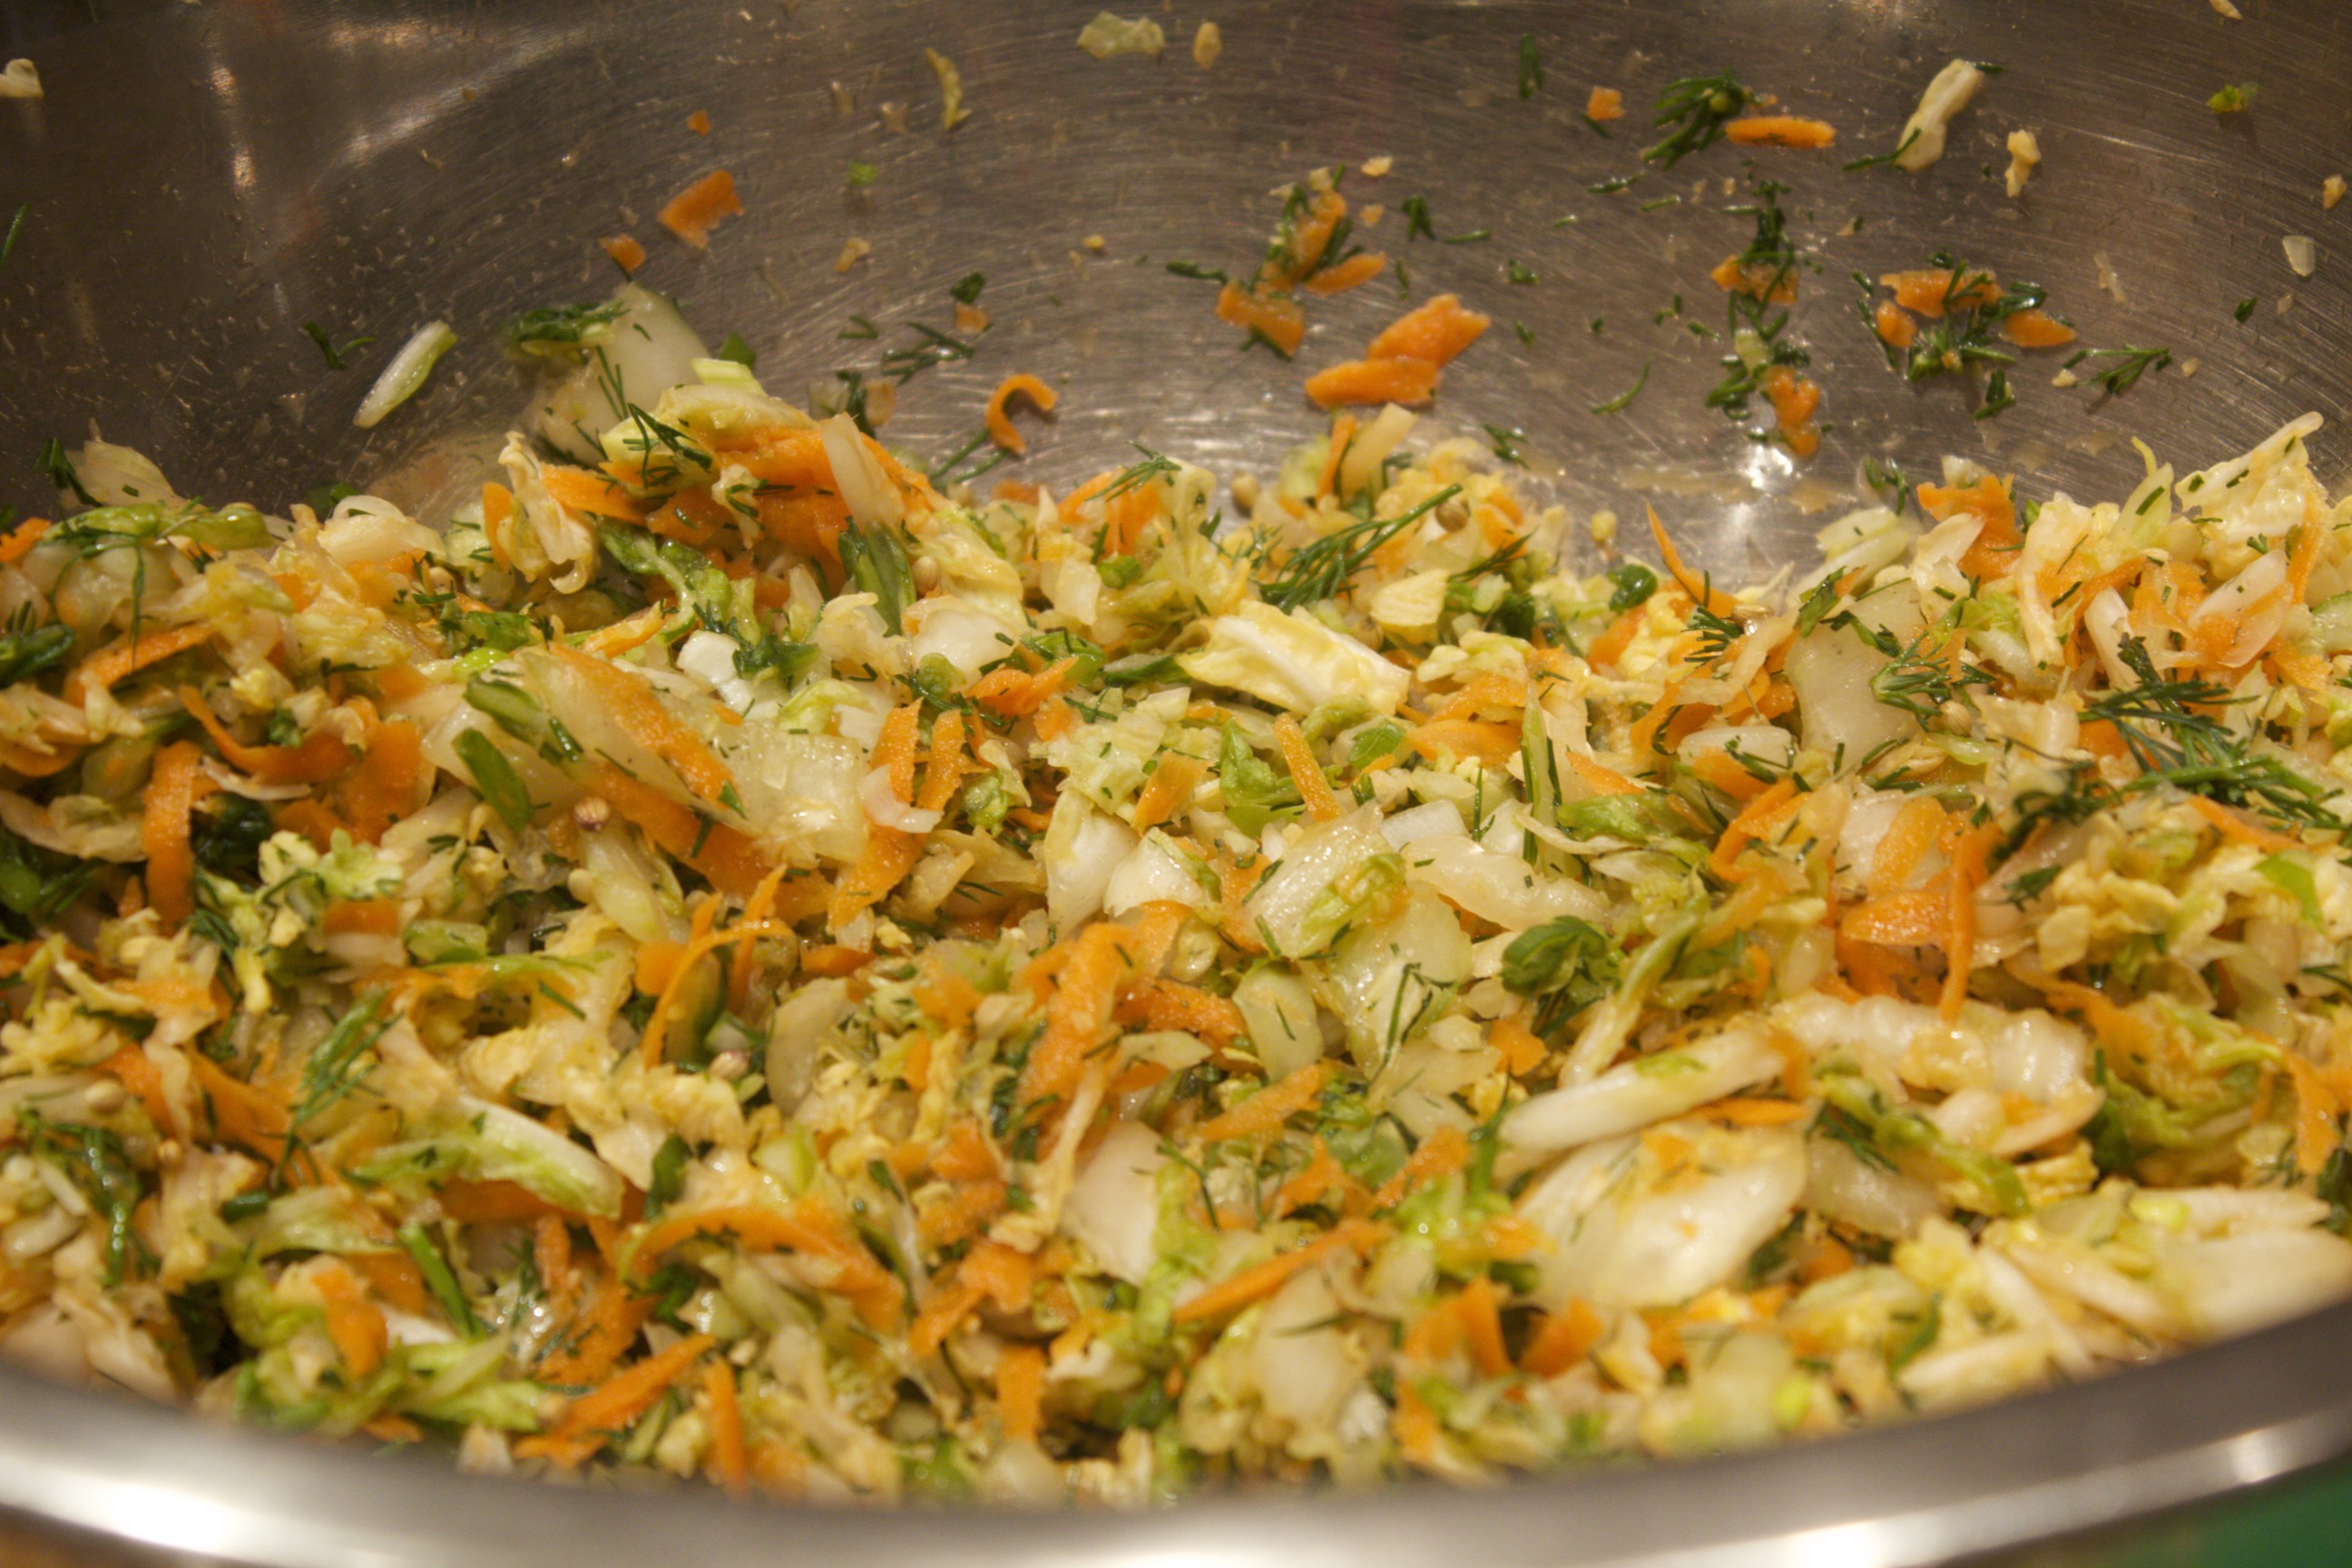 Cabbage ready to be packed Stuff the juicy cabbage mixture into a 1-quart bell jar, pressing down hard to make sure that there is liquid floating on the top. (A blunt, wooden, club-like instrument called a “kraut-pounder” is quite helpful for pressing down the vegetables, but you can improvise with the end of a tapered rolling pin as well.) Leave a generous inch of space at the top of the jar in order to prevent liquid from seeping out the top.  Make sure liquid covers the top. Let your imagination reign when it comes to the variations. Start with a base of cabbage: red, savoy, or nappa. I’ve enjoyed all kinds of additions to my slaws, including onions, fennel, daikon, fennel seed, juniper berries, chiles, and curry powder (but not all in the same slaw, of course). Leave the ferment on the counter from 5 days to 2 weeks. The insert in the middle of the bell jar will be hard to press down once the ferment really gets going. Start tasting the kraut at that point. It will be fermented after a few days; but, if you can leave the kraut for the full two weeks, you’ll have a tangier, richer flavor. (After tasting, make sure that the cabbage is still tightly packed and submerged in liquid.) Transfer the jar to the refrigerator; it’s ready to eat, but it tastes even better if you can leave it for a couple of additional weeks before opening. Once opened, the ferment stays fresh at least a good three months refrigerated. Start off slow; a few tablespoons added to your meals is sufficient. You can increase the amount as your belly becomes acclimated to all the additional probiotic flora. It’s deeply satisfying to make your own krauts; you might just find yourself with a refrigerator full of delicious varieties.
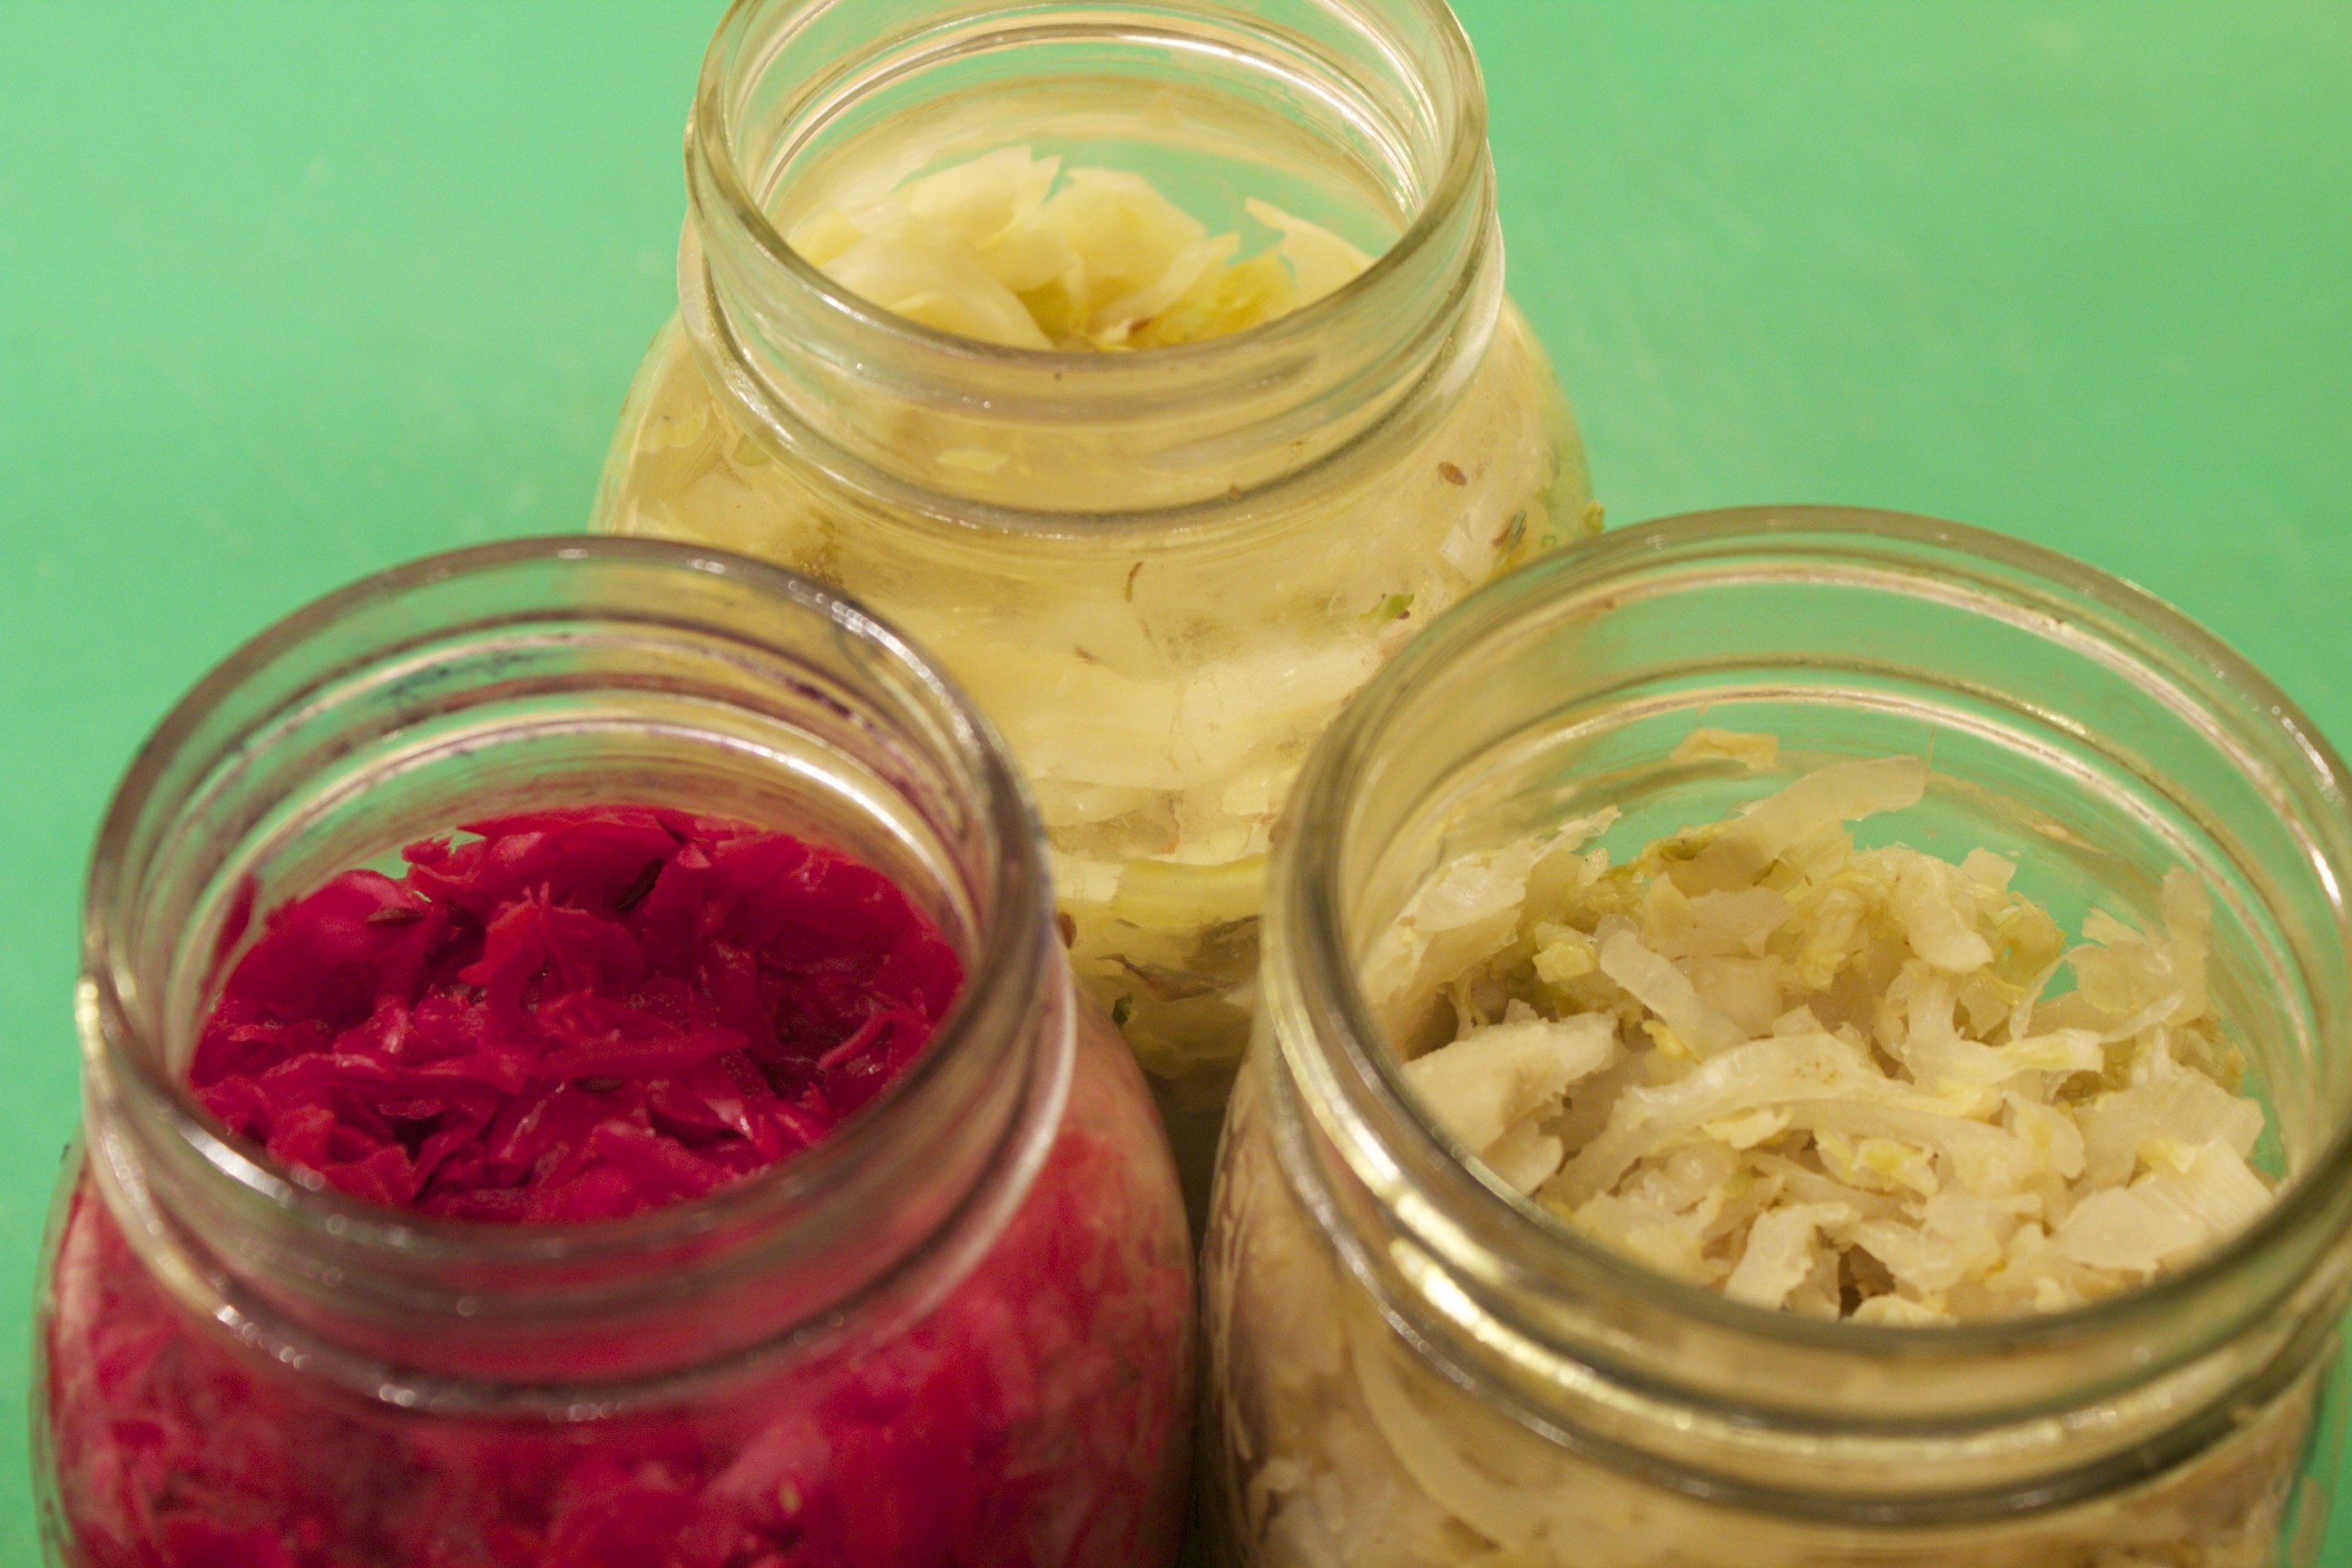 Finished lacto-ferments
Share on Facebook and Twitter | condiments, Health Tips, Kitchen Tips, Side Dishes, Vegetables | No comments
Herbed Pesto So many gorgeous herbs are available this time of year that I often get carried away and find myself with a refrigerator drawer full of beautiful choices. One of the ways that I like to have fun with these herbs as well as use up the extra is to make an out-of-the-ordinary pesto. In the demonstration video, I’m starting with a base of toasted pumpkin seeds, about ¾ of a cup. I toast them in a dry heavy-bottomed skillet just until they are plumped, about a minute or so. While I use pumpkin seeds in the video, you can use any nut or seed that you have in your pantry. Some favorites include walnuts, almonds, sunflower seeds, pine nuts, pecans and pistachios. I transfer the lightly toasted seeds to a food processor. I then add 2 cups packed mixed herbs. In this demo I work with a combination of cilantro, basil, chives, and mint. Some other herbs that are delicious for this technique include parsley, dill, watercress, arugula, and sorrel. I add extra virgin olive oil—about 1/3 cup—as well as a couple of tablespoons of fresh lemon juice, a garlic clove, and 1/2 teaspoon of a good mineral-rich salt. I also mix in a teaspoon of light miso—such as mellow white— which gives depth and complexity to the overall flavor. This dairy-free version allows for the greatest flexibility, and is delicious with fish, chicken, pasta, grains, and vegetables. You can always add cheese later if you like. I whirl all of the ingredients in the food processor for a couple of minutes, and that’s it. The pesto is ready to use immediately and it freezes well too. One delicious all-time favorite option, which I show on the video is to dollop some pesto between slices of fresh tomato, top with shaved parmesan, and drizzle with some good extra virgin olive oil and a sprinkling of black pepper and chives. Every mouthful is exciting.  Tomatoes with Herbed Pesto and Parmesan
Share on Facebook and Twitter | condiments, Kitchen Tips, nuts and seeds, Recipes, techniques | No comments
Red Cabbage Lacto-Fermented Sauerkraut Lately, I’ve been on a lacto-fermenting frenzy, fermenting everything from red cabbage to dill pickles to beet and fruit kvass. The lactobacilli, which are good bacteria, proliferate in fermented vegetables and fruit. The vegetables and fruit are easier to digest and the vitamin levels are increased as well. The main by-product of lacto-fermentation is lactic acid, which promote the growth of healthy flora throughout the intestine. What I like about these fruits and vegetables is that once they’re fermented, they last for a long time in the refrigerator. They’re an instant quick hit of super nutrition. Moreover, they are easy to produce. Here’s one of my favorites, a red cabbage ferment, that needs only salt to get the whole process of fermentation going. The salt inhibits any bacteria that could putrify the ferment until the lactic acid forms. I start with a head of finely shredded red cabbage. I add some shredded carrots, a piece of minced ginger, a tablespoon caraway seeds, and two tablespoons Celtic sea salt.
After stirring everything together, I massage the mix with my hands to help the cabbage release its juices. There’s no need to add water to the brine when you make a cabbage ferment.. You can pound that cabbage with a mallet or just put a weight on the cabbage ( a bowl with a weight in it works well). and it will start sweating away in no time.  Ready to Jar I then stuff the mix into a jar (a one quart bell jar is perfect) pressing down to make sure that there’s liquid floating on top. I make sure to have an inch of space at the top. (This is quite important to avoid leaks.) I leave this on my kitchen counter for 3 to 5 days. With a bell jar, the piece in the middle is hard to press down when the ferment is complete.  Make Sure There's Liquid on Top The red cabbage doesn’t look so bright in the beginning, but as it ferments it turns a beautiful magenta color. It’s best to transfer this to the refrigerator, where it can last a long time (up to a year) without opening. Once opened, it’s good for about three months.  Ready to Refrigerate  Hot Pink and Delicious Share on Facebook and Twitter | condiments, Health Tips, Kitchen Tips, Side Dishes, techniques, Vegetables | No comments
|