|
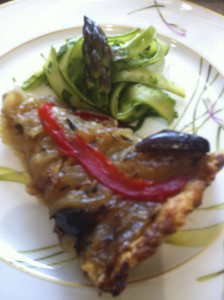
Catering Gig This past Friday and Sunday, I catered a couple of on-site parties. I had Wednesday and Sunday morning to prepare for the Sunday brunch, and Thursday and Friday to prepare for the Friday evening party. Since I had to prepare a good amount in advance of Sunday, I had to plan on a certain number of dishes that would freeze or hold well for up to five days. These individual cheesecakes fit the criteria. As they rest in the refrigerate, they just keep on getting tastier, so making them five days ahead was not a stumbling block. I bought the molds at J.B. Prince, an amazing store on 31st street in NYC. I froze a batch of crepes (which were to be filled with strawberry-rhubarb compote), zucchini pancakes, lasagna, and this caramelized onion tart.
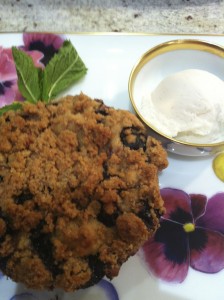
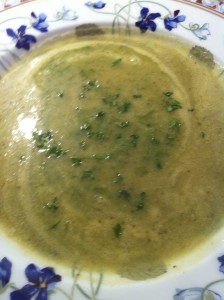
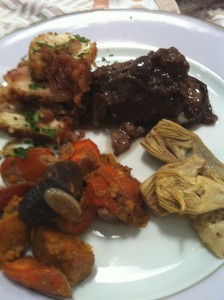
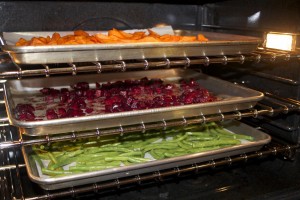
I made the Friday desserts Friday afternoon. This is the blueberry buckle from the Healthy Hedonist Holidays. This is a chocolate cake made in individual aluminum ramekins. Powdered sugar covers a multitude of craters. The Friday night meal had as a starter the Turkish chopped romaine salad and the miso-marinated black cod from The Healthy Hedonist. I marinated the cod early in the day (marinade made the day before) and just tossed it in the broiler to brown. Before serving I blasted the fish in a hot oven to reheat; the oily fish is so forgiving it was not in the least bit dried out . The stock for the broccoli soup was made Wednesday and the soup and pistou topping were finished Thursday. The main course included braised short ribs and stuffed chicken (a great way to keep the chicken moist) as well as braised-roasted purple potatoes, sweet potatoes and carrots, and lemony sautéed artichokes. I planned the main course to have items on it that would reheat well without drying out. For the Sunday buffet I did cook a couple of items that required precise timing, but not too many. One of the most important things about cooking for a crowd–beside being organized–is to have a menu that is a bit forgiving. Share on Facebook and Twitter | Dinner, Main course, Musings, Side Dishes, Where To Buy (Sources) | No comments
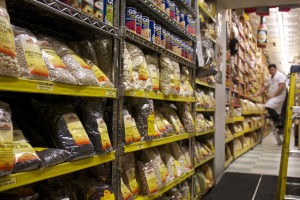
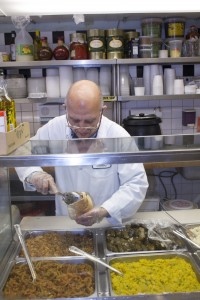
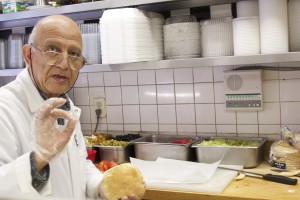
Kalustyan’s I describe Kalustyan’s, on 123 Lexington, between 28th and 29th streets, as the store that sells everything from everywhere. This is the place to go to get exotic ingredients for ethnic recipes. The spice room itself is the size of an entire shop. Looking for Urfa or Biba peppers from Turkey? No problem. Do you want mastic, berber powder, or mild smoked paprika? All of them are available. The selection of black peppercorns includes those from Turkey, Iran, and India. Since there’s a high turnover, nothing seems to sit on the shelf for too long, and the spices are fresh. Kalustyan’s also has an impressive array of condiments imported from around the world. You’ll find every brand of tamarind that is imported, as well as every type of rose petal and orange blossom water as well. There’s an impressive array of salts and an even more impressive selective of grains and legumes. They also sell fresh curry leaves, Thai chiles, and lemongrass as well frozen kaffir lime leaves and galangal for Southeast Asian cooking. Every trip I take to Kalustyan’s is a fascinating culinary education. Often when I am finished with shopping, I go upstairs and have a bite at the deli counter where Chester Arthur was sworn in as president. (If you want to read the whole placard that is on the wall, read the blog piece on “Amusing Trivia about Kalustyan’s.”) The fellow who works the deli counter is a generous soul who takes pride in his dishes. He makes each mujadarrah (lentils and rice with caramelized onions) sandwich with care, and he varies the offerings daily. He’ll give you a taste of any of the dishes to sample. Kalustyan’s has a great selection of books on middle eastern and ethnic cooking at the counter as well. For those of you that don’t live in New York, you can order from the website http://kalustyans.com. They ship nationwide. Share on Facebook and Twitter | Where To Buy (Sources) | No comments
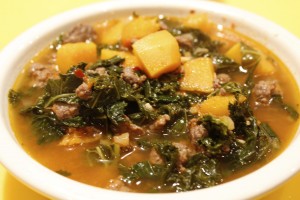
Lamb Merguez Stew I have been making lots of soups and stews this week to give to a friend who is recovering from surgery. The upside is that I’ve had a lot of delicious warming food around as well. This lamb merguez stew was a snap, since I had lamb bone broth in my freezer. Chicken stock, however, would work as well. I purchased the sausage from my favorite lamb farmer, 3-corner-Field farm at the Union Square greenmarket.
I first browned the sausage (about a pound) in a large pot, then removed it and cooked down the liquid. I added ½ cup shallots and sweated those in the small amount of lamb fat left in the pot for about 5 minutes. I then added a 2 ½ pound butternut squash that I had cut into 1-inch cubes, a jar of roasted red peppers, the cooked sausage and about 4 cups stock. I added some salt, covered the pot, and let the stew simmer for about 20 minutes, until the squash was soft. I added a whole head of chopped kale, then cooked the stew another 10 minutes until the kale was tender. Meanwhile, on another burner, in a small skillet, I sautéed some garlic, ginger, and harissa powder for a couple of minutes, then added that to the stew. At the end, I smashed some of the cooked squash against the sides of the pot to thicken the stew. Simple, quick, delicious meal-in-a-pot. Share on Facebook and Twitter | Dinner, Lamb, Lunch, Main course, Soups, Where To Buy (Sources) | No comments
Young Coconuts and How to Crack Them Coconut water is the liquid found inside a young coconut. Don’t mistake it for coconut milk, which comes from the meat of a mature coconut. In addition to natural sugars, which make it taste deliciously sweet, the water contains a complex array of vitamins and minerals. The nutritious beverage is high in potassium, chlorides, calcium, and magnesium. As a tree sap, coconut water is essentially the “blood” of the coconut palm. The electrolyte profile of coconut water is somewhat similar to human plasma and has been used by doctors as an intravenous solution and injected directly into the bloodstream to prevent dehydration. When freshly extracted from the coconut, the liquid is free from germs and parasites. Sure, you can buy the water in packs from the grocery store, but it’s great fun to whack open the fruit yourself. Not to mention that there’s no comparison in the flavor between the fresh and the bottled. Young coconuts are large and green off the tree, but come already shaved in this country, so thankfully, you don’t need a machete to open them. It is not difficult to open these neatly, so that you can drink the water and scoop out the soft gel-like meat. I use a serrated knife to shave around the top part of the coconut. Then I take the heel of a heavy knife. I use a cleaver and whack it a few times. I hold the coconut on an angle, which makes it really safe. The key is to whack the coconut with confidence. After three or four whacks, the lid just lifts off. I can put a straw in this and drink the liquid and use a spoon to scoop out the gel. This is the best sports drink, thirst quencher, and cooler around. The best brand of purchased young coconut products is from exoticsuperfoods.com. You can buy packs of the young meat and bottles of fresh coconut water, which is second only to the ones you crack open yourself.
Share on Facebook and Twitter | Fruit, Health Tips, ingredients, Kitchen Tips, Where To Buy (Sources) | No comments
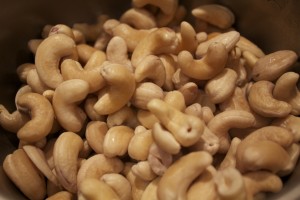
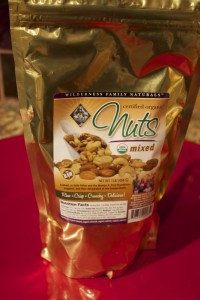
Nuts and Seeds It is undeniable that when nuts and seeds are soaked – and dehydrated if you want them crunchy – they are more readily digestible, and the nutrients within are easier to absorb. Besides, they taste simply delicious. Nuts and seeds contain enzyme inhibitors, which are there as protection until they have what they need to grow, such as sunlight, water, or soil. The soaking water will have the enzyme inhibitors in it, so after you drain the nuts or seeds, make sure to give them a rinse. You can use the plumped nuts as is (perfect for smoothies and nut milks), since soaking makes them softer. You can store the soaked nuts for a few days in the refrigerator to use as needed. Alternatively, dehydrate them in a low oven (or dehydrator) to make crispy nuts. Either way, you can really feel the difference in your body between those nuts that have been properly treated and those that have not. For best results, start with organic and raw. The worst nuts to purchase are packaged varieties that have already been roasted and salted. Poor quality fat and salt are added and the roasting has damaged the fat inherent in the nuts and seeds. Here are appropriate soaking times for each variety: 0 to 2 hours: Brazil, macadamia, and pine nuts 2 to 4 hours: Cashews, pecans, and walnuts (pecans and walnuts can go up to 6 hours) 4 to 6 hours: Sunflower seeds 6 to 8 hours: Pumpkin seeds, sesame seeds, hazelnuts 8 to 12 hours: Almonds If the idea of soaking and dehydrated nuts is going to send you over the edge, consider purchasing from Wilderness family naturals. Wildernessfamilynaturals.com These folk already do all the soaking and dehydrating work for you. I first tasted their exceptional products at the Wise Traditions conference a couple of years ago. The folks from Wilderness Family Naturals had a large booth, and I was able to sample before buying. I was hooked, and returned home from the conference with quite a few bags. I’ve been ordering ever since; the box arrives on my doorstep fast, within just a few days. If you just want to get your feet wet before committing to a big order, try the mixed nuts. I guarantee you’ll be pleased. It’s good to know that there’s high quality choices available. Share on Facebook and Twitter | ingredients, Kitchen Tips, nuts and seeds, Where To Buy (Sources) | No comments
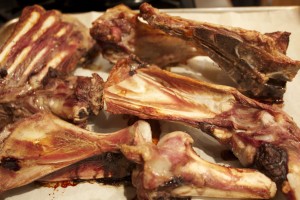
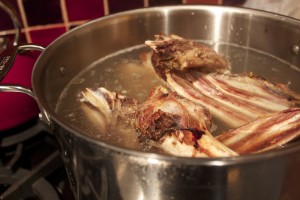
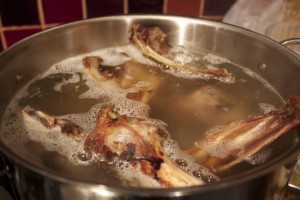
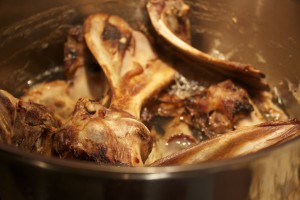
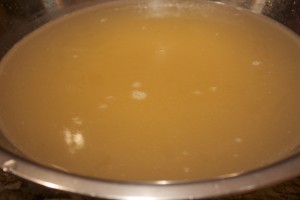
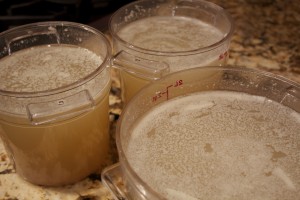
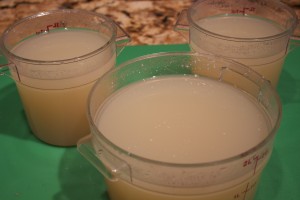
Lamb Bone Broth I purchased 5 pounds of lamb bones the other day at the booth of 3 Corner Field Farm (one of my favorite stalls) at Union square Greenmarket. The large and impressive bag of bones prompted another customer to inquire why I was buying them. What followed was a discussion on how to make lamb broth. I’m detailing the process here since lamb broth is not a stock that many make. After all, you can certainly use chicken stock with great success for any lamb dish that requires a flavorful liquid. A lamb broth, on the other hand, will make your lamb stew or braise incredibly rich and deep-flavored. You can make a stew so satisfying that it tastes as nurturing as a giant hug. (Those are the words a friend of mine used to describe a lamb stew I had recently made for her with lamb broth.) Plus, this dish is seriously easy to put together. It requires about five minutes of active participation to get the stock going, and just a few minutes work straining it when finished. First roast the bones: Arrange them on a parchment-covered baking tray (see the last post if you need a good resource for getting the flat professional type of parchment) and place the trays (you’ll need 2 trays for five pounds bones) in a 375˚ oven for about 45 minutes (actually any temperature from 350˚F to 400˚F is fine) to roast until they are browned. The aroma as the lamb roasts is intoxicating. Transfer the bones to a large stockpot (12 quart is perfect) and fill with water to just about the top of the bones. I used about 6 quarts water. Add ¼ cup vinegar (I used apple cider) to draw calcium from the bones into the stock. Bring the liquid slowly to a boil, then lower the heat to a gentle simmer. A few bubbles breaking the surface now and again is what you want to see. From time to time, skim off the impurities (skum) that form on the surface of the stock when it first starts to bubble. Don’t skip this step; it’s important to a great-tasting stock. Besides, the scum is unappealing! Now just let it go. I left my stock to cook overnight. I put it on the lowest heat so that I wouldn’t have to concern myself that it would reduce too quickly. I had started the stock at 3 p.m. in the afternoon Wednesday, and I strained it at 7 a.m. on Thursday morning – a total of 17 hours in the pot. Let a lamb or beef stock cook for at least 12 hours; they can go much longer, even days! After 17 hours, the stock had reduced by about one third. I let it sit on the countertop until it was cool enough to refrigerate. After it was refrigerated and thoroughly chilled – about three hours later – I removed the fat layer on top with a skimmer. I’ll freeze half and use the rest within the week. The yield was 4 quarts of nourishing bone broth that will be delicious for any lamb dish. Share on Facebook and Twitter | Lamb, Recipes, Soups, Where To Buy (Sources) | No comments
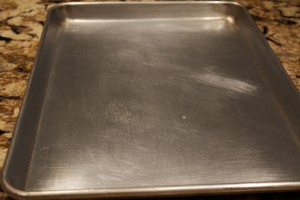
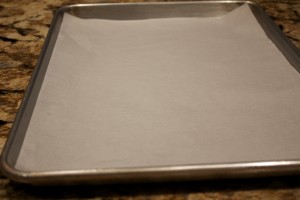
Parchment Paper I consider parchment one of the most indispensible supplies in the kitchen. I line my half sheet (18×13-inch) aluminum baking sheets every time I use them. These industry standard-sized trays are what I became used to working in professional kitchens. I do like the way aluminum distributes heat, but I don’t bake directly on the aluminum trays since I don’t want to run the risk of aluminum leaching out into my food. Aluminum trays, in combination with a protective layer of parchment paper, work exceptionally well.
The type of parchment available in grocery store is sold in rolls, and it is a nuisance: the unwieldly sheets torn from the roll never fit quite right or lie flat on a baking sheet. After getting used to snug, flat, professional parchment paper, I find the rolls nothing less than frustrating. After a bit of fumbling around and testing, I found a few good sources of professional parchment paper.
Some say they prefer silicon for its ability to withstand higher temperatures and longer cooking times than paper coated with quilon. They also maintain that silicon is a safer coating than quilon. Quilon-coated is the industry standard, since it’s substantially less pricey than the silicon-coated. It’s the type used in every establishment that I’ve ever worked in, and it’s the only one most professional cooks even know about. I’ve found it to be more than sufficient for all my culinary needs, from roasting vegetables to rolling pastry crusts. I’ve even cooked pizza on parchment at a temperature of 500˚F. Though the paper turns dark at such high heat, it still does the job perfectly well. You can purchase the sheets in 100 half sheets or 1,000 full sheets (16 x 24). Full sheets fit a large standard-sized baking sheet, which is twice the size of the half sheet pans. (You get a whopping 2,000 sheets when you halve them.) Or course, you save a lot of money buying the 1000 sheets. On the down side, you have to have room to store the box, or enough people to share it with. I purchased both silicon-coated and quilon-coated to compare. I now have enough parchment to last a very long time. The parchment was delivered quickly, within three days. I found it difficult to differentiate between the two varieties of coating. Henceforth, unless I were convinced otherwise, I would probably go with the quilon-coated. Here are good sources for both varieties, in two sizes each: Quilon-coated Parchment: http://www.webstaurantstore.com/16-x-24-quilon-parchment-paper-pan-liner-1000-case/433JR24Q.html http://www.webstaurantstore.com/12-x-16-quilon-parchment-paper-pan-liner-100-pk/99930005.html Silicon-coated parchment: http://www.webstaurantstore.com/16-x-24-silicon-pan-liner-1000-cs/433JR27SIL.html http://www.amazon.com/UltraBake-Parchment-Paper-Sheets-16½/dp/B000E7A6BM
Share on Facebook and Twitter | Kitchen Items/Gadgets, Kitchen Tips, Where To Buy (Sources) | No comments
Maple Sugar and Candied Nuts When I want to use a granulated sugar, I invariably reach for maple sugar as my first choice. This natural sweetener has a subtle maple taste, and works well in many recipes that call for granulated sugar. Maple sugar is simply maple syrup that has been cooked until the water in the syrup has evaporated off. The clumps that are left are ground into smaller pieces, then sifted according to size – powder, granules, or a combination of the two. Nothing is added during the processing.
Maple sugar is relatively expensive. However, when purchased from the source, shipping and all, it is considerably less expensive than purchasing it in a store. I get mine directly from Coombs family farms, a wonderful sugar plant based in Vermont. Their phone number is 888 266-6271 and their website is Coombsfamilyfarms.com. They ship quickly, and you can purchase a choice of maple granules, powdered maple sugar, or a combination or the two. I use the maple powder for all of my maple sugar recipes, since this grind is the most like granulated sugar.
This morning I made a couple batches candied nuts to give away. I love candied nuts. When you make them yourself, you can use just the right amount of high quality sweetener to enhance great nutty flavor. A sprinkling of these crunchy nuts add so much pizzazz to hot breakfast cereals, desserts, salads and soups. They stay fresh in the pantry for two to three months, making them wonderful hostess gifts and edible presents. Bundle them in festive party bags for a treat that everyone will enjoy.
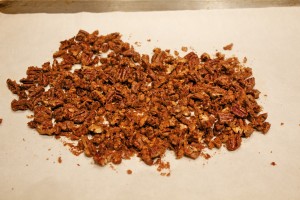
Here are a couple of my favorite combinations. These recipes both take a minimum of prep time and the oven does most of the work. Watch the video on how to make candied nuts. This first recipe is for candied pecans. I toss one cup roughly chopped pecans with 2 tablespoons maple syrup and 2 tablespoons maple sugar. I spread them on a parchment-covered baking dish and place them in the oven for 20 minutes. I stir the pecans one time during the baking, so that they caramelize evenly. The pecans are ready when they are dry all the way through. This technique works well with chopped walnuts, almonds, and blanched hazelnuts as well. When I remove the pecans from the oven, I let them cool before packing them. These pecans keep covered, at room temperature, for two to three months.
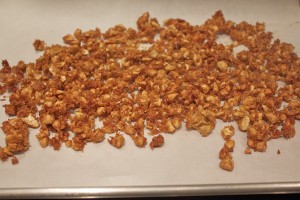
The second recipe is for coconut cashews, one of my favorites. The mix is an exciting combination of sweet, spicy, and crunchy, which makes, among other uses, an excellent garnish for a zesty carrot soup. I toss together in a medium bowl one cup of roughly chopped cashews, ½ cup unsweetened coconut, 1/3 cup maple sugar, ¼ teaspoon salt, and ¼ teaspoon cayenne. I then add one egg white to bind the whole mix together. Again, I’m spreading it on a parchment-covered baking sheet and baking it for 15 to 20 minutes at 325˚. I have to stir this mix twice during the baking session to ensure that the more delicate coconut colors evenly. (By the way, I pull out my tray to stir the mix, so I don’t lower the temperature of the oven. Then I return the tray to the oven to finish baking.) When the mix is evenly browned, I remove the tray from the oven and let it cool to room temperature. I break up the clumps into small clusters that are now ready to be stored or packed. Sweet holidays!
Share on Facebook and Twitter | Kitchen Tips, Natural Sweeteners, Recipes, Snacks, Where To Buy (Sources) | No comments
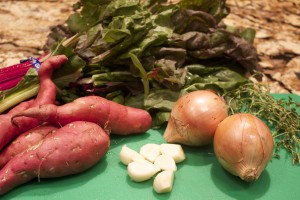
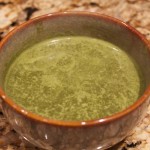
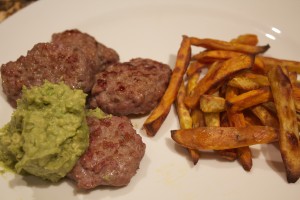
Night Before Irene We were among the lucky to have been in Manhattan during hurricane Irene. Still, we didn’t know how hard the storm would hit, but we did know the city would shut down public transportation as of noon on Saturday. It seemed wisest to stock up with eatables. Everyone seemed of the same mindset; the markets on Friday afternoon were teeming, and rumors circulated at Union Square that the greenmarket would be closed on Saturday. Half of the farmers did show up, however, and they did brisk business. Hats off to those intrepid farmers. It was a good weekend to attend to some home projects without the guilt of feeling I should be out and about. I wanted our food to be quick and comforting – and, of course, delicious and nutritious. The menu: Purée of Swiss Chard soup, roasted sweet potato fingers, and turkey sausage with avocado mustard. Purée of sweet potato soup: I sweated a couple cups onions in olive oil, then added half a dozen peeled whole garlic cloves, a dime’s thickness of fresh thyme springs, a couple of peeled fingerling potatoes, teaspoon salt and a quart of chicken stock that I had from one of my favorite greenmarket purveyors (Garden of Spice, which are at the Union Square on Wednesdays). I let the soup simmer partially covered beautiful chard (stemmed) and let it wilt in the hot soup for a couple of minutes. I blended the soup, put it back in the pot, added a squeeze of lemon, a sprinkling black pepper, and adjusted the salt. Meanwhile, I roasted these sweet potatoes (mix of white and orange) in virgin coconut oil and salt. Coconut oil gives the sweet potatoes a delicious buttery flavor. I smashed an avocado with a dollop of Dijon mustard and cooked up sweet turkey sausage from Di Paulo farms. The sausage is beautifully spiced and ready to cook. Everyone loves it! http://brooklynbased.net/email/2010/11/where-to-get-your-gobble-gobble/. (This link has a description of the poultry farmers at Union Square. Not all have websites. The link also includes some purveyors that ship pasture-raised poultry.) It was a casual and satisfying meal on the eve of an impending storm. Share on Facebook and Twitter | Dinner, Greenmarket Bits, Recipes, Where To Buy (Sources) | No comments
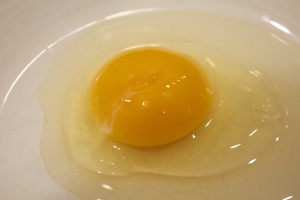
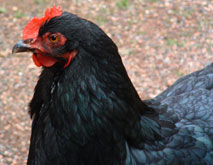
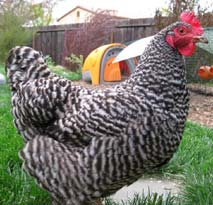
Grazin’ Angus Acres Eggs From the Union Square Green Market If you want eggs from chickens that are truly roaming around outside, you have to go for what is called “pastured” eggs. These are the types of eggs that one usually finds when buying at a greenmarket, farm, or community buying club. Pastured chickens are free to roam, peck, and wander around in the fresh air. They eat supplementary feed to round out their diet of foraged bugs, worms, and fly larvae. Pastured eggs have beautiful orange yolks, which stand up proudly on top of the glossy whites. Pastured eggs are loaded with Omega 3’s and beta carotenes. They taste immeasurably better and have more vital energy than a supermarket egg, even the organic variety. I’ve never heard of a pastured egg from a well-treated healthy chicken containing salmonella. It’s a given for me that these eggs are definitely worth seeking out. That being said, even at Union Square there’s quite a selection of eggs to choose from, and a price range that goes from 4 to 8 dollars a dozen. I wanted to find out why this was so. To satisfy my curiosity, I spoke at length two days ago to the farmer manning the booth at Grazin’ Angus Acres. I asked him why his eggs were so much more expensive than everyone’s at the market. What I got was an interesting earful of details about his farming methods. Grazin’ Angus Acres 450 acre farm, located in Ghent, New York, is for grass fed and finished Black Angus beef. They also have pasture raised chickens for eggs. During the summer months they also raise chickens for meat. The owner Dan Gibson says “it’s all about the grass.” He works an additional couple thousand acres where he raises grasses and hay to feed the cattle and chicken throughout the winter. Dan proudly displays pictures of his egg mobiles and his happy chickens roaming on the grass. The farmer at the booth told me that one of the reason Dan’s eggs are so expensive is that he keeps his chicken on pasture the entire year. The grasses he grows for the winter are also expensive. The supplemental feed that he purchases for them is organic, grown by a local farmer. (I had heard before from other farmers that what usually drives up the price of eggs is the use of organic supplemental feed.) The feed currently includes organic corn and soy, but they are working on developing a feed that does not contain soy. Dan Gibson’s egg mobiles are quaint-looking old hay rig tractor gear that he built with local lumber. The chicken are ushered into the egg mobiles every night to protect them from predators. The chickens and cattle on the farm have a symbiotic relationship around the cultivated grasses. At Grazin’ Angus Acres they have four kinds of grasses, including high sugar carbohydrate rye grasses and two broad leaf clovers – all of which fix nitrogen out of the air and bring it into the soil. The fertile soil feeds the grasses which feeds the cows and chickens. The folks at Grazin Acres manage the grazing carefully. They corral the cows into a designated area for a 24 hour period, where the cows eat most of the grass and trample the rest. They leave behind their organic material. The chickens are brought in about three days later, just as the fly larvae are about to emerge. The chickens scratch the patties apart, eat the larvae (which cut down on the number of flies on the farm), and spread the manure. There’s no need for a tractor or fossil fuel. Chicken manure is apparently the best organic fertilizer known to man. It helps the grass grow, which helps the cows grow, which helps the chickens. The relationship is perfectly symbiotic. Of his 400 hens, 200 are Black Australorp and 200 are Barred Plymouth Rocks. The average hen lays 6 eggs a week, which comes to about 10 dozen a day. Grazin’ Angus Acres are at the Union Square green market Friday and Saturday. They are at Carroll Gardens and The Natural History Museum on Sundays. Share on Facebook and Twitter | Eggs, Greenmarket Bits, ingredients, Where To Buy (Sources) | No comments
|

