|
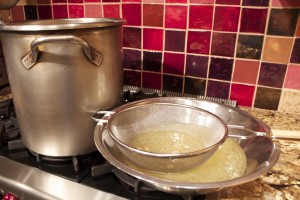
Immersion Blender Having the right equipment for the job makes cooking a whole lot easier. I’m going to be writing a series on essential equipment. I’m starting with one of my favorite tools, the immersion blender. While it doesn’t replace a good stand blender or a food processor, an immersion blender is a convenient way to blend a soup right in the pot. It’s speedy and tidy, as long as you remember not to lift the immersion blender out of the pot while blending. For a long time I resisted buying one, since the weak small models don’t compare to the powerful industrial strength varieties I was accustomed to using back in my restaurant days. The industrial-sized blender was essential for blending soups and sauces in pots that were 20 quarts or bigger. My graduate class last week took place in a commercially outfitted kitchen with large equipment. While it was quite thrilling to pulverize a small pot of soup in a matter of seconds, the equipment was clearly a bad fit for the job. All this brings me to my favorite home model, the Waring blender, which is appropriately powerful for small to medium-sized pots. It’s stronger that most of the other brands on the market. This size is more than good enough for what most of us make at home. On the other hand, should you find most of your cooking is in pots larger than 20 quarts, then the jackhammer-sized model would be a good fit.
Share on Facebook and Twitter | Kitchen Items/Gadgets | No comments
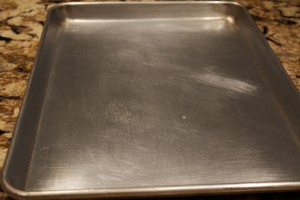
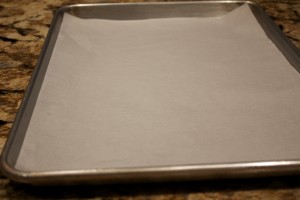
Parchment Paper I consider parchment one of the most indispensible supplies in the kitchen. I line my half sheet (18×13-inch) aluminum baking sheets every time I use them. These industry standard-sized trays are what I became used to working in professional kitchens. I do like the way aluminum distributes heat, but I don’t bake directly on the aluminum trays since I don’t want to run the risk of aluminum leaching out into my food. Aluminum trays, in combination with a protective layer of parchment paper, work exceptionally well.
The type of parchment available in grocery store is sold in rolls, and it is a nuisance: the unwieldly sheets torn from the roll never fit quite right or lie flat on a baking sheet. After getting used to snug, flat, professional parchment paper, I find the rolls nothing less than frustrating. After a bit of fumbling around and testing, I found a few good sources of professional parchment paper.
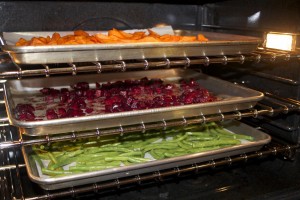
Some say they prefer silicon for its ability to withstand higher temperatures and longer cooking times than paper coated with quilon. They also maintain that silicon is a safer coating than quilon. Quilon-coated is the industry standard, since it’s substantially less pricey than the silicon-coated. It’s the type used in every establishment that I’ve ever worked in, and it’s the only one most professional cooks even know about. I’ve found it to be more than sufficient for all my culinary needs, from roasting vegetables to rolling pastry crusts. I’ve even cooked pizza on parchment at a temperature of 500˚F. Though the paper turns dark at such high heat, it still does the job perfectly well. You can purchase the sheets in 100 half sheets or 1,000 full sheets (16 x 24). Full sheets fit a large standard-sized baking sheet, which is twice the size of the half sheet pans. (You get a whopping 2,000 sheets when you halve them.) Or course, you save a lot of money buying the 1000 sheets. On the down side, you have to have room to store the box, or enough people to share it with. I purchased both silicon-coated and quilon-coated to compare. I now have enough parchment to last a very long time. The parchment was delivered quickly, within three days. I found it difficult to differentiate between the two varieties of coating. Henceforth, unless I were convinced otherwise, I would probably go with the quilon-coated. Here are good sources for both varieties, in two sizes each: Quilon-coated Parchment: http://www.webstaurantstore.com/16-x-24-quilon-parchment-paper-pan-liner-1000-case/433JR24Q.html http://www.webstaurantstore.com/12-x-16-quilon-parchment-paper-pan-liner-100-pk/99930005.html Silicon-coated parchment: http://www.webstaurantstore.com/16-x-24-silicon-pan-liner-1000-cs/433JR27SIL.html http://www.amazon.com/UltraBake-Parchment-Paper-Sheets-16½/dp/B000E7A6BM
Share on Facebook and Twitter | Kitchen Items/Gadgets, Kitchen Tips, Where To Buy (Sources) | No comments
Gluten Free Flours – Part 1 Before examining the ins and outs of the different gluten-free flours, it’s good to have a basic understanding of gluten and its properties. You are then in a better position to make an informed choice when deciding which of the gluten-free flours or mixes will be appropriate for your particular dish. As a quick review: note that the flours that contain gluten include barley, rye and wheat, including the unhybridized varieties, such as spelt, kamut, and farro. Gluten-free oats can be purchased, but not everyone on a gluten-free diet can tolerate them. If you’re not sure about oats, it’s safer to leave them out of your diet. Gluten is what makes dough stretchy and doughy, and in the case of bread, helps the dough to rise. Flours that contain gluten actually have two proteins in them by the name of glutenin and gliadin. These only turn into gluten when they come in contact with liquid. The more water added to the flour, the more gluten, and the chewier the dough. Kneading makes gluten molecules in dough form into long elastic strands, so how much the dough is kneaded also makes a big difference in the degree of elasticity. Added yeast gives off gasses that are trapped by sheets of gluten molecules, causing the dough to rise. Different types of wheat dough contain different amounts of gluten. Bread dough has a lot, pastry dough a little. In addition, pastry dough contains additional fat, with only a little water, which is mixed in briefly, so that the gluten strands are just barely formed. Wheat is especially versatile. It is used as a thickener in pies, sauces, and roux, as well as a crispy coating for sautéed items. It is common for a recipe to call for dredging an item in flour before sautéing it to make a crispy coating. When it comes to substituting gluten-free flours for those with gluten, there is no “magic blend” that works for all recipes. You need to consider whether you need a thickener, a binder, or just simply structure. Gluten-free flour mixtures (as opposed to a quantity of a single variety) work best in many instances, since a combination of flours will contribute different properties. You can buy a commercial mix, or keep the flours on hand to make your own. In some instances, however, a single flour will do the job. I’ve used almond flour, sorghum flour, brown rice flour, chickpea flour, and coconut flour successfully in recipes. When you need to thicken a sauce, the root starch thickeners, such as tapioca or arrowroot, work well. You can coat items in arrowroot, tapioca, rice flour, or cornmeal to get delicious crispy crusts. Since tapioca and rice flours tend to give baked goods structure, these are common in flour blends. Gums, such as xantham gum or guar gum are used to create the sticky binding effect that gluten has. They are not always necessary, especially if there are eggs in a recipe. Although people vary the amount of gum added, a good rule of thumb is a ratio of ¼ teaspoon xantham gum per cup of flour for cakes, ¼ to ½ teaspoon for cookies, quick breads and muffins, and 1 to 2 teaspoons per cup of flour for items that require kneading. Sometimes gluten-free baked goods do not hold up as well as those containing gluten, so the use of muffin tins or bread loaf pans can be helpful. Note that the addition of warm liquid helps to give structure to your baked goods, and it is always best to add your liquid slowly. If you are using a blend of flours, it’s a good idea to sift them together in order to make sure that you don’t end up with unmixed pockets of leavener or flour. Keep gluten free flours in the refrigerator, if you have the room, for up to four or five months, or in the freezer for up to a year. Most of the time, 1 cup of wheat flour can be substituted for 1 cup of a gluten-free flour, but there are some notable exceptions. The biggest difference is that you have to use only half as much nut flour in your recipe. You can grind your own grains in a high power blender or a spice grinder. It is easiest, however, to use readymade flours. The following flours can be purchased readymade: 1 cup Wheat Flour Equals: Amaranth – 1 cup Bean Flour – 1 cup Cornmeal – 1 cup Gluten free flour mix – either home made or commercial – 1 cup Millet Flour – 1 cup Nuts (finely ground- almond, hazel nut)- ½ cup Oat Flour – (only if gluten free) 1 1/3 cup Potato Starch – ¾ cup Quinoa Flour – 1 cup Rice Flour (White/Brown)- 7/8 cup Sorghum Flour – 1 cup Sweet Rice Flour – 7/8 cup Tapioca Flour/Starch – 1 cup Teff Flour – 7/8 cup Share on Facebook and Twitter | Gluten Free, ingredients, Kitchen Items/Gadgets | No comments
Welcome to Myra’s Kitchen blog Welcome to Myra’s Kitchen blog. Check in for frequent posts that will include cooking tips and greenmarket ingredients; notes on favorite products; commentary on books and articles; and health tips and musings. We’d love to hear from you, so please e-mail us with comments or queries. Share on Facebook and Twitter | Books, Greenmarket Bits, Happenings/Events, ingredients, Kitchen Items/Gadgets, Kitchen Tips, Musings | No comments
|
