|
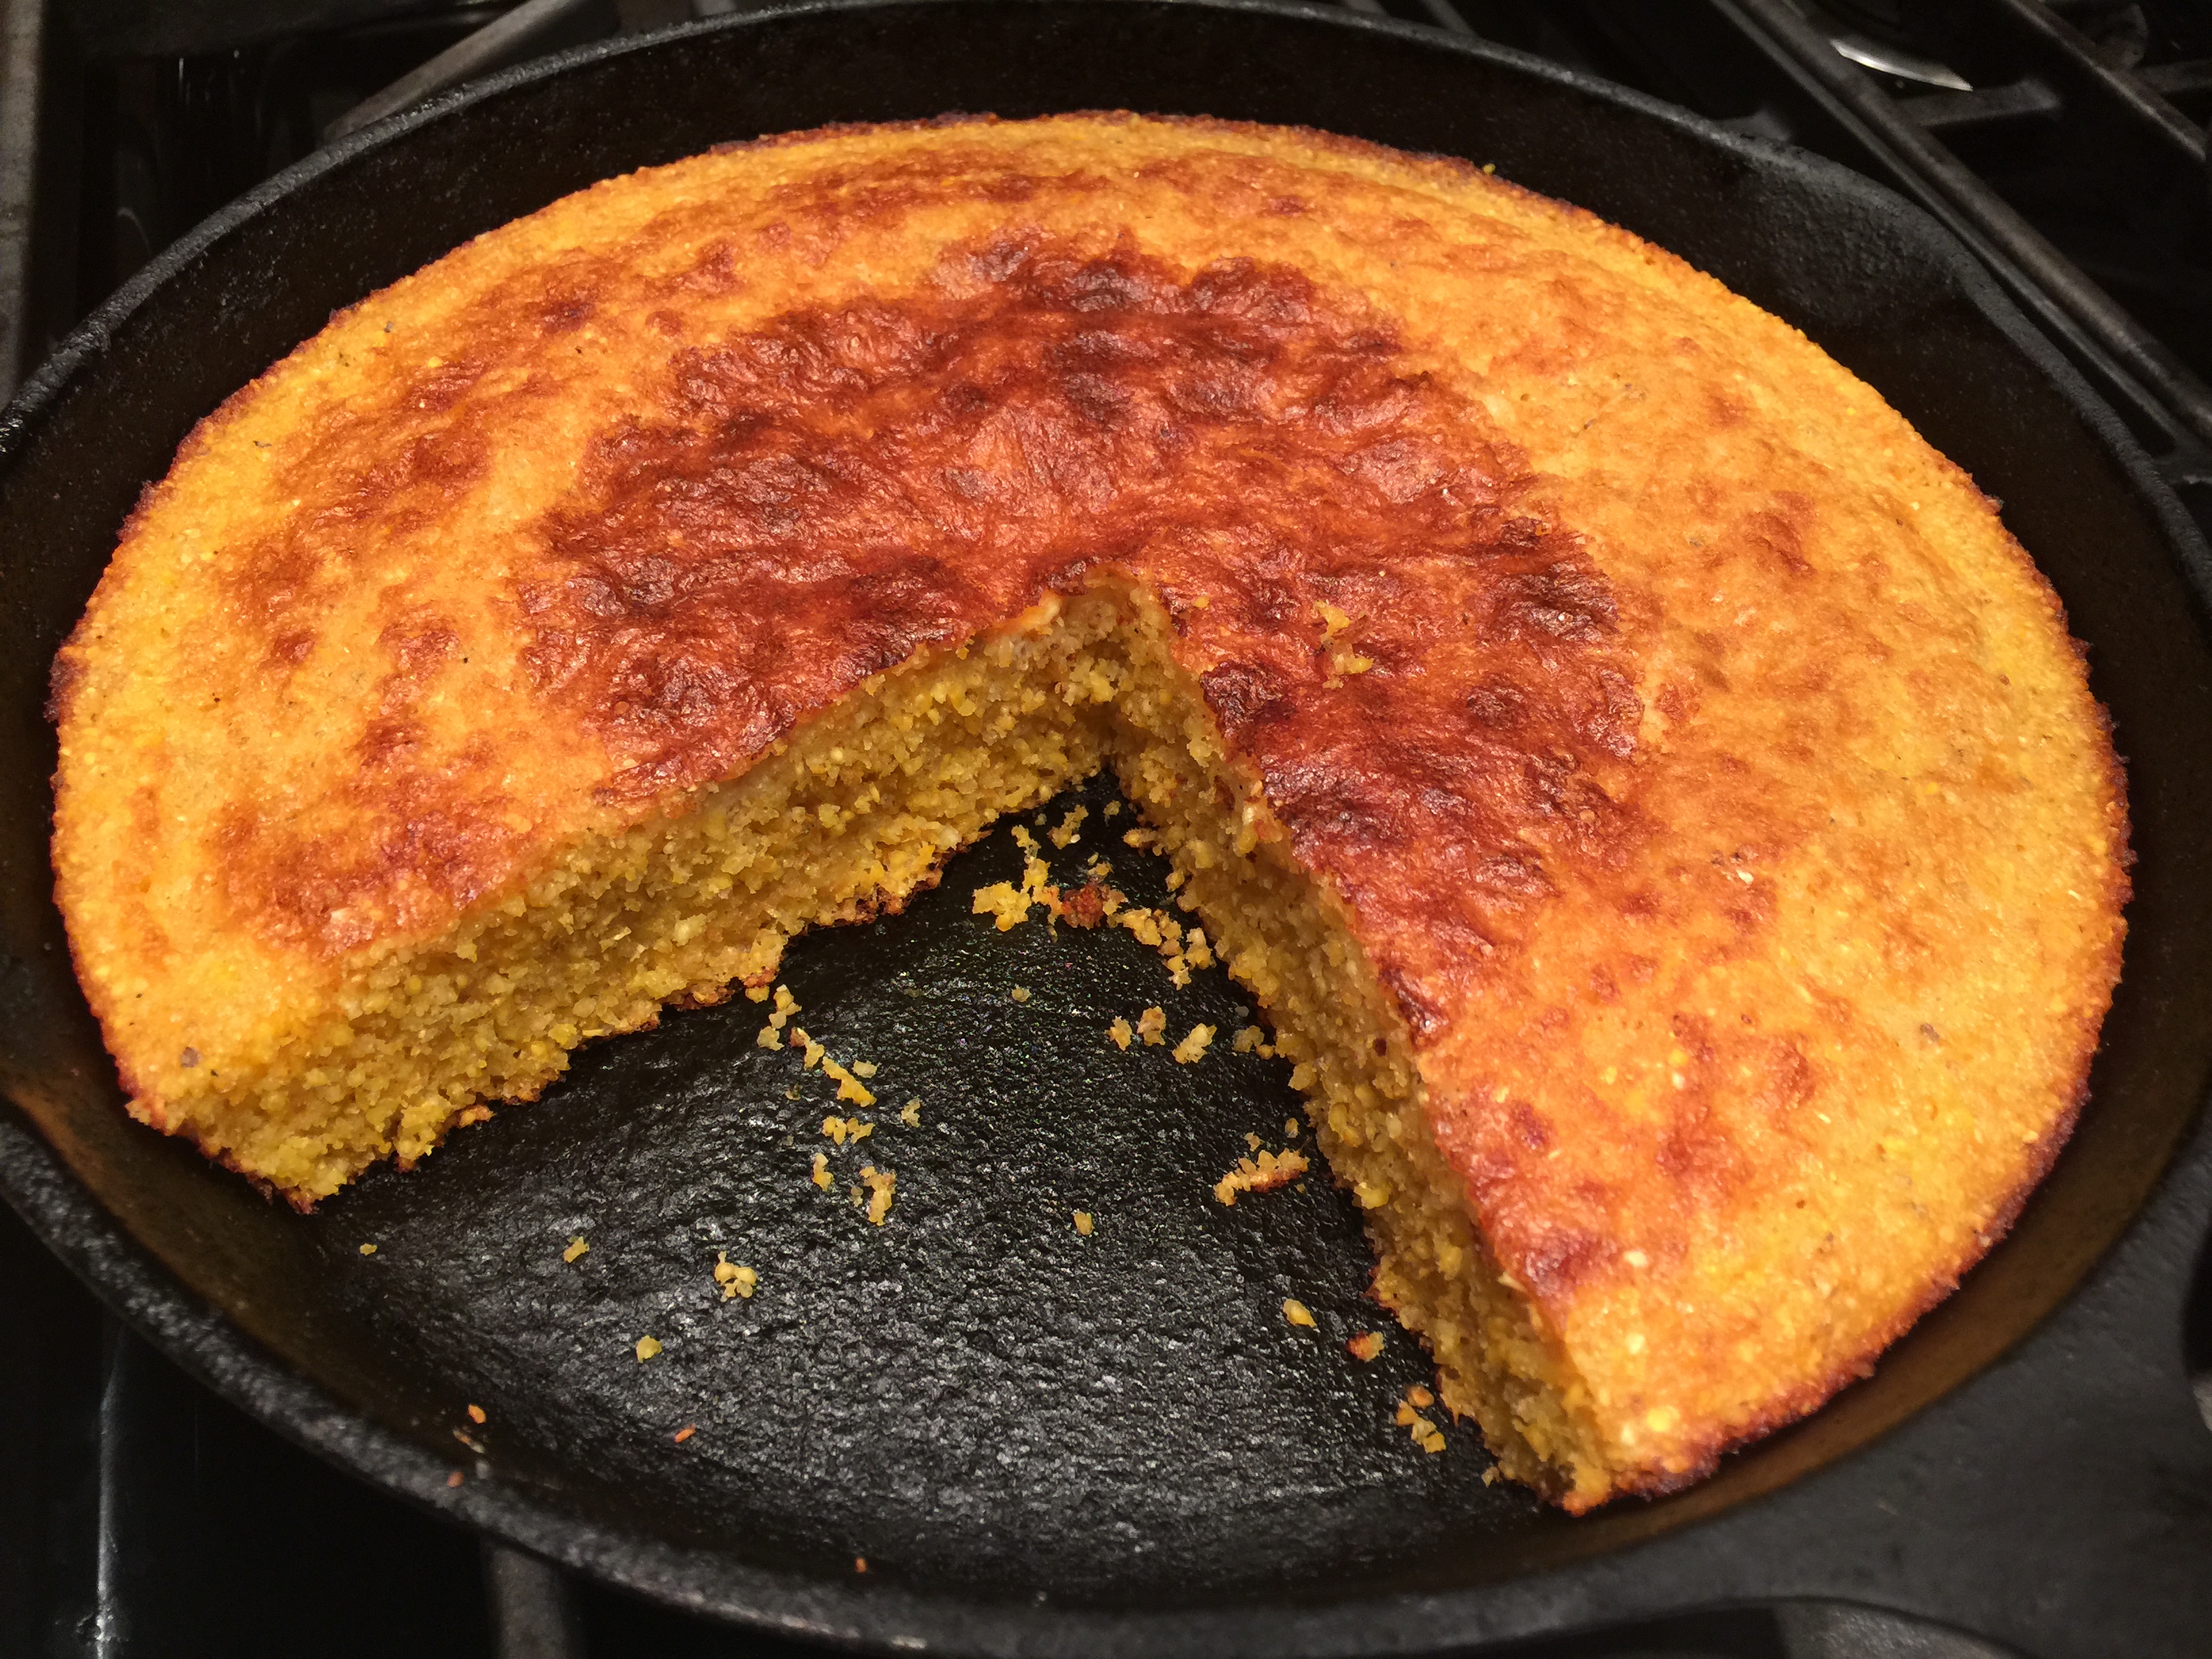
Southern Skillet Cornbread My new favorite cornbread is adapted from a recipe in Cook’s Country magazine. It’s made from pure cornmeal, so it’s got super corny flavor. It’s easy to make, baked at high temperature in a cast iron skillet.
In today’s video, I show how to make a delicious Southern-style skillet cornbread. This cornbread is made completely from cornmeal, without any other flours, making it gluten free. Besides the cornmeal, there are just a few other ingredients besides good quality fat (a mix of coconut oil and butter). The dish is baked in a 10-inch cast iron skillet, and it’s quick to make. The technique for making this dish is also a little unusual. You can make this cornbread using either course cornmeal or fine-grind cornmeal, which yields very different results; or you can mix the two. In the video, I demo a mix; I use 1 1/4 cups of a course-grade polenta and 1 1/4 cups of a fine grind masa harina, cornmeal that’s been treated with edible lime (calcium carbonate) to make it digestible and impart that distinctive tortilla flavor. The two together give the cornbread a delightful texture. To begin, spread both types of cornmeal on a parchment-covered sheet tray and toast in a very hot (450 degree) oven for 10 minutes. Once the cornmeal has been in the oven for 5 minutes, add 1/4 cup aroma-free coconut oil to a 10-inch cast iron skillet, and place that in the oven on a higher shelf to melt and heat. Remove the sheet tray and the cast iron skillet at the same time after 5 more minutes. The cornmeal will have started to brown around the edges. To the melted coconut oil, add 1/4 cup butter and return that to the oven to melt. Transfer the cornmeal to a bowl (it’s still warm) and whisk in 2 cups buttermilk. Add the remaining ingredients: 2 beaten eggs, 1 teaspoon each baking powder and baking soda, and 3/4 teaspoon salt. Notice how the mix starts to bubble as soon as the leaveners are stirred in. By this time, the butter will have melted. Remove the cast iron skillet from the oven, and pour off all of the fat into the bowl with the other ingredients, leaving just enough fat in the skillet to coat the bottom. Thoroughly mix the coconut oil-butter mixture into the other ingredients; then pour the entire contents of the bowl into the prepared skillet. Give the skillet a shake to even and smooth out the batter. Return it to the oven and bake it from 12 -16 minutes, rotating the pan after about 7 minutes. Remove the pan when the top is crusty and golden. Let the cornbread cool for a few minutes before slicing. Make sure to wrap a towel or kitchen mitt around the handle so that you don’t inadvertently touch the skillet. Even though you know you just took it out of the oven, you’re liable to forget out of sheer habit. Cut the cornbread into wedges. Marvel at the lightness of the texture, the corniness of the flavor, and the ease of assembly. Enjoy this luscious treat with your favorite cold weather dish or holiday meal.
Share on Facebook and Twitter | Gluten Free, Grains, Kitchen Tips, Recipes, Side Dishes | No comments
Acai Bowls
Acai berries contain many beneficial compounds, such as powerful antioxidants, fiber, monounsaturated fats (oleic acid), and anthocyanins, which are all clinically proven to have health benefits. Because they’re so low not only in sugar, but also in the acid that protects most fruits, they must be picked, processed, and flash frozen before being transported out of the Amazon. Otherwise the fruit would oxidize, turn brown, and lose its beneficial nutrients. The berries are squeezed into juice or—my favorite—pureed into frozen smoothie packs. These are sold in the freezer section of natural food stores. You can take advantage of the packs by making delicious frozen treats without using an ice cream maker. The only equipment required is a food processor. In today’s video, I demonstrate two delicious bowls that are suitable for dessert, snacks, or even breakfast. Each one has healthy fat added to keep your blood sugar stable and help you feel satisfied for hours. They’re quick to make: You whirl a few ingredients together, then immediately eat what you’ve made. You can store leftovers in the freezer, but you do have to let them thaw before eating. The first bowl that I demonstrate in the video is flavored with cherries, cocoa, and almonds, all of which complement the acai. Begin by adding 2 unsweetened smoothie packages to the bowl of a food processor. It’s best to let the acai pack sit out for 5 minutes or so to thaw slightly, so it’s not rock hard when you whirl it. Add a cup of frozen cherries, half a ripe avocado, a couple tablespoons cocoa powder, a tablespoon raw honey, and 1/4 teaspoon almond extract. Now you’re ready to whirl, except you need to add about 1/2 cup of liquid to loosen up the mixture. (In the demo video I add coconut milk, but almond and cashew milk are both delicious as well.) A quick whirl in the food processor melds these ingredients into a luscious concoction. To add a bit of texture, top the two servings with a sprinkling of almonds and cocoa nibs, and a dash of cocoa powder. The second bowl features bananas and almond butter. Again, start with two packages of acai smoothie packs, the contents broken into chunky pieces. Add one chopped frozen banana, 3 pitted medjool dates, a tablespoon almond butter, and a dash cinnamon. Loosen the whole mix with 1/2 cup of coconut milk. Again, a quick whirl transforms the whole mix into frozen ambrosia. Top this banana-almond acai bowl with large flakes of dried coconut and rosy goji berries. These simple blends are so easy to make with ingredients that you can keep handy in your freezer and pantry. These bowls (which can serve as a snack, a breakfast, or a dessert) underscore that a luscious frozen treat can both satisfy a sweet tooth and be truly health-promoting.
Share on Facebook and Twitter | Breakfast, desserts, Fruit, Gluten Free, ingredients, Recipes, Snacks, techniques, Uncategorized | No comments
Chia Seed Puddings
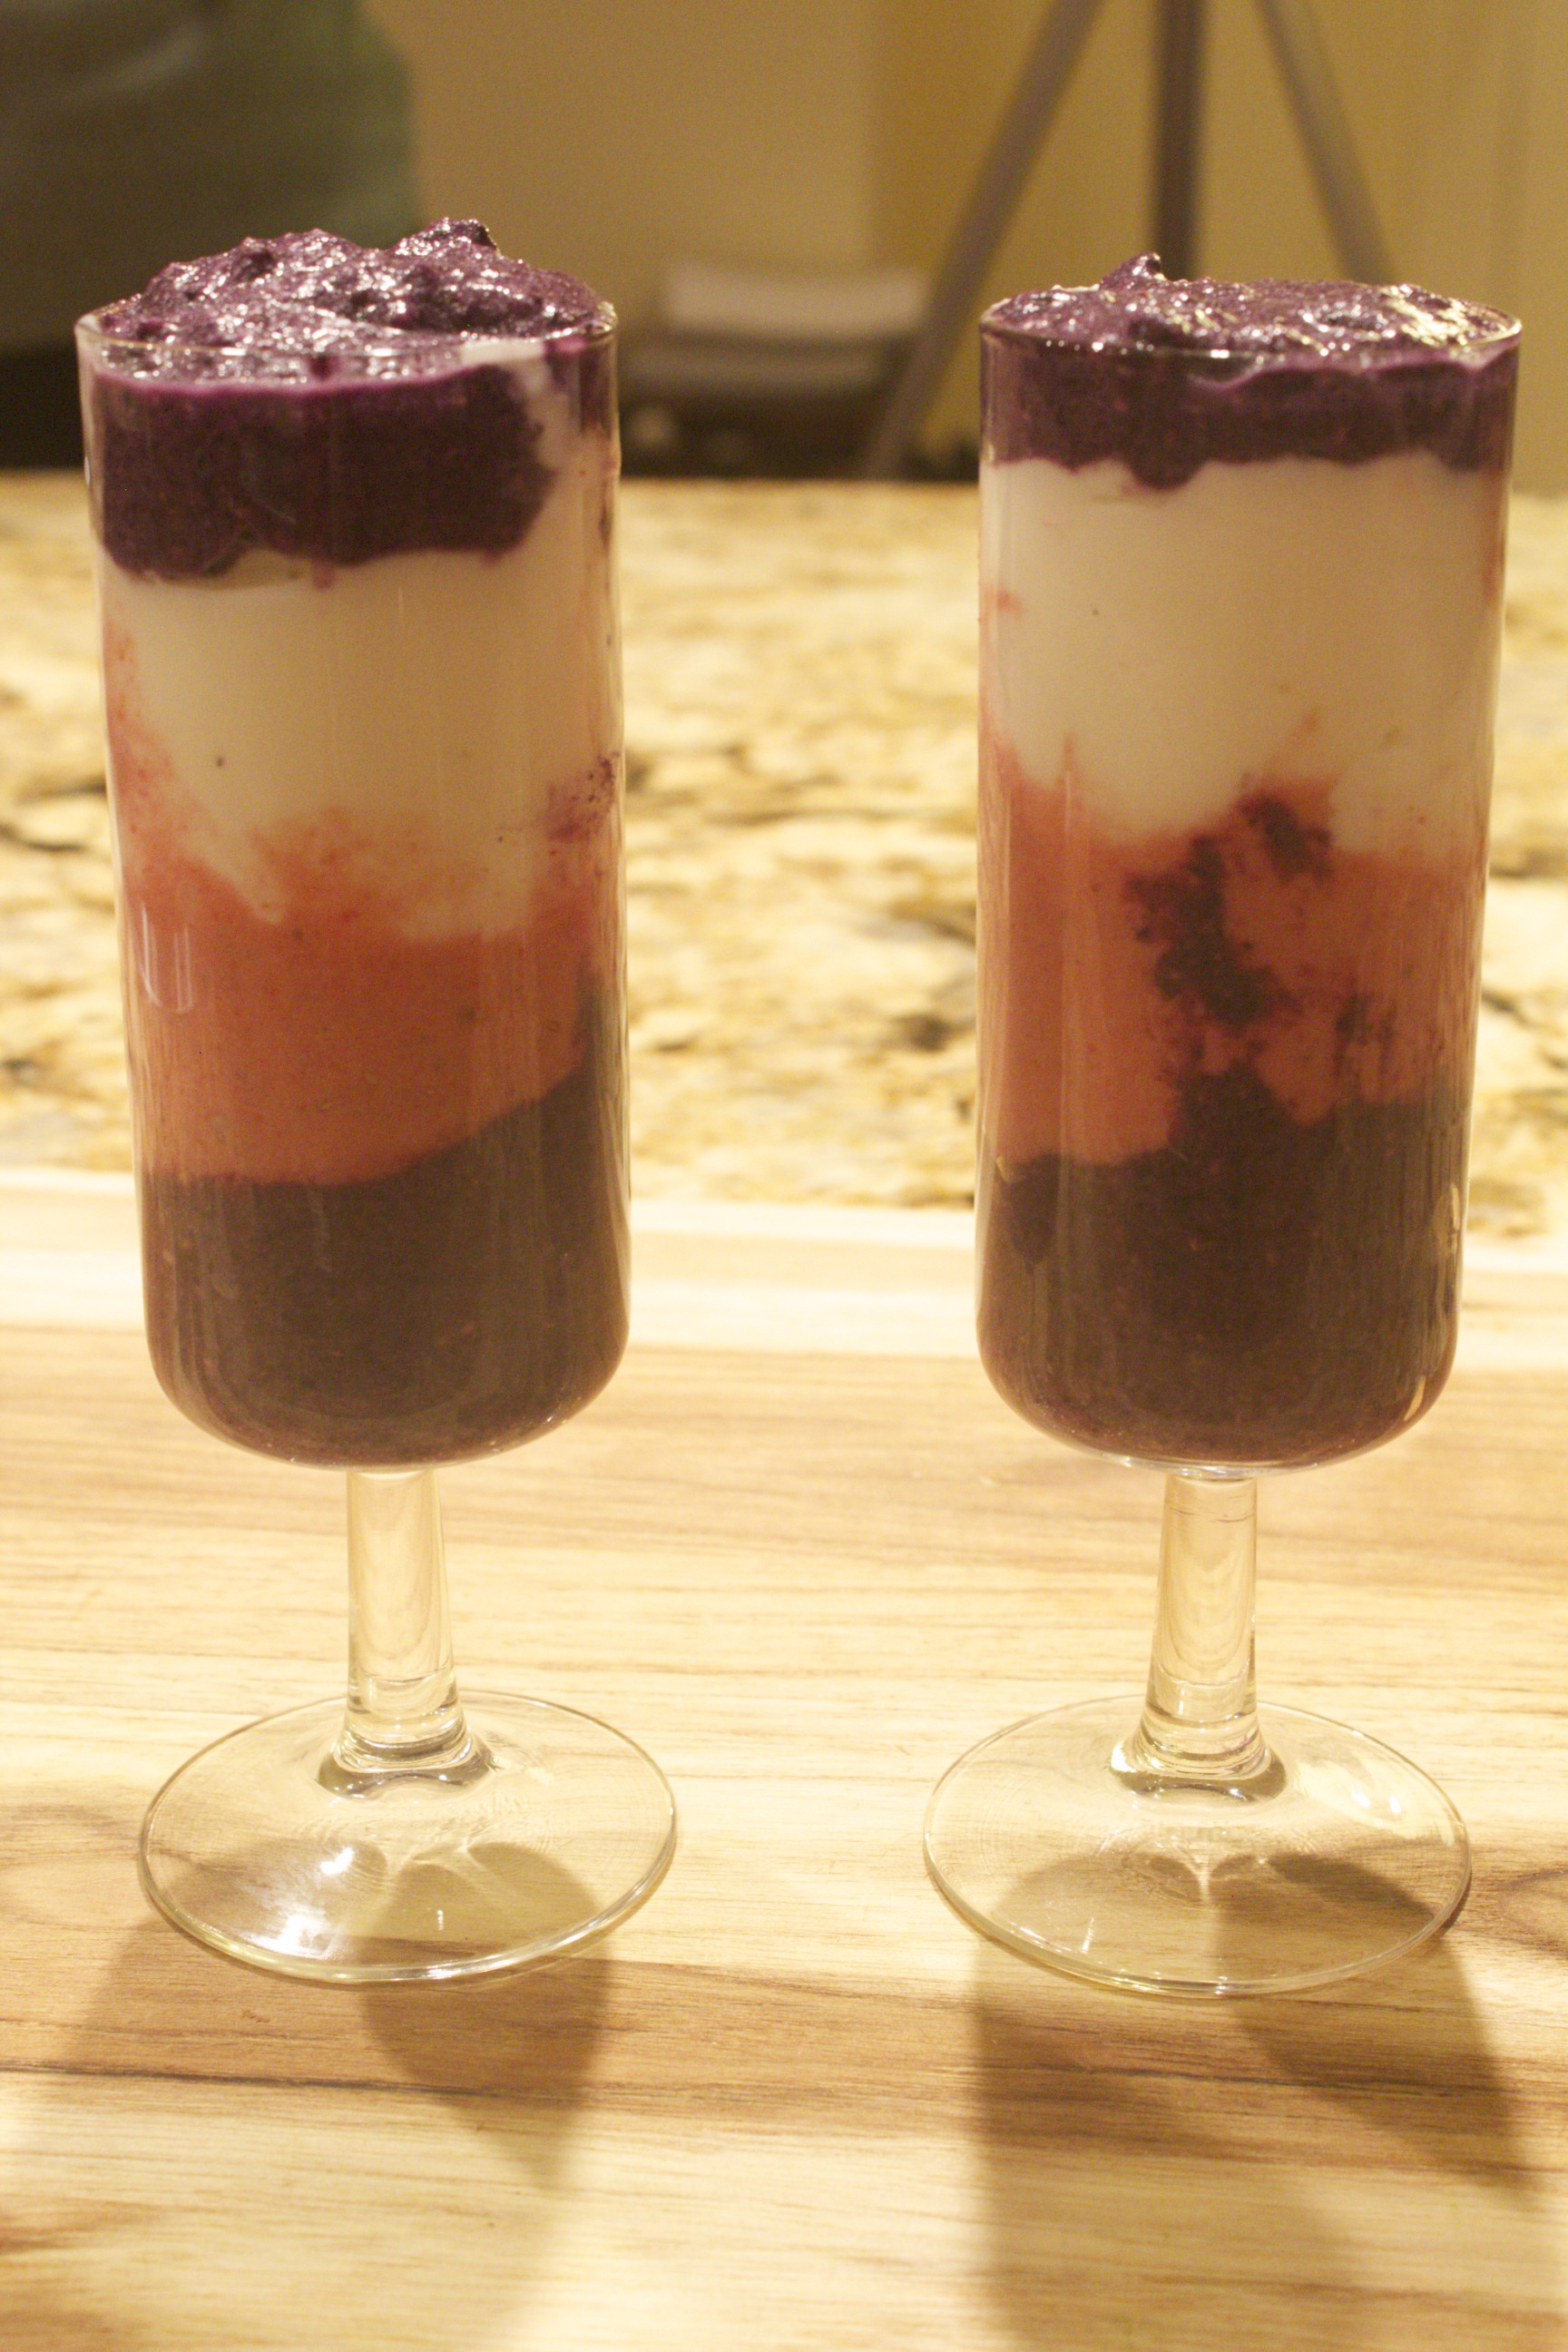
In today’s video of chia seed puddings, I show how to make two delicious chia seed puddings. Chia seeds are touted for their powerful salutary benefits: Included among their vital nutrients are protein, fiber, antioxidants, and ALA (alpha-linoleic acid), a type of omega-3 fatty acid. It seems that nowadays people are shaking these micro-seeds into everything from cereals to salads, from baked goods to beverages. I’m not a fan of the dry chia sprinkle: Chia seeds are most digestible when allowed to soak and swell. Therefore, I favor adding them to blended concoctions, then leaving enough time for the tiny powerhouses to plump. The result is thickened puddings with luscious pebbly beads, reminiscent of tapioca. The procedure for making chia seed pudding is quick, simple, and consistent. Whiz together a flavorful blend, stir in some chia, and refrigerate for at least 30 minutes to allow the seeds to thicken. The array of potential flavor permutations are vast. In the video, I demonstrate two berry-based puddings, each one ideal to savor alone or to layer into a colorful parfait. You’ll need a stand blender to pulverize the ingredients; a high-powered blender is the gold standard, but it’s not essential. The first purée that I show has a base of blueberries. Start with 2 cups of the fruit, either fresh or frozen. If you’re using frozen, let the berries rest a few minutes to defrost. Add 1/2 cup cashews, ideally after having soaked them for 2 hours before draining. Soaking the cashews allows for maximum nutrient absorption and digestibility. The sweetener in this pudding is a mere 4 dates. Any variety of date (make sure to remove the pit!) is fine, but the medjool variety is the softest and sweetest. This resulting pudding is sweet enough without being cloying. A couple tablespoons coconut oil—virgin or aroma-free—will also help keep your blood sugar stable as well as ensure that the pudding has a luxurious texture. One tablespoon vanilla and a generous sprinkling of cinnamon complete the flavorings. A cup of liquid is necessary for proper blending. In the video, I use coconut water, but plain water would be fine as well. Give the ingredients a good whiz until well combined. Transfer the purée to a bowl or container, then stir in 6 tablespoons chia. The micro seeds need a bit of time to work their magic and swell. Transfer the pudding to the refrigerator and leave for 30 minutes minimum, preferably longer. The next strawberry chia delight that I show in the video is simplicity itself. Blend well 3 cups strawberries (if frozen, defrost a bit), 1/4 cup raw honey, and 3/4 cup coconut milk, which lends the needed richness and body to the finished dish. Add a splash vanilla, and give a long enough whiz in the blender until the base is smooth. Transfer to a bowl or container, and stir in 1/4 cup chia. Refrigerate for a minimum of 30 minutes, but longer is even better to allow for the seeds to expand as much as possible. The puddings last refrigerated for at least a week, and they each yield 4 to 6 luscious servings. Either of them alone—or the two in combination—can make a great snack or low-sugar dessert. You can also leave them refrigerated for a convenient grab-and-go breakfast. One favorite breakfast of mine is the combination of puddings layered in a parfait or martini glass with sheep’s milk yogurt. The blend tastes tart and sweet, looks gorgeous, and contains just enough fat, fiber, and fruit to keep you happily sated until lunch. Share on Facebook and Twitter | Breakfast, desserts, Gluten Free, Gluten Free, Snacks | No comments
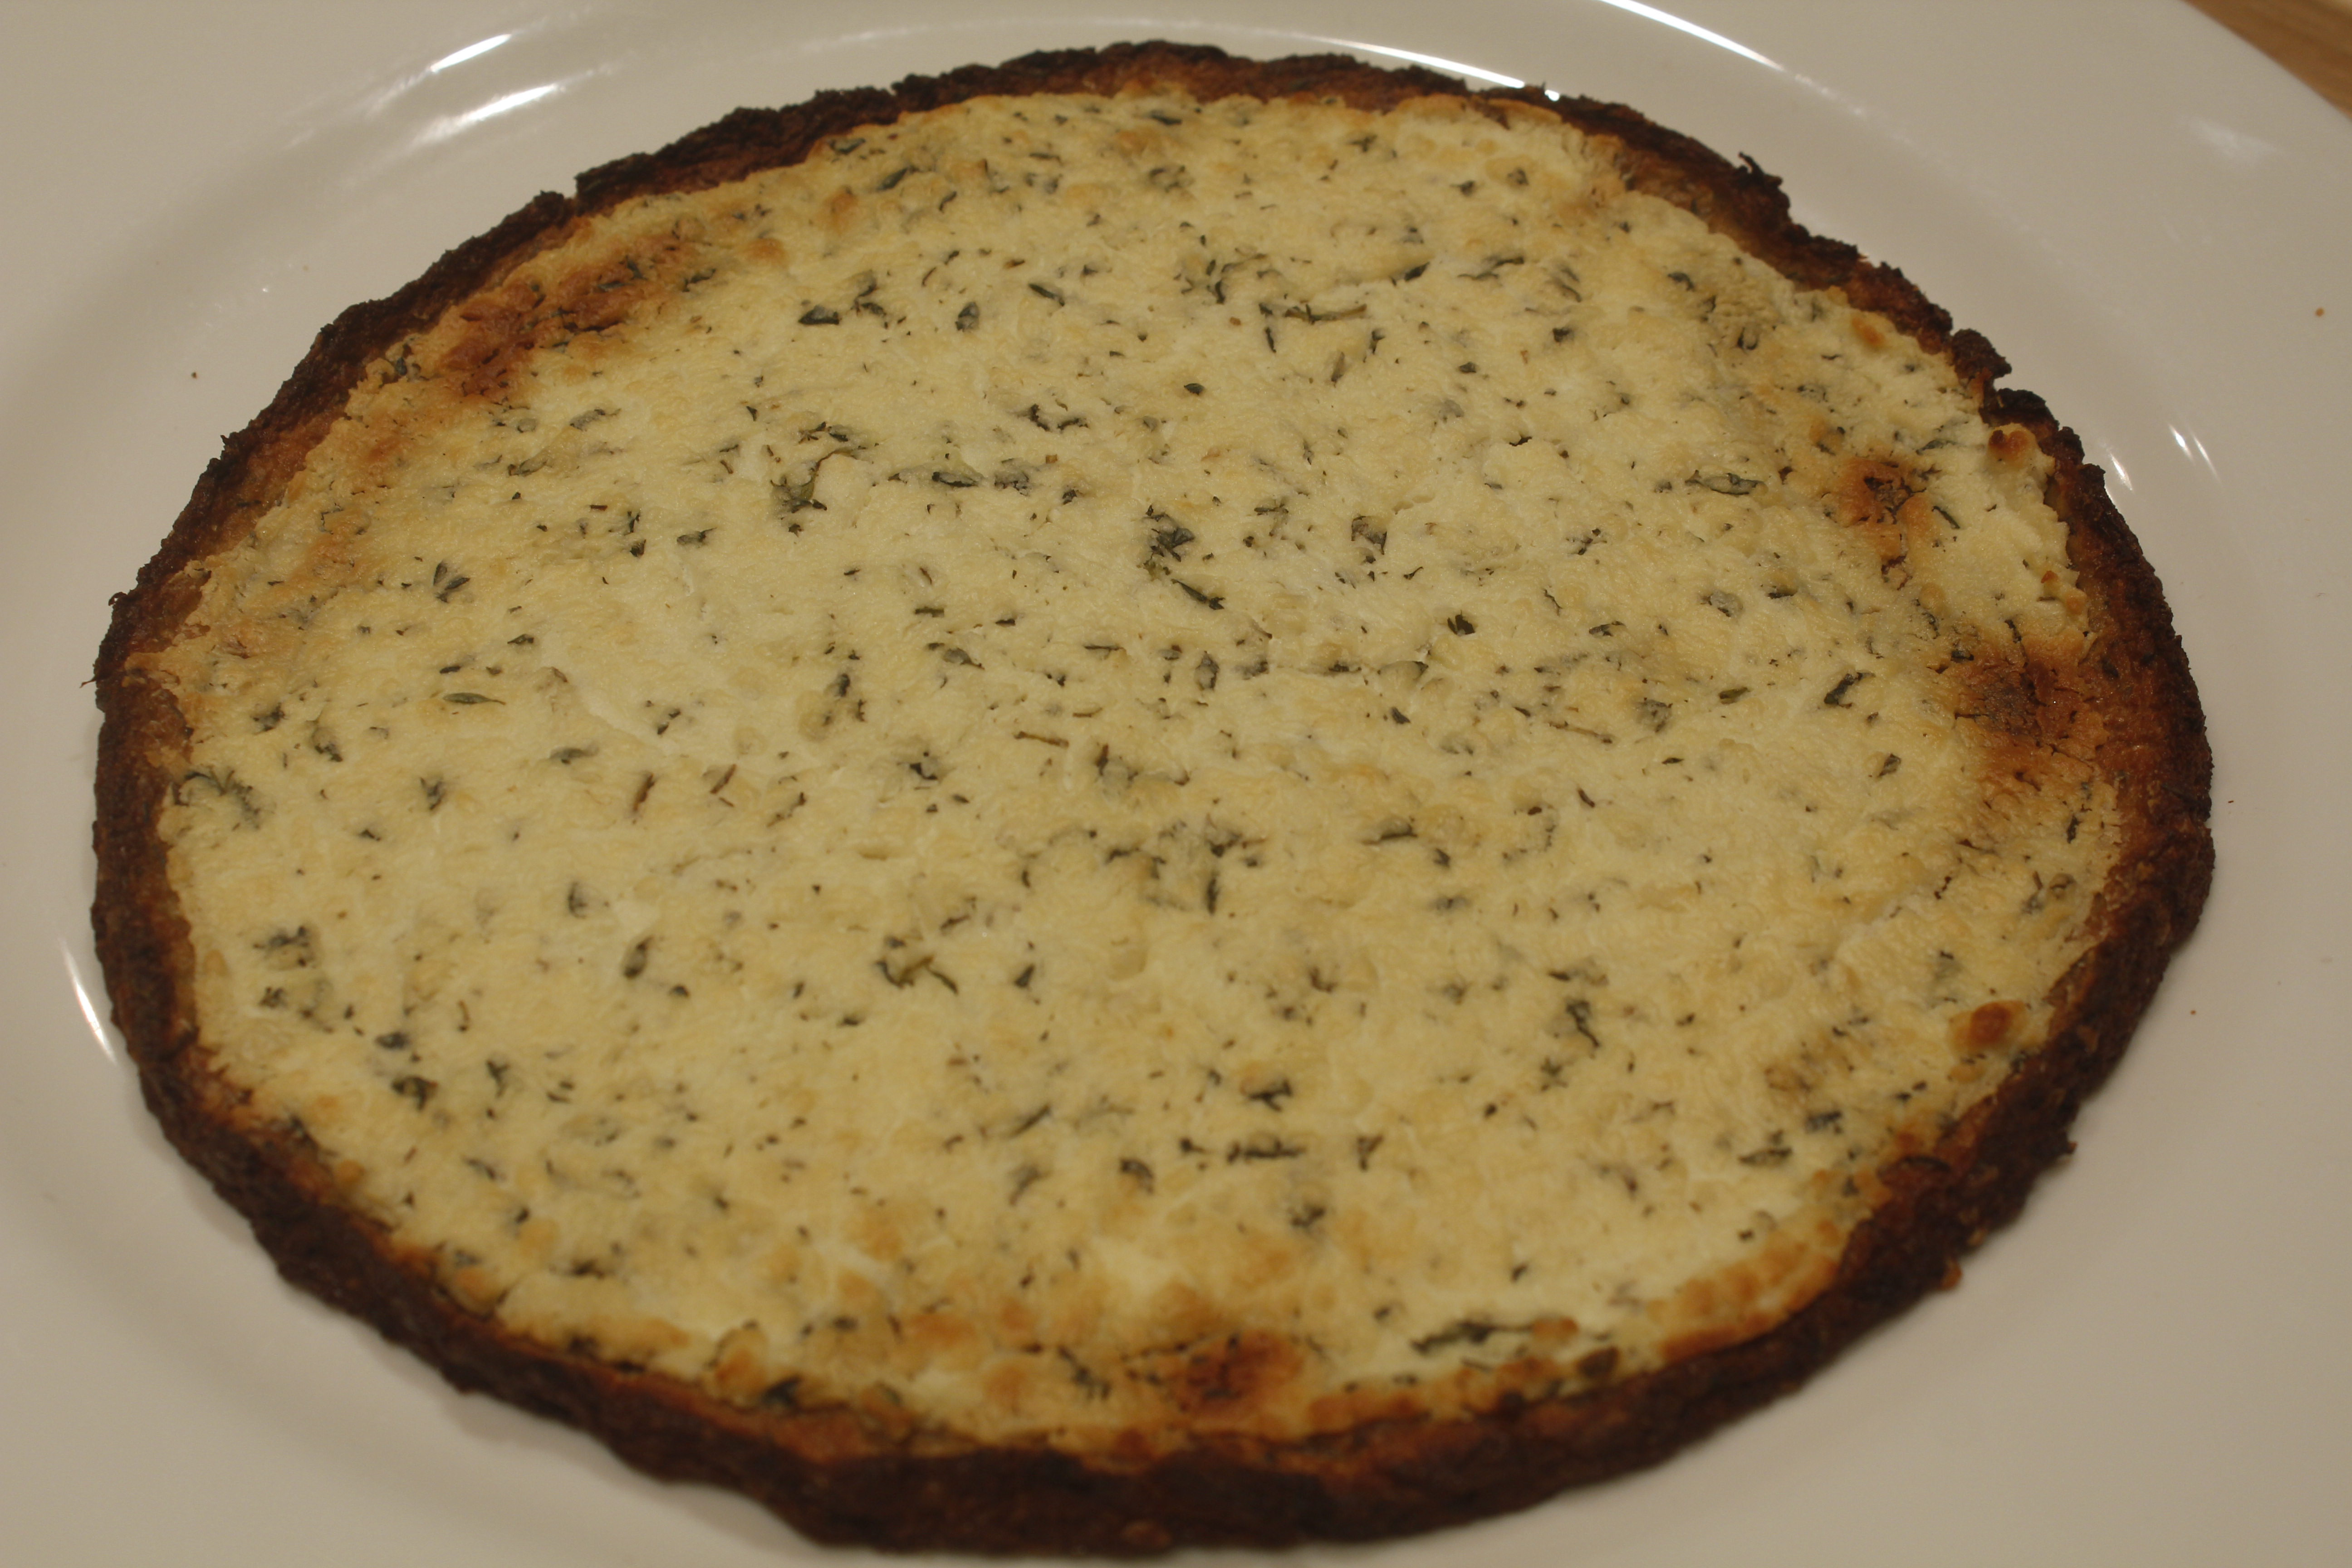
Cauliflower-crusted Pizzas
In today’s video on cauliflower-crusted pizzas, I show how to make a couple of variations on a cauliflower-crusted pizza. These delicious pizzas are light and low carb, yet as satisfying as traditional pizza. And, of course, you can vary the toppings to suit your preferences. To begin, cut a medium-sized cauliflower into florets. Pulverize the florets in a food processor until they take on a crumbly, couscous-like texture. Because you’re grinding the cauliflower raw, you’re not in danger of turning it into a puree. Next, have ready a pot with about an inch of boiling water. Add the cauliflower and blanch for 2 to 3 minutes, then pour into a fine mesh strainer to drain. Let the cauliflower cool for a few minutes. Now—and this part is very important—wrap the cauliflower granules in a tea towel and squeeze to extract as much liquid as you can. You may be surprised at just how much water comes out. Finally, turn the squeezed mass into a bowl; by this time, the cauliflower actually has the texture of a dough, and you’re ready to flavor it. The crust needs a binder; for this purpose, a couple of lightly beaten eggs are essential. To flavor the dough, stir in a teaspoon of dried thyme, and half that amount of garlic powder and salt. Next, decide whether or not you wish your crust to contain a little cheese or to be dairy free. Stir in 1/2 cup of grated Parmesan for a delectable cheese version. For an equally scrumptious dairy-free variation, replace the cheese with 1/4 cup almond flour and 1 tablespoon nutritional yeast. The nutritional yeast lends a cheese-like flavor to the combination. In the video, I demonstrate a half version of both the crust with cheese and the crust with almond flour. The next step is to press out the crust on a parchment-covered baking sheet. A medium sized head of cauliflower should press into about two 8-inch pizzas. Press the crust down to about 1/8-inch thickness, leaving a raised border around the edges. You do need to bake it until golden before topping. 30 to 40 minutes in a 400˚F oven will color the crust just right. You can assemble the crusts and bake them up to a day in advance; refrigerate them until you’re ready to add the toppings and bake the pizzas. I present two toppings in the video, but these are merely two ideas out of many. The first one is a classic combination of toppings: the requisite tomato pizza sauce and dollops of fresh mozzarella. Refrain from overdoing the mozzarella since it tends to spread a lot when it melts. This one also has crumbled cooked ground beef and wilted spinach. The surface is then dusted with grated Parmesan. The second is a goat cheese topping. Four ounces of soft cheese are mashed in a bowl with a clove of minced garlic, a dollop of Dijon mustard, a couple tablespoons fresh thyme, a tablespoon olive oil, and a sprinkle of salt. Using an offset spatula makes spreading the cheese over the crust smooth and effortless. Both pizzas return to the oven for 10 minutes, until the toppings have colored, the cheese is melted, and everything is heated through.
Transforming cauliflower into a crust is exciting, and the pizzas taste amazing. This is a deliciously fun way to have your pizza and your vegetables too! Share on Facebook and Twitter | Gluten Free, Main course, techniques, Uncategorized, Vegetables | No comments
Homemade Nut Milk In today’s video, I show just how easy it is to make your own nut milks. Homemade versions are not only fresher than the store-bought (which contain synthetic vitamins, thickeners, and sweeteners): they are also healthier and more flavorful. You can use these versatile beverages as a base for smoothies, hot chocolate, or cereal, or as an alternative to dairy in your baked goods. Or, add a touch of natural sweetener and a dash of spice to make a simple nut-milk drink. The basic prep technique is the same for most nuts. Step one is to soak the nuts. Almonds require a good overnight soak; it’s even okay to let them go for as long as 12 hours. The reason for the soak is as follows: nuts and seeds are naturally adapted to lie dormant in nature until proper sprouting conditions are present. When it rains, nuts and seeds get wet; then they germinate, and the plants grow. When we soak the almonds, we are mimicking nature’s incubating process. When there is moisture, enzyme inhibitors and toxic substances called phytic acid are washed away naturally. In other words, phytic acid is nature’s padlock, and water is the key. Once the nuts are soaked, all of the enzymes & minerals available in them—almonds have phosphorous, magnesium, manganese, & copper—become available to the body. These soaked nuts become swollen and soft so that they blend easily into a rich nut milk, and they are noticeably easy to digest. Next you rinse and drain the nuts. If you’re not ready to make nut milk right away, leave the drained nuts refrigerated for up to 3 days. When ready, blend them with fresh water at a ratio of 3 parts water to 1 part nuts. A high-speed blender, such as a Vitamix, is convenient for whizzing the nuts into a foamy beverage in a blink; other blenders take a couple of minutes. The last step is to squeeze the frothy liquid through a nylon mesh nut bag, which you can conveniently use over and over again, or a double layer of cheesecloth draped over a strainer. The leftover pulp has all the flavor squeezed out of it; you can simply compost or discard it. Cashew milk is different from the typical nut milk. Cashews blend up so pulverized that the particles squeeze through the fine mesh of the bag, so don’t bother to strain them! Do add an extra cup water for a 4 to 1 ratio of water to cashews; this way your milk won’t be too heavy or too thick. In the last part of the video, I demo a speedy hot chocolate made with only two other ingredients besides the cashew milk. I stir a tablespoon of cocoa powder and 2 tablespoons maple syrup in the bottom of a small pot until bubbling; then I add a couple cups of nut milk and let the liquid come to a boil. That’s it: soothing and delectable, and just one of the many luscious comestibles that you can concoct with homemade nut milk.
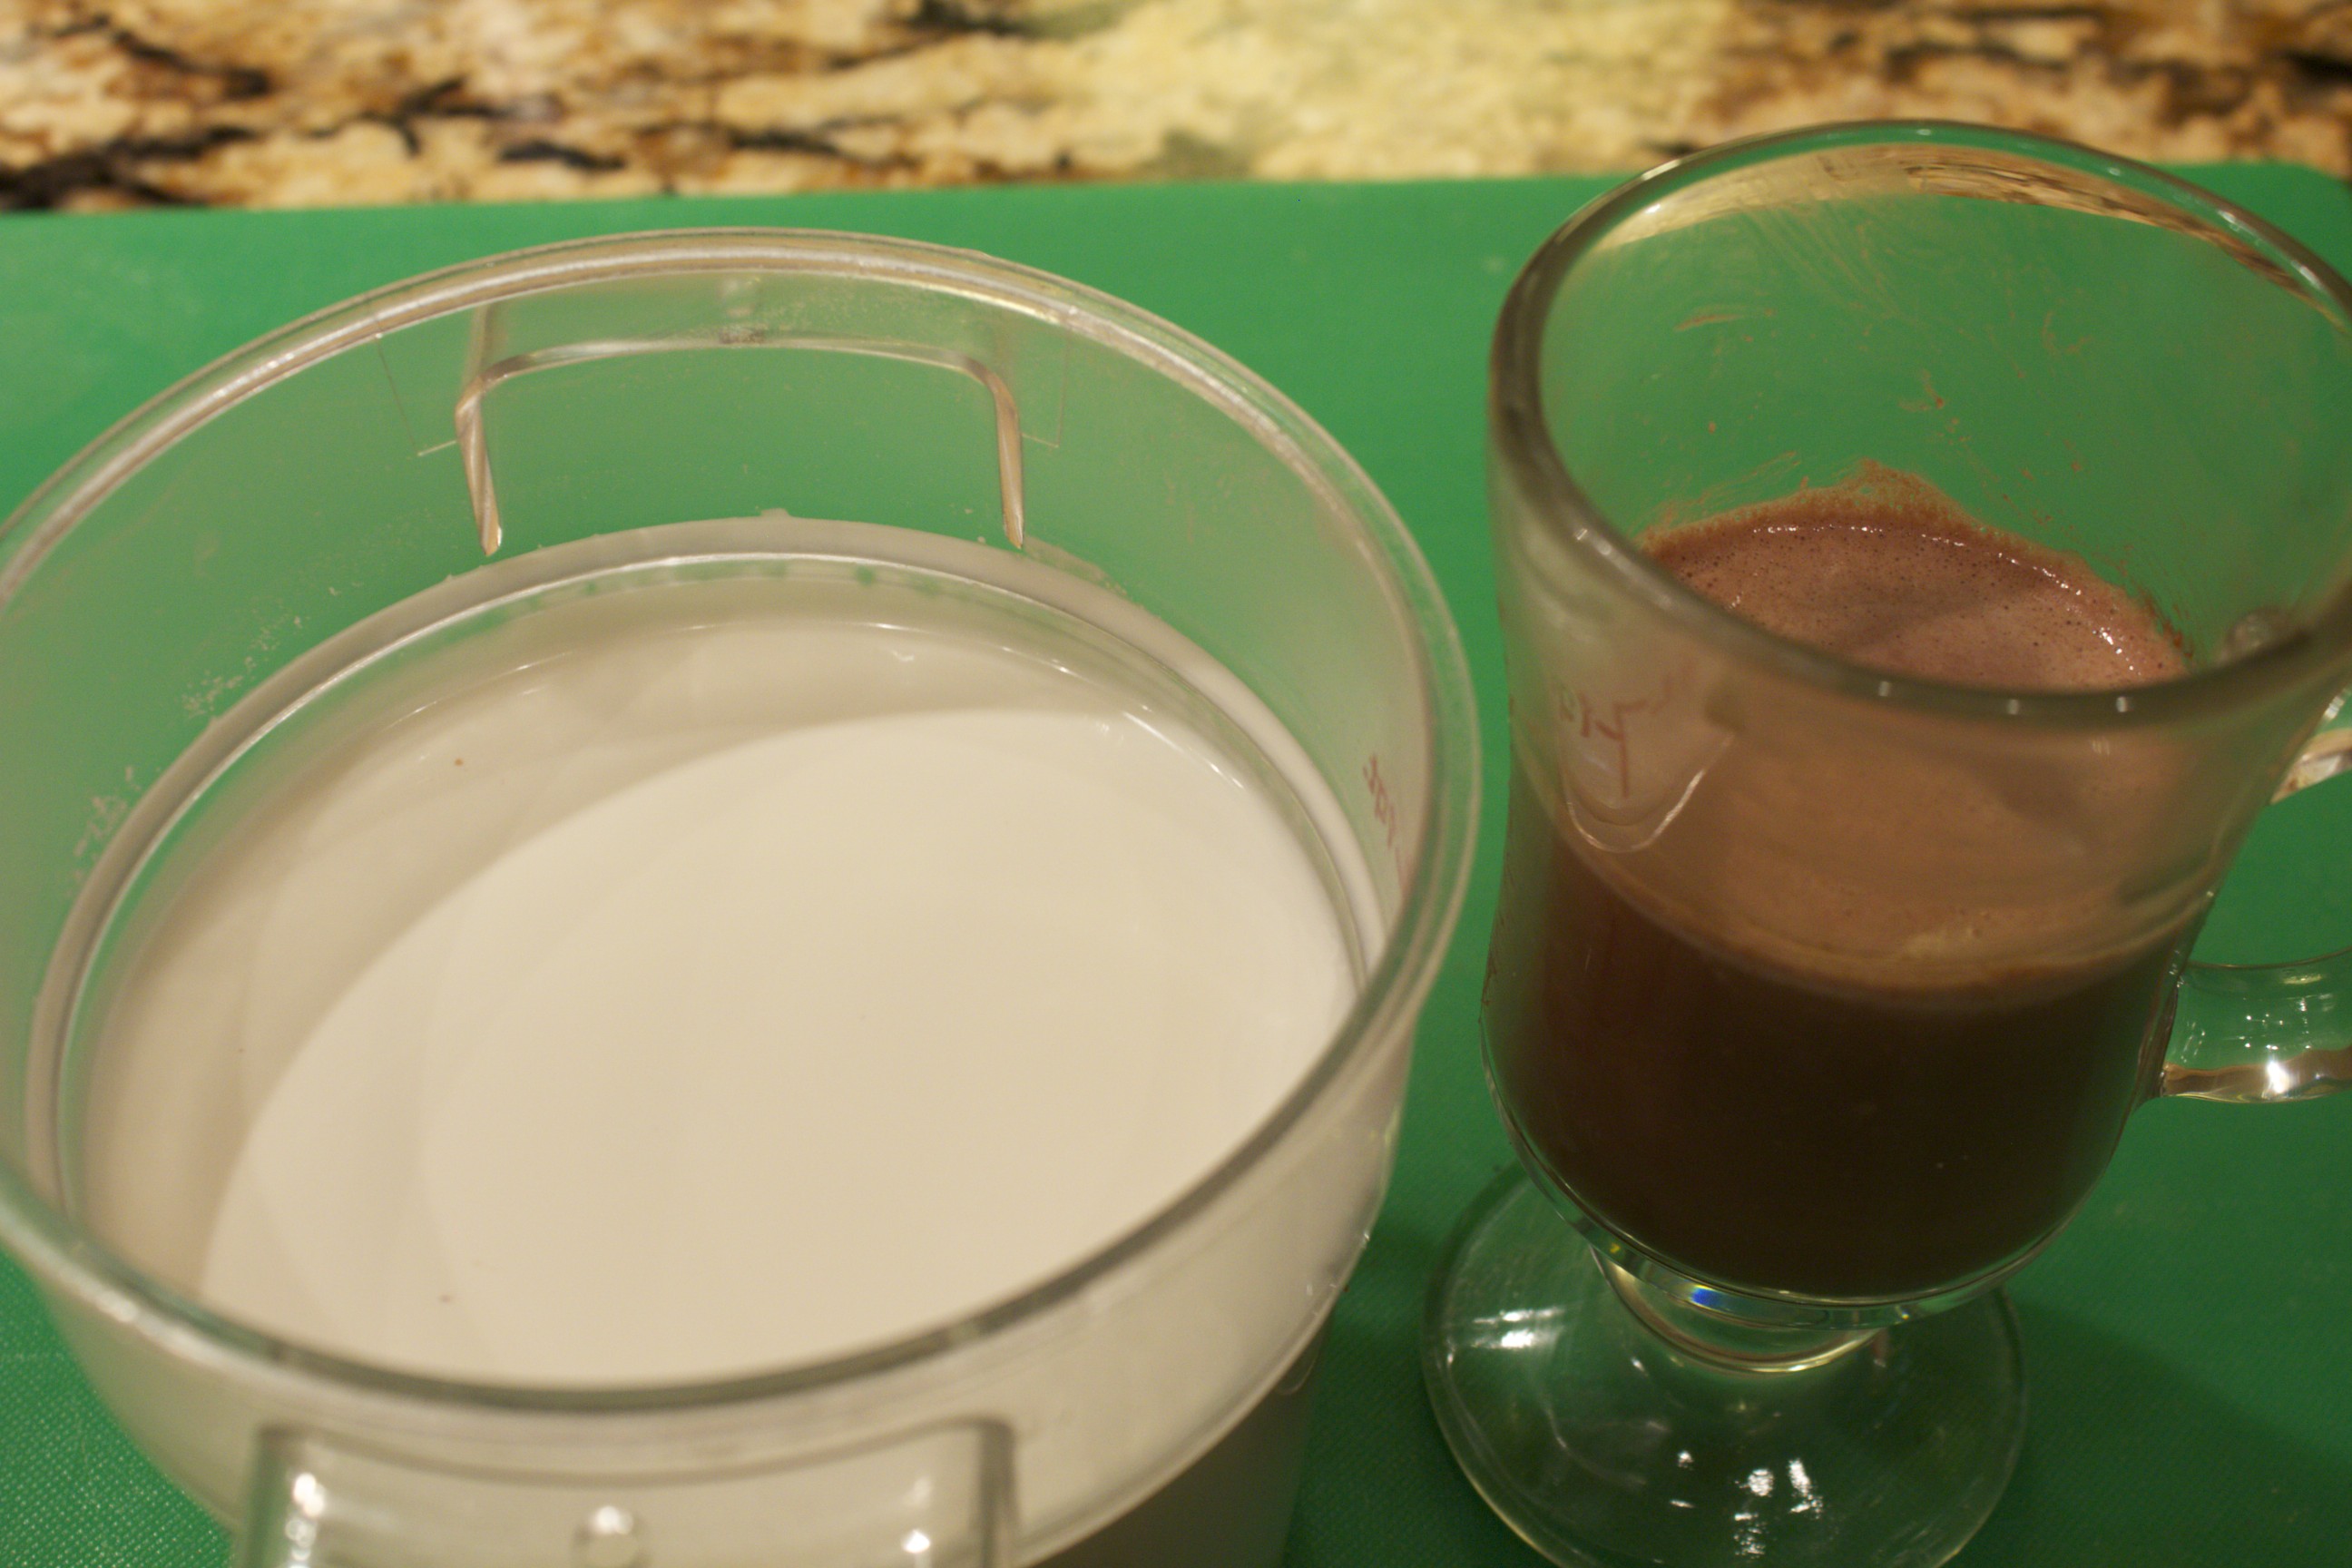 Cashew Milk and Hot Chocolate Share on Facebook and Twitter | Beverages, Chocolate, Gluten Free, Kitchen Tips, Natural Sweeteners, nuts and seeds, Snacks, techniques | No comments
Quick Vietnamese Pho with Fresh Herbs This quick Vietnamese pho, pronounced fuh, as in fun, is a soothing one-pot meal that’s flavorful and light, especially after the heavier foods of winter. Watch the Video Quick Vietnamese Pho with Fresh Herbs The first step is to toast some spices—a couple of tablespoons of coriander, a few cloves, a pieces of star anise, a spoonful of black peppercorns— in a dry heavy-bottomed skillet over medium heat until the spices smell fragrant, which takes only a couple of minutes. I then wrap the spices in a cheesecloth along with some chunks of ginger and onions. l add this bouquet to two quarts of chicken broth (this is where a homemade one really shines) along with a pound of boneless chicken (breasts or legs are fine), a tablespoon of natural brown sugar, a couple of tablespoons of Vietnamese fish sauce, and a few pinches of salt. The fish sauce consists simply of fermented anchovies, which gives the broth authentic Southeast Asian pizazz. After bringing the liquid to a boil, I lower the heat and simmer the broth very gently (so as not to toughen the chicken) for 20 minutes or so, until the chicken is cooked through. I love that I can flavor the broth and cook the chicken all at the same time. While the chicken is cooking, I pour hot water over fettuccine rice noodles, and I assemble the garnishes. I chop some fresh mint, cilantro and basil, cut some limes, slice some red onions, and finely chop a couple of hot chile peppers. When the chicken is cooked, I remove it from the broth and discard the spice bag. As soon as the chicken is cool enough to touch, I tear it into chunky pieces. To assemble the final dish, I ladle the broth over the noodles and chicken, then add the garnishes. I start with the onions and bean sprouts and then add a big handful of the fresh herbs. A sprinkle of the hot chiles and a squeeze of fresh lime at the last minute makes the dish sing! Assembling the dish to order allows me to adjust the spice level for all who are eating. The flavorful herbed broth is nourishing and cleansing, not to mention delicious! 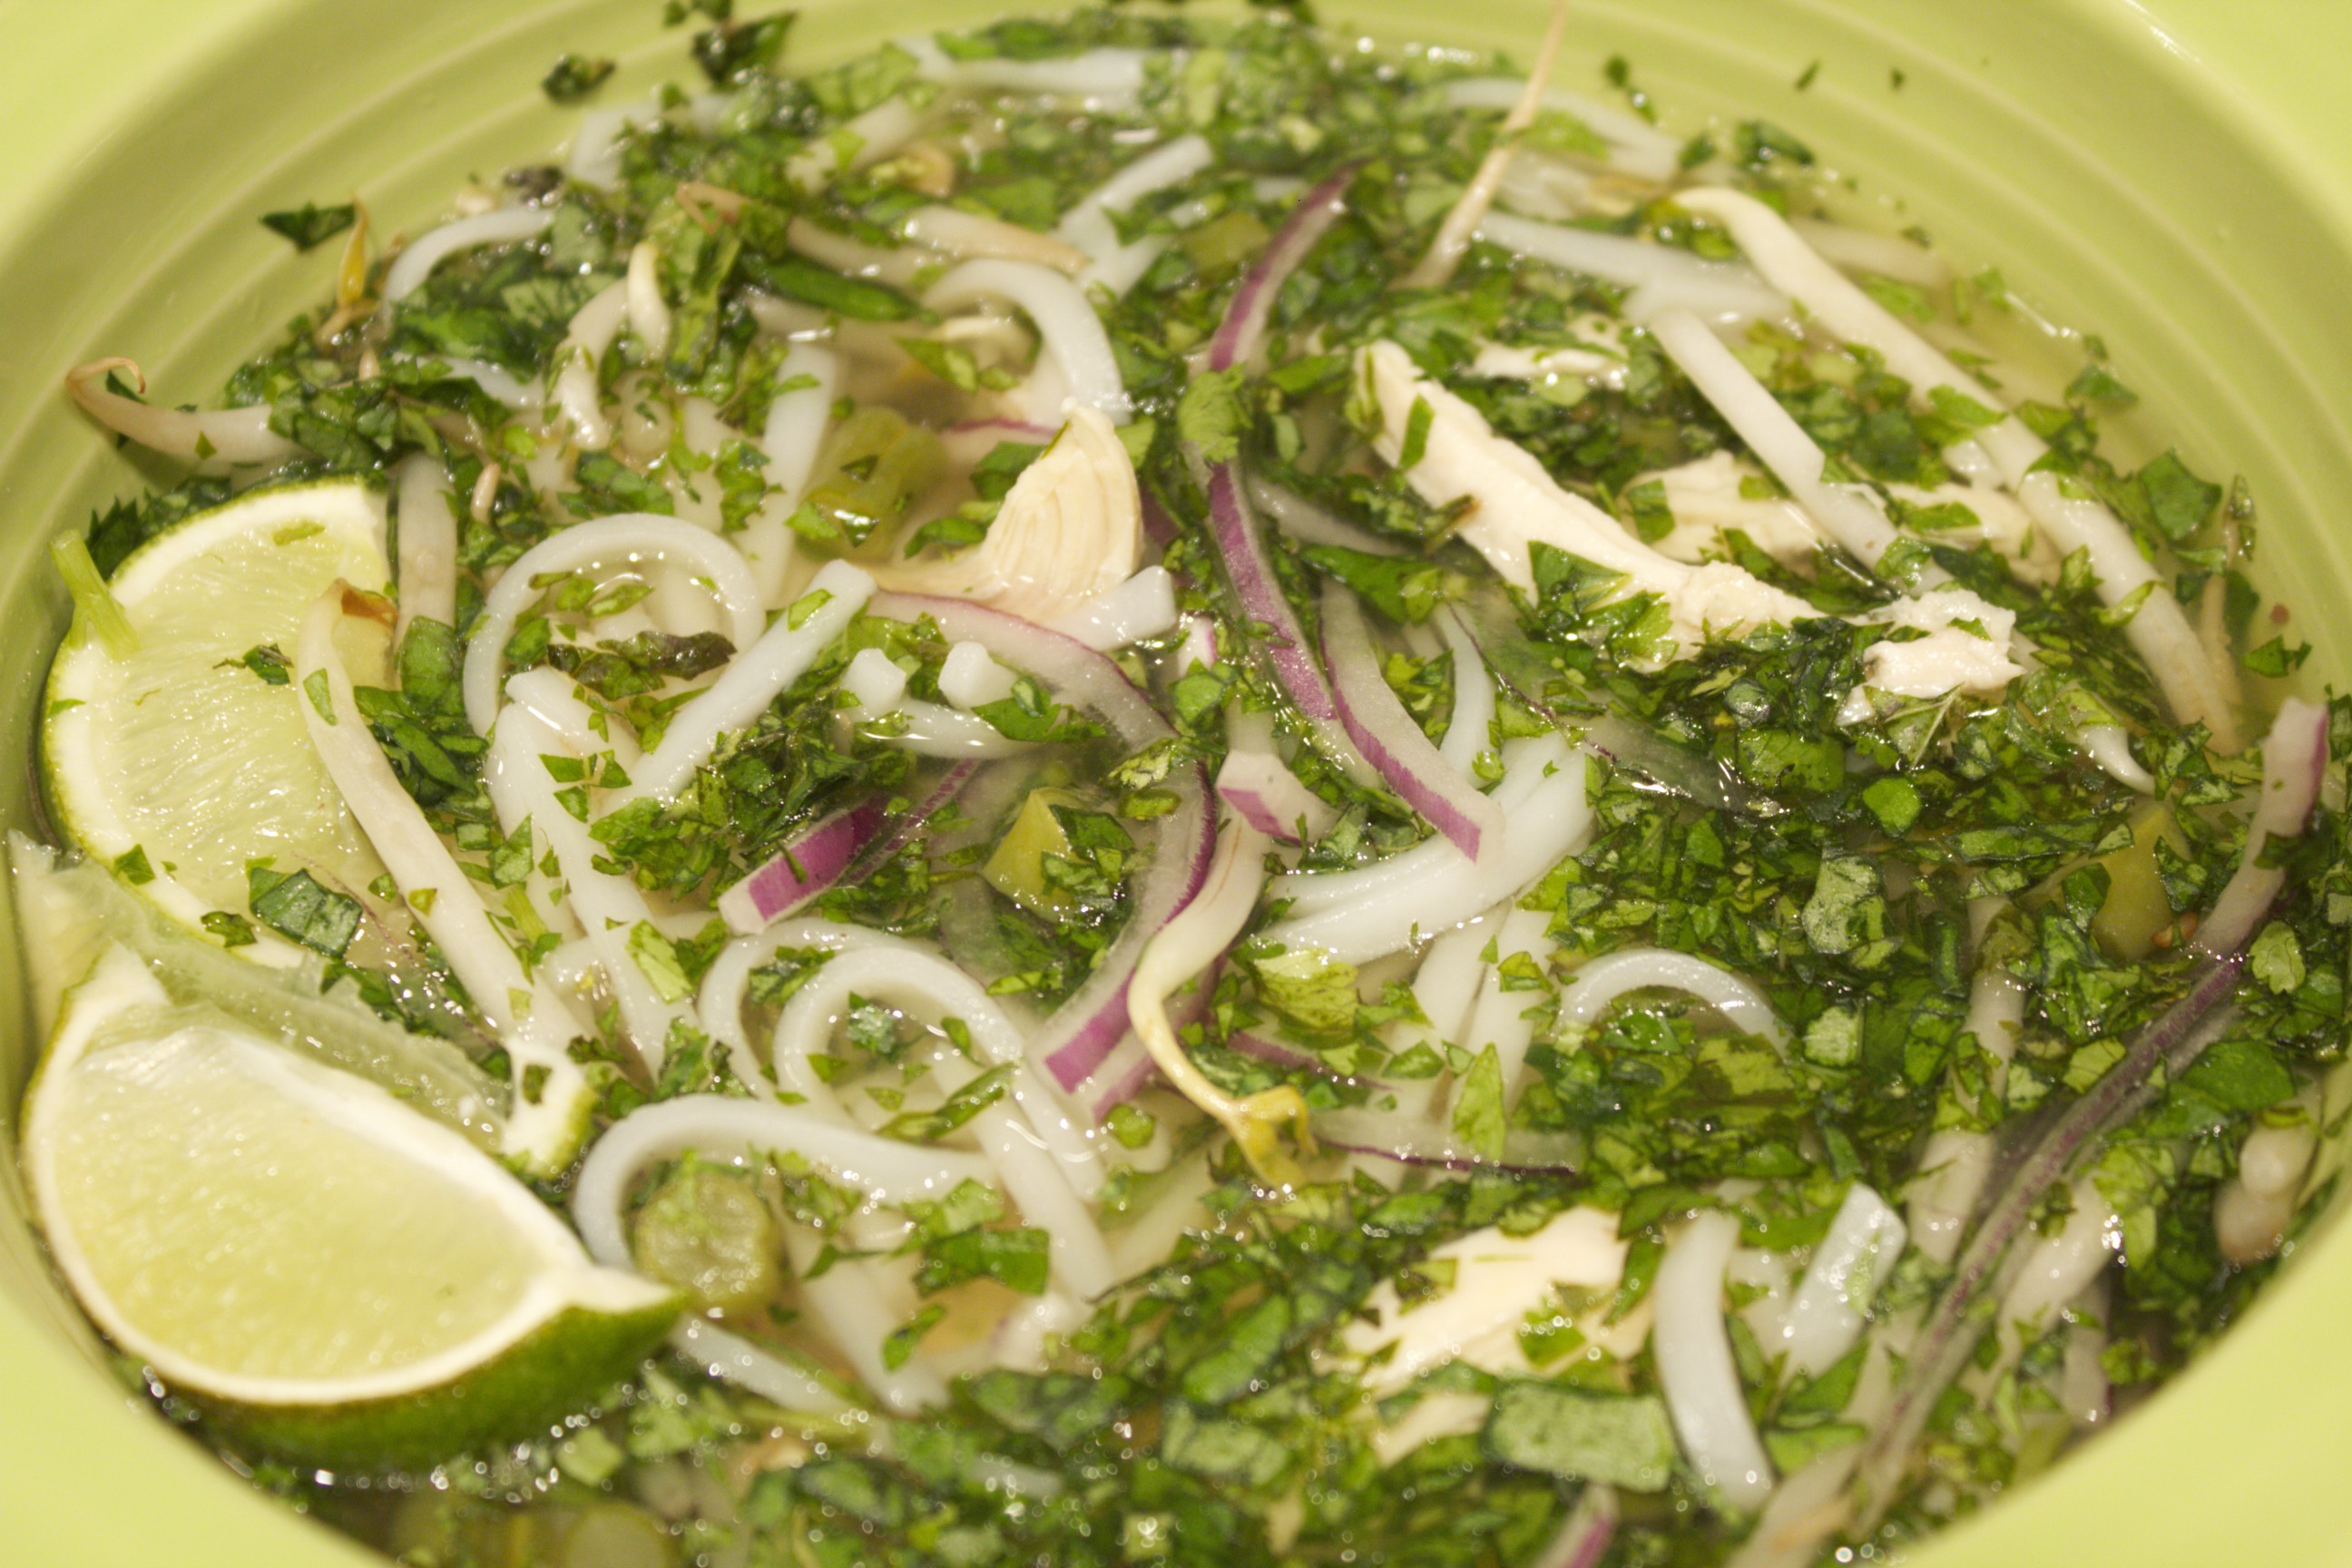 Vietnamese Chicken Pho Share on Facebook and Twitter | Dinner, Gluten Free, Main course | No comments
Cornmeal-Crusted Cod with Fresh Tomato Sauce Miniature tomatoes dazzle in a variety of different sizes, shapes and colors; they are flavorful long after the larger varieties are truly out of season. I love using these miniature packets of flavor to make versatile stove-top sauces. The one that I demo in the video is just as delicious over polenta and simple greens as it is over fish. In the video, I’m demonstrating a single serving of cornmeal-crusted cod, although the tomato sauce is enough for up to four filets. You can swap out the cod for halibut or pollack or any thick white-fleshed fish. Cornmeal-Crusted Cod with Fresh Tomato Sauce I begin with a pint of small tomatoes. I’ve used grape and cherry, or sweet sun-golds—my favorites—when I can find them at my local greenmarket. I often mix a beautiful combination of colors, varieties and sizes. I add to the skillet—besides the halved tomatoes—a teaspoon or so of minced garlic, a couple tablespoons minced shallots, a teaspoon of fennel seeds, a few tablespoons extra virgin olive oil and a splash of balsamic vinegar. I sprinkle a dusting of sea salt and freshly ground black pepper over everything, give it a quick mix, then cover and set the pan aside while I start the fish. I salt and pepper the filet before I dredge it on both sides in cornmeal. When the cast iron skillet (or any other heavy-bottomed skillet will do) is heated, I add a film of coconut oil—unflavored is best—and cook the fish a couple of minutes on each side over medium-high heat until golden. I transfer the pan to a preheated 400˚F oven for 5 minutes to cook the inside of the fish thoroughly. While the fish is in the oven, I turn the heat on the tomatoes and let them stew for 2 to 3 minutes, just until warmed through and juicy. I then stir in a tablespoon or so of minced chives and parsley, which brightens the colors and heightens the flavors. When the fish is ready, I plate it and spoon the sauce over the top. The fish is moist on the inside, crispy on the outside and complemented by the warm tomato sauce. It’s a guest-worthy dish that is easy, seasonal, and delicious.
Share on Facebook and Twitter | Corn, Dinner, Fish, Gluten Free, ingredients, Lunch, Main course, Sauces | No comments
Gluten Free Flours — Part 2 Part 2 Here’s a primer on some of the most useful gluten free flours:
Almond Meal or Flour is ground blanched almonds. It’s great for crusts, as a combo in flours, and as a coating for chicken, fish, or vegetables. Hazelnut meal also makes a tasty nut flour. Nut flours work well in combination with brown rice flours to create a grainy pleasing texture. Almond flour mixed with sorghum flour and a little arrowroot is a good mix for thin tuille cookies. Arrowroot is a root starch thickener, and acts like cornstarch, but is more digestible. Arrowroot is good for thickening sauces and making crispy coatings. Add a couple tablespoons to thin tuille cookie batter to add the necessary gluey component. Amaranth flour is best used in a flour mix (such as 25 per cent of a gluten-free combo) in recipes that do not have a lot of water, such as breads, muffins, or cookies. It adds protein, and tastes nutty and sweet. You can also use amaranth flour to thicken roux, sauces, and gravies. Buckwheat flour is strong and earthy, and best when you want that particular flavor, such as in buckwheat pancakes and waffles. You can also use it as part of a flour combination. Chickpea flour adds protein, moisture and texture. Both the delicious French socca and the Italian chickpea farinata are versions of crêpes made from chickpea flour. Another bean flour combination that is popular now is garfava flour, which is half chickpea flour and half fava bean flour. The mix of beans flours has a less intense flavor than pure chickpea flour. Chickpea flour functions deliciously in baked goods that have strong flavors, such as chocolate, spices or nut butters. (The uncooked batter never tastes good, however.) Bean flours boost the protein content of baked goods, although some people have a hard time digesting them. Coconut flour, also know as coconut fiber, is amazing when it works. Sift it and use in small quantities. It is high in fiber and fat, and low in carbohydrates. Coconut flour is highly absorbent and therefore requires a lot of added liquid to keep baked products moist. You can’t use coconut flours directly to replace wheat flours in recipes, because the recipes don’t call for enough liquid, and the cooking methods cause moisture to be absorbed by the coconut too quickly. It’s best to use recipes that have been specially designed for coconut flour. You’ll notice they all have a high liquid to coconut flour ratio. Muffins made with coconut flour and eggs make a great low-carbohydrate high-energy breakfast, perfect for those on the go. Make sure to refrigerate baked goods made with coconut flour. Cornmeal is great for corn muffins, bread and pancakes, and is a wonderful flour to use for dredging. Use it in combination with rice flour or quinoa flour for excellent light muffins. Purchase the stoneground variety in natural food stores. Millet flour is high in protein. Add it in small amounts, in combination with other flours, to boost the nutrition in baked goods. Potato Starch is a thickener, and it is used to add moisture to baked goods. It can tolerate higher temperatures than arrowroot. Quinoa flour is a good source of protein, gives baked goods a nutty flavor, and adds moisture to gluten-free baked goods. It has a somewhat bitter taste, but is excellent in combination with other flours. Try it with cornmeal in muffins or quick breads. Rice Flour includes three types: brown, white, and sweet rice. All are mild- flavored. Brown rice flour, which is the most nutritious, has a somewhat gritty texture. You can use the grittiness to advantage by combining it with nut flours, such as almond or walnut, to make baked goods with a pleasant nutty crumb. Rice flours, both white and brown, make excellent roux. Sweet rice flour is called glutinous flours, but doesn’t contain gluten. It is a good thickener; you can coat foods with it before sautéing, and small amounts added in baked goods improve the texture. Sorghum flour is high in protein, and has a wheat-like taste. It is becoming very popular in the gluten-free community, since it has a neutral flavor and adds great texture to baked goods. It isn’t gritty like brown rice flour, and doesn’t have the beany flavor of chickpea. You can use it in a gluten-free flour mix; and in many recipes it works well by itself. Tapicoa flour is a flavorless, high carbohydrate starch, and is low in nutrients. On the up side, it is a good binder in baked goods when used in combination with other flours. It is a reliable thickener for sauces and desserts, and is included in batter coatings to make crisp, golden crusts. Teff flour has a nutty, almost sweet flavor, and imparts moistness in gluten-free baking. Use it in small quantities to improve the nutritional quality. Xantham gum is a common ingredient used in gluten free baking to improve the binding quality, which is lacking. The amount that usually works is ¼ teaspoon per cup of flour for cakes and ¼ to ½ teaspoon cup per flour for cookies, quick breads, and muffins. For baked goods that require kneading, 1 to 2 teaspoons per cup flour is needed. Guar gum can be used in place of xantham gum. Keep in mind that it is a good idea to combine the more nutritious gluten-free flours with the high starch flours to improve the nutritional quality. Soy flour, which is commonly used in gluten-free baking, is difficult to digest, and therefore not recommended. Sorghum flour can substitute for soy flour in most recipes. Here are some simple mixes that you can keep on hand. Make up a canister; and for best results, keep it refrigerated. Have fun experimenting with your favorite recipes. For muffins and quick breads try equal parts sorghum flour, tapioca flour, and brown rice flour. For an all-purpose combination, try 2 cups rice flour, 2/3 cup potato starch, 1/3 cup tapioca flour, and 1 teaspoon xantham gum. Share on Facebook and Twitter | Gluten Free, Grains, ingredients | No comments
Gluten Free Flours – Part 1 Before examining the ins and outs of the different gluten-free flours, it’s good to have a basic understanding of gluten and its properties. You are then in a better position to make an informed choice when deciding which of the gluten-free flours or mixes will be appropriate for your particular dish. As a quick review: note that the flours that contain gluten include barley, rye and wheat, including the unhybridized varieties, such as spelt, kamut, and farro. Gluten-free oats can be purchased, but not everyone on a gluten-free diet can tolerate them. If you’re not sure about oats, it’s safer to leave them out of your diet. Gluten is what makes dough stretchy and doughy, and in the case of bread, helps the dough to rise. Flours that contain gluten actually have two proteins in them by the name of glutenin and gliadin. These only turn into gluten when they come in contact with liquid. The more water added to the flour, the more gluten, and the chewier the dough. Kneading makes gluten molecules in dough form into long elastic strands, so how much the dough is kneaded also makes a big difference in the degree of elasticity. Added yeast gives off gasses that are trapped by sheets of gluten molecules, causing the dough to rise. Different types of wheat dough contain different amounts of gluten. Bread dough has a lot, pastry dough a little. In addition, pastry dough contains additional fat, with only a little water, which is mixed in briefly, so that the gluten strands are just barely formed. Wheat is especially versatile. It is used as a thickener in pies, sauces, and roux, as well as a crispy coating for sautéed items. It is common for a recipe to call for dredging an item in flour before sautéing it to make a crispy coating. When it comes to substituting gluten-free flours for those with gluten, there is no “magic blend” that works for all recipes. You need to consider whether you need a thickener, a binder, or just simply structure. Gluten-free flour mixtures (as opposed to a quantity of a single variety) work best in many instances, since a combination of flours will contribute different properties. You can buy a commercial mix, or keep the flours on hand to make your own. In some instances, however, a single flour will do the job. I’ve used almond flour, sorghum flour, brown rice flour, chickpea flour, and coconut flour successfully in recipes. When you need to thicken a sauce, the root starch thickeners, such as tapioca or arrowroot, work well. You can coat items in arrowroot, tapioca, rice flour, or cornmeal to get delicious crispy crusts. Since tapioca and rice flours tend to give baked goods structure, these are common in flour blends. Gums, such as xantham gum or guar gum are used to create the sticky binding effect that gluten has. They are not always necessary, especially if there are eggs in a recipe. Although people vary the amount of gum added, a good rule of thumb is a ratio of ¼ teaspoon xantham gum per cup of flour for cakes, ¼ to ½ teaspoon for cookies, quick breads and muffins, and 1 to 2 teaspoons per cup of flour for items that require kneading. Sometimes gluten-free baked goods do not hold up as well as those containing gluten, so the use of muffin tins or bread loaf pans can be helpful. Note that the addition of warm liquid helps to give structure to your baked goods, and it is always best to add your liquid slowly. If you are using a blend of flours, it’s a good idea to sift them together in order to make sure that you don’t end up with unmixed pockets of leavener or flour. Keep gluten free flours in the refrigerator, if you have the room, for up to four or five months, or in the freezer for up to a year. Most of the time, 1 cup of wheat flour can be substituted for 1 cup of a gluten-free flour, but there are some notable exceptions. The biggest difference is that you have to use only half as much nut flour in your recipe. You can grind your own grains in a high power blender or a spice grinder. It is easiest, however, to use readymade flours. The following flours can be purchased readymade: 1 cup Wheat Flour Equals: Amaranth – 1 cup Bean Flour – 1 cup Cornmeal – 1 cup Gluten free flour mix – either home made or commercial – 1 cup Millet Flour – 1 cup Nuts (finely ground- almond, hazel nut)- ½ cup Oat Flour – (only if gluten free) 1 1/3 cup Potato Starch – ¾ cup Quinoa Flour – 1 cup Rice Flour (White/Brown)- 7/8 cup Sorghum Flour – 1 cup Sweet Rice Flour – 7/8 cup Tapioca Flour/Starch – 1 cup Teff Flour – 7/8 cup Share on Facebook and Twitter | Gluten Free, ingredients, Kitchen Items/Gadgets | No comments
|