|
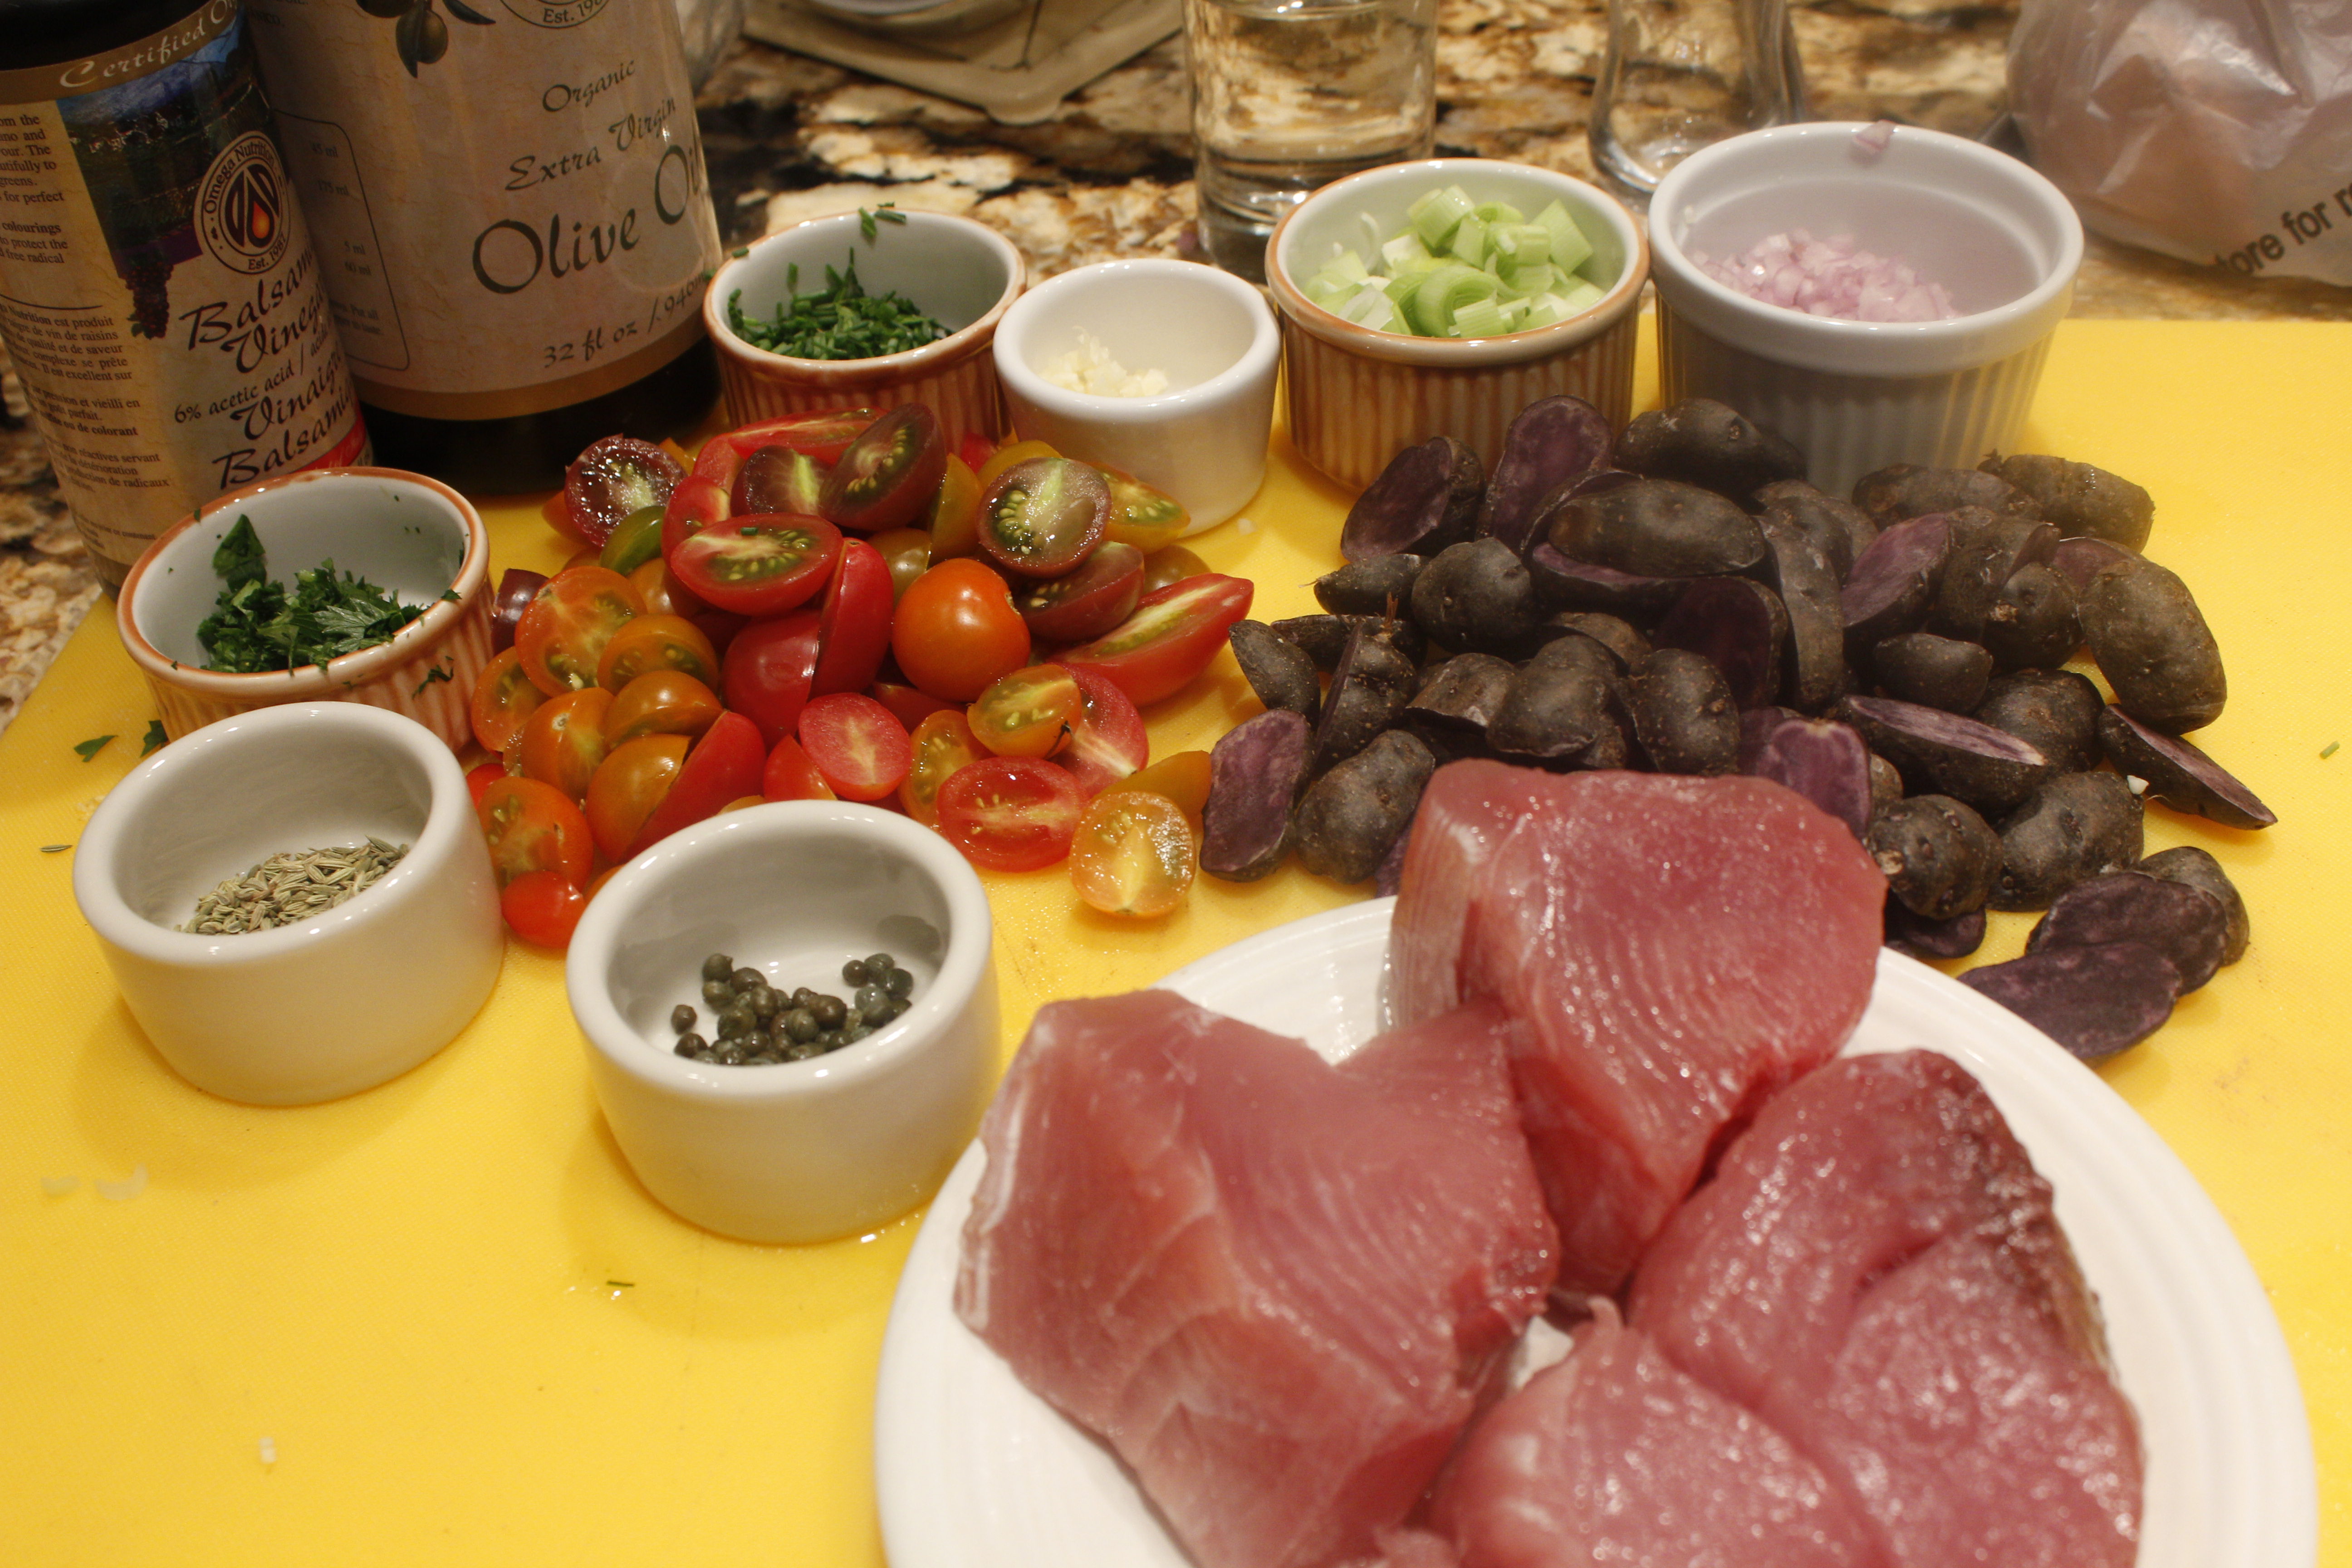
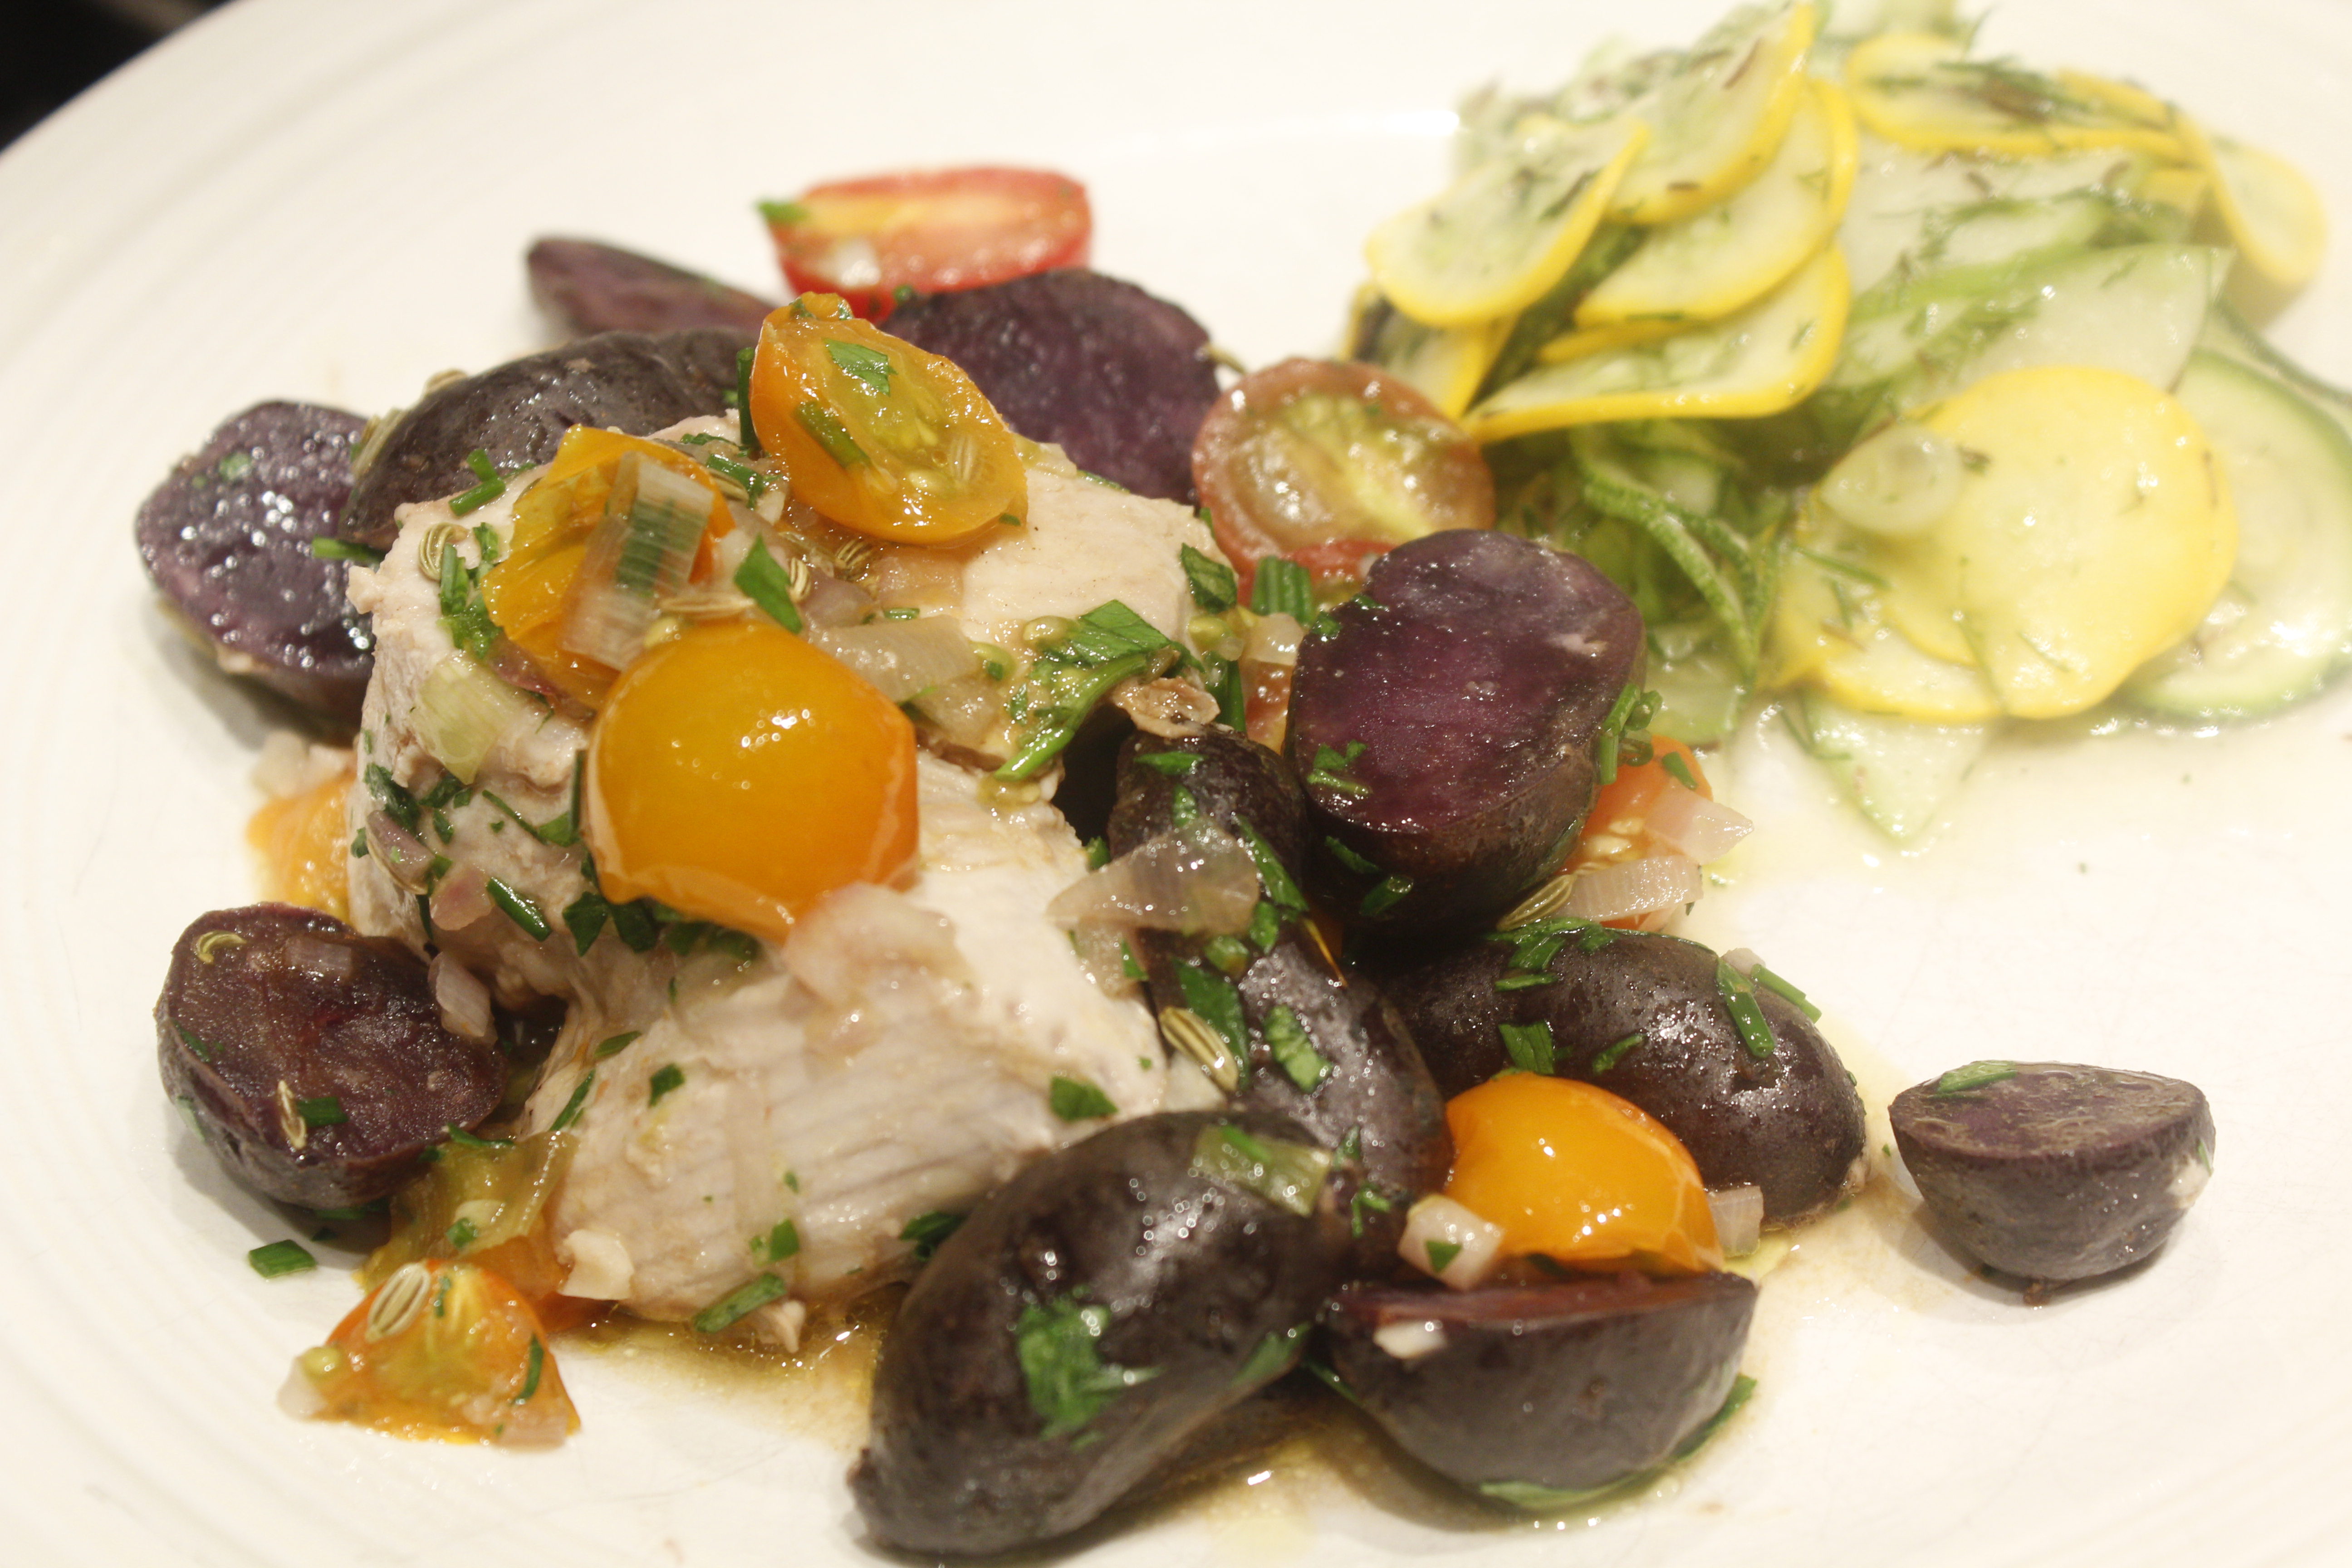
Sun-gold Tomatoes with Purple Peruvian Potatoes Recently, the greenmarket has had beautiful thick slabs of fresh tuna caught off the coast of Long Island. Bins of purple Peruvian potatoes have beckoned me as well. I love their appealing purple flesh and the fact that they are something like 40 times more nutritious than white potatoes. The summer sun gold tomatoes taste like candy, so I haven’t been able to resist buying scores of those. I started the dish in a large pan with a few leeks, then added the potatoes, and cooked the whole lot for about five minutes in a dollop of extra virgin olive oil. I then added the halved tomatoes, shallots, garlic, capers, balsamic vinegar, a bit more olive oil and the tuna. It took only four minutes to cook the dish. I then sprinkled the dish with chives and parsley before serving.
I served the tuna with a thinly shaved zucchini and apple salad with dill and black cumin. It was a delicious lunch!
What I’ve been cooking this week: Breakfast I’ll be teaching a workshop on traditional foods in March at the Natural Gourmet, which will include bone broths and lots of stuff to do with them, as well as lacto-ferments. I’ve been making loads of lacto-ferments lately, with ruby kraut and beet kvass being among my favorite. Here’s one of my go-to breakfasts that includes those two ferments as well as my favorite coconut muffins. These coconut muffins have a healthy amount of tumeric added to them, which serves to give them a vibrant yellow color as well as an anti-inflammatory boost. I split the muffins open, add a dollop of coconut oil and a slab of smoked salmon, and accompany it with the homemade ruby kraut (cabbage, caraway, carrots) and the beet kvass (beets that have fermented with whey, garlic, and ginger.) This is a light, energizing, vibrantly-colored breakfast. (All that deep pink!) To make beet kvass, all you have to do is chop up a beet, grate some ginger, and chop up a clove or two of garlic if desired and add it to a 2-quart jar. Add 1 cup whey (the liquid left when you drain yogurt over a cheesecloth-lined strainer), 1 tablespoon of a very good salt such as celtic, and fill the rest up with water. Leave a one-inch space at the top of the jar, seal the jar tightly, and ferment for 2 to 5 days on the counter. Transfer it to the refrigerator and leave for a couple of weeks. Then strain the liquid if you like and drink a few ounces a day. It will give you a great boost! 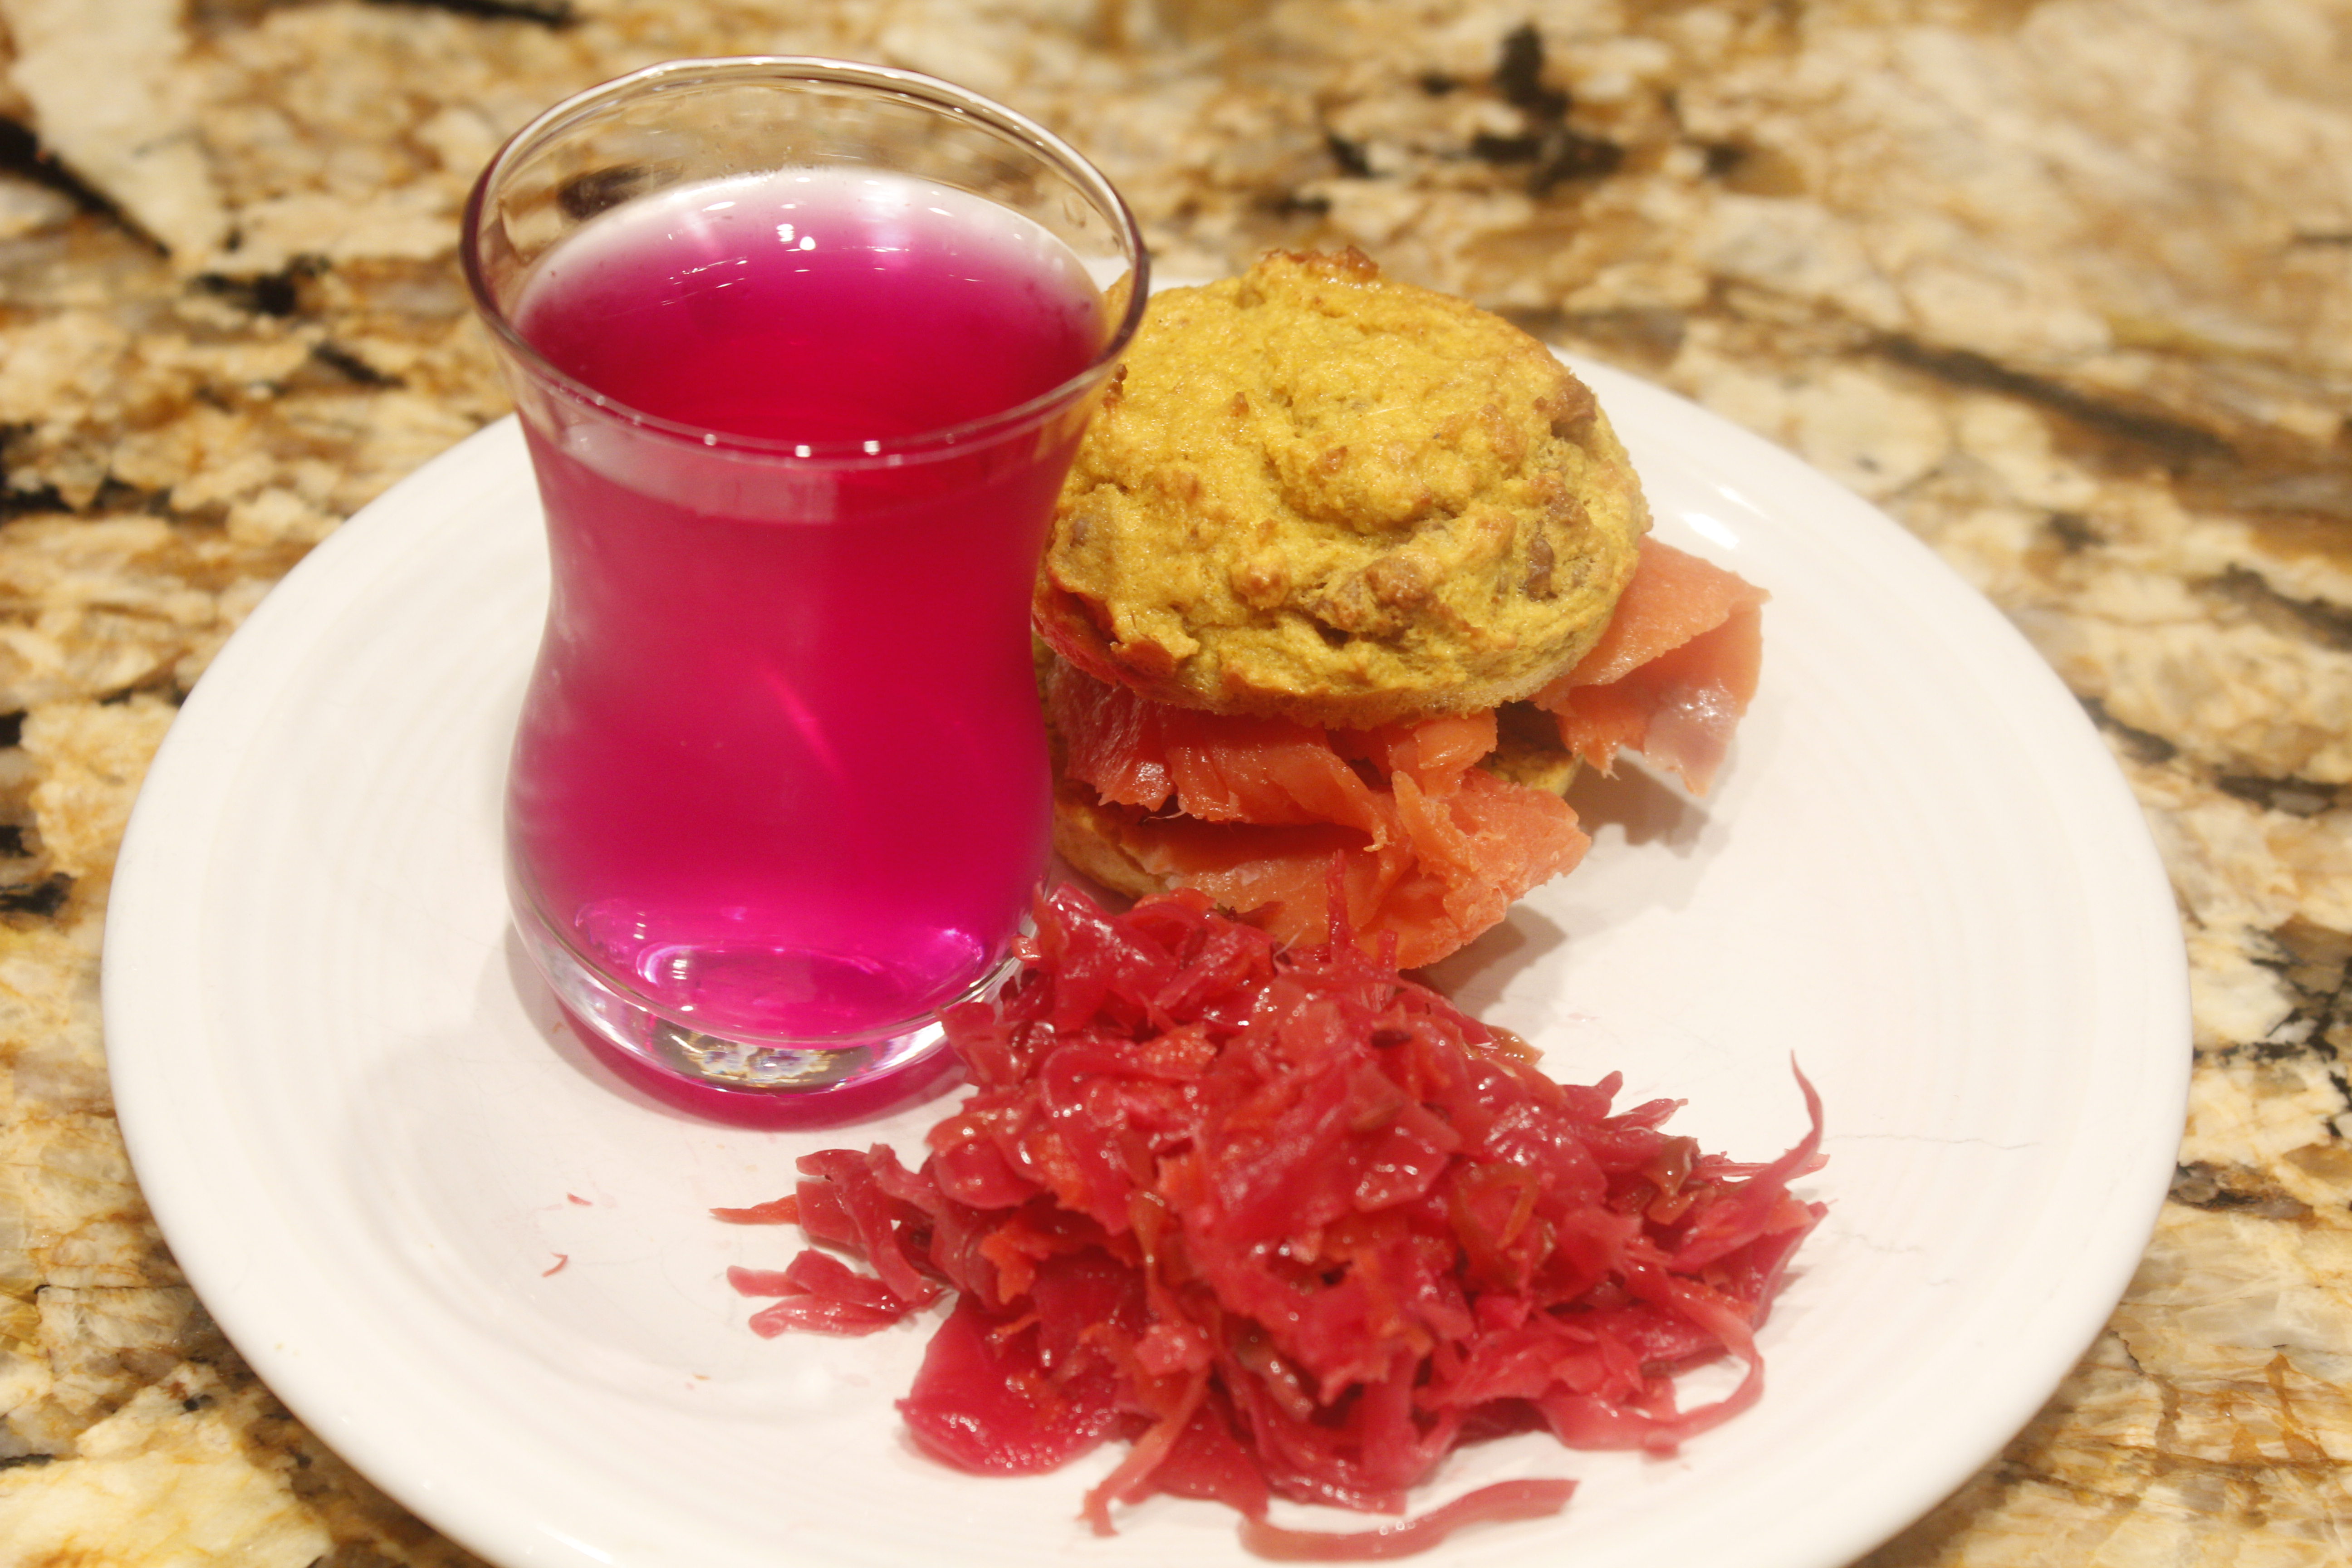 Coconut muffin with smoked salmon, ruby kraut, and beet kvass. Share on Facebook and Twitter | Beverages, Breakfast | No comments
Culinary Roulette Peppers The first time I tried a shishito pepper, I thought that they were unbearably hot. I didn’t know at the time that only about one in ten is hot, while the rest are mild and flavorful. This experience kept me away from these delicious peppers for a good couple of years, until I was seduced by the gorgeous overflowing bins at the Union Square greenmarket. Fortunately, I finally gave them another try, and have been happily eating them ever since. Not only do shishito peppers abound right now, there are another two varieties similar enough that they can be treated the same way. Here’s the rundown on the different types: There’s the shishito pepper, which are very aromatic. They have little ridges. 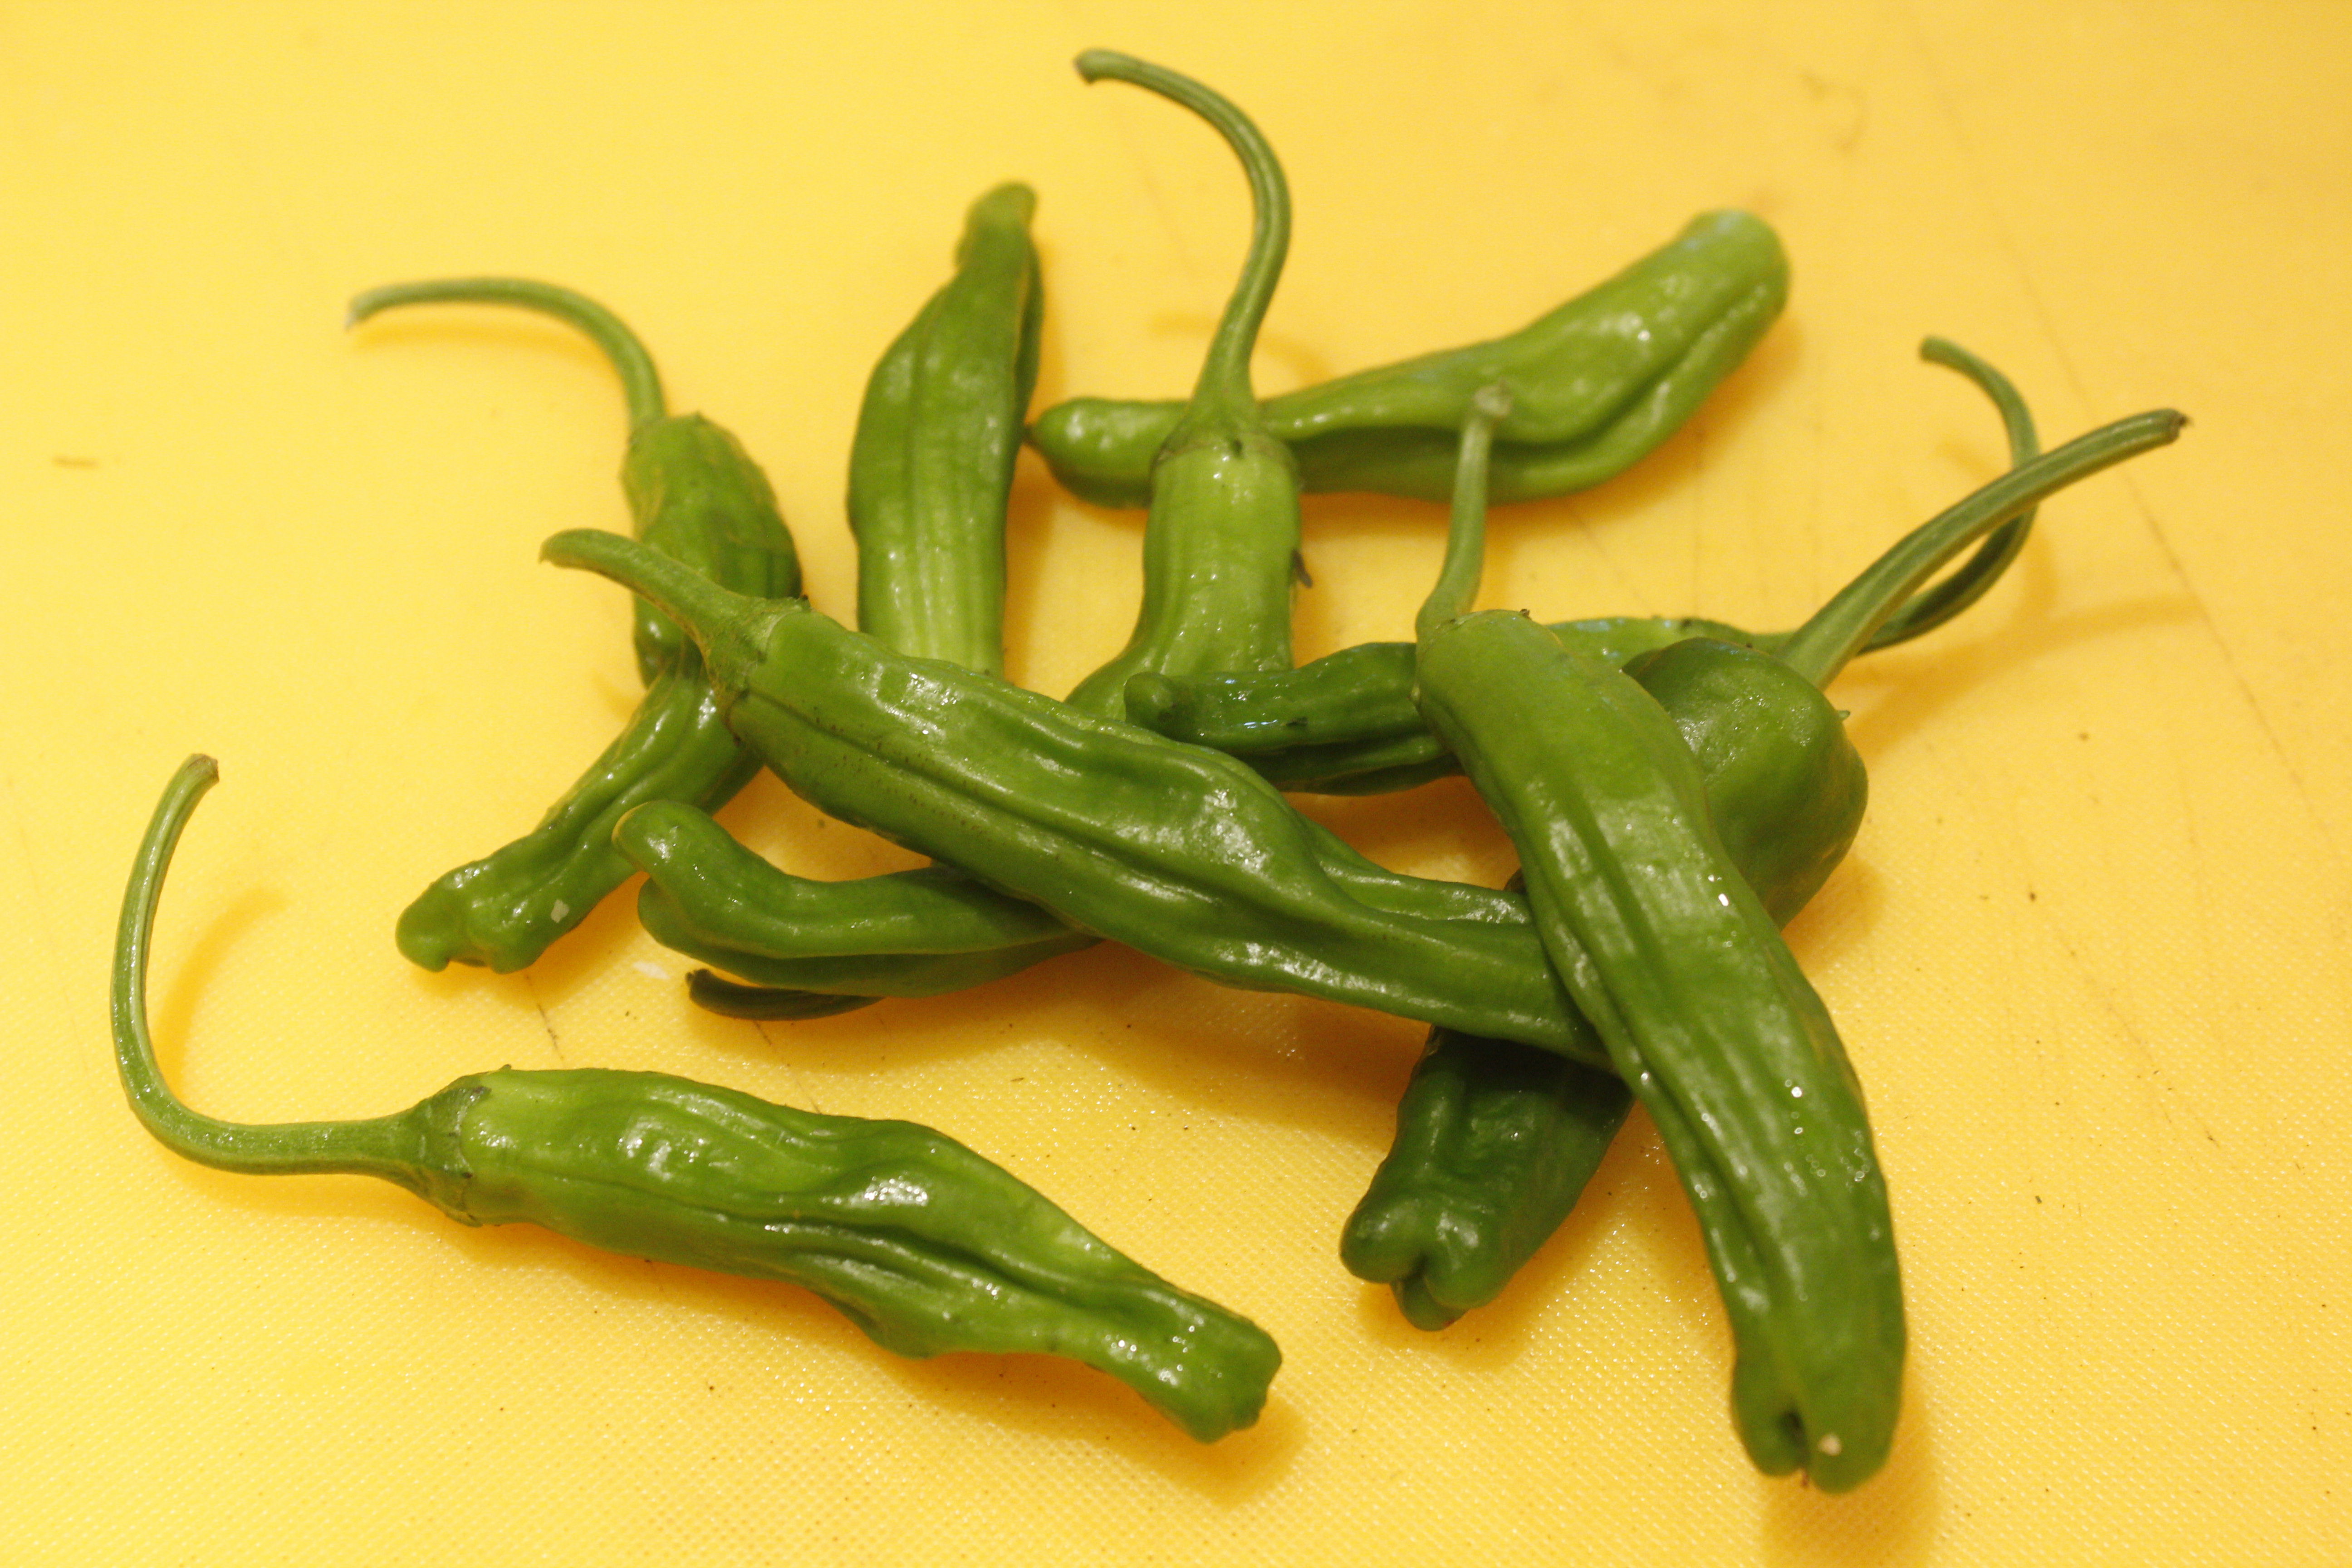 Shishito Peppers A pepper that competes with the shishitos is the Fushimi pepper. They have an even crispier skin and texture. You can eat these raw as well as cooked.  Fushimi Pepper Another squatter horn-shaped pepper with similar characteristics is the Pimento de Padrón, the heirloom variety from Spain. 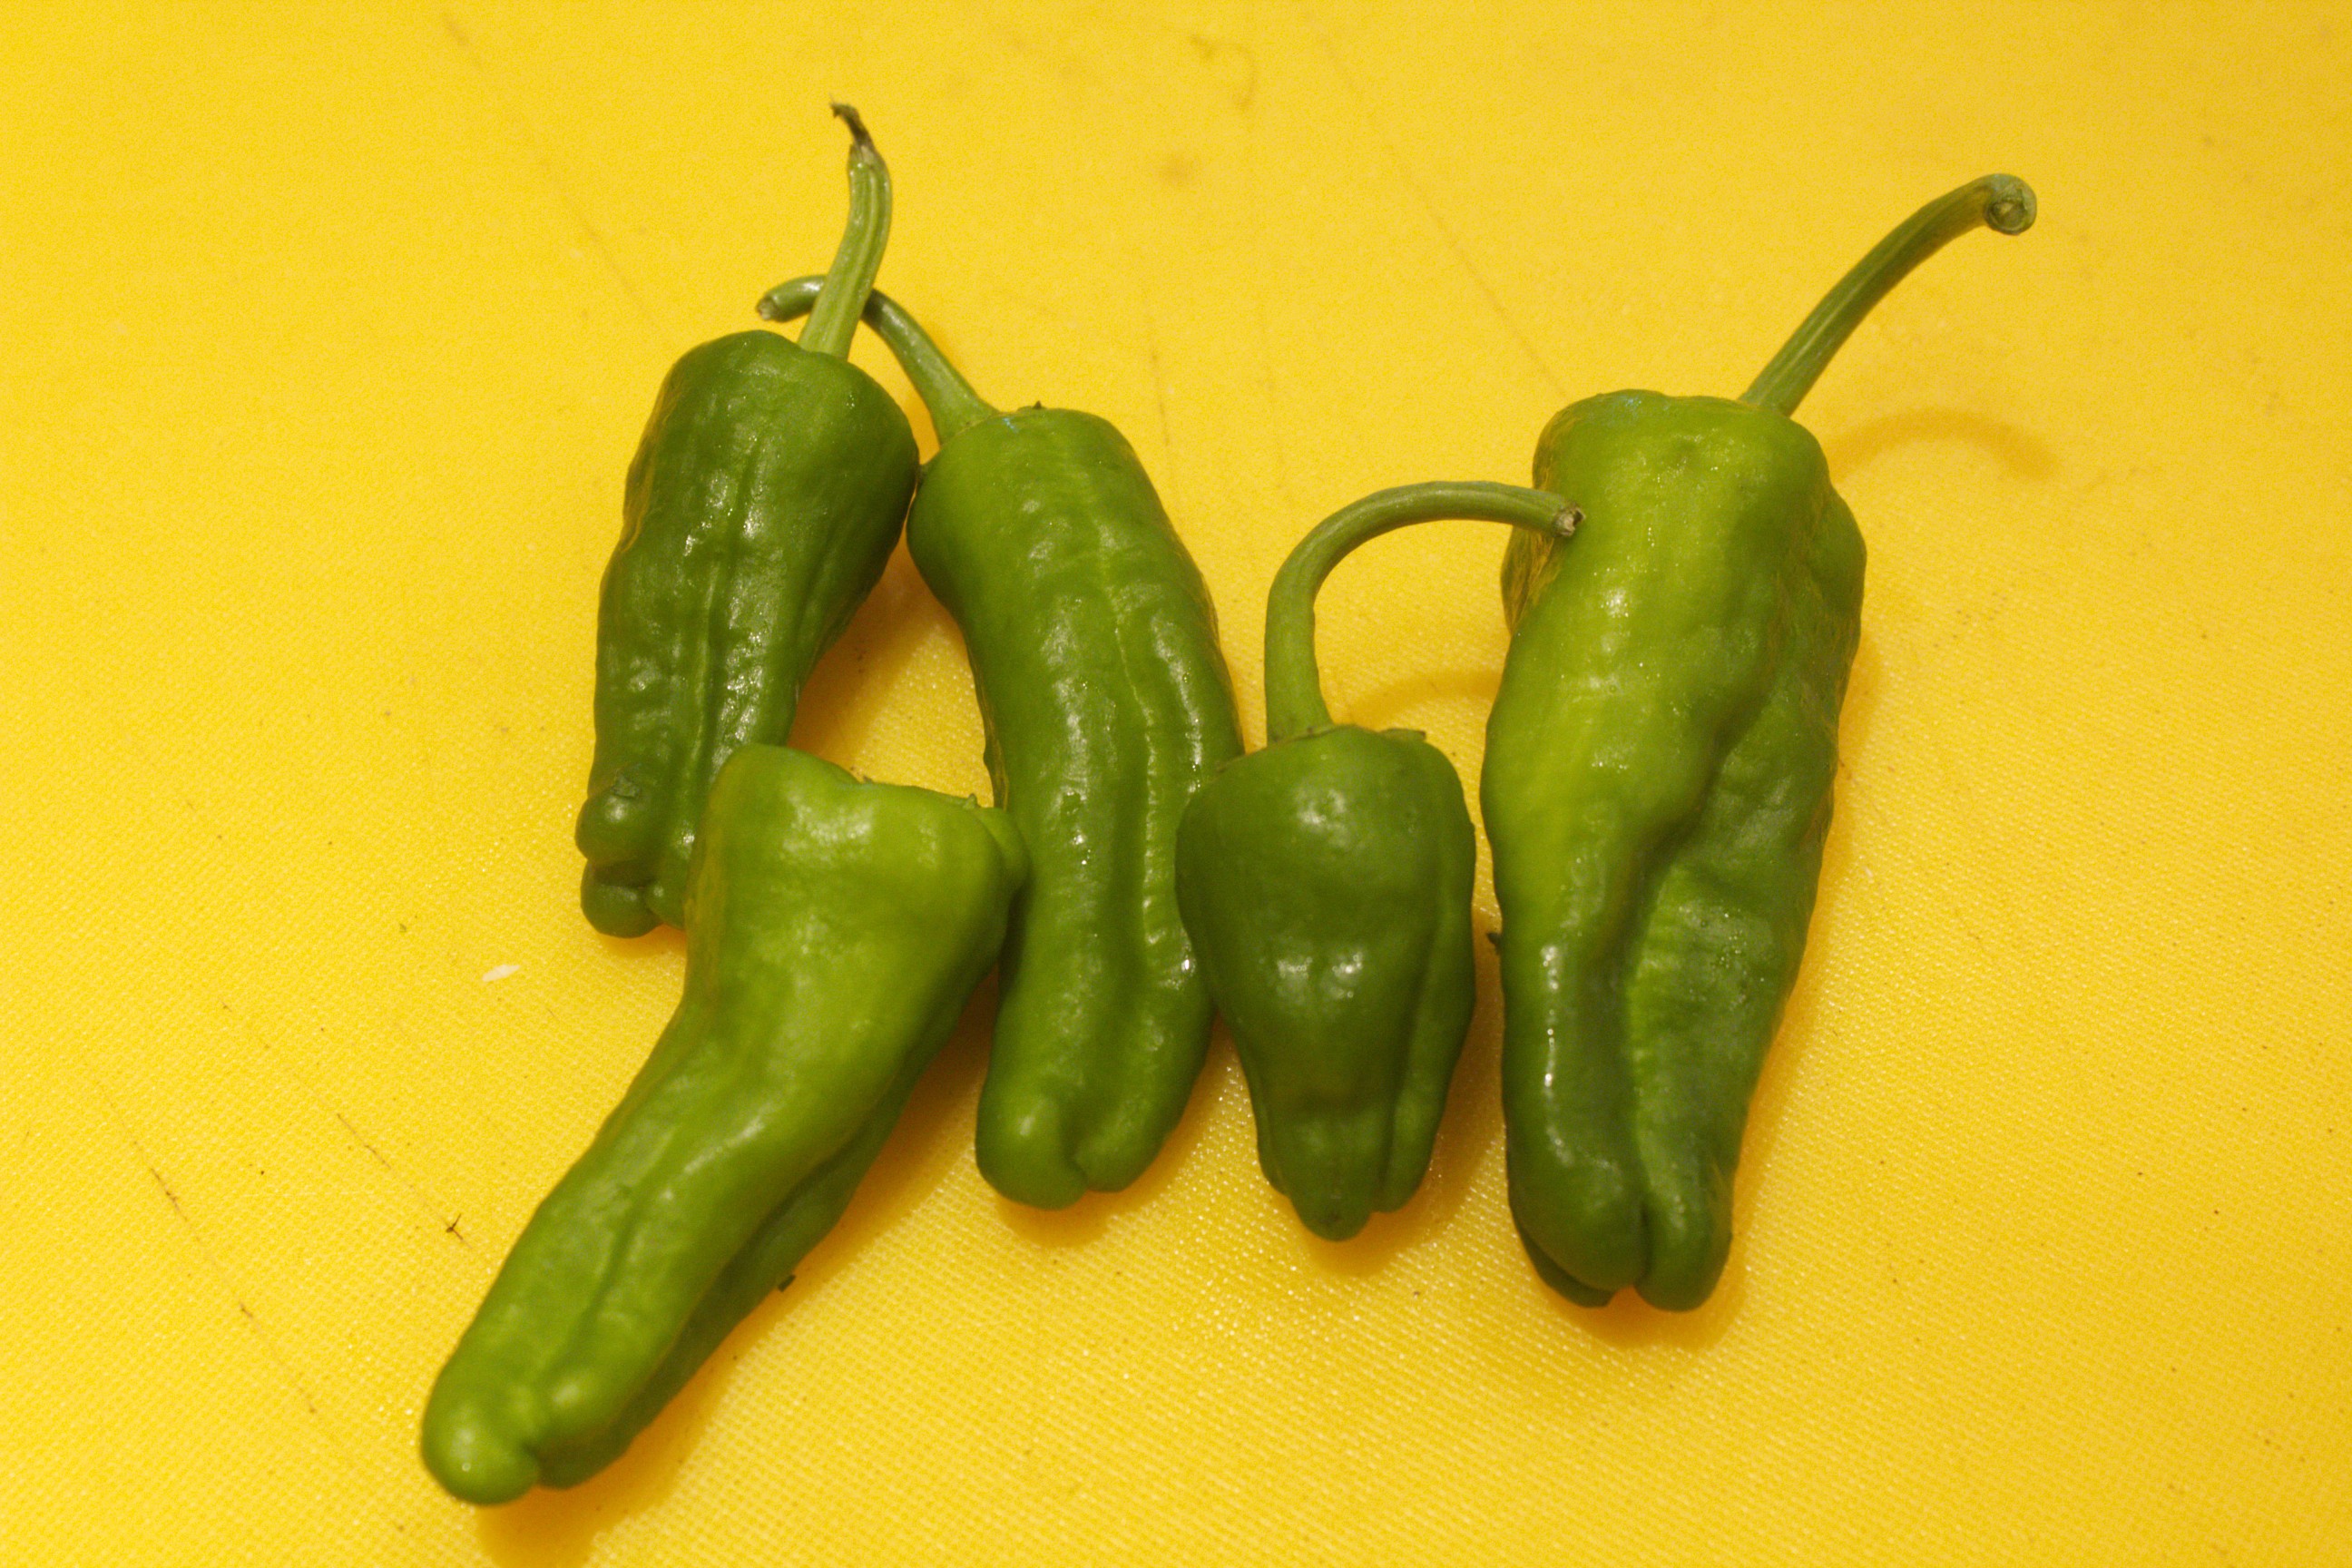 Pimento de Padrón All of the peppers have a lot of health benefits: high levels of vitamin A and C and carotenoids like lutein, which is helpful for maintaing healthy hair and skin, as well as providing resistance to colds. These retain their vitamins when they are pickled as well. My favorite way to cook all of these peppers is to toss them into a hot skillet that is filmed with oil and simply blister them. I then toss them with a course salt. Lately, I’ve been tossing them with lapsong souchong salt, so they have a delicious smokey tea flavor. 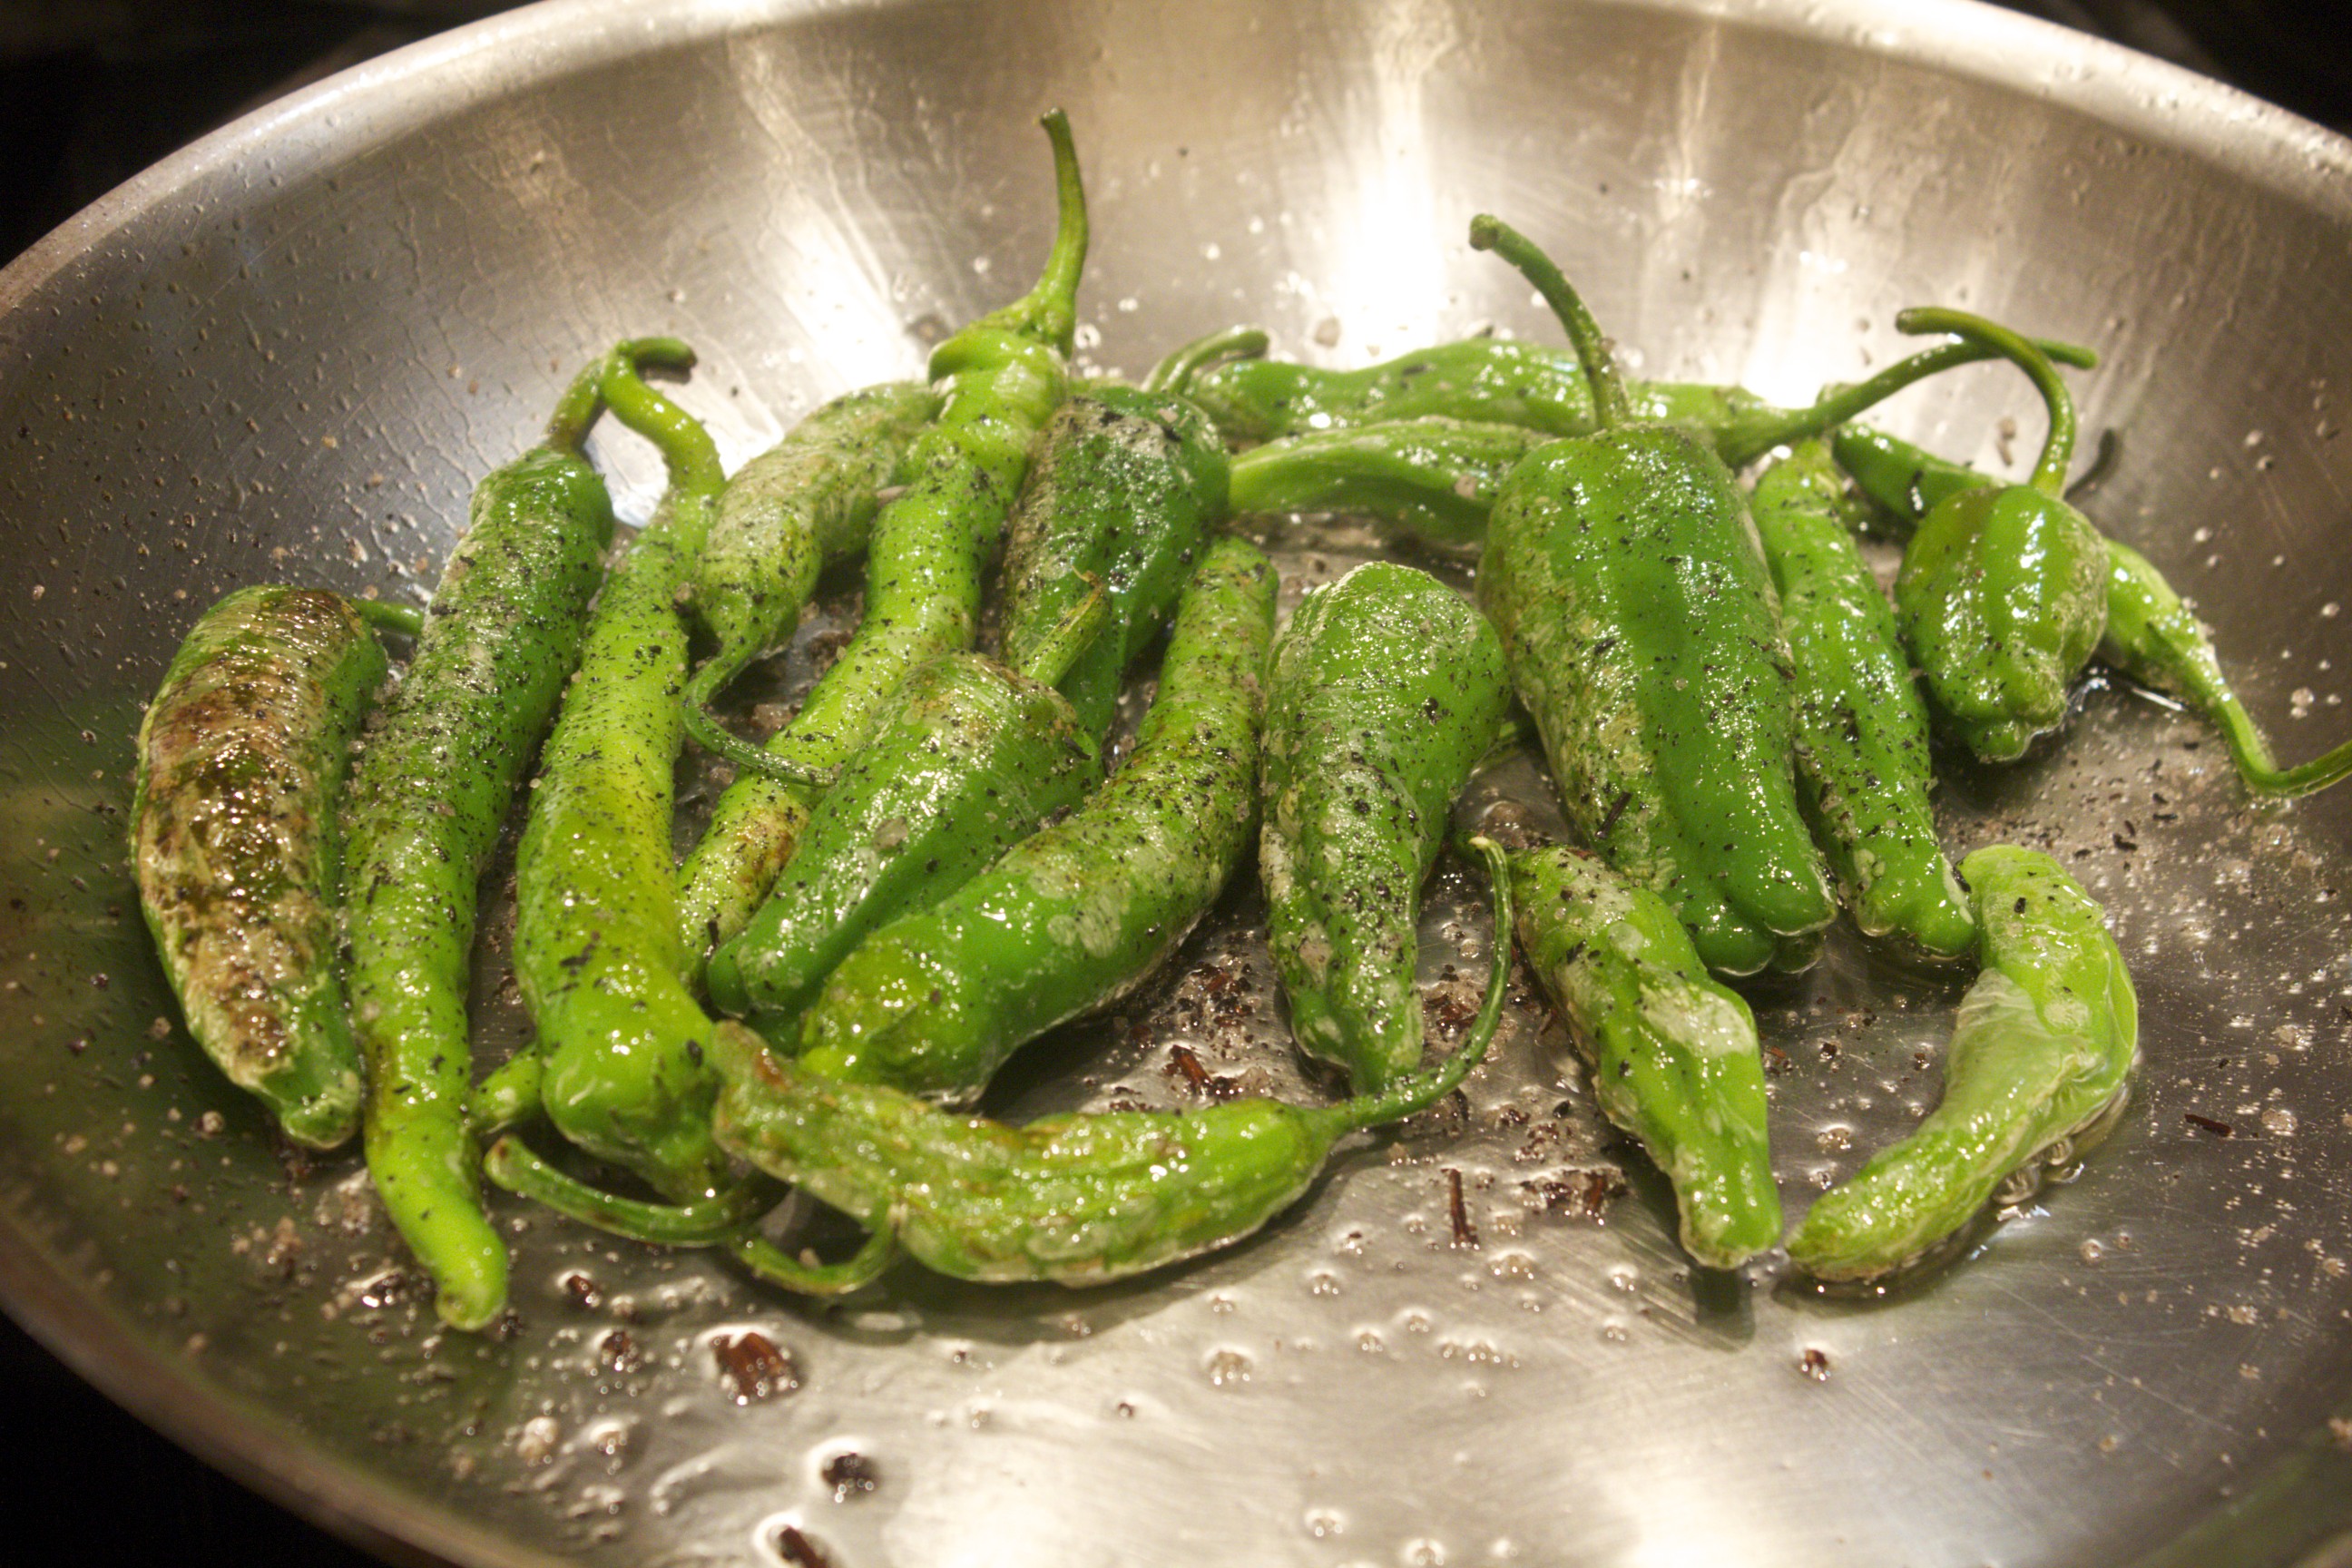 Blistered Peppers For more ideas on exciting salts, visit The Filling Station in Chelsea Market, where you can choose from a variety of flavored coarse salts. All of these peppers make for an exciting game of culinary roulette. I like to serve these to guests sitting around the table and watch their faces as they eat them. Since most of the peppers are sweet and mild, it’s a bit of a surprise when you get that one zinger in ten that is picante. Proceed with caution, and take a small first bite! Share on Facebook and Twitter | Health Tips, Side Dishes, Vegetables | No comments
Stress-Free Entertaining Last week I taught a class in stress-free entertaining. The night before I made food for a party of six with this concept in mind. While hassle-free entertaining might seem difficult to achieve, it is more than possible during the summer. The key is designing a room temperature menu. Nothing has to be juggled on the burners or in the oven at the last minute. Each dish is laid out on a serving dish, making the meal look like an extravagant antipasto bar. You can go over the top and make a huge variety of dishes, like I did for the party the night before my class. This kind of menu lends itself to easy transport as well. Happily, all the dishes packed up well. When they were all laid out on serving dishes, the guests were astounded and delighted at the variety (and of course the flavors!). Here’s some of what was included in the two nights: Poached salmon: Salmon is in season from May through October and well-priced wild Alaskan salmon is readily available. On Wednesday night I poached steaks in a cort bouillion of onions, leeks, carrots, celery, white wine, sliced lemon, thyme, parsley, peppercorns, and bay leaf. I cooked the stock for 25 minutes, then poached the steaks for 10. I served them with the mustard-dill-cucumber sauce from The Healthy Hedonist. We made this in class as well, only we sliced thick fillets into 1-inch pieces, and rolled them into even rounds that we tied with strings.  Poached Salmon Steaks Roasted Cauliflower with Fennel and Garlic Cloves. I used a variety of white and bright yellow cauliflower.  Roasted Cauliflower with Fennel and Garlic One basic crowd-pleaser was heirloom tomatoes with sliced fresh mozzarella with basil chiffonade, balsamic and olive oil. 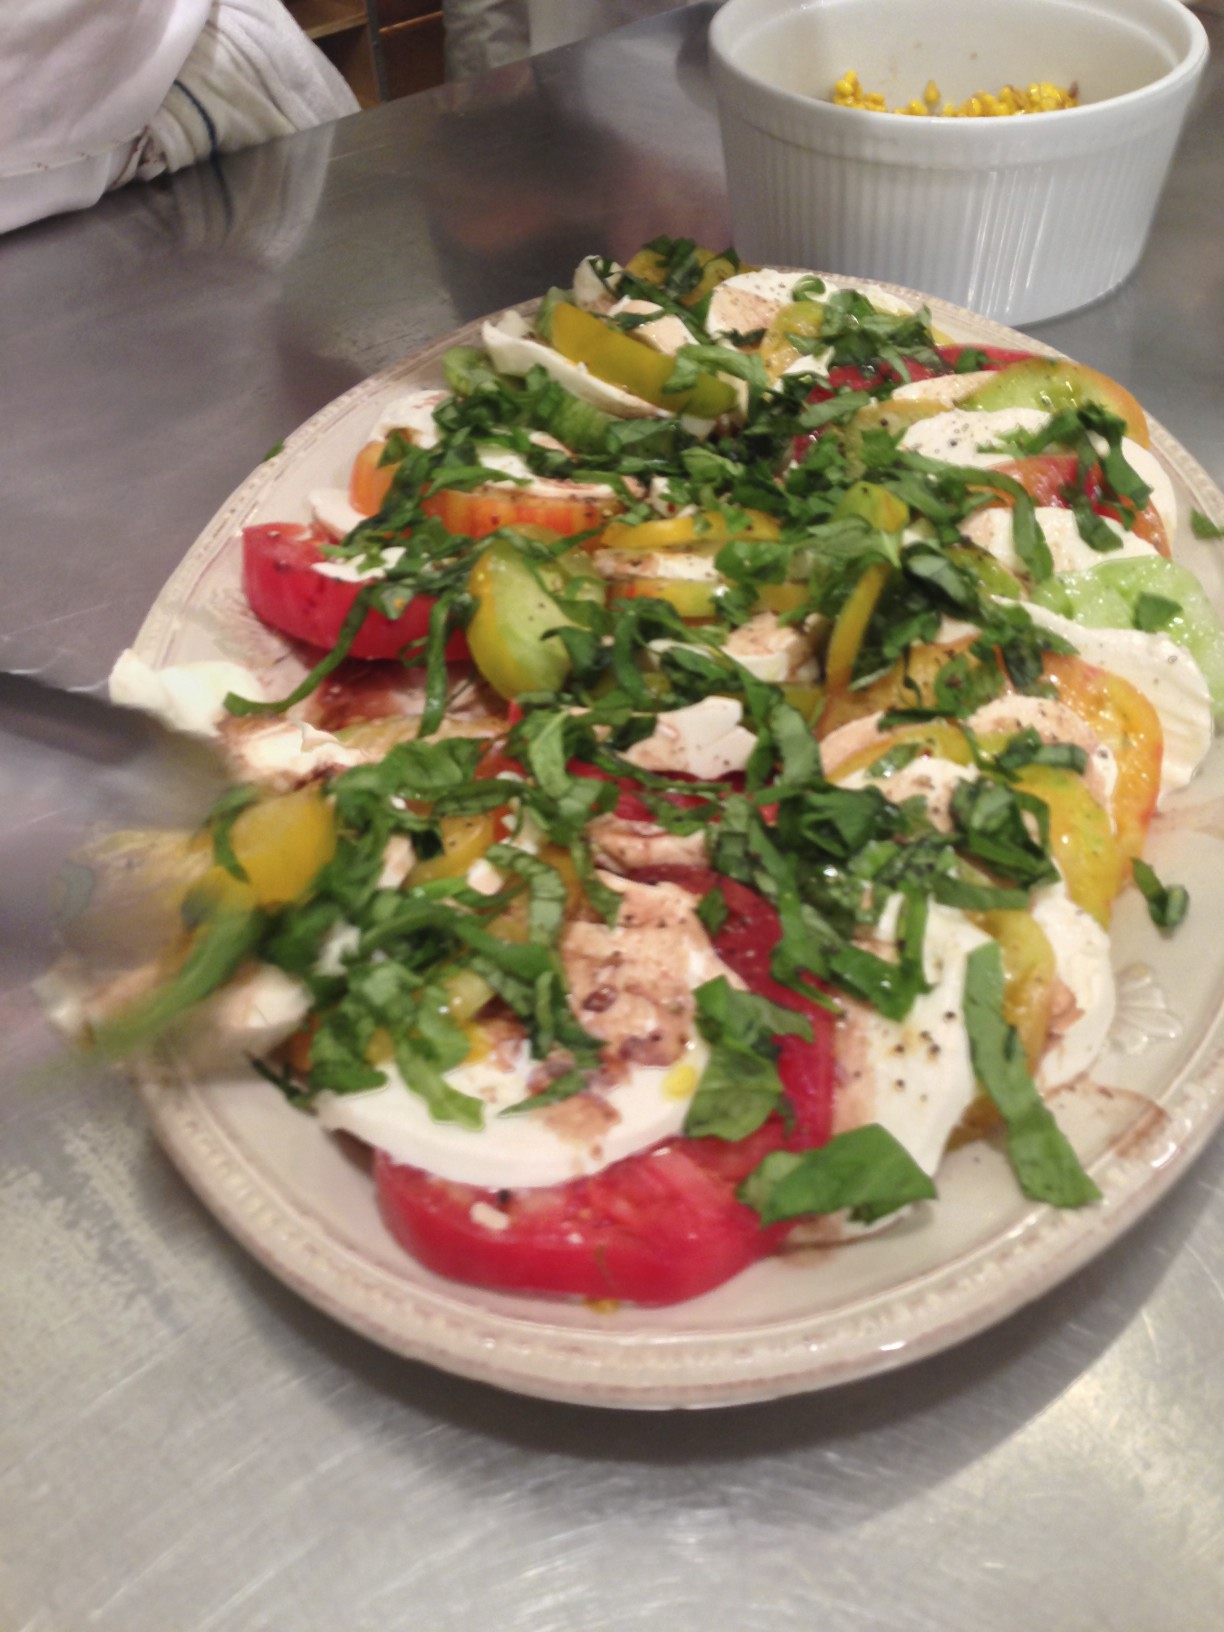 Mozarella and Tomatoes with Basil Beets with fig-balsamic vinegar, walnuts, and purslane.  Beets with Fig Balsamic, Walnuts, and Purslane Sautéed shallots and corn, pan deglazed with balsamic vinegar.  Sautéed Corn and Shallots with Balsamic Vinegar Marinated roasted red peppers with anchovy breadcrumbs.
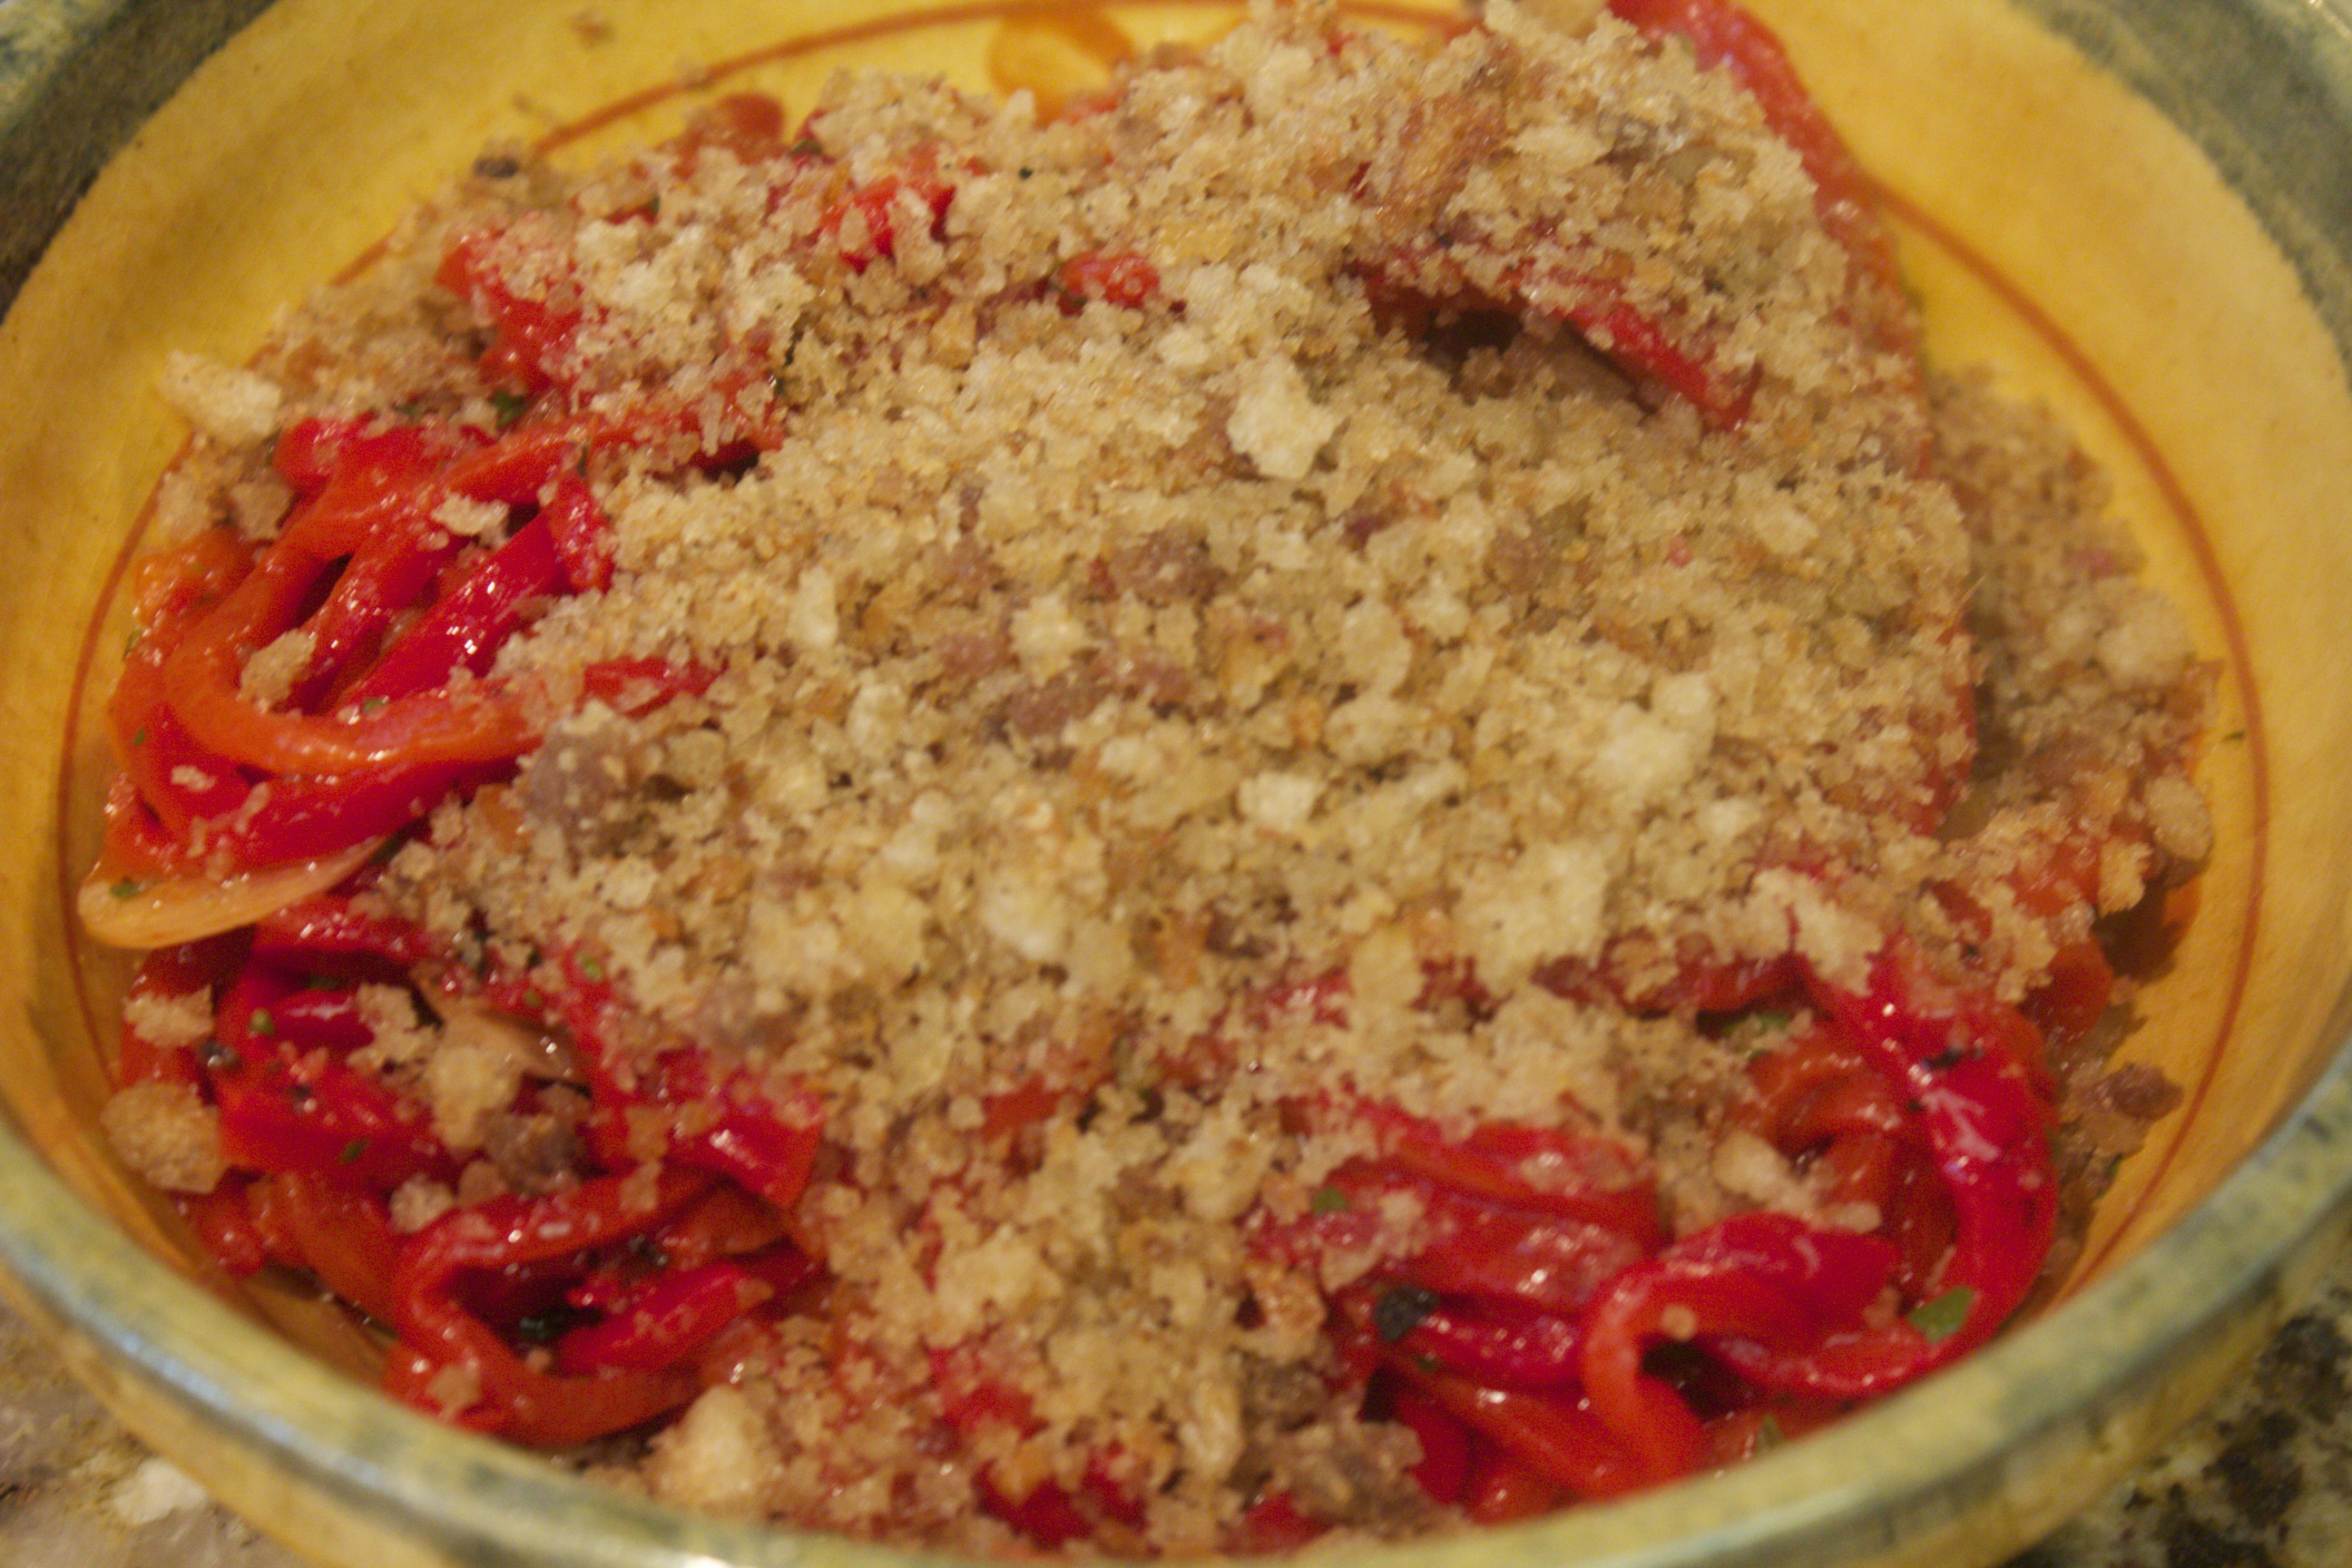 Roasted Red Peppers with Anchovy Breadcrumbs Crab salad featuring Tanner crab from Vital Choice with buttered brioche. It’s kind of like a lobster roll, only with crab. The salad had homemade mayonnaise, tarragon, celery and a touch hot sauce. 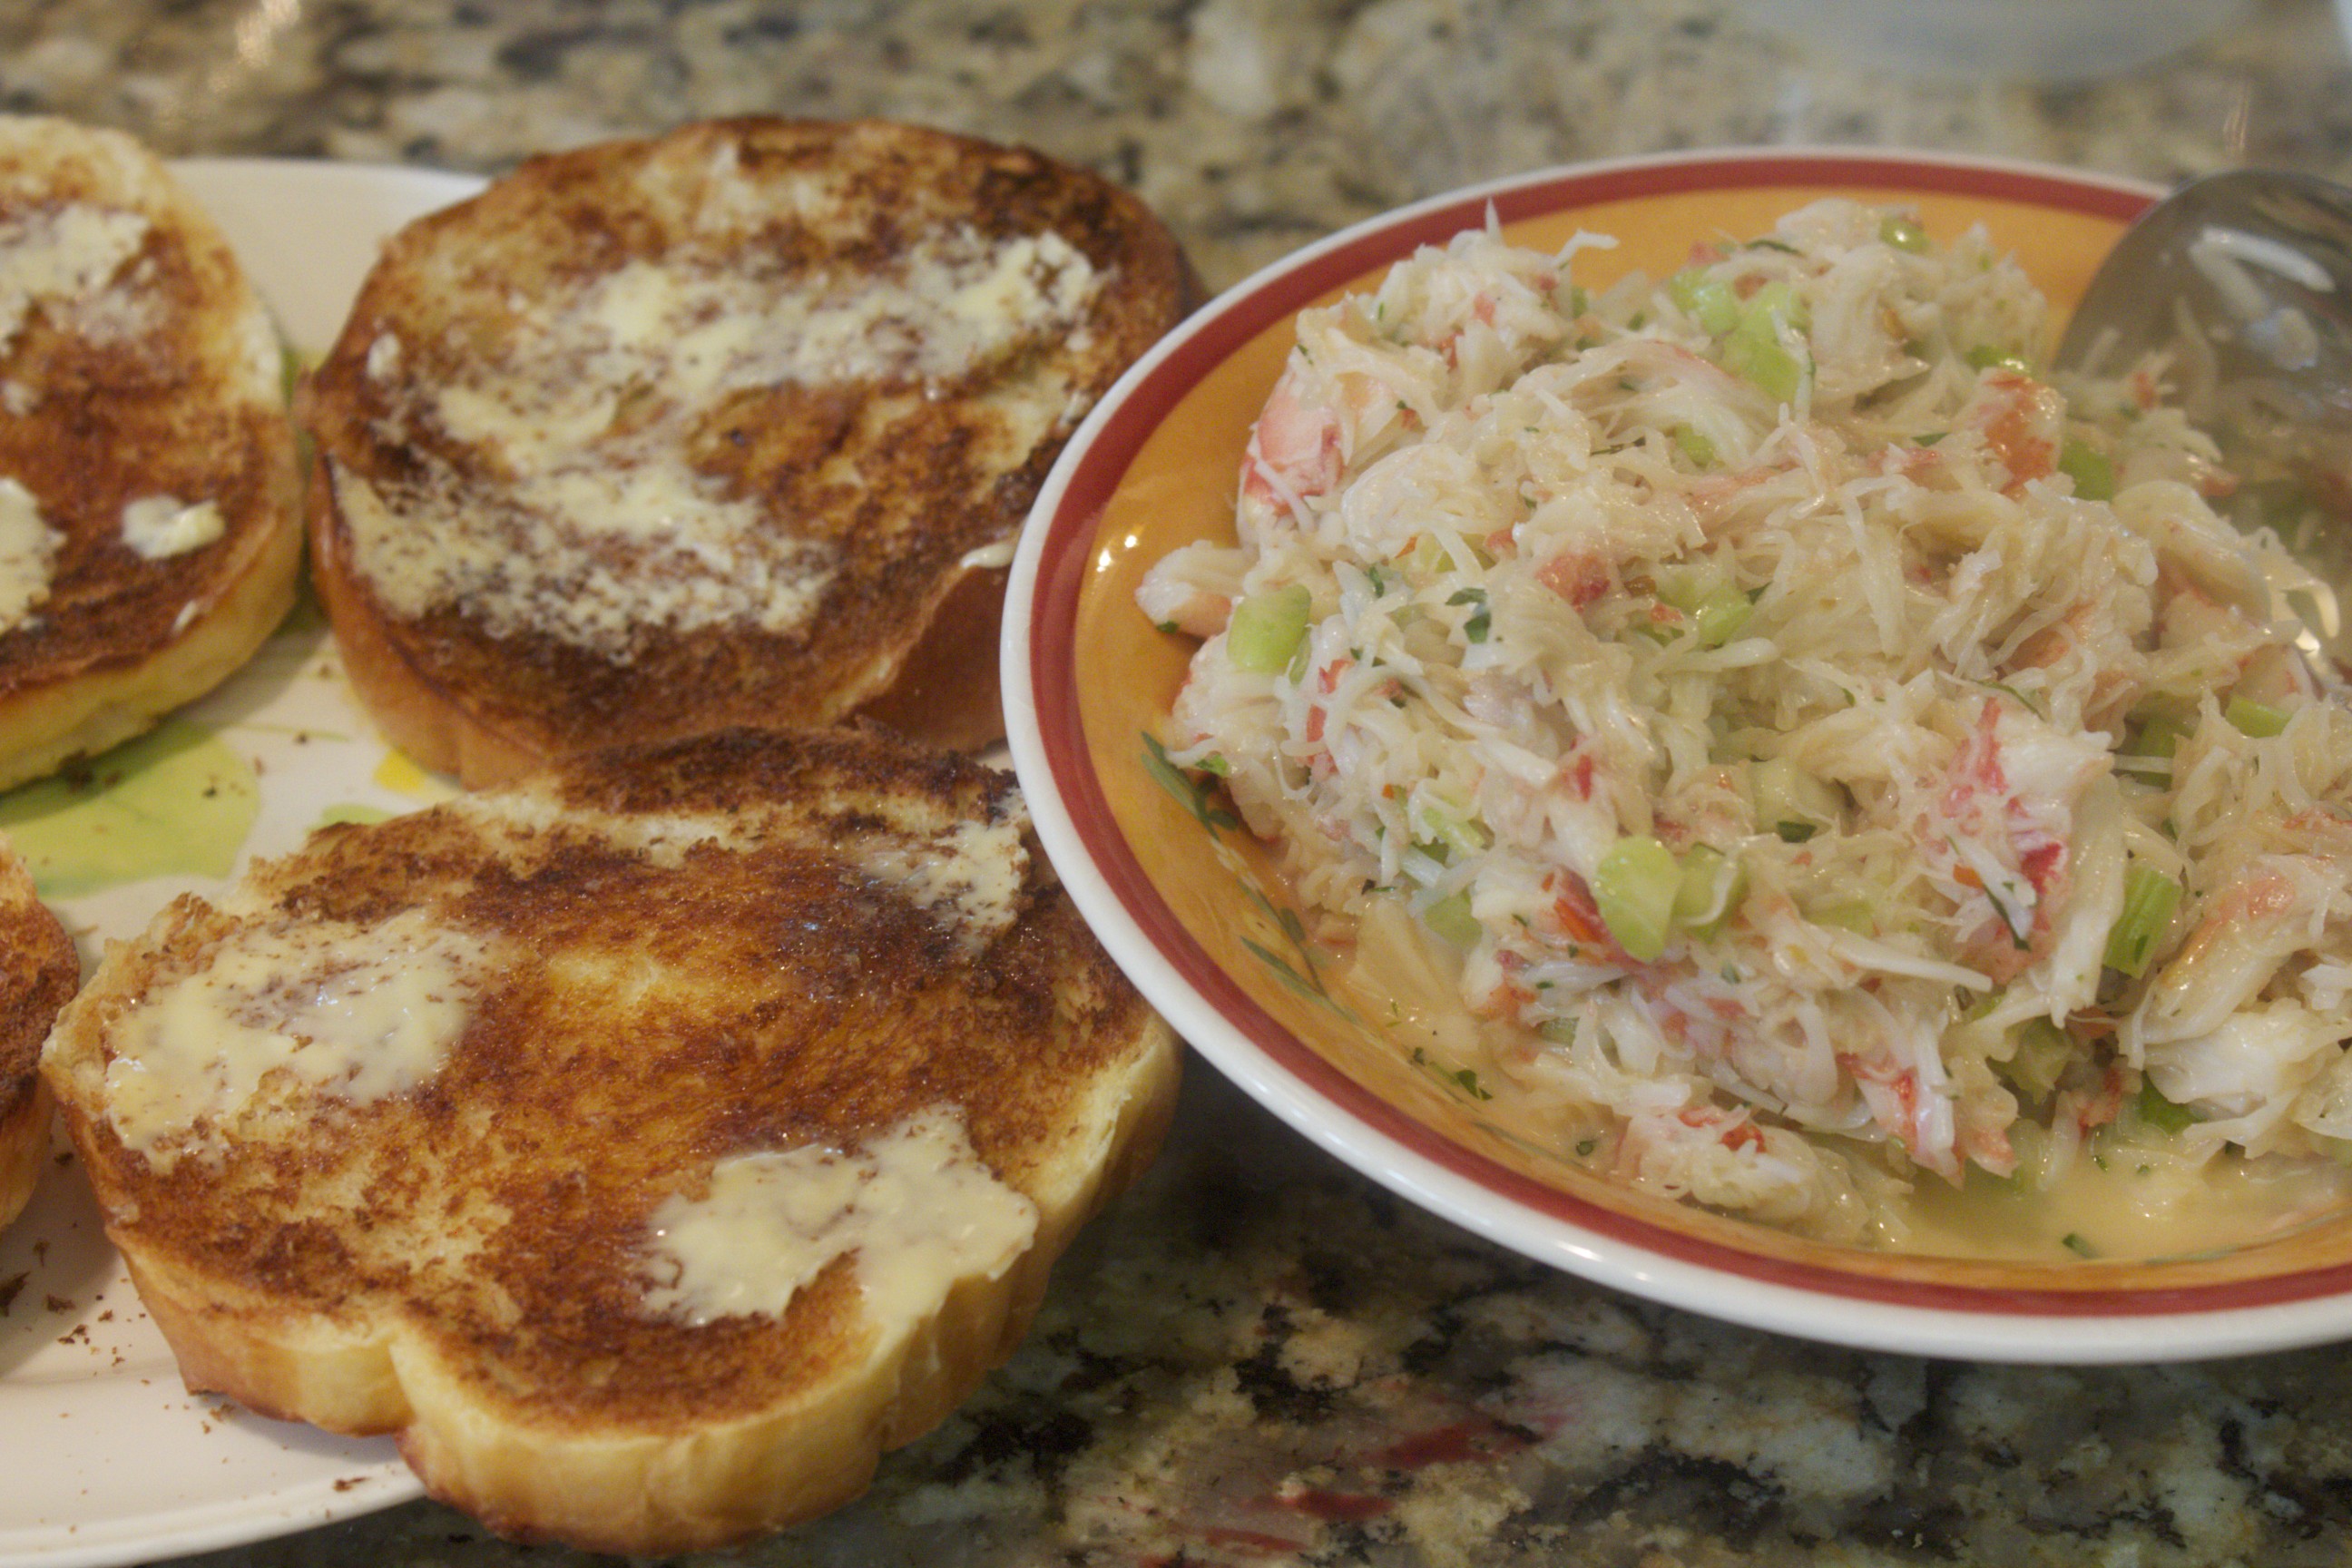 Crab Salad with Buttered Brioche From class: Shaved zucchini salad with arugula and parmesan. 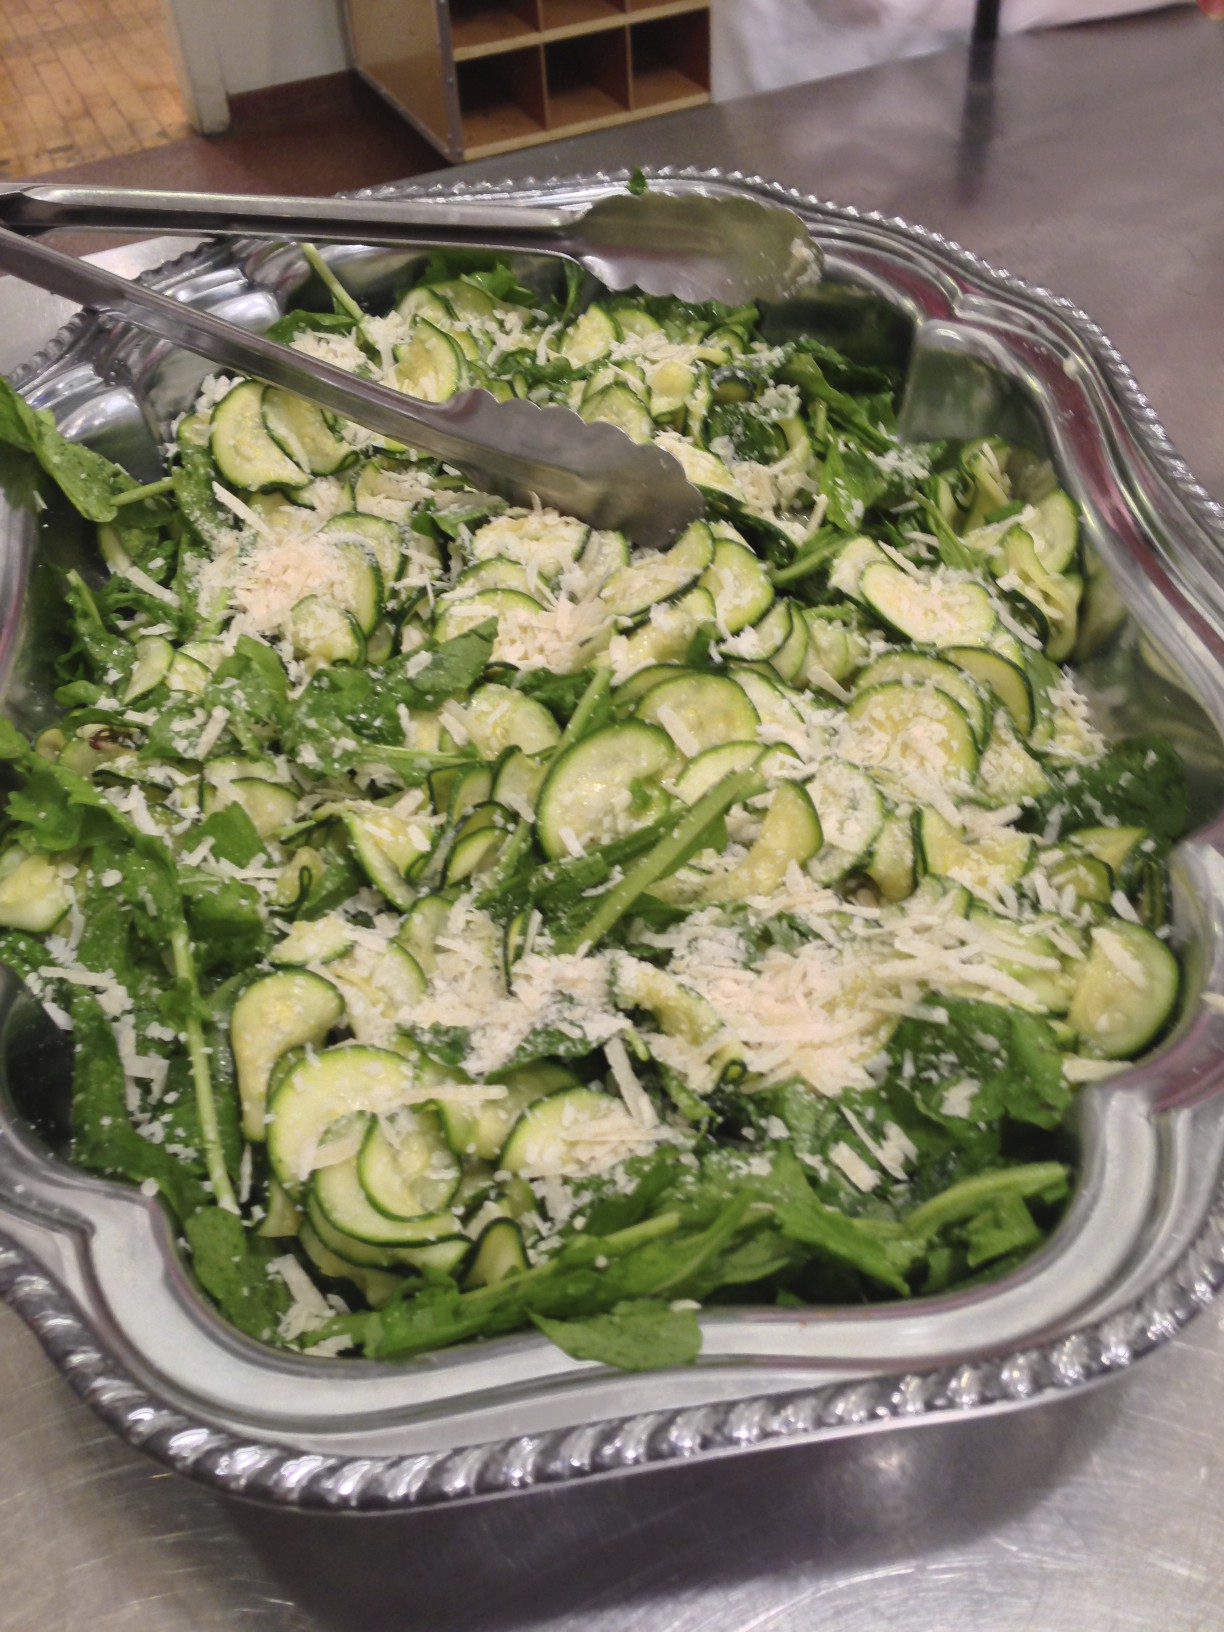 Shaved Zucchini Salad with Arugula and Parmesan Yellow tomato and golden beet Gazpacho.  Yellow Tomato and Golden Beet Gazpacho The one dish I did serve hot was an onion tart made with caramelized spring onions, spring garlic, egg yolks, and a tad parmesan, cream, and milk. 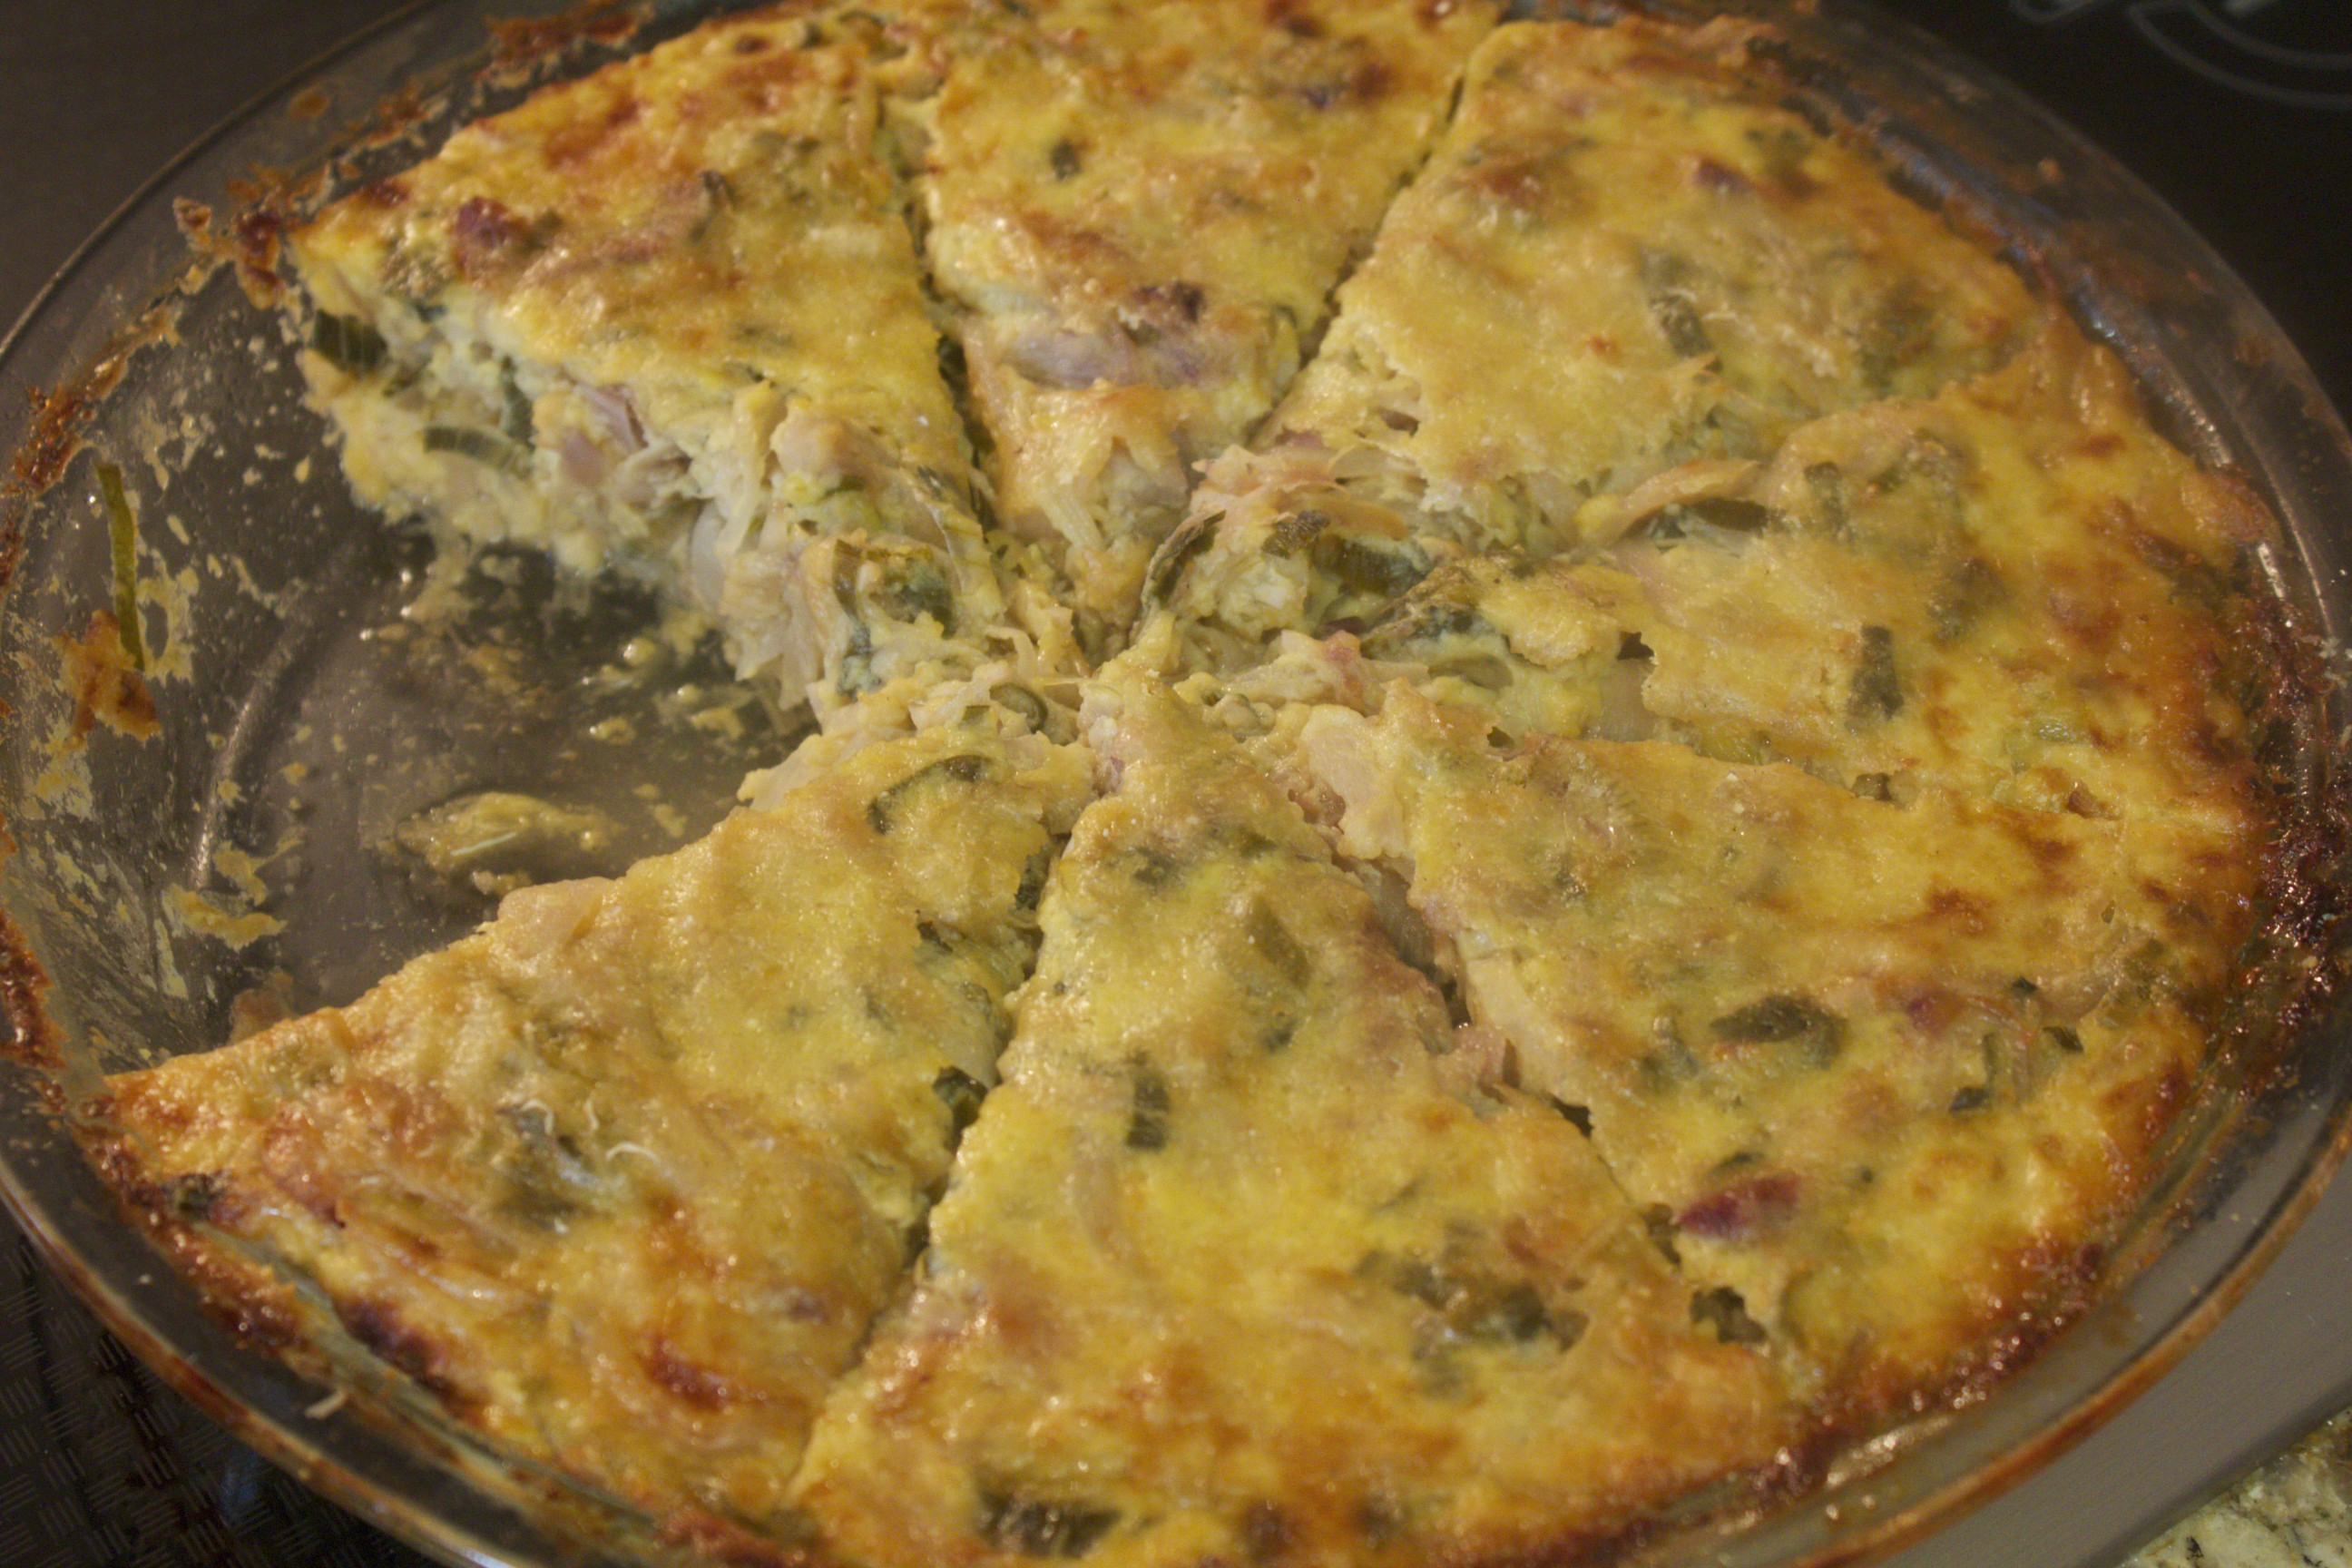 Caramelized Onion Tart Also included on this plate were marinated olives, Tuscan white beans, marinated grilled portobellos, and parmesan biscotti.  On the Plate I also included romano beans with a tahini and pomegranate dressing as well as parfaits with blackberries and cream! A good time was had by all!  Time to Eat! Share on Facebook and Twitter | Dinner, Happenings/Events | No comments
Strawberry Guacamole 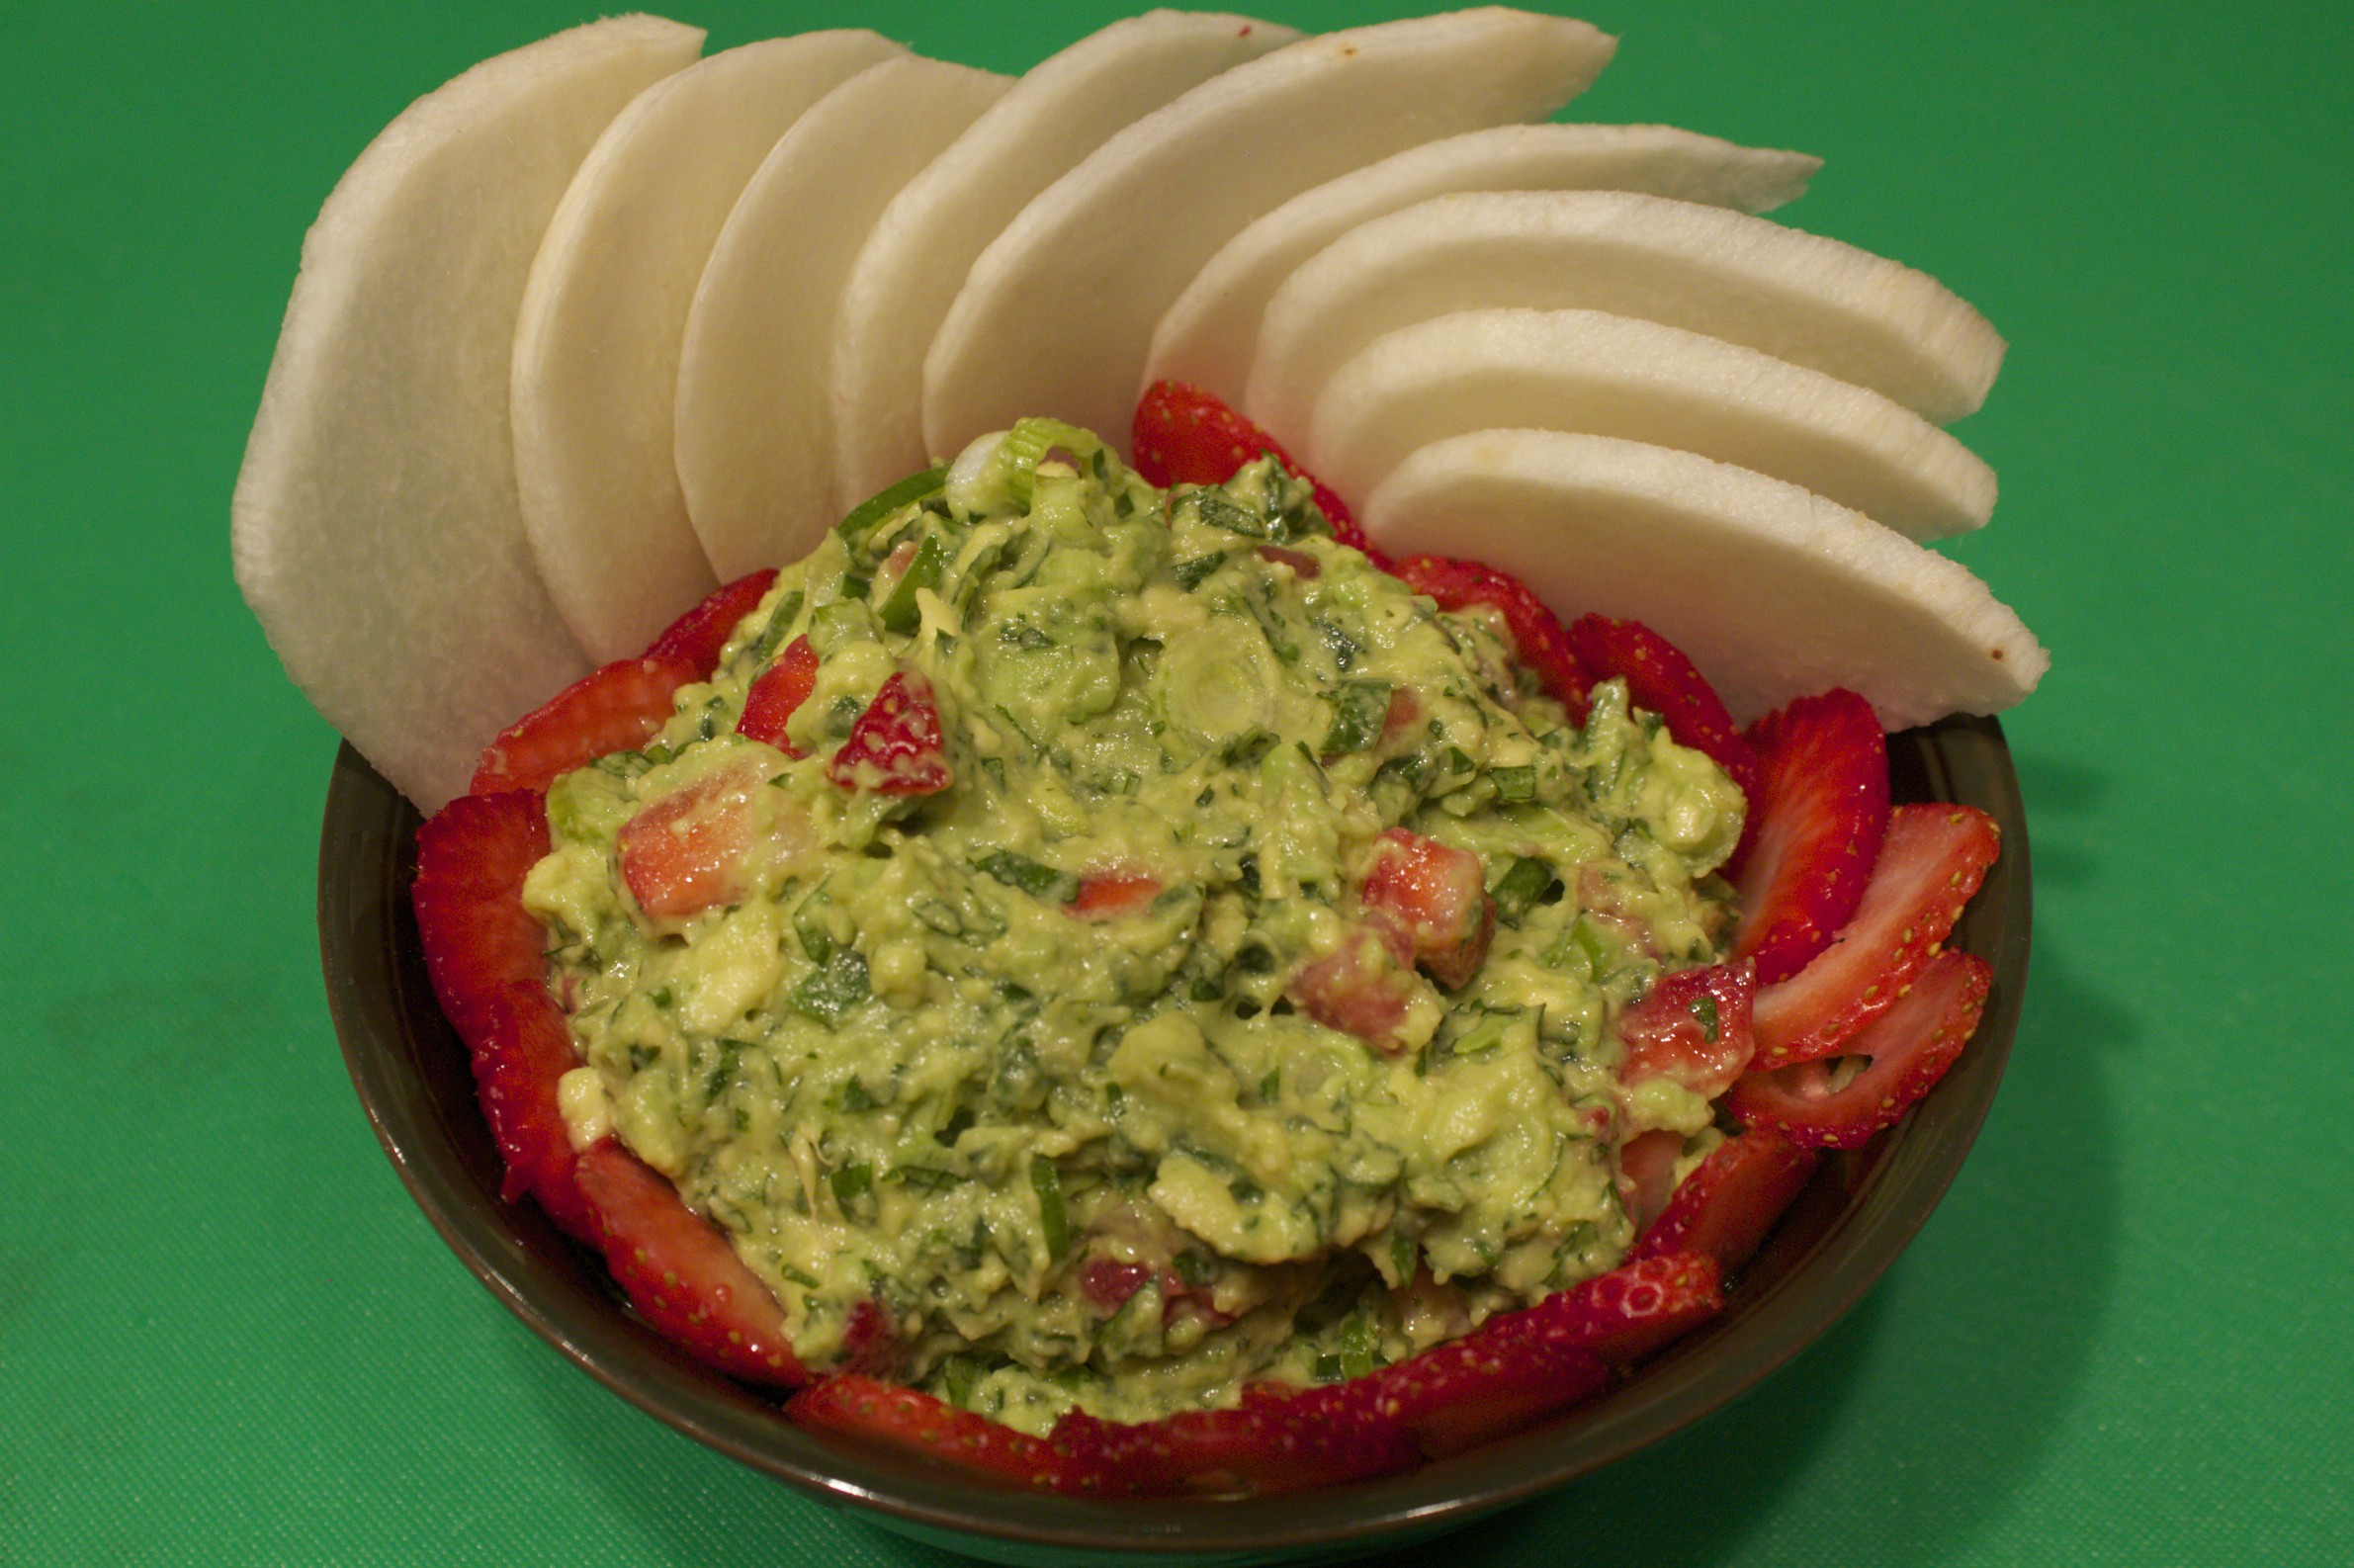 Strawberry Guacamole with Jicama Chips Fruit and avocado (which is technically a fruit itself) go well together, and it is traditional in Mexico to enjoy fruit-studded guacamole. Strawberries and guacamole are an especially refreshing and nutritious combination, containing lots of vitamin C from the strawberries and vitamin E from the avocados, as well as numerous phytochemicals and minerals from both. In the video, I show how to put this dish together in minutes. To make this attractive, summery version of a classic, start with a couple of ripe avocados. Cut them down the middle, and pop out the flesh into a bowl. Fork- mash them to break them up a bit, and then add a couple of tablespoons fresh lime juice as well as a teaspoon of salt. Mix in some essential guacamole ingredients: a couple of thinly sliced scallions, a quarter cup chopped fresh cilantro, and a couple of minced Serrano chiles. Mix all the green ingredients well before gently folding in a cup of chopped strawberries. Keep a few extra sliced strawberries as a garnish around the side of the bowl. I like to serve this colorful dip with jicama, the root vegetable that looks like a tuber but has a refreshing taste resembling that of a water chestnut. Make sure to choose a firm one free of too many blemishes. Peel the skin with a Y-shaped peeler, and cut it in half to safely position the vegetable cut-side down on the board. Then you can slice it into “chips.” Jicama makes a great alternative to the more typical corn chips. It is low-calorie and contains lots of fiber, as well as Vitamin C, making this a nutritious, light-but-filling snack or appetizer, as well a refreshing way to celebrate late spring and summer. Share on Facebook and Twitter | Fruit, Snacks, Vegetables | No comments
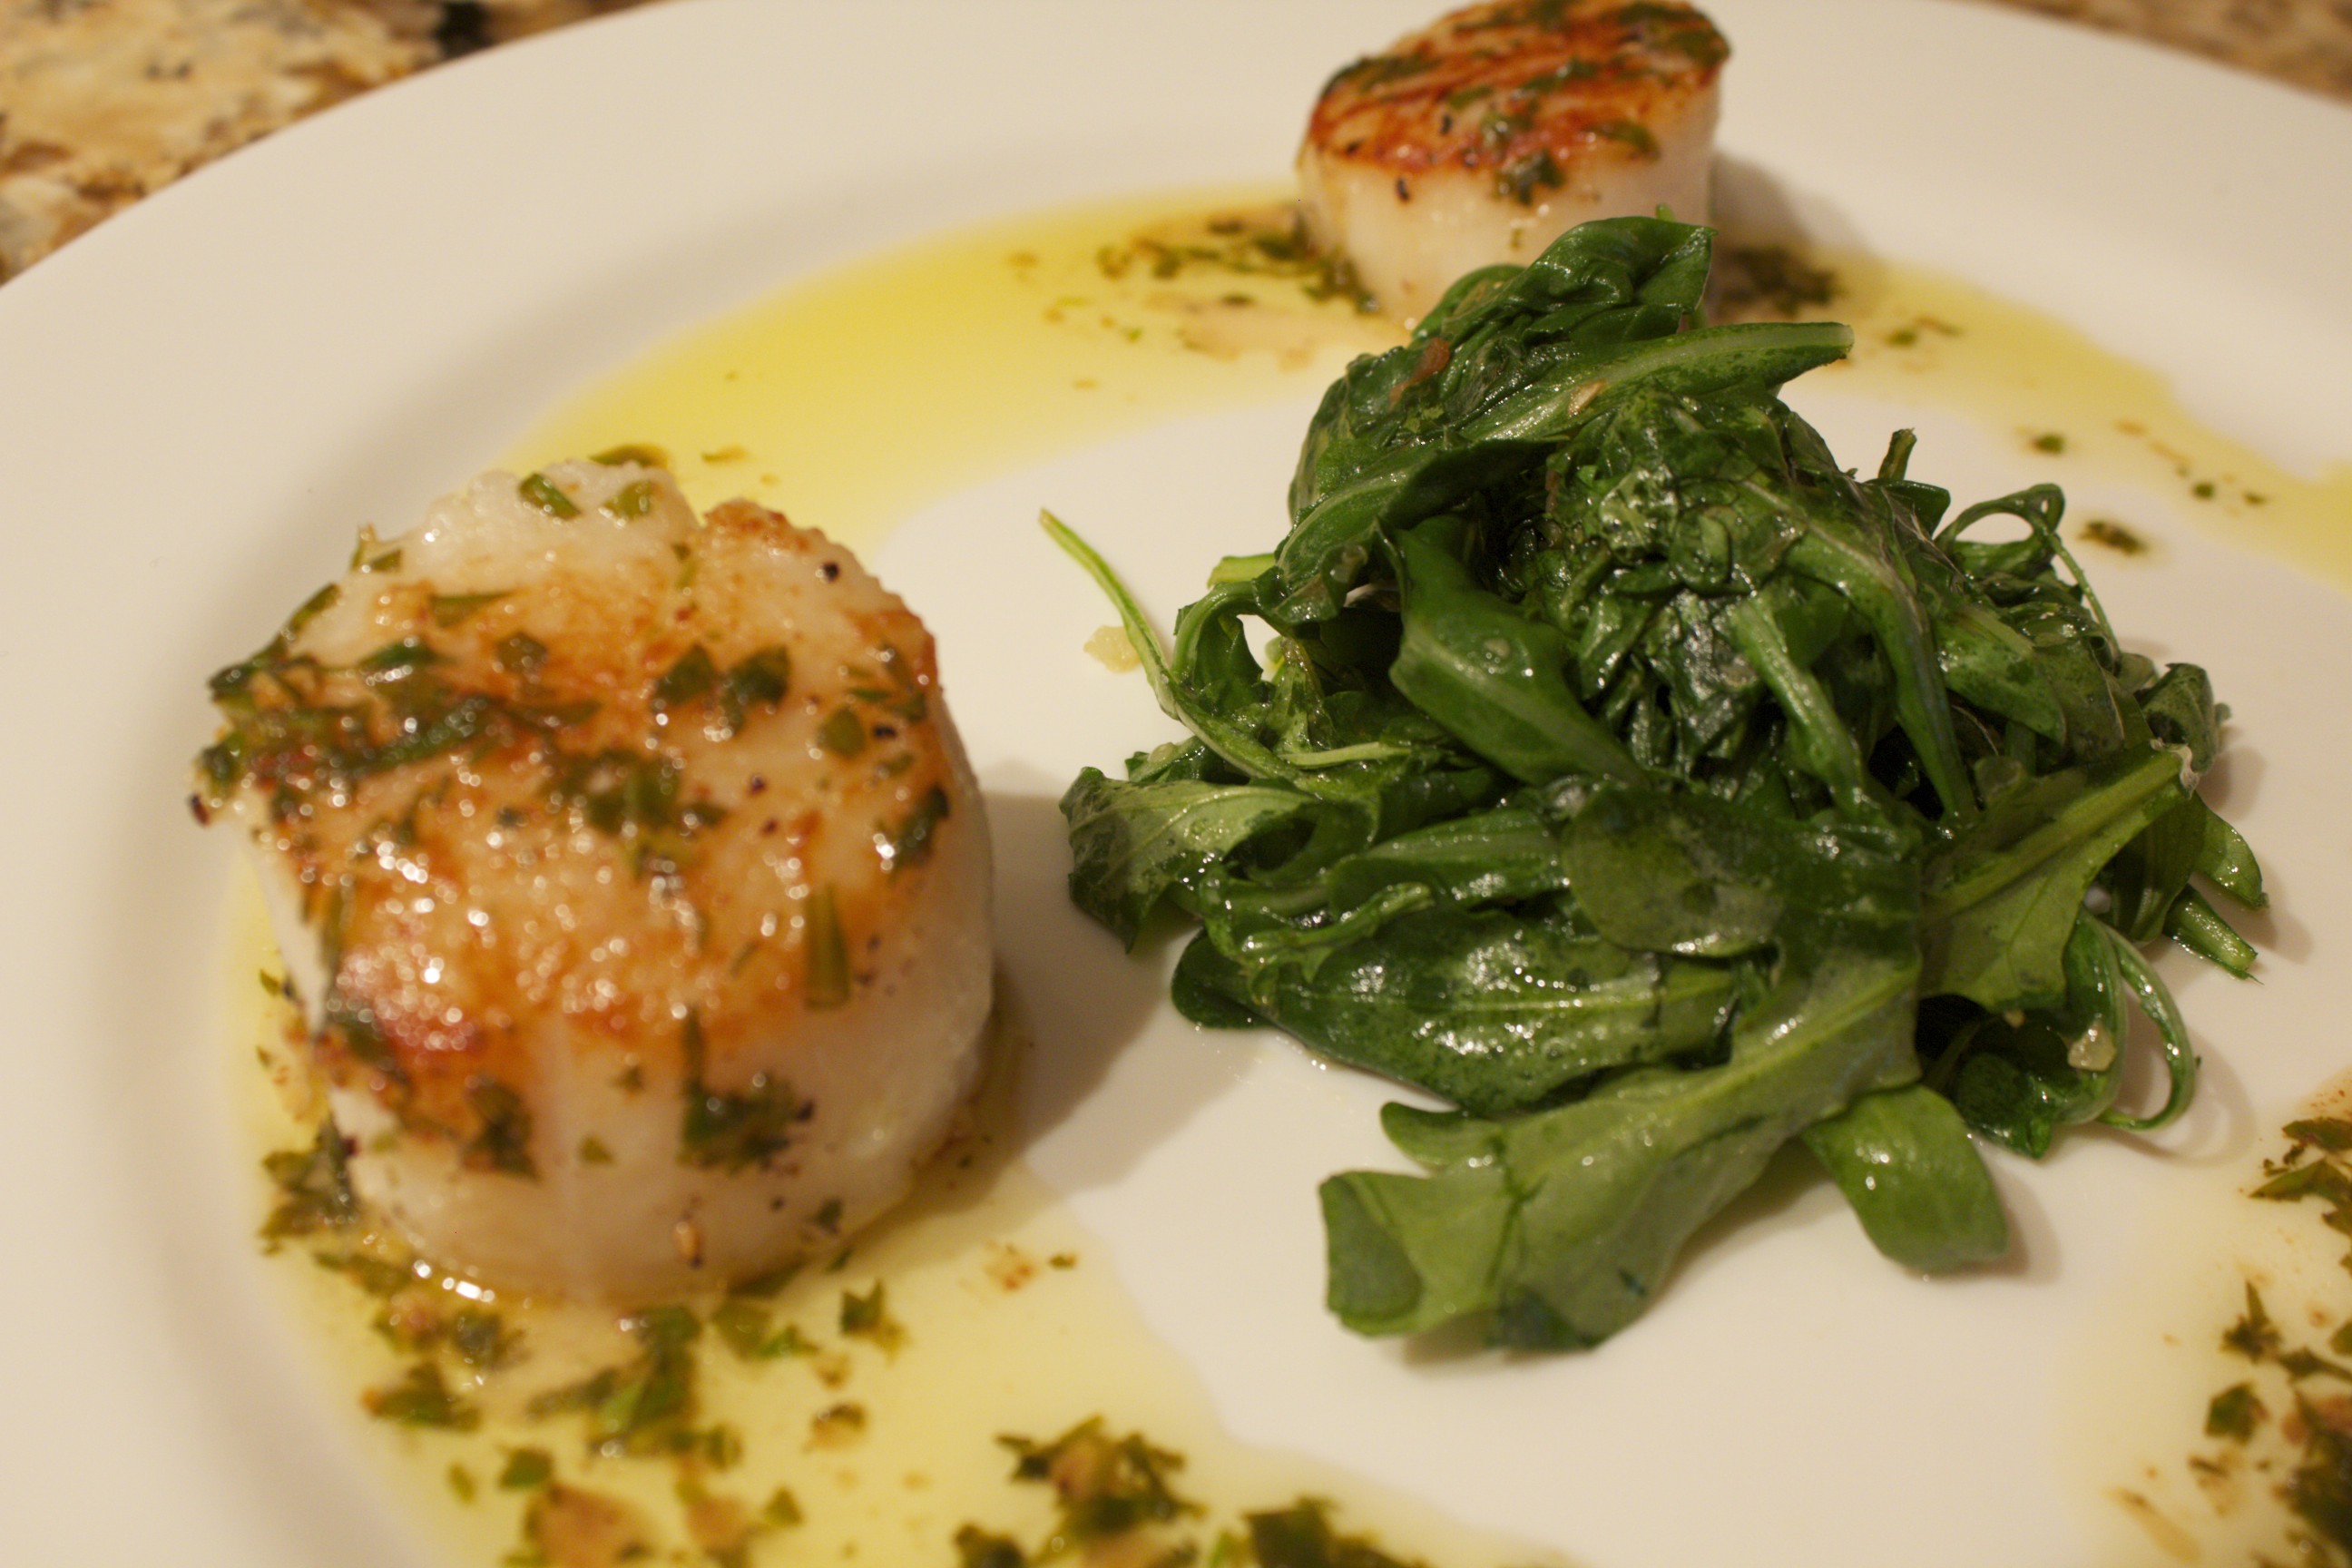
Scallops with Lemon-Tarragon Browned-Butter Sauce and Garlicky Arugula After the heavier foods of winter, spicy and bitter spring greens are cleansing to the body and taste delicious. Peppery lettuces such as arugula and watercress are typically served raw in salads, but they are very tasty when cooked as well. In this video, I show how to make a quick spring meal that you can put together in just 10 minutes. It features seared scallops in a lemony tarragon browned-butter sauce as well as garlicky sautéed arugula. Scallops in Lemon-Tarragon Browned-Butter Sauce Start with the scallops, since they take longer to cook than the greens. Make sure to purchase dry scallops that have not been soaked in any solution. Dry them well with a paper towel, and pull the tough little muscle off. (It is often attached at the side.) Toss the scallops with a little salt and freshly ground black pepper. Heat a thin film of fat in a non-stick or cast iron skillet over medium flame. Fats that are good for this dish include ghee, aroma-free coconut oil, or extra virgin olive oil. Heat the oil over a medium-high flame until your hand, when it’s held one inch above the pan, feels hot. Add the scallops—they should sizzle—and cook for about three minutes, until seared on the first side. Using a tongs, flip the scallops and cook them on the second side for another three minutes or so until they feel firm, with just a little give. Meanwhile, melt 4 tablespoons butter in a small pot on another burner over medium-high heat. You’ll notice that the butter starts gurgling right away, which means that the water content of the butter is evaporating. After about three minutes, the butter will foam and smell nutty. Use a spoon to push the foam aside and see the color of the butter, which should have turned a burnished chestnut color. Immediately remove the pan from the heat and pour in a couple of teaspoons or so of lemon juice to stop the cooking process. Add a tablespoon chopped tarragon to infuse the lemony buttery sauce with a fresh herby flair. Now you have a delicious sauce that is versatile as well. In a medium skillet, add a splash of olive oil with a couple cloves minced garlic. Start heating the oil and the garlic at the same time, which will keep the garlic from burning. When the oil starts to sizzle, and the garlic just starts to take on some light color, add a pile of greens and toss to cook. In the video, I use arugula, but watercress is delicious as well. The greens wilt and are ready in under a minute. Sprinkle with a dash salt and a splash lemon. Greens cook down a lot, so make sure you plan for two cups of loosely packed greens per person. Serve the scallops drizzled with the browned butter sauce accompanied by a mound of the garlicky greens. You’ll marvel at how something so tasty was so easy to make.
Share on Facebook and Twitter | Dinner, Lunch, Main course, Recipes, techniques | No comments
Quick Vietnamese Pho with Fresh Herbs This quick Vietnamese pho, pronounced fuh, as in fun, is a soothing one-pot meal that’s flavorful and light, especially after the heavier foods of winter. Watch the Video Quick Vietnamese Pho with Fresh Herbs The first step is to toast some spices—a couple of tablespoons of coriander, a few cloves, a pieces of star anise, a spoonful of black peppercorns— in a dry heavy-bottomed skillet over medium heat until the spices smell fragrant, which takes only a couple of minutes. I then wrap the spices in a cheesecloth along with some chunks of ginger and onions. l add this bouquet to two quarts of chicken broth (this is where a homemade one really shines) along with a pound of boneless chicken (breasts or legs are fine), a tablespoon of natural brown sugar, a couple of tablespoons of Vietnamese fish sauce, and a few pinches of salt. The fish sauce consists simply of fermented anchovies, which gives the broth authentic Southeast Asian pizazz. After bringing the liquid to a boil, I lower the heat and simmer the broth very gently (so as not to toughen the chicken) for 20 minutes or so, until the chicken is cooked through. I love that I can flavor the broth and cook the chicken all at the same time. While the chicken is cooking, I pour hot water over fettuccine rice noodles, and I assemble the garnishes. I chop some fresh mint, cilantro and basil, cut some limes, slice some red onions, and finely chop a couple of hot chile peppers. When the chicken is cooked, I remove it from the broth and discard the spice bag. As soon as the chicken is cool enough to touch, I tear it into chunky pieces. To assemble the final dish, I ladle the broth over the noodles and chicken, then add the garnishes. I start with the onions and bean sprouts and then add a big handful of the fresh herbs. A sprinkle of the hot chiles and a squeeze of fresh lime at the last minute makes the dish sing! Assembling the dish to order allows me to adjust the spice level for all who are eating. The flavorful herbed broth is nourishing and cleansing, not to mention delicious! 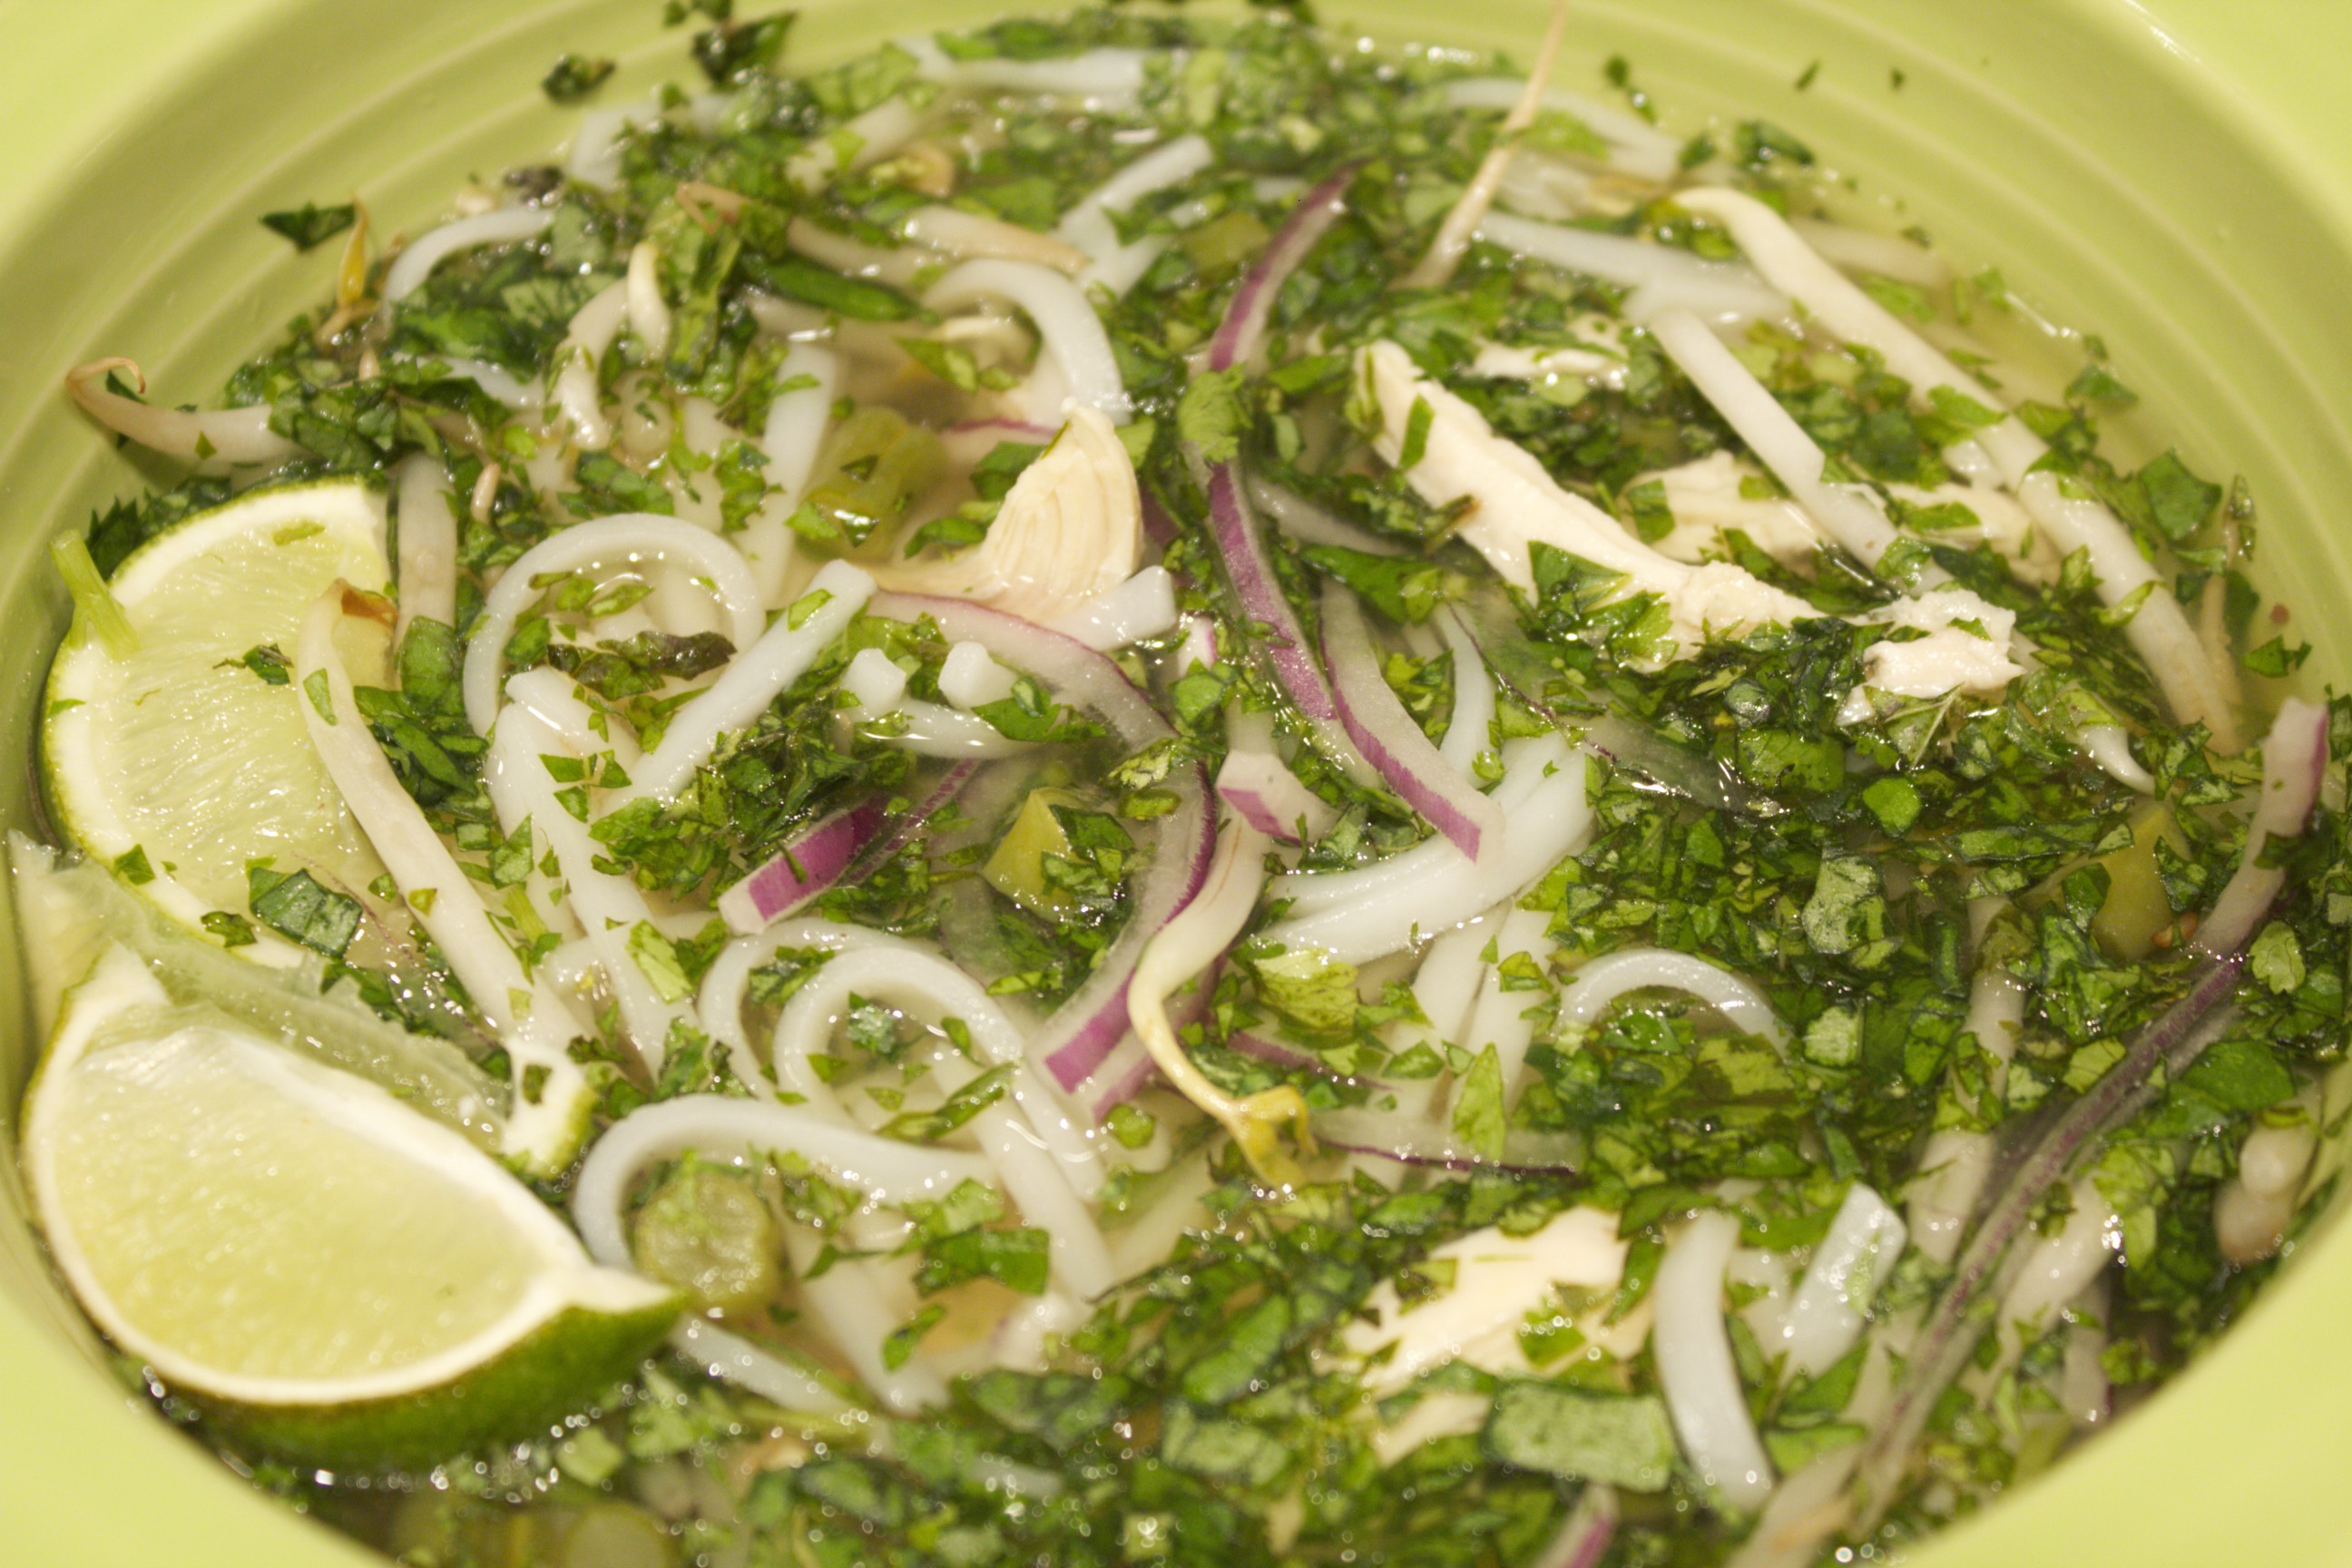 Vietnamese Chicken Pho Share on Facebook and Twitter | Dinner, Gluten Free, Main course | No comments
Sautéed Apples in Ghee One of my favorite quick morning dishes to make throughout the winter is sautéed apples in ghee. Ghee—clarified butter with the milk solids and water removed—is ideal for high heat cooking since it doesn’t burn as easily as regular butter. It still contains all the good qualities of butter, however, such as fat-soluble vitamins, short- and medium-chain fatty acids, and selenium. To get the most nutrition and best flavor, it’s best to purchase good quality ghee from cows that have been pasture-raised, or you can make your own from your favorite high quality butter. Sautéed apples are quick and simple enough to make for breakfast. In the video, I show my favorite way to peel and cut an apple. With a Y-shaped peeler—my favorite—I make a ring around the top and one around the bottom as well. I then peel the sides and quarter the apple. I lay the quarters on their sides, and cut out the core in one easy-angled cut. This is the most efficient way to core an apple, and you don’t need any special equipment. Best of all, it’s safe because, after coring the apple, you then have a flat side that rests firmly on the board. I then slice each quarter into 3 or 4 pieces. The next part is simple: I warm some ghee in a medium skillet over medium heat, add the apples and a dash cinnamon powder, and cover the skillet. I check on the apples after about 2 or 3 minutes, give them a toss, and cook them a couple of minutes more. That’s all there is to it: the tender apples smell and taste heavenly. They make a great topping for oatmeal, pancakes, waffles, or yogurt. They can also serve as a succulent side dish with scrambled eggs or other protein. 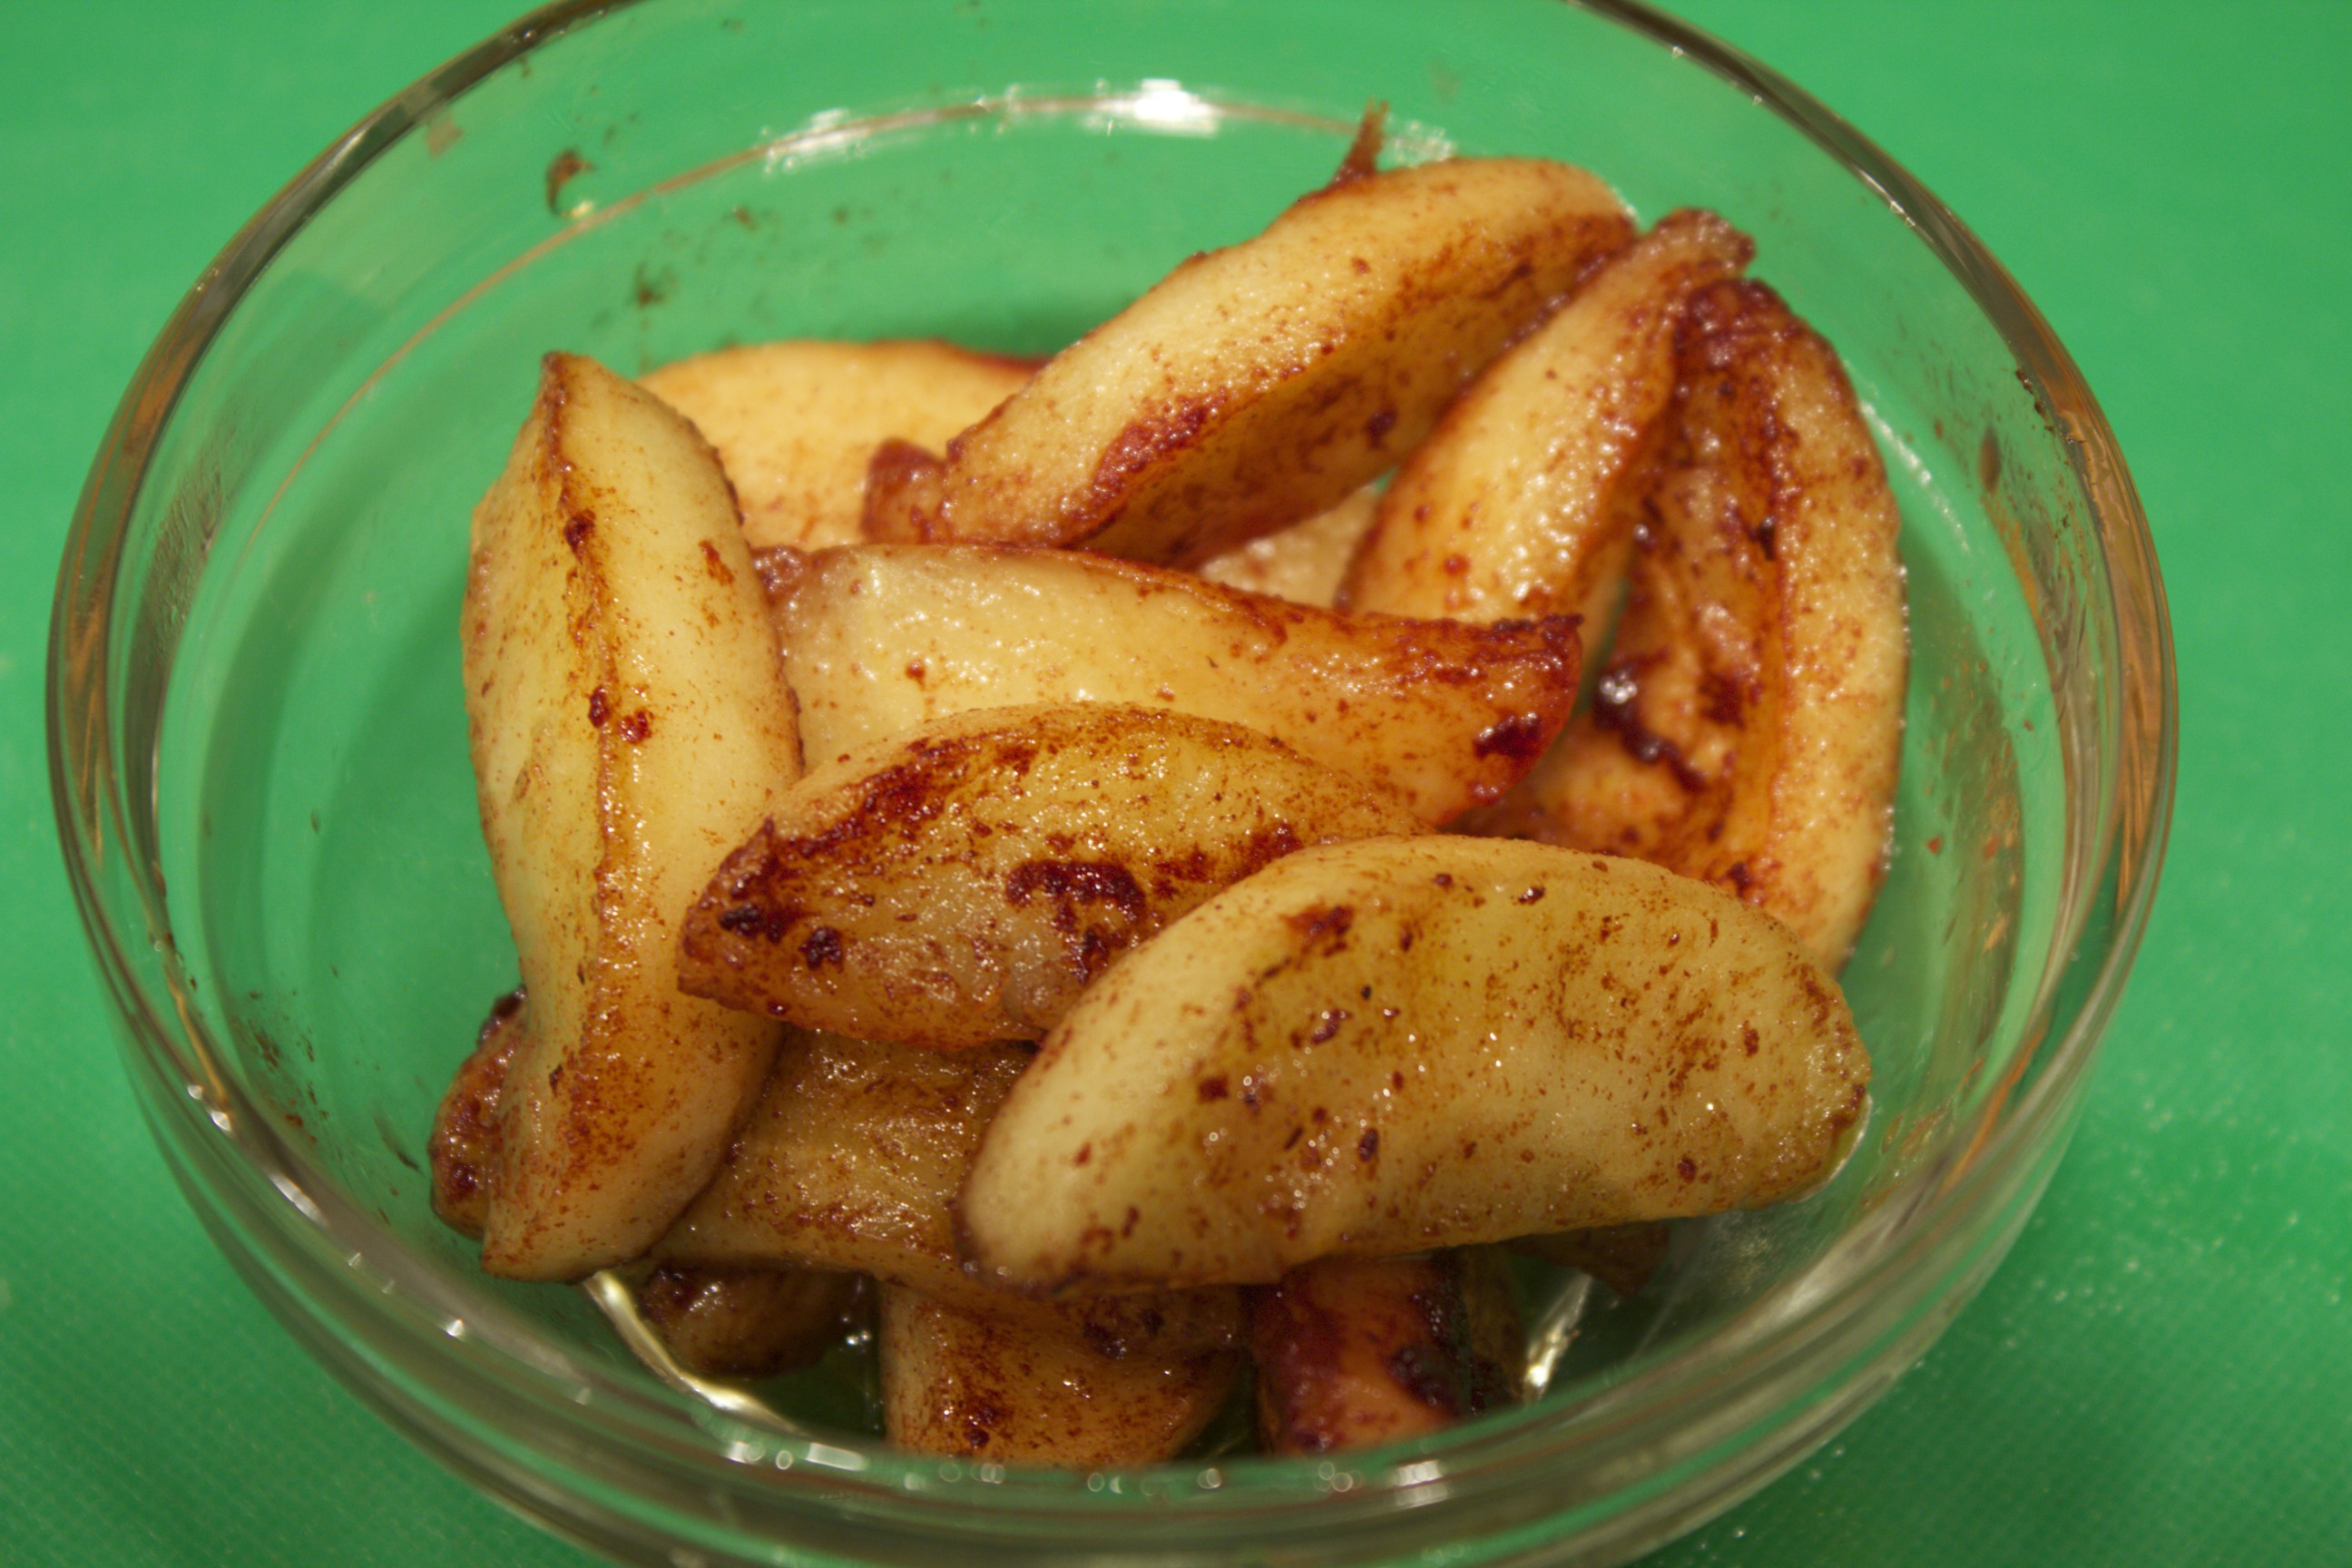 Sautéed Apples in Ghee Share on Facebook and Twitter | Breakfast, Fats & Oils, Fruit | No comments
My Favorite Winter Salad After a season of holiday indulgence and too many meals out, it’s time to begin the new year with a little lighter fare. I’m busy with obligations, but I don’t want to skimp on good food. So I turn to my favorite nourishing winter salads that I can make in minutes. This hearty winter salad that I show on the video consists of arugula, oranges, fennel, and sardines, with a complement of olives, walnuts and feta cheese. It’s composed in such a way that I don’t even need a separate dressing.  Sweet, Salty, Crunchy, Juicy I start with a nest of baby arugula, or watercress, or mesclun greens. In the video, I use arugula with some farmer’s market pea shoots mixed in. I next add an orange that is cut into segments known as supremes. I cut the orange over a bowl to make sure to catch the juices that will become part of the dressing. I sprinkle the greens and orange with salt and then add a layer of paper-thin sliced fennel, which is arguably the most appealing way to eat raw fennel. Using the mandolin is the easiest way to get such slices. Next, I sprinkle in some black olives—a flavorful variety such as kalamata or nicoise—followed by a handful of walnuts. I then crumble my favorite feta cheese, a sheep’s milk feta, over the salad. Finally, I crown the salad with sardines. I use sardines packed in extra virgin olive oil, so that the oil from the tin of the sardines becomes part of the dressing, mixing with the juice of the oranges. Every bite is exciting—a medley of sweet, salty, juicy, and crunchy. Moreover, this salad is a nutritional winner, packed with a range of nutrients, from omega 3’s to vitamins C and E, and loaded with phytochemicals and minerals as well. You can pack this salad to take on the go. Layer the greens with the fennel, olives, walnuts, and feta. Put the juicy orange slices in a separate container. Salt the salad, add the oranges, and top with the sardines right before eating. Share on Facebook and Twitter | Fish, Greens, Kitchen Tips, Lunch, Main course, techniques | No comments
Amaretti Cookies Amaretti cookies are chewy Italian cookies studded with pine nuts. These are festive enough for your holiday gift-giving but simple enough to make any time. This video shows the ins and outs of making these gluten-free cookies. I start with 2 cups almond flour, then add 1½ cups natural sugar. My favorite sweetener for these is maple sugar, but succanat ™ and rapadura™ work as well. Keep in mind that different natural sugars affect the flavor and moisture and can alter the texture slightly. I then stir in a pinch of salt and a couple teaspoons almond extract to heighten the almond flavor. The next step is to whip three egg whites in a separate bowl until they form peaks. You can do this by hand or with a hand-held or stand mixer, but my tool of choice to make the job efficient is an immersion blender. I then stir the fluffy egg whites into the flour mix. Finally, I brown the butter. I melt half a stick of butter, and cook it until it is copper-colored and fragrantly nutty. I keep a watchful eye on the pot after the butter melts—the process takes only a few minutes, and I want to make sure to stir the butter into the batter when it is browned, not burnt. At this point, I’m ready to form cookies. The batter is sticky, so using 2 spoons is the easiest way to drop the batter onto a parchment-covered baking tray. In order to leave enough room for these cookies to spread, I use 2 trays and drop the batter 1 ½ inches apart, making about 30 cookies. I sprinkle each cookie with pine nuts before it goes into a 300˚F oven to bake. Halfway through the cooking, after ten minutes, I rotate the trays to help them to color evenly. They smell heavenly while they bake. Once I’ve let the cookies cool, I store the extras in the refrigerator for up to two weeks, or I freeze them for up to two months. What a wonderful way to start off the holiday season.
Share on Facebook and Twitter | desserts, Gluten Free, Natural Sweeteners | No comments
|