|
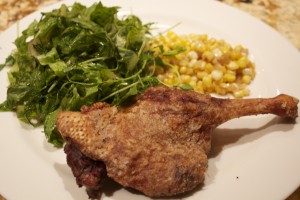
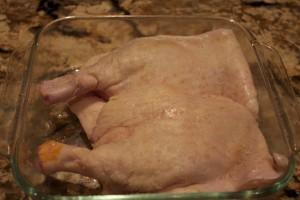
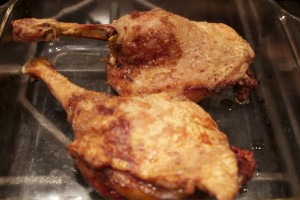
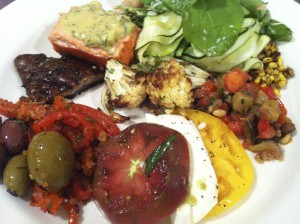
Duck Confit Duck confit is arguably the tastiest way to eat duck. The legs are slowly cooked in a low oven until all of the fat is rendered, leaving a skin that is super crispy – tastes fried – and flesh that pulls off the bone. It’s a dish that lots of folk are fearful of making at home (the thought of cooking in all that fat can be scary) Confit tastes rich, so a little goes a long way. If you get your duck from a purveyor that raises the ducks traditionally, the dish is healthy as well. I paired the Sautéed Corn with Balsamic and Shallots (last post) with the duck confit and a romaine salad that had pea shoots, dill, and a lemon olive-oil dressing. The whole meal took only half an hour of active time. Start with the plumpest duck legs you can find. At Union Square Greenmarket, Hudsen Valley Duck farm are out on Mondays, so that’s the day I usually buy the legs. I get the Moulard, which is a cross between a Pekin and Muscovy. These are large birds with rich flavor. The duck legs make terrific confit – no need to add any extra fat. http://www.hudsonvalleyduckfarm.com/blog/ for more info about Hudson Valley duck farm. Remove the ducks from the refrigerator about an hour before you want to get them in the oven. They take about two hours in the oven, so plan accordingly. Prick the skin all over with the tip of a sharp knife, making sure just to prick into the fat, not the flesh. This will help the fat render while the legs cook. Sprinkle an even dusting of salt all over the ducks, both skin side and underneath. Place the legs in a baking pan that holds them snugly, and let sit at room temperature for 1 hour.
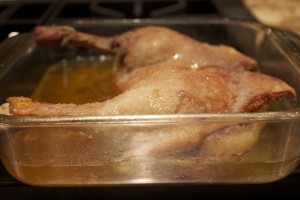
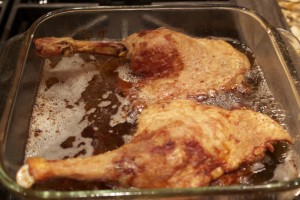
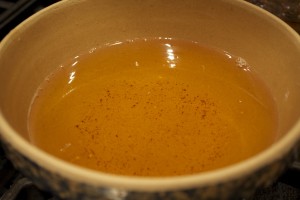
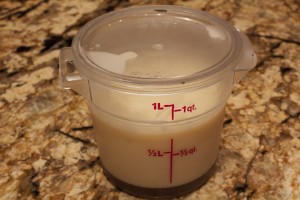
After about 1 ½ hours, the skin will start to color. Turn up the heat to 375˚F. and cook for an additional half hour until the skin is evenly golden and crispy looking. Remove the pan from the oven, lift the legs from the pan with a tongs, and strain the fat. You’ll have quite a bit. Save the fat to use later. Later on, when the fat cools down, add it to a container and refrigerate. Here’s my container of duck fat that I use it when I want to make confit, and I only have small duck legs. I add a layer of fat to the pan under the legs before I place them in the oven to give them a head start. Enjoy the confit hot, room temperature, or chilled. Share on Facebook and Twitter | Dinner, Main course, Recipes | No comments
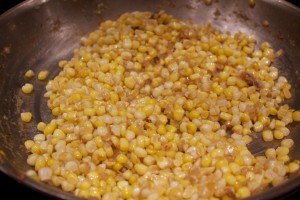
Sautéed Corn with Shallots and Balsamic Vinegar Last Friday evening I taught an antipasto class at the Natural Gourmet. The recipes were designed specifically with August entertaining in mind. Everything is at room temperature and can be made in advance, including these blackberry parfaits. The students did a great job on the whole menu. A lot of the recipes were really simple. Monday I was thinking about the sautéed corn with balsamic vinegar and shallots, one of the dishes from the class. Fresh local corn is stunning right now, so I picked some up at Union Square. Since Hudsen Valley Farms are at the Union Square Greenmarket on Mondays, I decided that a good duck confit with the corn would be a special meal, but would require only minutes of active time. Here’s the recipe for my Sautéed Corn with Balsamic Vinegar and Shallots which is a quick version of Swiss Chard with Corn and Balsamic Vinegar from The Healthy Hedonist.
Serves 4 1/4 tablespoon extra virgin olive oil 1/2 cup minced shallots 4 ears corn, husked and silk removed, kernels removed (about 2 cups) 1/2 teaspoon salt 1 tablespoon + 1 teaspoon balsamic vinegar freshly ground black pepper Warm the olive oil in a large skillet over medium heat. Add the shallots and corn kernels and salt. Sauté over medium heat until the corn has released its liquid and the shallots have started to brown, about 4 minutes. Stir in the balsamic vinegar, scrape up the brown bits and turn off the heat. Sprinkle with freshly ground black pepper. Remove the corn to a serving dish. Serve warm or at room temperature. Share on Facebook and Twitter | Corn, Dinner, ingredients, Recipes, Side Dishes | No comments
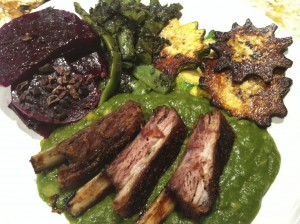
The Meal Continues Although the lamb riblet meal blog entry was almost two weeks ago, I’ve done a lot of cooking since then. I’m going to use this “hunker down” period in New York to catch up with some of the more noteworthy meals. It’s eerily quiet outside. Subways and businesses are shut down – pretty much everything is closed in preparation for the hurricane. In the city, though, it has not even started to rain. After my last post, I had about 7 leftover riblets. I would not have cooked so many at once, but I had bought a 3 1/2 pound pack from 3 Corner Field Farm (www.dairysheepfarm.com) at the Greenmarket one Saturday. Since I had to defrost all of the riblets at once, I knew we would have enough for two meals. I wanted the meals to be different from each other. The day after making the riblets I taught a pasta-making class to the professional students at the Natural Gourmet. The class was small that day, and there was a lot of food left over. I made use of the cooked beets and white bean sauce. I tossed the beets with balsamic vinegar and cocoa nibs, and blended the white bean sauce with some Swiss Chard, which I wilted quickly first. The reheated riblets were delicious over the creamy sauce. I picked up some patty pan squash at the greenmarket on the way home, which I sliced, sprinkled with salt, and then left to “sweat” for 20 minutes. I sautéed them until golden on each side, a couple of minutes per side. The flat beans I cooked in a small amount of water (sort of steaming it in the pan) with a sprinkle of salt. When they were cooked, after about 5 minutes, I tossed them with the basil puree I had made the day before. It was a delicious, quick, vegetable-packed meal. Here’s the recipe for the White Bean Sauce, from my first book The Voluptuous Vegan. You can freeze it and have the sauce ready to whip out at a moment’s notice. Serves 6 2 tablespoons extra virgin olive oil 2 cups onions 8 cloves garlic, thinly sliced 3 ½ cups cooked cannellini beans (or navy or great northern) or 2 15-ounce cans Salt 5 sprigs fresh sage Handful fresh thyme sprigs 1 bay leaf 2 teaspoons fresh lemon juice Freshly Milled Black Pepper Warm the olive oil in a medium pot. Add the onions and cook over medium-low heat until the onions are softened and starting to brown, about 7 minutes. Add the garlic and cook a few more minutes. Add the beans and 2 ½ cups water (or better yet, bean cooking liquid if you have it) along with 1 ½ teaspoons salt. Tie the herbs together with a cotton string and add them to the pot along with the bay leaf. Cover, and bring to a boil. Lower the heat and simmer, partially covered, for 15 minutes to allow the flavors to marry. Add the lemon juice and a sprinkling black pepper. Taste and add more salt if necessary. Remove the bay leaf and tied herbs.
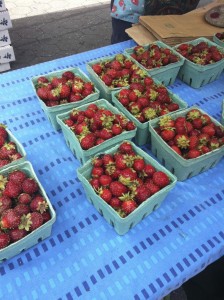
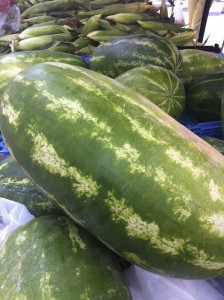
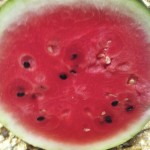
August Report from the Union Square Greenmarket Saturday was my first day back at Union Square greenmarket after a period of traveling. I had to restrain myself from buying everything in sight. Here’s some notes and a record of what I made from my purchases: These late New York season strawberries were irresistible – super sweet, the best strawberries of the year. I was thrilled to see piles of watermelons. It’s melon season, of course. A note to purchasing just the right ripe melon: Please make sure to knock on the melon, as if you were knocking on someone’s door. If it’s ripe and sweet, it will sound hollow. I scored with this one.
The extra went into these popsicle molds.
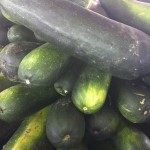
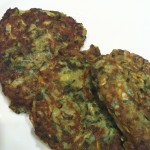
The sight of these elephant-sized zucchini stopped me in my tracks. I was assured that once the seedy middle was cut out, the remaining part would be sweet. While I am intrigued by the thought of stuffing one of these, I refrained from purchasing them . Instead I came home with a large bunch basil, some yellow and green zucchini, a few ears of corn, and a couple of racks of lamb riblets. When I got home, I picked the leaves off of the basil and pureed it with extra virgin olive oil to keep it fresh. I knew I had little time to make dinner today, but nonetheless I wanted a delicious meal. I got home in the late afternoon, and had a lot to do besides make dinner. I decided to construct a meal that would cook slowly (lamb riblets take over 2 hours) but would require minimal active time. I had defrosted the lamb riblets overnight in the refrigerator. I had some barbecue spice rub (from The Healthy Hedonist, which consisted of a mix of salt, maple sugar, cumin, chili powder, black pepper, cayenne, and paprika) in a little container, so rubbing the mix on the riblets and placing them in the oven on a parchment-covered baking sheet took only a matter of minutes. An hour later, I turned down the heat from 325˚to 225˚. An hour after that (by this time it was 6:45) I started the rest of the dinner. I grated the zucchini (one yellow and one green) and mixed it in a bowl with ½ teaspoon salt. I let it sit for fifteen minutes. Meanwhile, I filled a medium pot with water, placed it on the stove, and husked the corn. Fifteen minutes later, I cranked up the heat on the burner under the pot. I squeezed the water out of the zucchini, and placed it back in the bowl, and mixed it with a couple of tablespoons unbleached white flour, a scoop of the basil puree made the day before, and one egg. I dropped the corn in the boiling water and a tablespoon or so of coconut oil to heat in a large non-stick skillet. I dolloped spoonfuls of pancake batter into the skillet (two zucchini yielded 7 medium- sized) and cooked the pancakes for 2 to 3 minutes per side, until golden.
Share on Facebook and Twitter | Dinner, Fruit, Greenmarket Bits, Kitchen Tips, Main course | No comments
Interview on Martha Stewart August 12th Friday, August 12th, I’m to be interviewed on Martha Stewart Whole Living Radio on Sirius XM 110. from 10 to 10:30 a.m. The topic will be “Abundant August” and will focus on cooking healthful dishes with summer’s harvest- specifically, corn, summer squash and blueberries. I will be discussing with the host Terri Trespicio some of the dishes from each of the three classes as well as the nutritional value of each main ingredient, why we should be eating local, and what the Natural Gourmet is about. The Caller hotline is 866-675-6675 in case anyone wants to call in for questions or comments. Six of the featured recipes are from my public classes Crazy for Corn and Summer Squash Sensations.
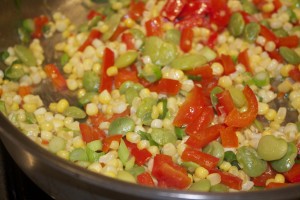
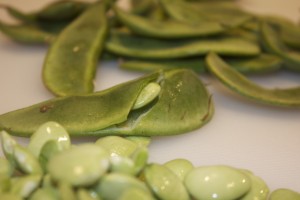
The succotash we’ll be referencing features fresh lima beans from the greenmarket. If you’ve never tasted a fresh lima bean, you’re in for a great surprise. These buttery beans barely resemble the insipid frozen variety. To prepare the beans, all you have to do is take a few minutes to pop them out of their pods Sauté these nuggets with corn, red peppers, a hot pepper or two, and a swirl of butter for a colorful and delectable dish.
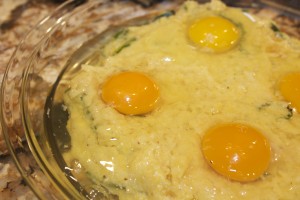
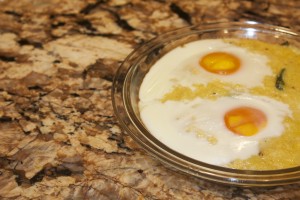
Another recipe featured from Crazy for Corn is a polenta with baked eggs. The dish starts with fresh corn and corn grits that are cooked into a thick purée, then mixed with roasted poblano peppers and cheddar cheese. The mix is poured into a four quart baking dish or individual gratin dishes, and little indentations are made. An egg is cracked into each indented spot, then placed in the oven. Twenty minutes or so later you have one delectable comfort food dish. Share on Facebook and Twitter | Breakfast, Happenings/Events, ingredients | No comments
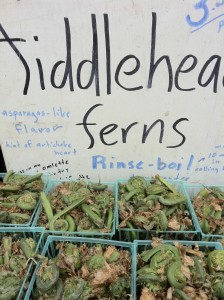
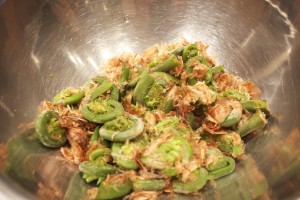
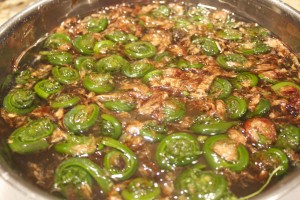
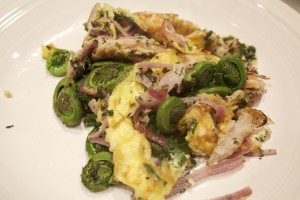
Fiddlehead Ferns Last week I noticed the first fiddlehead ferns at the Union Square greenmarket. I couldn’t resist purchasing them. Fiddleheads epitomize spring at its most fleeting – they are available a mere three to four weeks locally. If you want to play with these furled fronds, get them soon; consider a visit to a local market at least in the next two weeks, or you’ll be too late and will have to wait until next year. The ferns actually started showing up in Whole Foods a few weeks earlier than they did at the greenmarket; the ones at Whole Foods are are probably imported from Maine, since those have a bit of a longer season, lasting from April through May. Fiddleheads are from the Ostrich fern, and have a brown papery scaly covering (they remind me of bonito flakes) the uncoiled fern. The ostrich fern is a wild food found in wet areas: on the banks of river, steams, and brooks. Their flavor is a cross between that of asparagus and artichoke. For my preparation, I soaked these in water to dislodge the papery coverings. Honestly, I never did see ferns with the coverings before this year, and I’ve been cooking these delicate scrolls for years. The coverings made these specimens seem fresher and just-foraged. Make sure to pick off any papery bits that don’t dislodge in the water (this job is a bit “fiddly”), then steam or boil the ferns before cooking or dressing further. I paired these babies with smoked mackerel, sautéed red onions and slivered ramps for a delicious breakfast this week. Viva la primavera! Share on Facebook and Twitter | Breakfast, Greenmarket Bits, ingredients, Vegetables | No comments
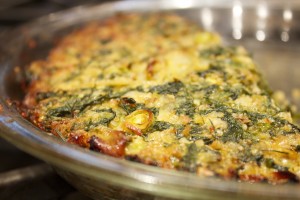
Greens and Quinoa Pie Greens and Quinoa Pie Spring greens combine with quinoa and sheep or goat cheeses for a light yet hearty savory pie that bakes into an appealing deep golden brown. One 9-inch pie (serves 6) 1/2 cup quinoa Salt 1 large bunch chicory (1 to 1 1/4 pound), cut into bite-sized pieces (bottom 11/2 inches of hard stems removed ) 1 head romaine, shredded 3 tablespoons extra viegin olive oil, divided 2 cups thinly sliced onions, (2 medium) 1/4 cup thinly sliced scallions, whites and greens 1/4 cup chopped dill 1/2 cup crumbled feta cheese, preferably goat (about 2 ounces) or sheep’s milk 1/2 cup grated gruyere or aged goat cheese (about 2 ounces) 3 eggs Freshly milled black pepper Preheat the oven to 350˚F. Have ready a 9-inch ovenproof pie pan (pyrex is ideal). Rinse the quinoa in a strainer and dry toast in a small pot until almost dry. Add 1 cup water and a pinch salt. Cover and bring to boil, then lower the heat and simmer covered until the grains have swelled and the water is absorbed, about 15 minutes. Do not disturb the steam vents that will form while the quinoa is cooking. Remove from the heat and pour into a large bowl. Wash the chicory and romaine; no need to dry them. Add the chicory to a large pot and wilt over medium heat, stirring frequently or tossing with tongs to push uncooked leaves to the bottom of the pot. (You don’t have to add additional water since droplets clinging to leaves from washing is enough to start the cooking.) Don’t be daunted by the quantity of greens, as it reduces significantly when wilted. Cook until the leaves have wilted and shrunk, about 5 minutes. Add the romaine, and toss frequently, another minute or 2 until wilted. Remove and place in a strainer, squeezing against the strainer to remove excess water. Transfer to a cutting board and chop into small pieces. You should have 2 1/2 to 3 cups packed greens. Transfer to the bowl with quinoa. Warm 1 tablespoon of the oil in a medium skillet. Add onions and sauté over medium high heat until the onions are browned, about 10 minutes. Transfer to a bowl. Stir in the scallions, dill, feta cheese, and gruyere. Whisk together in a small bowl the eggs, 3/4 teaspoon salt, and a generous sprinkling black pepper. Stir the eggs thoroughly into the quinoa mixture. Pour 1 tablespoon of the oil in a pie pan and place in the oven. Heat the oil for five minutes until hot. Remove the pan and swirl the oil to coat the bottom of the pan, then pour in quinoa mixture, evening it with a spatula. Return to the oven and bake uncovered for 20 minutes. Remove pie and evenly drizzle remaining the 1 tablespoon oil over the pie. Return the dish to the oven and bake 20 to 30 minutes longer, until golden brown on the top and bottom. Serve hot or at room temperature. Share on Facebook and Twitter | Grains, Greens, ingredients, Main course, Recipes | No comments
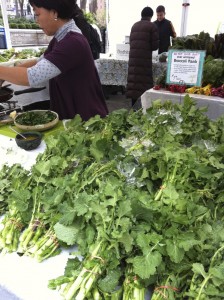
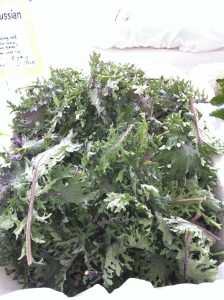
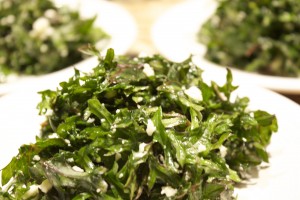
“Wintered-Over” Greens from the Union Square Greenmarket Today, as I walked by the Bodhitree farm stall, on the Northwest side of Union Square market, I was immediately attracted by a big beautiful pile of broccoli rabe sitting on a table in front of the booth. Up until now, in late March and early April, I have refrained from buying at the market the greenhouse greens. I don’t get that excited about greenhouse greens, which to me is like trying to force in Spring a little too early. I like to wait until greens come out of the ground, which is a sure sign that spring has truly arrived. This particular pile of broccoli rabe did come out of the ground. They are what is known as “wintered over” greens. Nevia No, formally the owner of Yuno’s, who now has rented 70 acres in Burlinton County, New Jersey, enthusiastically explained what “wintered over” greens are. “We cover the greens with a kind of tarp for the winter until there’s no more sign of frost. We then uncover them. The roots are still in the ground, so that the first greens that come up are really sweet.” Thus, the first broccoli rabe of the season is barely bitter, unlike the broccoli rabe that grows in the warmer months. I was inspired to purchase a head, which I plan on cooking tomorrow. Next, it was an exotic pile of Russian Kale that drew my attention. I’m not talking about the decorative Red Russian kale that is used for winter garden borders. This is a spindly-leaf variety that I had never seen before, and I think of myself as a kale veteran. I’ve used curly kale and dinosaur kale (a.k.a. Lacinato, Italian, or black kale ) in a multitude of different preparations. This new variety was a thrilling discovery. Since the Russian kale was wintered over as well, and reportedly quite sweet, I was even more interested. When No waxed enthusiastically on how good it even was used raw in salads, I was sold. The first thing I did to the kale when I returned home was pull the leaves off the thick stems. I then tore them into bite-sized pieces and washed them. I transferred the leaves to a bowl where I massaged a simple olive oil-lemon-garlic vinaigrette into the leaves along with some salt. It sounds strange to massage a salad, but you really don’t have to go too crazy. You simply rub the leaves for a few minutes until you can feel them soften. I then tossed the salad with a little sheep’s milk feta cheese. It was quick and simple as can be, but the results were delicious. One head served a decent portion for three. Since these “wintered over” treasures are only going to be available at the market for another 10 days or so, I suggest making a stop at the market and trying some. Bodhitree Farm is at the Union Square Greenmarket Wednesdays and Fridays. Share on Facebook and Twitter | Greenmarket Bits, Greens, Recipes | No comments
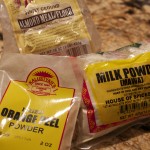
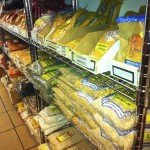
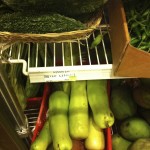
Homemade Washing Powder On a recent trip to Kalustyan’s, I was pleased to find orange rind powder, which I purchased to mix into my homemade face washing mix. The recipe that I use for homemade face washing mix is from Pratima Raichar’s book Absolute Beauty. The approach to skin care in this book is Ayurvedic, the ancient Indian science of life. I recommend the book if you have an interest in Ayurveda and/or concocting you own natural skin-care products. Among other things, the book has wonderful recipes for creams, moisturizers, lip balms, and cleansing powders. You first have to determine your skin type, which is easily done after taking an extensive questionnaire. For my skin type – which is sensitive – a good cleansing powder mix is a combination of orange rind powder, almond meal, and dry milk powder. I make up a couple of cups at a time, a big enough batch to last for months. The combination smells pleasantly orangey, and leaves my skin clean and soft. I purchased the milk powder at Little India, around the corner from Kalustyan’s on 28th street between Park and Lexington. As the name implies, this little gem of a store specializes in Indian groceries. You can purchase unusual produce such as methi (fenugreek) leaves, dudhi (zucchini-like squash) and kerala (knobbly bitter melon) here, as well as a wide variety of Indian legumes, flours, and dry goods. Share on Facebook and Twitter | Books, Kitchen Tips, Recipes, Where To Buy (Sources) | No comments
|
