
|
Sautéed Apples in Ghee One of my favorite quick morning dishes to make throughout the winter is sautéed apples in ghee. Ghee—clarified butter with the milk solids and water removed—is ideal for high heat cooking since it doesn’t burn as easily as regular butter. It still contains all the good qualities of butter, however, such as fat-soluble vitamins, short- and medium-chain fatty acids, and selenium. To get the most nutrition and best flavor, it’s best to purchase good quality ghee from cows that have been pasture-raised, or you can make your own from your favorite high quality butter. Sautéed apples are quick and simple enough to make for breakfast. In the video, I show my favorite way to peel and cut an apple. With a Y-shaped peeler—my favorite—I make a ring around the top and one around the bottom as well. I then peel the sides and quarter the apple. I lay the quarters on their sides, and cut out the core in one easy-angled cut. This is the most efficient way to core an apple, and you don’t need any special equipment. Best of all, it’s safe because, after coring the apple, you then have a flat side that rests firmly on the board. I then slice each quarter into 3 or 4 pieces. The next part is simple: I warm some ghee in a medium skillet over medium heat, add the apples and a dash cinnamon powder, and cover the skillet. I check on the apples after about 2 or 3 minutes, give them a toss, and cook them a couple of minutes more. That’s all there is to it: the tender apples smell and taste heavenly. They make a great topping for oatmeal, pancakes, waffles, or yogurt. They can also serve as a succulent side dish with scrambled eggs or other protein. 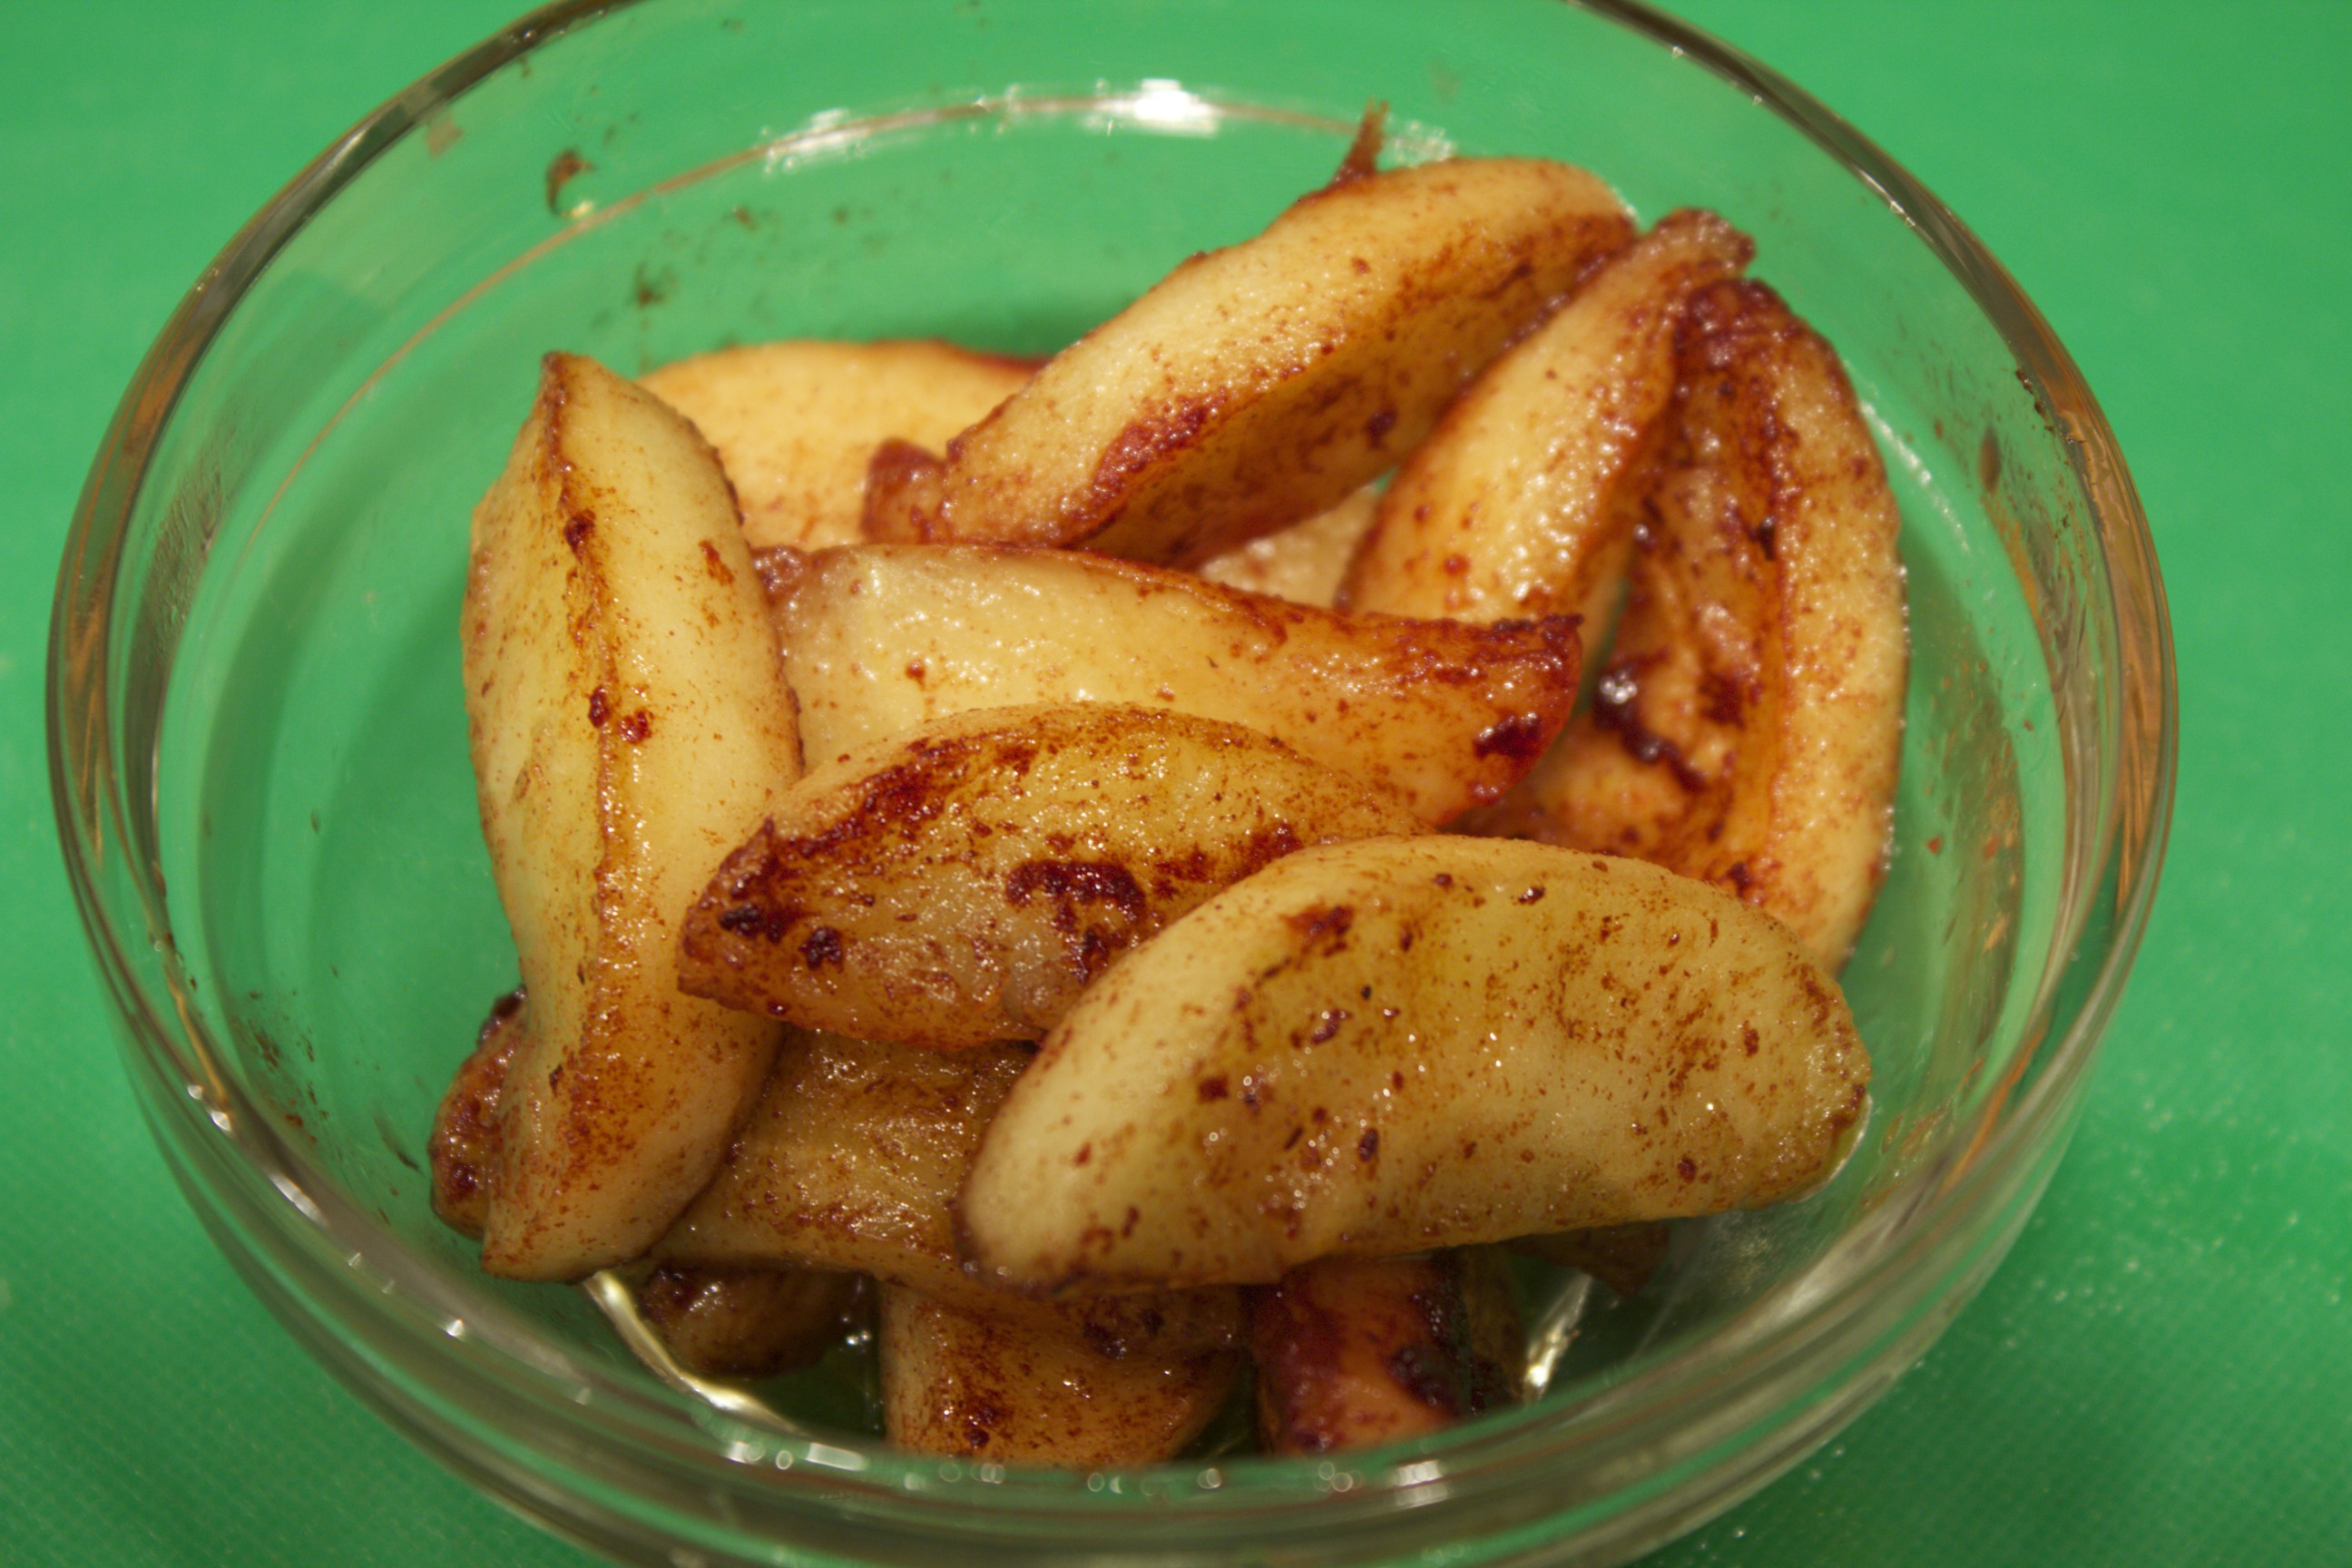 Sautéed Apples in Ghee Share on Facebook and Twitter | Breakfast, Fats & Oils, Fruit | No comments
My Favorite Winter Salad After a season of holiday indulgence and too many meals out, it’s time to begin the new year with a little lighter fare. I’m busy with obligations, but I don’t want to skimp on good food. So I turn to my favorite nourishing winter salads that I can make in minutes. This hearty winter salad that I show on the video consists of arugula, oranges, fennel, and sardines, with a complement of olives, walnuts and feta cheese. It’s composed in such a way that I don’t even need a separate dressing.  Sweet, Salty, Crunchy, Juicy I start with a nest of baby arugula, or watercress, or mesclun greens. In the video, I use arugula with some farmer’s market pea shoots mixed in. I next add an orange that is cut into segments known as supremes. I cut the orange over a bowl to make sure to catch the juices that will become part of the dressing. I sprinkle the greens and orange with salt and then add a layer of paper-thin sliced fennel, which is arguably the most appealing way to eat raw fennel. Using the mandolin is the easiest way to get such slices. Next, I sprinkle in some black olives—a flavorful variety such as kalamata or nicoise—followed by a handful of walnuts. I then crumble my favorite feta cheese, a sheep’s milk feta, over the salad. Finally, I crown the salad with sardines. I use sardines packed in extra virgin olive oil, so that the oil from the tin of the sardines becomes part of the dressing, mixing with the juice of the oranges. Every bite is exciting—a medley of sweet, salty, juicy, and crunchy. Moreover, this salad is a nutritional winner, packed with a range of nutrients, from omega 3’s to vitamins C and E, and loaded with phytochemicals and minerals as well. You can pack this salad to take on the go. Layer the greens with the fennel, olives, walnuts, and feta. Put the juicy orange slices in a separate container. Salt the salad, add the oranges, and top with the sardines right before eating. Share on Facebook and Twitter | Fish, Greens, Kitchen Tips, Lunch, Main course, techniques | No comments
Amaretti Cookies Amaretti cookies are chewy Italian cookies studded with pine nuts. These are festive enough for your holiday gift-giving but simple enough to make any time. This video shows the ins and outs of making these gluten-free cookies. I start with 2 cups almond flour, then add 1½ cups natural sugar. My favorite sweetener for these is maple sugar, but succanat ™ and rapadura™ work as well. Keep in mind that different natural sugars affect the flavor and moisture and can alter the texture slightly. I then stir in a pinch of salt and a couple teaspoons almond extract to heighten the almond flavor. The next step is to whip three egg whites in a separate bowl until they form peaks. You can do this by hand or with a hand-held or stand mixer, but my tool of choice to make the job efficient is an immersion blender. I then stir the fluffy egg whites into the flour mix. Finally, I brown the butter. I melt half a stick of butter, and cook it until it is copper-colored and fragrantly nutty. I keep a watchful eye on the pot after the butter melts—the process takes only a few minutes, and I want to make sure to stir the butter into the batter when it is browned, not burnt. At this point, I’m ready to form cookies. The batter is sticky, so using 2 spoons is the easiest way to drop the batter onto a parchment-covered baking tray. In order to leave enough room for these cookies to spread, I use 2 trays and drop the batter 1 ½ inches apart, making about 30 cookies. I sprinkle each cookie with pine nuts before it goes into a 300˚F oven to bake. Halfway through the cooking, after ten minutes, I rotate the trays to help them to color evenly. They smell heavenly while they bake. Once I’ve let the cookies cool, I store the extras in the refrigerator for up to two weeks, or I freeze them for up to two months. What a wonderful way to start off the holiday season.
Share on Facebook and Twitter | desserts, Gluten Free, Natural Sweeteners | No comments
Butternut Squash Soup with Crispy Shallots and Sage Nothing screams autumn like butternut squash soup. The version shown in the video, from The Healthy Hedonist, is simple to prepare, yet velvety and delicious-tasting. I start with a 2 ½ to 3-pound butternut squash, slice it open down the middle, place it in a 375˚ oven and bake until it’s tender, about 45 minutes. With a soup as simple as this one, roasting the squash first to heighten its flavor is of the utmost importance. I then remove it from the oven, let it cool for a few minutes, and scoop out and discard the seeds. The seeds come out so much more easily after the squash is cooked. I then scoop out the flesh and set it aside. I start the soup by adding a splash of extra virgin olive oil to a medium pot. I stir in 1 cup of leeks, 6 cloves of garlic, and 1 ½ teaspoon ground cumin, and cook the mix over gentle heat until softened. I next add a couple cups of sliced sweet potatoes, the reserved squash flesh, a cup of apple cider, and 5 cups of water or stock. This is a good place to boost nutrient content and flavor with a homemade chicken or vegetable stock, but the soup is still delicious with water as the primary liquid. Add a teaspoon salt, and cook the soup partially covered at a gentle bubble for about fifteen minutes, until the sweet potatoes are tender. While the soup is simmering, I make the garnish. I slice shallots into thin rings and add them to ¼ cup extra virgin olive oil. At first, nothing seems like it is happening. Then the oil starts to sizzle, and slowly but surely the shallots start to fry around the edges of the pan. At that point, it’s important to stir continuously for the next three or four minutes, until the shallots are more or less evenly caramelized. At the final stage, some will be darker than others, but they should all have a golden hue. Have a strainer set over a bowl ready and close. When the shallots are colored as evenly as possible, you have to separate them from the hot oil quickly, to keep them from continuing to cook. About 15 seconds before the shallots are finished I add the sage, just to sizzle them in the oil. After I strain the oil, I remove the sage from the shallots and chop the leaves into small pieces. The sage, shallots, and oil are now ready lend flair to the soup. For simplicity’s sake, I blend the soup with a hand-held blender, also known as an immersion blender. I’m careful when using the immersion blender, to immerse it in the liquid before turning it on, as well as to turn it off before lifting the blender from the soup. At this last stage I always taste the soup, to see if it needs an extra dash of salt to pull up the flavors. I sprinkle in a dusting of black pepper as well. The soup has a delightful aroma and a rich taste. The silky texture is offset with the flourish of caramelized shallots and sage, and a drizzle of shallot oil.  Butternut Squash Soup with Crispy Shallots and Sage
Share on Facebook and Twitter | Kitchen Tips, Soups, techniques, Vegetables | No comments
Very Berry Power Smoothie Sometimes an antioxidant, nutrient-dense smoothie makes a quick and powerful meal. The one in this video is rich and filling enough to keep your energy and blood sugar stable for hours. Best of all, it tastes delicious. It’s a combo of mixed frozen berries, yogurt, avocado, raw honey, coconut oil, egg yolks from pastured eggs, and coconut water. I also added a splash of macadamia nut oil because I like the nutty flavor. I made this video for Vital Choice, a company whose products I love. Not only do they have the finest wild Alaskan seafood, but they also have some other choice products such as frozen berries and macadamia nut oil, an oil that has similar nutritional properties to extra virgin olive oil. They presented the video on their newsletter, and I received the question from a viewer of why I don’t use the egg whites in the smoothie. Here is my answer: I don’t use the raw egg white because it contains a protein called avidin that interferes with the body’s absorption of biotin (Vitamin B7). It also contains a protein called “conalbumin,” which binds to iron (making it not biologically available to the body.) Also, trypsin inhibitors make digestion of the protein in the raw egg white more difficult. All of these is deactivated when the white is cooked. That being said, I still may use a raw egg white in a classic Caesar salad dressing or–once in a great white, a mousse–but I don’t make a practice of it, especially for something like a breakfast smoothie. The raw yolk, on the other hand, is great to eat raw or barely cooked. It’s great to have a lot of quick breakfast ideas in your repertoire.
Share on Facebook and Twitter | Breakfast, Eggs, Fats & Oils, Fruit, Health Tips, ingredients, Natural Sweeteners | No comments
Savory Plum Dishes Now that the summer has transitioned into autumn, I am thrilled to resume my favorite cooking method: braising. I love the way that the prep for a braise is usually short; the oven does all of the hard work. A cut of meat that starts out tough slowly cooks for hours until it is meltingly tender. Best of all, braises taste better the following day, making them ideal dishes for gatherings. A few weeks ago I was inspired by a New York times article by Melissa Clark on braising a brisket with Italian plums and port wine. Because of the wonky weather in New York this year, peaches and plums were mealy and unappealing to eat raw, but I envisioned cooked plums melting down into a beautiful regal sauce. I purchased a second cut grass-fed brisket, which is the fattier of the two possible brisket cuts. Since grass-fed meat tends to be extra lean, this is the better of the two cuts to use. I salted and peppered the six-pound piece, seared it on both sides in a little oil for about 7 minutes per side in a large skillet, then transferred it to a plate. I added a few cups sliced onions and a few cloves minced garlic to the pan, and gently sweated the onions until softened. I then added a cup of port and a cup of rich chicken stock, and scraped up the brown bits on the bottom of the pan. To a baking dish that would fit the brisket, I added a couple pounds of halved Italian plums along with a couple cinnamon sticks, a few stars of star anise, some bay leaves and a handful of fresh thyme branches. I poured the onion-wine mix over the plums, lay the brisket on top, and spooned some of the liquid over the brisket. I covered the pan with foil and placed it in a 325 degree oven for about 5 hours. Every half hour or so I flipped the brisket. The last half hour I uncovered the brisket to thicken the liquid. I let the meat cool to room temperature, then chilled it overnight in the refrigerator. I sliced it while cold and shared the dish with friends. I reheated the sliced pieces in the oven in the sauce. The brisket was succulent and delicious.  Brisket braised with Plums Since I was not yet over plums, I made a quick plum sauce to go over duck breasts. While my duck breasts were searing, I added a bit of the rendered duck fat to an adjacent skillet and sweated some sliced onions. I then added a cup of chicken stock, a cup of port, a cinnamon stick, some star anise pods, a few sprigs thyme, a bay leaf and 2 pounds of halved plums. I let the whole sauce reduce while the duck breasts cooked. The duck and the sauce were finished around the same time, in about 15 minutes. Earlier in the day I had roasted some whole beets in a pan with thyme, olive oil, and water for a couple of hours. When they were ready, I slipped off the skin, cut them into wedges, and drizzled a bit of pomegranate molasses over them.  Thyme-Roasted Beets I served the meal with a mélange of corn, peppers, and zucchini and a few spoonful’s of lacto-fermented carrots. This bright and colorful meal took only 30 minutes of labor.  Duck with Plum Sauce
Share on Facebook and Twitter | Beef, Dinner, duck, ingredients, Main course, Sauces | No comments
Cornmeal-Crusted Cod with Fresh Tomato Sauce Miniature tomatoes dazzle in a variety of different sizes, shapes and colors; they are flavorful long after the larger varieties are truly out of season. I love using these miniature packets of flavor to make versatile stove-top sauces. The one that I demo in the video is just as delicious over polenta and simple greens as it is over fish. In the video, I’m demonstrating a single serving of cornmeal-crusted cod, although the tomato sauce is enough for up to four filets. You can swap out the cod for halibut or pollack or any thick white-fleshed fish. Cornmeal-Crusted Cod with Fresh Tomato Sauce I begin with a pint of small tomatoes. I’ve used grape and cherry, or sweet sun-golds—my favorites—when I can find them at my local greenmarket. I often mix a beautiful combination of colors, varieties and sizes. I add to the skillet—besides the halved tomatoes—a teaspoon or so of minced garlic, a couple tablespoons minced shallots, a teaspoon of fennel seeds, a few tablespoons extra virgin olive oil and a splash of balsamic vinegar. I sprinkle a dusting of sea salt and freshly ground black pepper over everything, give it a quick mix, then cover and set the pan aside while I start the fish. I salt and pepper the filet before I dredge it on both sides in cornmeal. When the cast iron skillet (or any other heavy-bottomed skillet will do) is heated, I add a film of coconut oil—unflavored is best—and cook the fish a couple of minutes on each side over medium-high heat until golden. I transfer the pan to a preheated 400˚F oven for 5 minutes to cook the inside of the fish thoroughly. While the fish is in the oven, I turn the heat on the tomatoes and let them stew for 2 to 3 minutes, just until warmed through and juicy. I then stir in a tablespoon or so of minced chives and parsley, which brightens the colors and heightens the flavors. When the fish is ready, I plate it and spoon the sauce over the top. The fish is moist on the inside, crispy on the outside and complemented by the warm tomato sauce. It’s a guest-worthy dish that is easy, seasonal, and delicious.
Share on Facebook and Twitter | Corn, Dinner, Fish, Gluten Free, ingredients, Lunch, Main course, Sauces | No comments
Zucchini Salads Until recently, too many bad memories of thick chunks of raw zucchini in crudité platters made me shy away from ever eating the vegetable raw. I had assumed that the best way to coax and concentrate the flavor of the watery squash was to cook it. Before cooking, I’d often salt the zucchini to draw out the water. If I had grated it, I would squeeze out the excess; if I had sliced it, I would blot it dry before sautéing. I gave raw zucchini a second chance recently. The difference was that I sliced the vegetable paper thin. I then added a fat sprinkling salt to draw out the water. The slices wilted into an appealing texture that changed my assessment of raw zucchini. I’ve been making many delicious salad all summer with this technique. I repeat: the key is to slice the zucchini thin. This is where a mandolin comes in handy. I don’t use anything fancy—a plastic one or the slicer that is on some flat metal graters works fine. I then sprinkle some salt on the zucchini, along with something acidic like lemon and lime juice as well as all of the other ingredients. Sometimes I hold back on adding the oil until after the salad is completely softened. I let the zucchini wilt for about an hour, turning every so often.  Zucchini before Wilting These salads retain their good looks and flavor up to three days in the refrigerator. The salad pictured here includes lime juice, a few chopped anchovies, scallions, jalapeños, cilantro, dill, Thai fish sauce, and baby shrimp. I let it sit about an hour, mixing a couple of times, until the zucchini is wilted and tender. I then add some oil. Nowadays I’m using a blend of extra virgin olive oil, sesame oil, and filtered coconut oil. I serve this over a bed of mesclun for a delicious lunch.
The version I made the other day was with zucchini, salt, lemon juice, olives, mint, basil, and oil. If I had some cherry tomatoes I would have thrown those in as well. This humble vegetable (and use the yellow variety as well) lends itself to lots of possibilities for extraordinary dishes. Share on Facebook and Twitter | Kitchen Tips, Lunch, Main course, Vegetables | No comments
Herbed Pesto So many gorgeous herbs are available this time of year that I often get carried away and find myself with a refrigerator drawer full of beautiful choices. One of the ways that I like to have fun with these herbs as well as use up the extra is to make an out-of-the-ordinary pesto. In the demonstration video, I’m starting with a base of toasted pumpkin seeds, about ¾ of a cup. I toast them in a dry heavy-bottomed skillet just until they are plumped, about a minute or so. While I use pumpkin seeds in the video, you can use any nut or seed that you have in your pantry. Some favorites include walnuts, almonds, sunflower seeds, pine nuts, pecans and pistachios. I transfer the lightly toasted seeds to a food processor. I then add 2 cups packed mixed herbs. In this demo I work with a combination of cilantro, basil, chives, and mint. Some other herbs that are delicious for this technique include parsley, dill, watercress, arugula, and sorrel. I add extra virgin olive oil—about 1/3 cup—as well as a couple of tablespoons of fresh lemon juice, a garlic clove, and 1/2 teaspoon of a good mineral-rich salt. I also mix in a teaspoon of light miso—such as mellow white— which gives depth and complexity to the overall flavor. This dairy-free version allows for the greatest flexibility, and is delicious with fish, chicken, pasta, grains, and vegetables. You can always add cheese later if you like. I whirl all of the ingredients in the food processor for a couple of minutes, and that’s it. The pesto is ready to use immediately and it freezes well too. One delicious all-time favorite option, which I show on the video is to dollop some pesto between slices of fresh tomato, top with shaved parmesan, and drizzle with some good extra virgin olive oil and a sprinkling of black pepper and chives. Every mouthful is exciting.  Tomatoes with Herbed Pesto and Parmesan
Share on Facebook and Twitter | condiments, Kitchen Tips, nuts and seeds, Recipes, techniques | No comments
Ayran, National Beverage of Turkey I’ve been immersed in Turkish culture and food lately. Tonight I’m giving my first class of three Turkish classes at the New York Open Center. We will start off the meal with Aryan, which is one of the national beverages of Turkey. Rumi, the great 13th century mystic and poet, who cloaked spiritual truths in food terminology, referenced this beloved drink when he said that “just as the fat is hidden in ayran, the essence of truth is buried in lies.” Just like any other food, in Turkey there are delicious versions of this drink that are made fresh, and then there are insipid packaged varieties. You make it yourself by straining yogurt until really thick, which takes about 6 hours. Make sure to use full-fat organic (preferably with the cream on top) for best results. Whisk a cup of the thick yogurt with water (about three cups) until frothy. Add about ¼ teaspoon salt and whisk that in as well. I like serving it in small tea cups like an aperitif.  Ayran Served in a Turkish Tea Cup This is what ayran looks like in Turkey, when it’s made fresh. It’s frothed with a machine and resembles cappuccino foam on steroids.  Ayran Foamed by Machine It’s often served in beautiful mugs.
This next example was the most spectacular and the foamiest ayran that I tasted.
 Direct Way to Drink Ayran How does this man, with the most dashing mustache in Turkey, drink his Ayran? Amazing hair this man has, but a little awkward when drinking Ayran. 
You can drink Ayran with a ladle, especially when it’s that frothy.
What a way to enjoy yogurt!
|


