|
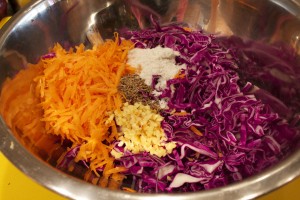
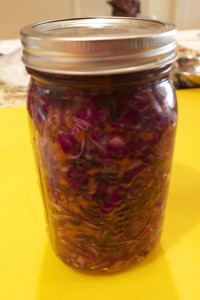
Red Cabbage Lacto-Fermented Sauerkraut Lately, I’ve been on a lacto-fermenting frenzy, fermenting everything from red cabbage to dill pickles to beet and fruit kvass. The lactobacilli, which are good bacteria, proliferate in fermented vegetables and fruit. The vegetables and fruit are easier to digest and the vitamin levels are increased as well. The main by-product of lacto-fermentation is lactic acid, which promote the growth of healthy flora throughout the intestine. What I like about these fruits and vegetables is that once they’re fermented, they last for a long time in the refrigerator. They’re an instant quick hit of super nutrition. Moreover, they are easy to produce. Here’s one of my favorites, a red cabbage ferment, that needs only salt to get the whole process of fermentation going. The salt inhibits any bacteria that could putrify the ferment until the lactic acid forms. I start with a head of finely shredded red cabbage. I add some shredded carrots, a piece of minced ginger, a tablespoon caraway seeds, and two tablespoons Celtic sea salt. After stirring everything together, I massage the mix with my hands to help the cabbage release its juices. There’s no need to add water to the brine when you make a cabbage ferment.. You can pound that cabbage with a mallet or just put a weight on the cabbage ( a bowl with a weight in it works well). and it will start sweating away in no time. I then stuff the mix into a jar (a one quart bell jar is perfect) pressing down to make sure that there’s liquid floating on top. I make sure to have an inch of space at the top. (This is quite important to avoid leaks.) I leave this on my kitchen counter for 3 to 5 days. With a bell jar, the piece in the middle is hard to press down when the ferment is complete. The red cabbage doesn’t look so bright in the beginning, but as it ferments it turns a beautiful magenta color. It’s best to transfer this to the refrigerator, where it can last a long time (up to a year) without opening. Once opened, it’s good for about three months. Share on Facebook and Twitter | condiments, Health Tips, Kitchen Tips, Side Dishes, techniques, Vegetables | No comments
Poached Eggs Poached eggs not only are suitable for brunch, but with the right accompaniments, make a light and nutritious supper as well. If you keep in mind three basic pointers, poached eggs are not difficult to master. With fresh eggs, the right temperature water, and a little care in adding the eggs, you’ll have beautifully formed creations every time. Watch this demo to see all three key steps. Use the freshest eggs that you can find to keep the proper shape of the white intact. Very fresh eggs—like that kind that you get from your local farmer—cook up perfectly without anything added to the water. If your eggs are not farm-fresh, add a teaspoon salt and a couple of teaspoons vinegar to your pot of simmering water to help coagulate the egg whites. Have the water ready at a simmer. You don’t want the eggs to be torn apart by agitation, which is what faster boiling water will do. On the other hand, if the water is not hot enough, the eggs will not cook quickly enough and the whites of the eggs will spread. Gentle bubbles in the water are the cue that the temperature is correct. Break the eggs one at a time into a dish or small plate. Create a little whirlpool by swirling a spatula or spoon in the water. Then drop the eggs— one at a time— into the whirlpool. (You can also slide the eggs in along the sides of the pot.) Simmer 3 to 5 minutes, until the whites are coagulated but the yolks are still soft. Remove the eggs from the pan with a slotted spoon or skimmer. Drain very well and serve. You can trim off any ragged edges if you like. If you want to make a large number of poached eggs but not serve them right away, immediately plunge the cooked ones into cold water. Reheat briefly in hot water right before serving. The classic here is eggs benedict, and yes, it is mighty tasty. For a variation, try serving the eggs over a steamed artichoke and smoked salmon in lieu of the English muffin and bacon. One delicious and light way to serve poached eggs is on a bed of wilted spinach and smoked salmon. I make a quick blender sauce of yogurt, avocado, cilantro, a bit of salt and a sprinkle of lime juice and ladle it over the top. It’s delicious and satisfying.
Share on Facebook and Twitter | Breakfast, Eggs, techniques | No comments
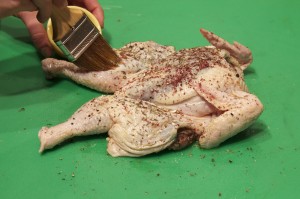
Sumac Chicken When my photography teacher waxed enthusiastic about his favorite sumac chicken, I started thinking about how much I like the sour, astringent flavor that that the purple spice imparts to dishes. I am especially fond of the combination called za’atar, a mix of sumac, thyme, and sesame seeds, which is typically baked into Middle Eastern flat breads. I hadn’t cooked with sumac for a while, and the thought of making a delicious chicken with the spice was intriguing. My first version, which had sumac and salt rubbed in, over, and around the chicken was tasty, but not as tasty as I wanted. The flavor needed a bit more complexity. The next two versions were delicious. First I mixed fresh thyme, salt, sumac, minced garlic, and extra virgin olive oil into a paste. I butterflied open the chicken, then slipped the paste under the skin of the chicken I had bought at Union Square green market. I flipped the chicken and then brushed it with olive oil, and sprinkled it with more sumac, some dried thyme, and some garlic powder, salt and freshly ground black pepper.
I then transferred the chicken to the refrigerator to let the flavors seep into the meat. It’s great if you can make this dish a day in advance and let it marinate overnight. So far I’ve cooked the chicken two ways. The first time I just placed it on a rack and put it in a 400˚F oven for about 50 minutes until a thermometer in the thigh registered about 175˚F.
The next time I set the chicken on a grill pan skin side down and put a weight on it. I used this nifty iron, but a cast iron skillet or anything weighty works just as well. I grilled it over medium-high heat for about 8 minutes until some serious browning appeared, and I then flipped the chicken and transferred it to a rack in a pan and placed it in a 350˚F. oven for another 40 minutes. It was delicious this way, even almost tasting as if it had been grilled outdoors. Of course you could grill it on an outdoor grill, but for me, in Manhattan, this was not a possibility. The bird was succulent, with bright zesty flavor. I served it with mujadarrah (rice and lentils with caramelized onions) and salad one time, and mujadarrah and roasted asparagus another. Share on Facebook and Twitter | Dinner, ingredients, Main course | No comments
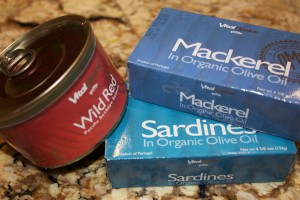
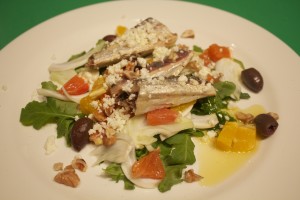
Eating for Radiant Skin: part 3 A Word about Fat: Fat is important for skin health. It’s a mistake to be on a low-fat or no-fat diet. You need fat in order to digest, transport, and absorb Vitamin A,D,E, and K. It’s soothing to the nervous system. Every cell in the body has a surrounding membrane – which is where communication between cells take place – that is made up of fat. You need an array of fats. You need saturated fats to maintain structure; mono and polyunsaturated fats to maintain elasticity. All fats and oils that we consume are made up of a combination of monounsaturated, polyunsaturated, and saturated fats. Polyunsaturated fats, also know as omega 3’s and 6’s, are the ones your body does not make. These are called essential fatty acids because you have to get them from food sources. Omega 3’s are good for countering inflammation in the body. Good sources for omega 3’s are fatty fish such as sardines, anchovies, tuna, and salmon; nuts, seeds, and organic eggs. Because of the standard American highly refined diet, most people have far too many Omega 6’s and not enough Omega 3’s. The ideal ratio is somewhere between 1 to 4 times as much omega 6’s as 3’s. Most Americans get 20 times more omega 6’s than 3’s. Poor quality oils and feed lot meat contribute to an excess of Omega 6 fatty acids in the body. It is easy to get good quality Omega 6’s from whole nuts and seeds, where they are less likely to be rancid. Refined polyunsaturated oils are unstable; they are exposed to high temperatures, chemical solvents, light and oxygen. The essential oils in them are destroyed, and they are rancid and oxidized. They suppress the immune system and cause inflamation. Eating a lot of polyunsaturated oil increases cholesterol in the tissues and cell membranes. The best fats for cooking, which can take the heat without becoming rancid or oxidized, are butter, ghee (clarified butter), olive oil, coconut oil, and sesame oil. To get a good supply of omega 3’s, I turn to the tinned fishes that I keep in my pantry. From these pantry staples I have developed nutritious, delicious meals that I can get on the table in minutes. A couple of years ago I met the folks at Vital Choice when I was at the wise traditions conference. They had a lot of samples of their fish, including everything from the tinned mackerel, sardines, and salmon to the wild king salmon. They were by far the most delicious tinned fish I had ever tasted, and I was impressed with the flash frozen salmon as well. We were served smoked cod from them as a first course as well, another delicious fish they sell. I returned home from the conference with multiple tins of each pantry staple and I ordered a lot more stuff when I returned home. Now I make sure to keep a supply of the flash-frozen salmon as well in my freezer. (By the way, the Vital Choice catalogue is extensive, and among other products includes macadamia nut oil, dark chocolate, and a variety of different kinds of fish oil.) One of my super quick go-to lunches is either the mackerel (or sardines) mashed with avocado, lemon, and salt on a bed of greens. I eat it on a bed of greens. Here’s a quick video on how to make it: Here’s a composed salad made with the sardines: Here’s a quick video on how to make it: Another quick dish that I make a lot is with the flash-frozen wild salmon. Here’s the video on how to make this: This last dish is made with the canned salmon and fresh salmon roe. Salmon roe is a nutritional powerhouse, loaded with anti inflammatory omega 3’s as well as Vitamin A and D. Here’s how to make it: Delicious, nutritious, fast, and easy!
Share on Facebook and Twitter | Breakfast, Dinner, Eggs, Fats & Oils, Health Tips, Lunch, Main course, Pantry Items | No comments
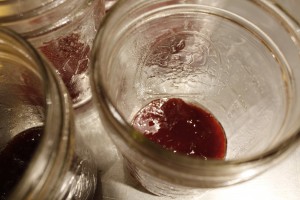
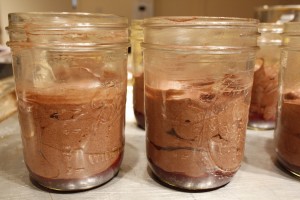
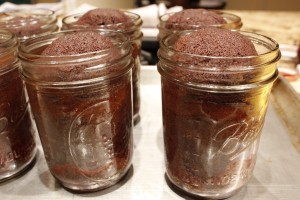
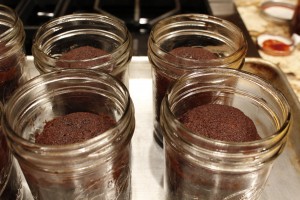
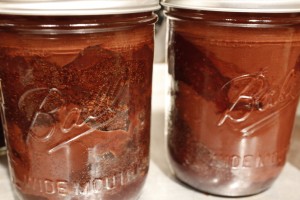
Cake-in-a-Jar Next week I am going to be making about 40 cakes-in-a-jar for a catering job, so I spent some time in the kitchen working out the technical challenges. I’ve been having a blast experimenting. These packed jars are not only adorable, they are delicious as well. My version here has chocolate cake, layers of raspberry or strawberry jam, and a thick layer of ganache. I’ve been using pint ball jars, which serve two, and are a good size for gifts. The smaller 1-cup ball jars are perfect for individual servings. First I coat the jars with spray. I rarely use spray fat, but since I’m about to make over 40 cakes, I’m looking to streamline the process. Plus, I just found a coconut oil spray from Spectrum. Next, I spoon a layer of jam on the bottom. I’ve used strawberry and raspberry jam, for the color as well as the flavor. It’s a treat to dig up with a long spoon the cooked jam under the baked cake. Use any favorite chocolate cake recipe and fill the containers half full. A cake recipe that makes two layer cakes is perfect for 6 pint-sized jars. I baked the cakes at 350˚ for about 25 minutes. Don’t worry, the jars won’t explode or anything — this is like baking in pyrex. The cakes do take a little less time than when they’re in cake pans, so check on them a little earlier than you might otherwise. The cakes emerge from the oven looking like they’ve risen too high, but they settle a lot after a few minutes. I then added a bit more jam around the top dome to fill in the gap (for 6 cakes you will need a 16-ounce jar) as well as a thick layer of ganache on top. (I flavored my ganache with Chambord.) Keep in mind that the weight of the ganache will eventually sink the cake about an inch. That makes the whole cake compress and taste extra fudgey. The whole concoction tastes like a trifle. Screw on the lid and refrigerate. These are tastiest if you refrigerate them for a couple of hours before eating to let the ganache settle. The cakes stay fresh for at least five days. Dig a long spoon in and get all of the layers in each bite. (I feel positively naughty eating these, kind of like I’ve been caught eating out of the jar.) The larger ones are fun to share. Pass the jar around, and dig in. At least it’s not illegal.
Share on Facebook and Twitter | Chocolate, desserts, Kitchen Tips, Musings, Recipes, techniques | No comments
Lamb Merguez Stew I have been making lots of soups and stews this week to give to a friend who is recovering from surgery. The upside is that I’ve had a lot of delicious warming food around as well. This lamb merguez stew was a snap, since I had lamb bone broth in my freezer. Chicken stock, however, would work as well. I purchased the sausage from my favorite lamb farmer, 3-corner-Field farm at the Union Square greenmarket.
I first browned the sausage (about a pound) in a large pot, then removed it and cooked down the liquid. I added ½ cup shallots and sweated those in the small amount of lamb fat left in the pot for about 5 minutes. I then added a 2 ½ pound butternut squash that I had cut into 1-inch cubes, a jar of roasted red peppers, the cooked sausage and about 4 cups stock. I added some salt, covered the pot, and let the stew simmer for about 20 minutes, until the squash was soft. I added a whole head of chopped kale, then cooked the stew another 10 minutes until the kale was tender. Meanwhile, on another burner, in a small skillet, I sautéed some garlic, ginger, and harissa powder for a couple of minutes, then added that to the stew. At the end, I smashed some of the cooked squash against the sides of the pot to thicken the stew. Simple, quick, delicious meal-in-a-pot. Share on Facebook and Twitter | Dinner, Lamb, Lunch, Main course, Soups, Where To Buy (Sources) | No comments
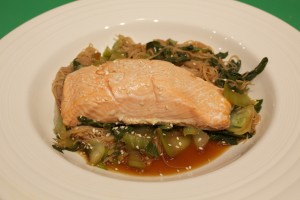
Sunday Night Dinner Sunday night was a night for using up those bits and pieces in the refrigerator and freezer. I had some wild salmon from Alaska ready to use that I had defrosted, as well as some toasted fennel seed vinaigrette. I keep a stash of homemade stocks in my freezer: roasted vegetable stock; chicken, fish, lamb, and beef bone broths, so I had instant flavor available to enliven my meal. I defrosted a small bit of vegetable stock. I added the Swiss chard in a small pot with ½ cup or so of vegetable stock, puréed the whole mix, and finished it with a pat of butter. I tossed the salmon in the fennel seed vinaigrette and then baked it at 375˚F. for about 15 minutes, until just pink in the middle. I mixed the sliced carrots and parsnips with a couple tablespoons stock, a couple tablespoons extra virgin olive oil, a pinch cinnamon, nutmeg, cayenne, salt and pepper. I nestled some garlic slices among the vegetables as well. I baked them covered until tender, about 20 minutes, then uncovered them for another 10 minutes until the carrots and parsnips browned. I steamed the cauliflower then sprinkled it with a mix of lemon zest, parsley, and chopped kalamata olives. I served the salmon, cauliflower, and carrot mix on top of the chard puree and tossed some pea shoots in the middle. Share on Facebook and Twitter | Dinner, Greens, ingredients, Recipes, Vegetables | No comments
Young Coconuts and How to Crack Them Coconut water is the liquid found inside a young coconut. Don’t mistake it for coconut milk, which comes from the meat of a mature coconut. In addition to natural sugars, which make it taste deliciously sweet, the water contains a complex array of vitamins and minerals. The nutritious beverage is high in potassium, chlorides, calcium, and magnesium. As a tree sap, coconut water is essentially the “blood” of the coconut palm. The electrolyte profile of coconut water is somewhat similar to human plasma and has been used by doctors as an intravenous solution and injected directly into the bloodstream to prevent dehydration. When freshly extracted from the coconut, the liquid is free from germs and parasites. Sure, you can buy the water in packs from the grocery store, but it’s great fun to whack open the fruit yourself. Not to mention that there’s no comparison in the flavor between the fresh and the bottled. Young coconuts are large and green off the tree, but come already shaved in this country, so thankfully, you don’t need a machete to open them. It is not difficult to open these neatly, so that you can drink the water and scoop out the soft gel-like meat. I use a serrated knife to shave around the top part of the coconut. Then I take the heel of a heavy knife. I use a cleaver and whack it a few times. I hold the coconut on an angle, which makes it really safe. The key is to whack the coconut with confidence. After three or four whacks, the lid just lifts off. I can put a straw in this and drink the liquid and use a spoon to scoop out the gel. This is the best sports drink, thirst quencher, and cooler around. The best brand of purchased young coconut products is from exoticsuperfoods.com. You can buy packs of the young meat and bottles of fresh coconut water, which is second only to the ones you crack open yourself.
Share on Facebook and Twitter | Fruit, Health Tips, ingredients, Kitchen Tips, Where To Buy (Sources) | No comments
Salt Salt draws out of food the essential flavor that would otherwise remain neutral or latent. Salting properly is what distinguishes a mediocre cook from a very good one. I love to stand around an almost finished dish with my students, adding salt in increments until the magical moment when the flavor bursts forward. After years of cooking, I still find that an exciting moment. Properly seasoned food leaves a rounded flavor on the tongue. Often before a dish is salted properly, the flavor of the food can be dull or might register only on the back receptors of the tongue. In addition, pleasantly spicy foods feel like they are overly spicy. Once the proper amount of salt is added – and that might mean the difference of only a pinch – the constituent flavors are drawn together harmoniously, and the food comes alive. In my recipes, I always indicate an amount of salt that is close to the amount that I think a given dish needs. The recipe usually needs one or two pinches more to draw out the flavors; it is impossible to include that tiny amount in the recipe, and it may vary, depending on the ingredients. I call this extra amount a “grandma pinch,” which means a good fat pinch, not a speck. If you tend to be heavy-handed, however, make your pinch a baby pinch. Many people today are afraid of seasoning their food properly because of the misconception that salt is bad for you. Nonetheless, the body needs sodium to function. It helps carry nutrients into the cells, and is the main component of the body’s extra-cellular fluids. But let’s be clear about one thing: unrefined salt is not the same as refined salt. Salt in its natural form–not altered during manufacturing–is unrefined. It is a naturally occurring complex of sodium chloride (which includes minerals such as calcium and magnesium) as well as a complete complement of essential trace minerals. Refined salt has all of its minerals removed, rendering it an essentially lifeless product. That’s why even though it has large crystals, kosher salt does not have my endorsement. (It’s appropriate for crusting fish or cleaning cast-iron skillets.) I favor the Celtic salt that has been harvested off the coast of Brittany, dried in salt pools by wind and air. I like the finely ground variety which I use in everything, including baking. The coarse ground variety is a wonderful finishing salt for when you large crystal is desirable, such as for boiled edamame. The pristine white layer that forms on the top of the salt beds is know as fleur de sel, my first choice for sprinkling on a chocolate tart. Another high quality mineral-rich salt is Himalayan pink salt. Both Celtic and Himalayan salt are both readily available in stores and online. Both will nourish the body while making your food taste delicious. It’s best to use unrefined salt, season your food until the flavor is maximized; and, to avoid getting too much sodium, stay away from processed food!
Share on Facebook and Twitter | Health Tips, salt | No comments
Nuts and Seeds It is undeniable that when nuts and seeds are soaked – and dehydrated if you want them crunchy – they are more readily digestible, and the nutrients within are easier to absorb. Besides, they taste simply delicious. Nuts and seeds contain enzyme inhibitors, which are there as protection until they have what they need to grow, such as sunlight, water, or soil. The soaking water will have the enzyme inhibitors in it, so after you drain the nuts or seeds, make sure to give them a rinse. You can use the plumped nuts as is (perfect for smoothies and nut milks), since soaking makes them softer. You can store the soaked nuts for a few days in the refrigerator to use as needed. Alternatively, dehydrate them in a low oven (or dehydrator) to make crispy nuts. Either way, you can really feel the difference in your body between those nuts that have been properly treated and those that have not. For best results, start with organic and raw. The worst nuts to purchase are packaged varieties that have already been roasted and salted. Poor quality fat and salt are added and the roasting has damaged the fat inherent in the nuts and seeds. Here are appropriate soaking times for each variety: 0 to 2 hours: Brazil, macadamia, and pine nuts 2 to 4 hours: Cashews, pecans, and walnuts (pecans and walnuts can go up to 6 hours) 4 to 6 hours: Sunflower seeds 6 to 8 hours: Pumpkin seeds, sesame seeds, hazelnuts 8 to 12 hours: Almonds If the idea of soaking and dehydrated nuts is going to send you over the edge, consider purchasing from Wilderness family naturals. Wildernessfamilynaturals.com These folk already do all the soaking and dehydrating work for you. I first tasted their exceptional products at the Wise Traditions conference a couple of years ago. The folks from Wilderness Family Naturals had a large booth, and I was able to sample before buying. I was hooked, and returned home from the conference with quite a few bags. I’ve been ordering ever since; the box arrives on my doorstep fast, within just a few days. If you just want to get your feet wet before committing to a big order, try the mixed nuts. I guarantee you’ll be pleased. It’s good to know that there’s high quality choices available. Share on Facebook and Twitter | ingredients, Kitchen Tips, nuts and seeds, Where To Buy (Sources) | No comments
|
