|
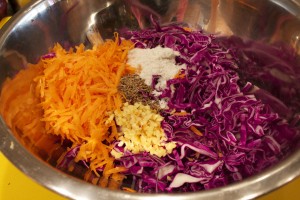
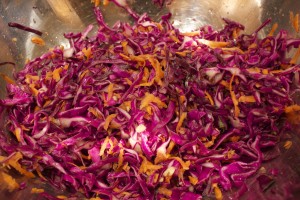
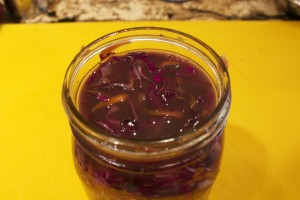
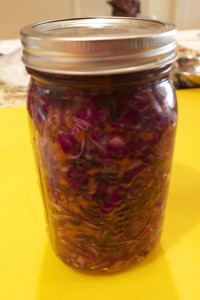
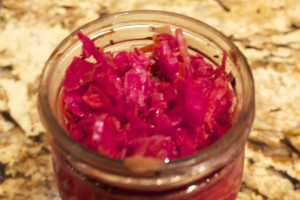
Red Cabbage Lacto-Fermented Sauerkraut Lately, I’ve been on a lacto-fermenting frenzy, fermenting everything from red cabbage to dill pickles to beet and fruit kvass. The lactobacilli, which are good bacteria, proliferate in fermented vegetables and fruit. The vegetables and fruit are easier to digest and the vitamin levels are increased as well. The main by-product of lacto-fermentation is lactic acid, which promote the growth of healthy flora throughout the intestine. What I like about these fruits and vegetables is that once they’re fermented, they last for a long time in the refrigerator. They’re an instant quick hit of super nutrition. Moreover, they are easy to produce. Here’s one of my favorites, a red cabbage ferment, that needs only salt to get the whole process of fermentation going. The salt inhibits any bacteria that could putrify the ferment until the lactic acid forms. I start with a head of finely shredded red cabbage. I add some shredded carrots, a piece of minced ginger, a tablespoon caraway seeds, and two tablespoons Celtic sea salt. After stirring everything together, I massage the mix with my hands to help the cabbage release its juices. There’s no need to add water to the brine when you make a cabbage ferment.. You can pound that cabbage with a mallet or just put a weight on the cabbage ( a bowl with a weight in it works well). and it will start sweating away in no time. I then stuff the mix into a jar (a one quart bell jar is perfect) pressing down to make sure that there’s liquid floating on top. I make sure to have an inch of space at the top. (This is quite important to avoid leaks.) I leave this on my kitchen counter for 3 to 5 days. With a bell jar, the piece in the middle is hard to press down when the ferment is complete. The red cabbage doesn’t look so bright in the beginning, but as it ferments it turns a beautiful magenta color. It’s best to transfer this to the refrigerator, where it can last a long time (up to a year) without opening. Once opened, it’s good for about three months. Share on Facebook and Twitter | condiments, Health Tips, Kitchen Tips, Side Dishes, techniques, Vegetables | No comments
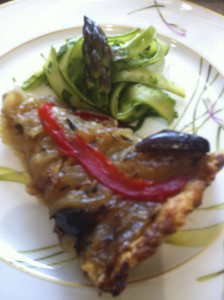
Catering Gig This past Friday and Sunday, I catered a couple of on-site parties. I had Wednesday and Sunday morning to prepare for the Sunday brunch, and Thursday and Friday to prepare for the Friday evening party. Since I had to prepare a good amount in advance of Sunday, I had to plan on a certain number of dishes that would freeze or hold well for up to five days. These individual cheesecakes fit the criteria. As they rest in the refrigerate, they just keep on getting tastier, so making them five days ahead was not a stumbling block. I bought the molds at J.B. Prince, an amazing store on 31st street in NYC. I froze a batch of crepes (which were to be filled with strawberry-rhubarb compote), zucchini pancakes, lasagna, and this caramelized onion tart.
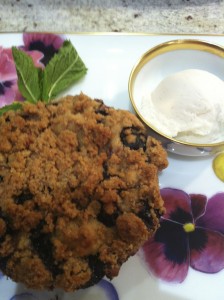
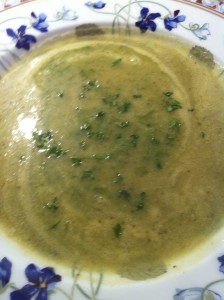
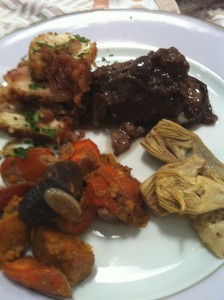
I made the Friday desserts Friday afternoon. This is the blueberry buckle from the Healthy Hedonist Holidays. This is a chocolate cake made in individual aluminum ramekins. Powdered sugar covers a multitude of craters. The Friday night meal had as a starter the Turkish chopped romaine salad and the miso-marinated black cod from The Healthy Hedonist. I marinated the cod early in the day (marinade made the day before) and just tossed it in the broiler to brown. Before serving I blasted the fish in a hot oven to reheat; the oily fish is so forgiving it was not in the least bit dried out . The stock for the broccoli soup was made Wednesday and the soup and pistou topping were finished Thursday. The main course included braised short ribs and stuffed chicken (a great way to keep the chicken moist) as well as braised-roasted purple potatoes, sweet potatoes and carrots, and lemony sautéed artichokes. I planned the main course to have items on it that would reheat well without drying out. For the Sunday buffet I did cook a couple of items that required precise timing, but not too many. One of the most important things about cooking for a crowd–beside being organized–is to have a menu that is a bit forgiving. Share on Facebook and Twitter | Dinner, Main course, Musings, Side Dishes, Where To Buy (Sources) | No comments
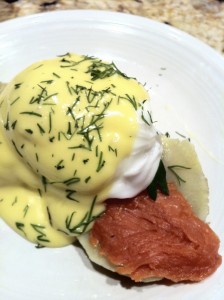
Poached Eggs Poached eggs not only are suitable for brunch, but with the right accompaniments, make a light and nutritious supper as well. If you keep in mind three basic pointers, poached eggs are not difficult to master. With fresh eggs, the right temperature water, and a little care in adding the eggs, you’ll have beautifully formed creations every time. Watch this demo to see all three key steps. Use the freshest eggs that you can find to keep the proper shape of the white intact. Very fresh eggs—like that kind that you get from your local farmer—cook up perfectly without anything added to the water. If your eggs are not farm-fresh, add a teaspoon salt and a couple of teaspoons vinegar to your pot of simmering water to help coagulate the egg whites. Have the water ready at a simmer. You don’t want the eggs to be torn apart by agitation, which is what faster boiling water will do. On the other hand, if the water is not hot enough, the eggs will not cook quickly enough and the whites of the eggs will spread. Gentle bubbles in the water are the cue that the temperature is correct. Break the eggs one at a time into a dish or small plate. Create a little whirlpool by swirling a spatula or spoon in the water. Then drop the eggs— one at a time— into the whirlpool. (You can also slide the eggs in along the sides of the pot.) Simmer 3 to 5 minutes, until the whites are coagulated but the yolks are still soft. Remove the eggs from the pan with a slotted spoon or skimmer. Drain very well and serve. You can trim off any ragged edges if you like. If you want to make a large number of poached eggs but not serve them right away, immediately plunge the cooked ones into cold water. Reheat briefly in hot water right before serving. The classic here is eggs benedict, and yes, it is mighty tasty. For a variation, try serving the eggs over a steamed artichoke and smoked salmon in lieu of the English muffin and bacon. One delicious and light way to serve poached eggs is on a bed of wilted spinach and smoked salmon. I make a quick blender sauce of yogurt, avocado, cilantro, a bit of salt and a sprinkle of lime juice and ladle it over the top. It’s delicious and satisfying.
Share on Facebook and Twitter | Breakfast, Eggs, techniques | No comments
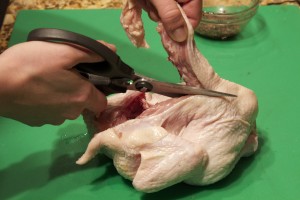
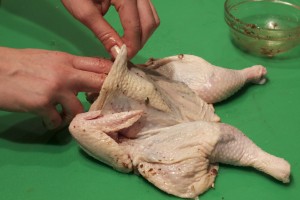
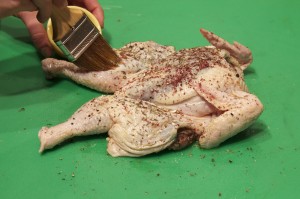
Sumac Chicken When my photography teacher waxed enthusiastic about his favorite sumac chicken, I started thinking about how much I like the sour, astringent flavor that that the purple spice imparts to dishes. I am especially fond of the combination called za’atar, a mix of sumac, thyme, and sesame seeds, which is typically baked into Middle Eastern flat breads. I hadn’t cooked with sumac for a while, and the thought of making a delicious chicken with the spice was intriguing. My first version, which had sumac and salt rubbed in, over, and around the chicken was tasty, but not as tasty as I wanted. The flavor needed a bit more complexity. The next two versions were delicious. First I mixed fresh thyme, salt, sumac, minced garlic, and extra virgin olive oil into a paste. I butterflied open the chicken, then slipped the paste under the skin of the chicken I had bought at Union Square green market. I flipped the chicken and then brushed it with olive oil, and sprinkled it with more sumac, some dried thyme, and some garlic powder, salt and freshly ground black pepper.
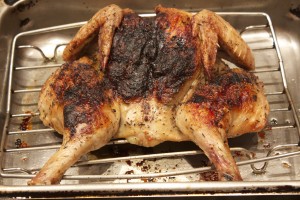
I then transferred the chicken to the refrigerator to let the flavors seep into the meat. It’s great if you can make this dish a day in advance and let it marinate overnight. So far I’ve cooked the chicken two ways. The first time I just placed it on a rack and put it in a 400˚F oven for about 50 minutes until a thermometer in the thigh registered about 175˚F.
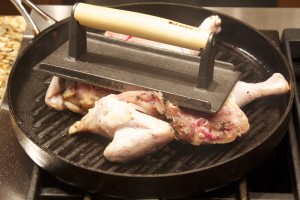
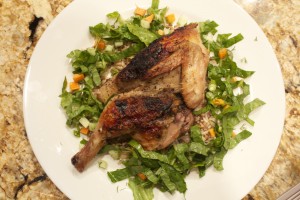
The next time I set the chicken on a grill pan skin side down and put a weight on it. I used this nifty iron, but a cast iron skillet or anything weighty works just as well. I grilled it over medium-high heat for about 8 minutes until some serious browning appeared, and I then flipped the chicken and transferred it to a rack in a pan and placed it in a 350˚F. oven for another 40 minutes. It was delicious this way, even almost tasting as if it had been grilled outdoors. Of course you could grill it on an outdoor grill, but for me, in Manhattan, this was not a possibility. The bird was succulent, with bright zesty flavor. I served it with mujadarrah (rice and lentils with caramelized onions) and salad one time, and mujadarrah and roasted asparagus another. Share on Facebook and Twitter | Dinner, ingredients, Main course | No comments
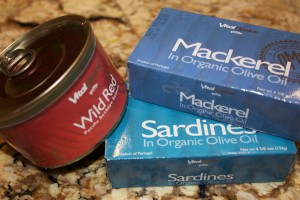
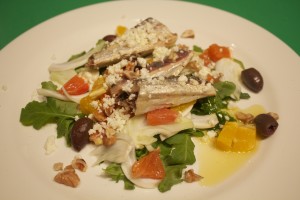
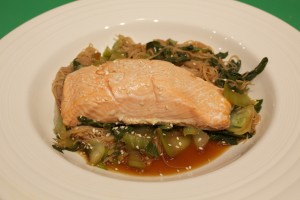
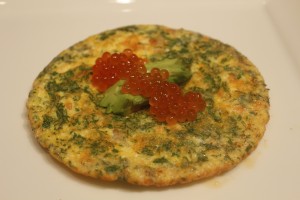
Eating for Radiant Skin: part 3 A Word about Fat: Fat is important for skin health. It’s a mistake to be on a low-fat or no-fat diet. You need fat in order to digest, transport, and absorb Vitamin A,D,E, and K. It’s soothing to the nervous system. Every cell in the body has a surrounding membrane – which is where communication between cells take place – that is made up of fat. You need an array of fats. You need saturated fats to maintain structure; mono and polyunsaturated fats to maintain elasticity. All fats and oils that we consume are made up of a combination of monounsaturated, polyunsaturated, and saturated fats. Polyunsaturated fats, also know as omega 3’s and 6’s, are the ones your body does not make. These are called essential fatty acids because you have to get them from food sources. Omega 3’s are good for countering inflammation in the body. Good sources for omega 3’s are fatty fish such as sardines, anchovies, tuna, and salmon; nuts, seeds, and organic eggs. Because of the standard American highly refined diet, most people have far too many Omega 6’s and not enough Omega 3’s. The ideal ratio is somewhere between 1 to 4 times as much omega 6’s as 3’s. Most Americans get 20 times more omega 6’s than 3’s. Poor quality oils and feed lot meat contribute to an excess of Omega 6 fatty acids in the body. It is easy to get good quality Omega 6’s from whole nuts and seeds, where they are less likely to be rancid. Refined polyunsaturated oils are unstable; they are exposed to high temperatures, chemical solvents, light and oxygen. The essential oils in them are destroyed, and they are rancid and oxidized. They suppress the immune system and cause inflamation. Eating a lot of polyunsaturated oil increases cholesterol in the tissues and cell membranes. The best fats for cooking, which can take the heat without becoming rancid or oxidized, are butter, ghee (clarified butter), olive oil, coconut oil, and sesame oil. To get a good supply of omega 3’s, I turn to the tinned fishes that I keep in my pantry. From these pantry staples I have developed nutritious, delicious meals that I can get on the table in minutes. A couple of years ago I met the folks at Vital Choice when I was at the wise traditions conference. They had a lot of samples of their fish, including everything from the tinned mackerel, sardines, and salmon to the wild king salmon. They were by far the most delicious tinned fish I had ever tasted, and I was impressed with the flash frozen salmon as well. We were served smoked cod from them as a first course as well, another delicious fish they sell. I returned home from the conference with multiple tins of each pantry staple and I ordered a lot more stuff when I returned home. Now I make sure to keep a supply of the flash-frozen salmon as well in my freezer. (By the way, the Vital Choice catalogue is extensive, and among other products includes macadamia nut oil, dark chocolate, and a variety of different kinds of fish oil.) One of my super quick go-to lunches is either the mackerel (or sardines) mashed with avocado, lemon, and salt on a bed of greens. I eat it on a bed of greens. Here’s a quick video on how to make it: Here’s a composed salad made with the sardines: Here’s a quick video on how to make it: Another quick dish that I make a lot is with the flash-frozen wild salmon. Here’s the video on how to make this: This last dish is made with the canned salmon and fresh salmon roe. Salmon roe is a nutritional powerhouse, loaded with anti inflammatory omega 3’s as well as Vitamin A and D. Here’s how to make it: Delicious, nutritious, fast, and easy!
Share on Facebook and Twitter | Breakfast, Dinner, Eggs, Fats & Oils, Health Tips, Lunch, Main course, Pantry Items | No comments
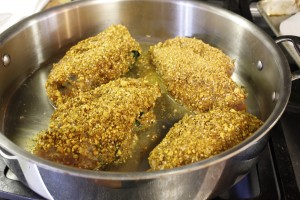
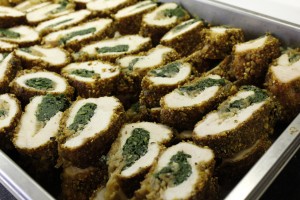
Mediterranean Catering I’ve been cooking a lot of Mediterranean food lately, for all kinds of events. This one featured dukkah-crusted stuffed medallions of chicken. I filled boneless breasts with caramelized onions and garlic-sautéed spinach, then coated the breasts with flour, egg, and dukkah. Dukkah is a combination of toasted pistachios, sesame seeds, cumin, coriander, smoked paprika, thyme, salt and pepper. (It’s a great mix to have on hand to jazz up a meal.) The breasts were sautéed, then finished in the oven for about 15 minutes. I then sliced them with an electric saw to get these beautiful even cuts. Best thing about these breasts is that they stay tender, even when reheated the next day.
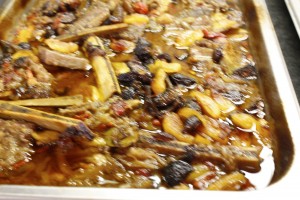
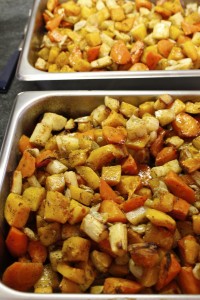
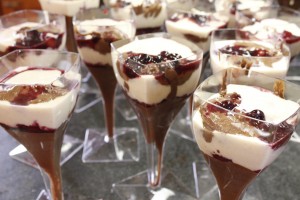
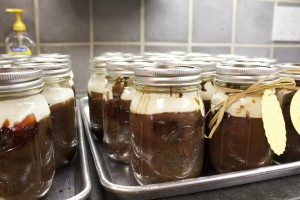
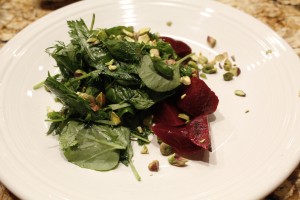
I also made Moroccan-braised short ribs. I had previously been making these with lamb shanks, but the short ribs worked as well. I salted, peppered, and browned the short ribs first, then sautéed sliced red onions until tender. I added some harissa, garlic, ginger, cinnamon sticks, bay leaves, cumin, coriander, and cooked the spices for a couple of minutes. I then added a jar of roasted red peppers and some stock, brought the liquid to a boil, and then transferred the baking pan to the oven. The dish braised at 325˚F. for 2 ½ hours. I pulled the dish out of the oven, added some dried apricots and figs, and returned it to the oven to cook uncovered at 500˚F. for another 30 minutes to brown. The ribs by this time were falling off the bone. I tossed carrots, parsnips, and butternut squash with garlic, extra virgin olive oil, chicken stock (vegetable stock is good as well), cinnamon, nutmeg, salt, and cayenne and place them in the oven to braise at 375˚F. for about 45 minutes. Then I let the vegetables cook another 20 minutes uncovered so that they could color. For dessert, I made the coconut chocolate mousse from The Healthy Hedonist, layered with berry sauce and cashew cream made from cashews blended with coconut milk, maple sugar, and vanilla. I also made the cakes-in-a-jar for gifts, only this time they were topped off with whipped cream. Thank goodness I had done a test run. (See previous post for how to make these.) They were a hit. The salad was an herbed watercress and orange blossom vinaigrette salad with roasted beets and was sprinkled with pistachios. This is how a single serving looked. All of these dishes stored well and could be made in advance, which was, after all, the whole idea. Share on Facebook and Twitter | desserts, Dinner, Main course, Side Dishes | No comments
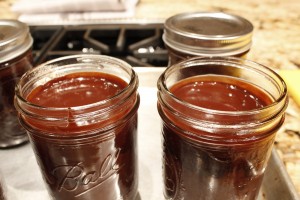
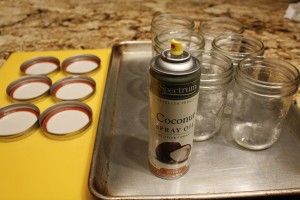
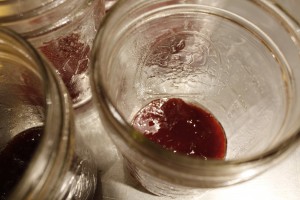
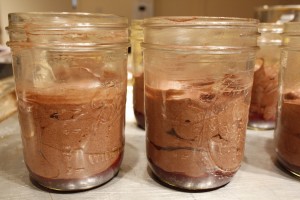
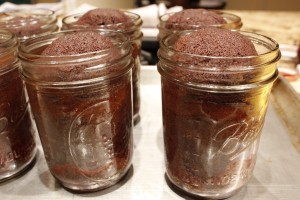
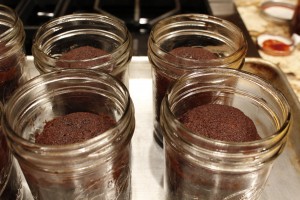
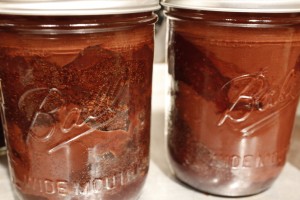
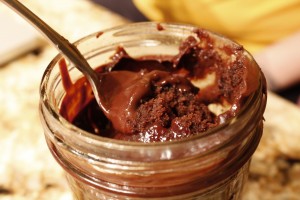
Cake-in-a-Jar Next week I am going to be making about 40 cakes-in-a-jar for a catering job, so I spent some time in the kitchen working out the technical challenges. I’ve been having a blast experimenting. These packed jars are not only adorable, they are delicious as well. My version here has chocolate cake, layers of raspberry or strawberry jam, and a thick layer of ganache. I’ve been using pint ball jars, which serve two, and are a good size for gifts. The smaller 1-cup ball jars are perfect for individual servings. First I coat the jars with spray. I rarely use spray fat, but since I’m about to make over 40 cakes, I’m looking to streamline the process. Plus, I just found a coconut oil spray from Spectrum. Next, I spoon a layer of jam on the bottom. I’ve used strawberry and raspberry jam, for the color as well as the flavor. It’s a treat to dig up with a long spoon the cooked jam under the baked cake. Use any favorite chocolate cake recipe and fill the containers half full. A cake recipe that makes two layer cakes is perfect for 6 pint-sized jars. I baked the cakes at 350˚ for about 25 minutes. Don’t worry, the jars won’t explode or anything — this is like baking in pyrex. The cakes do take a little less time than when they’re in cake pans, so check on them a little earlier than you might otherwise. The cakes emerge from the oven looking like they’ve risen too high, but they settle a lot after a few minutes. I then added a bit more jam around the top dome to fill in the gap (for 6 cakes you will need a 16-ounce jar) as well as a thick layer of ganache on top. (I flavored my ganache with Chambord.) Keep in mind that the weight of the ganache will eventually sink the cake about an inch. That makes the whole cake compress and taste extra fudgey. The whole concoction tastes like a trifle. Screw on the lid and refrigerate. These are tastiest if you refrigerate them for a couple of hours before eating to let the ganache settle. The cakes stay fresh for at least five days. Dig a long spoon in and get all of the layers in each bite. (I feel positively naughty eating these, kind of like I’ve been caught eating out of the jar.) The larger ones are fun to share. Pass the jar around, and dig in. At least it’s not illegal.
Share on Facebook and Twitter | Chocolate, desserts, Kitchen Tips, Musings, Recipes, techniques | No comments
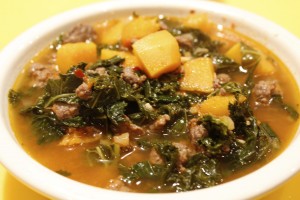
Lamb Merguez Stew I have been making lots of soups and stews this week to give to a friend who is recovering from surgery. The upside is that I’ve had a lot of delicious warming food around as well. This lamb merguez stew was a snap, since I had lamb bone broth in my freezer. Chicken stock, however, would work as well. I purchased the sausage from my favorite lamb farmer, 3-corner-Field farm at the Union Square greenmarket.
I first browned the sausage (about a pound) in a large pot, then removed it and cooked down the liquid. I added ½ cup shallots and sweated those in the small amount of lamb fat left in the pot for about 5 minutes. I then added a 2 ½ pound butternut squash that I had cut into 1-inch cubes, a jar of roasted red peppers, the cooked sausage and about 4 cups stock. I added some salt, covered the pot, and let the stew simmer for about 20 minutes, until the squash was soft. I added a whole head of chopped kale, then cooked the stew another 10 minutes until the kale was tender. Meanwhile, on another burner, in a small skillet, I sautéed some garlic, ginger, and harissa powder for a couple of minutes, then added that to the stew. At the end, I smashed some of the cooked squash against the sides of the pot to thicken the stew. Simple, quick, delicious meal-in-a-pot. Share on Facebook and Twitter | Dinner, Lamb, Lunch, Main course, Soups, Where To Buy (Sources) | No comments
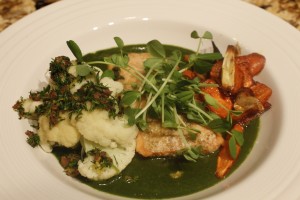
Sunday Night Dinner Sunday night was a night for using up those bits and pieces in the refrigerator and freezer. I had some wild salmon from Alaska ready to use that I had defrosted, as well as some toasted fennel seed vinaigrette. I keep a stash of homemade stocks in my freezer: roasted vegetable stock; chicken, fish, lamb, and beef bone broths, so I had instant flavor available to enliven my meal. I defrosted a small bit of vegetable stock. I added the Swiss chard in a small pot with ½ cup or so of vegetable stock, puréed the whole mix, and finished it with a pat of butter. I tossed the salmon in the fennel seed vinaigrette and then baked it at 375˚F. for about 15 minutes, until just pink in the middle. I mixed the sliced carrots and parsnips with a couple tablespoons stock, a couple tablespoons extra virgin olive oil, a pinch cinnamon, nutmeg, cayenne, salt and pepper. I nestled some garlic slices among the vegetables as well. I baked them covered until tender, about 20 minutes, then uncovered them for another 10 minutes until the carrots and parsnips browned. I steamed the cauliflower then sprinkled it with a mix of lemon zest, parsley, and chopped kalamata olives. I served the salmon, cauliflower, and carrot mix on top of the chard puree and tossed some pea shoots in the middle. Share on Facebook and Twitter | Dinner, Greens, ingredients, Recipes, Vegetables | No comments
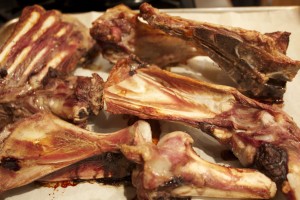
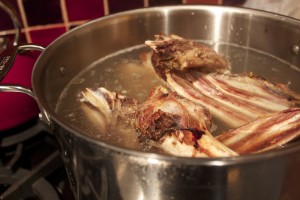
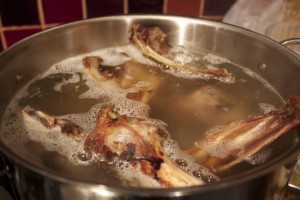
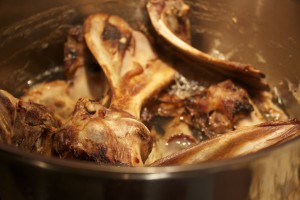
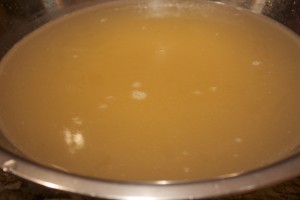
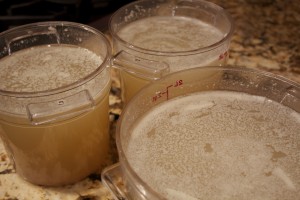
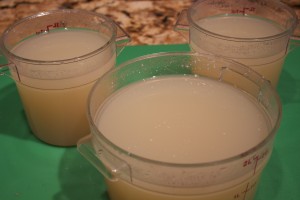
Lamb Bone Broth I purchased 5 pounds of lamb bones the other day at the booth of 3 Corner Field Farm (one of my favorite stalls) at Union square Greenmarket. The large and impressive bag of bones prompted another customer to inquire why I was buying them. What followed was a discussion on how to make lamb broth. I’m detailing the process here since lamb broth is not a stock that many make. After all, you can certainly use chicken stock with great success for any lamb dish that requires a flavorful liquid. A lamb broth, on the other hand, will make your lamb stew or braise incredibly rich and deep-flavored. You can make a stew so satisfying that it tastes as nurturing as a giant hug. (Those are the words a friend of mine used to describe a lamb stew I had recently made for her with lamb broth.) Plus, this dish is seriously easy to put together. It requires about five minutes of active participation to get the stock going, and just a few minutes work straining it when finished. First roast the bones: Arrange them on a parchment-covered baking tray (see the last post if you need a good resource for getting the flat professional type of parchment) and place the trays (you’ll need 2 trays for five pounds bones) in a 375˚ oven for about 45 minutes (actually any temperature from 350˚F to 400˚F is fine) to roast until they are browned. The aroma as the lamb roasts is intoxicating. Transfer the bones to a large stockpot (12 quart is perfect) and fill with water to just about the top of the bones. I used about 6 quarts water. Add ¼ cup vinegar (I used apple cider) to draw calcium from the bones into the stock. Bring the liquid slowly to a boil, then lower the heat to a gentle simmer. A few bubbles breaking the surface now and again is what you want to see. From time to time, skim off the impurities (skum) that form on the surface of the stock when it first starts to bubble. Don’t skip this step; it’s important to a great-tasting stock. Besides, the scum is unappealing! Now just let it go. I left my stock to cook overnight. I put it on the lowest heat so that I wouldn’t have to concern myself that it would reduce too quickly. I had started the stock at 3 p.m. in the afternoon Wednesday, and I strained it at 7 a.m. on Thursday morning – a total of 17 hours in the pot. Let a lamb or beef stock cook for at least 12 hours; they can go much longer, even days! After 17 hours, the stock had reduced by about one third. I let it sit on the countertop until it was cool enough to refrigerate. After it was refrigerated and thoroughly chilled – about three hours later – I removed the fat layer on top with a skimmer. I’ll freeze half and use the rest within the week. The yield was 4 quarts of nourishing bone broth that will be delicious for any lamb dish. Share on Facebook and Twitter | Lamb, Recipes, Soups, Where To Buy (Sources) | No comments
|
