|
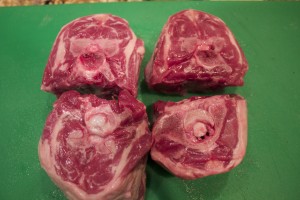
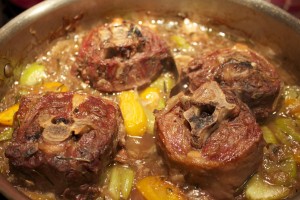
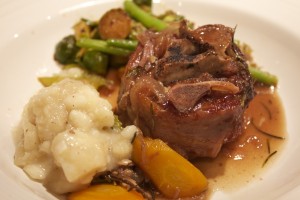
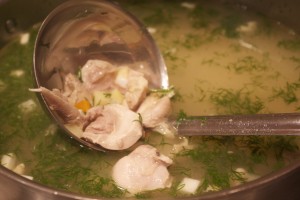
Slow Sunday Cooking Last week I luxuriated in a solitary Sunday, a day devoted to complete hibernation. I stayed up impossibly late the night before, slept well into the day, and turned off my cell phone and computer. I spent the entire day perusing a hard copy of the New York Times, just budging off the couch from time to time to tend to the dishes that I was slow cooking. The day before, from my local lamb farmer I had purchased lamb necks , which looked to me a lot like osso bucco. This cut I had never cooked before; I knew that, like a lamb shank, a long slow cook in the oven would coax out the flavor and cook the meat to falling-off-the-bone tenderness. This dish was perfect for my Sunday state of mind. An added incentive was that I had made some lamb stock from 5 pounds lamb bones a few days before, although chicken stock would have been delicious as well. I sprinkled the necks with salt and pepper, then browned them in a film of oil. I removed the lamb to a plate and added to the skillet 3 cups sliced onions, 6 whole garlic cloves, a few sprigs fresh thyme and rosemary, and a bay leaf. I let the onions cook until softened, about 10 minutes. I added 2 ½ cups lamb broth and ½ cup red wine, and let the liquid come to a boil. I then added back the necks, covered the skillet, and put it in a 325˚F oven for 2 ½ hours. After uncovering the skillet, I raised the heat to 500˚F for half an hour to brown the meat. By this time the necks had beautiful color and were perfectly tender. I removed the pan from the oven, removed the pieces to a plate, set the skillet on a burner, and raised the heat to high. I threw in a handful sliced celery and carrots, and simmered the broth uncovered for 10 minutes, until it was the thickness of gravy; I then returned the lamb to the skillet. I served it accompanied by mashed yucca, Brussels sprouts and green beans. What a soothing and delicious meal for a lazy Sunday. While I was braising the lamb, I also had a big pot of chicken stock bubbling on a back burner. The next day I sautéed a large array of vegetables: onions, carrots. turnips, celery root, parsnips and sweet potatoes until softened. I skinned some chicken thighs and poached them gently in the stock until tender. I added the vegetables along with fresh ginger and dill to the soup and then seasoned it. Three quarts were packed off to a friend who, fresh from surgery, needed good nourishment. Share on Facebook and Twitter | Dinner, ingredients, Kitchen Tips, Lamb, Main course, Recipes | No comments
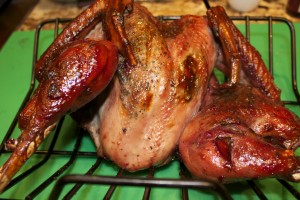
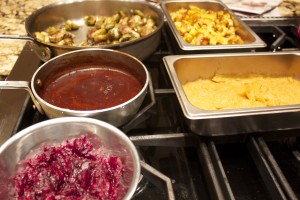
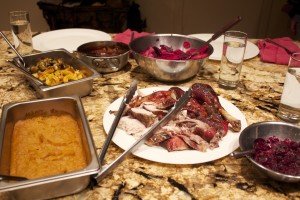
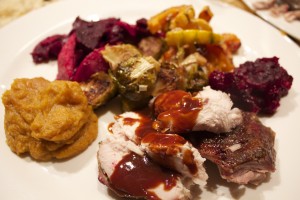
Wednesday Night Thanksgiving Even though the family was going out for the Thursday Thanksgiving meal, I still felt that yearly drive to make a whole turkey with lots of sides. It’s not important to me exactly which day I cook, as long as it’s around the holiday. The local farmer from the food club that I belong to had beautiful pasture-raised turkeys, so a friend and I decided to cook Wednesday, and have a mini celebration one day before the holiday. We split all the dishes we made – she had enough for her family the next day, and we had enough for one full meal of leftovers, which my husband and I enjoyed for lunch today. I had picked what vegetables looked good at the greenmarket, and we improvised a bunch of easy-to-make sides to go along with our beautiful turkey. Our turkey was small, about 10 pounds, perfect for about ten people. Tuesday night I chopped a couple tablespoons sage and mixed it with about a tablespoon of salt. I butterflied the turkey (I set aside the backbone along with the neck for stock), and slipped the sage-salt mixture under the skin. I sprinkled salt and pepper over the outside. I set the turkey on a rack in a roasting pan breast-side-down overnight. I took the bird out of the refrigerator an hour before baking and brushed the back with olive oil and added a couple cups water to the roasting pan. I roasted it at 350 for about an hour, then flipped the bird using wadded up aluminum foil, and cooked the bird another ½ hour. I then brushed it with cranberry glaze (made from 1 cup of cranberries cooked with ½ cup maple syrup and ¼ cup rice syrup until the cranberries burst.The mix was then strained.) I returned the turkey to the oven for 10 minutes, then added more glaze and roasted it another 15 to 20 minutes, until the temperature of the thigh was about 180˚F. I added water to the bottom a couple of times to keep the juiced from burning. The result: a beautiful deep red turkey – juicy and flavorful.
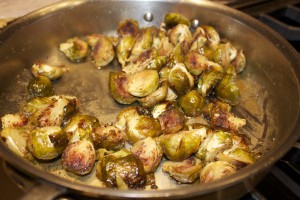
Gravy: I deglazed the pan with turkey stock (the neck and backbone I cooked in about 4 cups water for an hour while the turkey was roasting.) with about ½ cup of red wine. I made a roux of 2 tablespoons butter and 2 tablespoons flour cooked until light brown. I added the liquid and cooked it until thickened. The gravy was delicious – a deep red brown with hints of cranberry flavor. Cranberry sauce: I simmered 2 cups cranberries with the juice of one orange and 1/3 cup maple sugar. I added a splash brown rice vinegar and a teaspoon fresh thyme. I baked sweet potatoes (3 cups flesh), scooped them out and added a jar (1 ½ cups) chestnuts, ¼ cup butter, 1 tablespoon brandy, splash roasted vegetable stock to thin, salt, butter, and sprinkle of nutmeg, and puréed the whole lot. I roasted Brussels sprouts with extra virgin olive oil and salt for twenty minutes at 375˚F. I added a couple tablespoons butter with a small scoop mustard and about a cup roasted vegetable stock to a skillet. The mix was cooked until it reduced to a glaze, then the Brussels sprouts were stirred in.
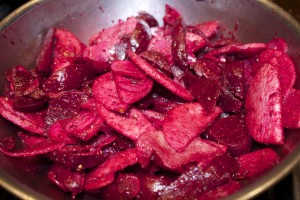
Beets: Beets were roasted in the oven for about 2 hours, then mixed with thinly sliced Asian pears, thinly sliced radishes, 1 teaspoon ground star anise and 1 teaspoon coriander warmed with 2 tablespoons extra virgin olive oil, 2 tablespoons aged balsamic vinegar, salt and black pepper.
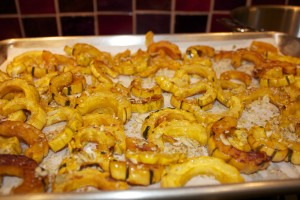
Delicata squash: Half rings were roasted with extra virgin olive oil and salt at 375˚F, then drizzled with pumpkin seed oil, lime juice, cayenne, and crushed pumpkin seeds. It was loads of fun – and good therapy too – hanging with a friend and cooking the day away. You don’t have to have a huge gathering to enjoy a delicious feast! Share on Facebook and Twitter | Dinner, Main course, Sauces, Side Dishes | No comments
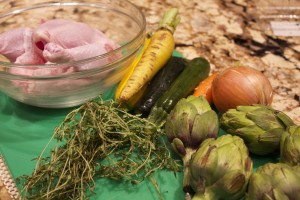
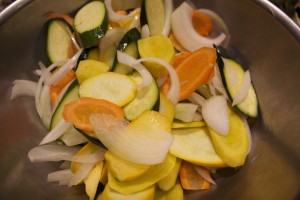
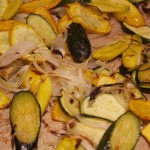
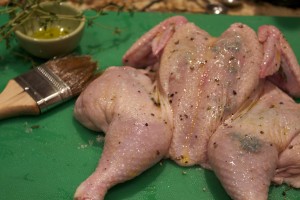
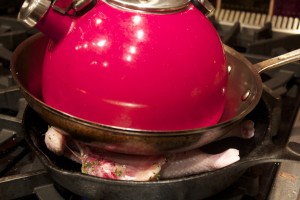
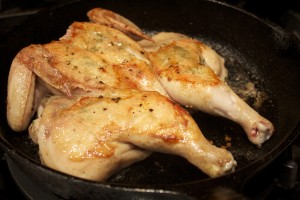
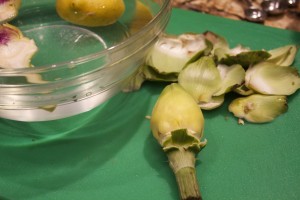
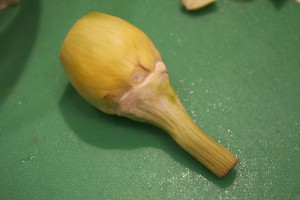
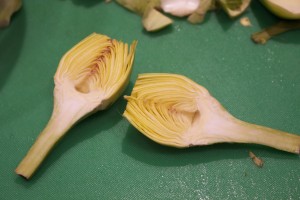
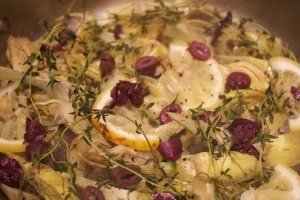
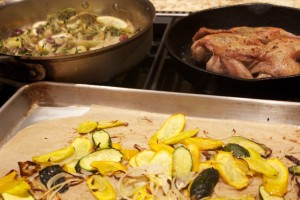
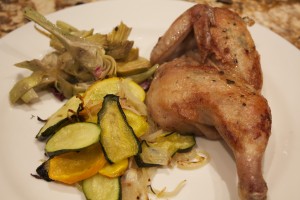
Fast but Unhurried I was leaving on a vacation last Thursday, so I wanted to make use of the beautiful vegetables that I had acquired on a pre-hurricane buying frenzy. My only new purchase at Union Square greenmarket Wednesday was a Cornish hen sized perfectly for two. Ben, the proprietor of Garden of Spices, has the tastiest pastured hens I’ve ever come across. I had a few baby artichokes as well as some yellow and orange carrots, zucchini, onions, and fresh thyme left over that I didn’t want to spoil. My meal thus had a focus. I peeled and cut the carrots on a diagonal, sliced the onions along the grow lines, and cut the zucchini into slim diagonal slices. I tossed the vegetables with coconut oil and salt, and placed them in a 400˚F oven to roast. Twenty minutes later they came out beautifully cooked. Meanwhile, while the vegetables were roasting, I prepped the hen. I cut out the backbone, opened up the bird (in other words I butterflied it), slipped some thyme and salt under the skin, sprinkled the top with black pepper, and brushed the skin with extra virgin olive oil. I seared the bird over medium-high heat face down in a cast iron skillet, weighted the top with another skillet, and placed a teapot on top to make sure the hen was pressed against the skillet. Get creative here. You need to weight that bird so that the maximum surface area touches the skillet. This way the bird can brown evenly. Once the skin side was browned – after about 10 minutes – I flipped the bird and placed it in the oven to finish cooking. 1o minutes later the bird was cooked to perfection – only 20 minutes total from start to finish. Lastly, I started on the artichokes. I prefer baby artichokes to the larger ones most of the time (with notable exceptions, of course) since there’s no hairy chokes to remove. Here’s a step by step method of how to prep a baby artichoke: Have ready a bowl of acidulated water (that’s water with a lemon squeezed into it) for the prepped artichokes, to keep them from discoloring. First, peel the layers of leaves off one by one until you strip the vegetables down to where yellow-green leaves cover the artichoke (except for the tip). Use a Y-shaped (the wide kind) peeler to peel off the tough green part around the base as well as the layer covering the stem. Cut off the tip. (A serrated knife works well for this.) Slice the artichokes in half and place them in the water as you finished prepping each one. I prepped six artichokes for the two of us. I then sliced the halves into several pieces, and placed them in a skillet with a dash of water, olive oil, salt, lemon slices, and thyme branches. I covered the skillet and steamed them for about five minutes, then uncovered the pan and cooked them a few minutes more. I then tossed in a few sliced kalamata olives.
Share on Facebook and Twitter | Dinner, Main course, Recipes, Side Dishes | No comments
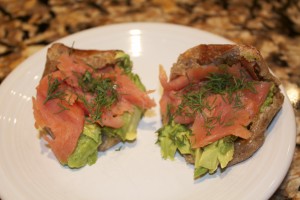
Hurricane Sunday Comfort Food Hurricane Sunday was nursery night all day. We stayed in cozy clothes and ate breakfast for every meal. A couple of noteworthy highlights: Mochi with avocado, smoked salmon, and fresh dill. Mochi recently came back on my radar. The sticky pounded rice squares are available in the refrigerator section of natural food stores. Cut off a square no bigger than 2×2 and bake it at 450˚F for 10 minutes, until it puffs. A toaster oven works just fine. Slice open a pocket and fill it with whatever you like, then make sure to eat it while it’s hot and gooey. Another favorite combination is mochi (raisin-cinnamon) with almond butter and sliced bananas with a drizzle honey. Supper continued in the breakfast mode: Baked eggs with Fresh Corn Polenta I pureed the kernels from a couple of ears corn, sautéed them in a little butter, then added about ¼ cup of corn grits, ¼ teaspoon salt, and a cup water. I cooked it in a medium skillet, stirring frequently, for about 5 minutes, then stirred in a sliced roasted red pepper. I transferred the whole corn mass to a pie plate, made a few craters, and cracked an egg into each indent. I sprinkled a lttle salt over the eggs along with a few drops water, and baked them in a 350 degree oven for about 25 minutes. Seriously delicious. Share on Facebook and Twitter | Breakfast, Corn, Dinner, Eggs, ingredients, Main course, Recipes | No comments
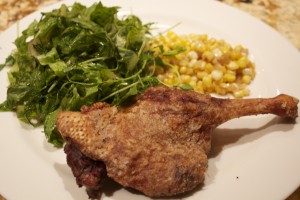
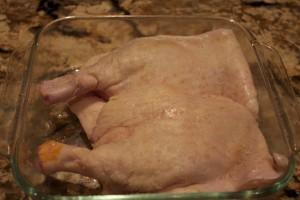
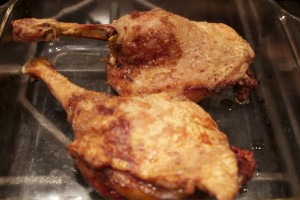
Duck Confit Duck confit is arguably the tastiest way to eat duck. The legs are slowly cooked in a low oven until all of the fat is rendered, leaving a skin that is super crispy – tastes fried – and flesh that pulls off the bone. It’s a dish that lots of folk are fearful of making at home (the thought of cooking in all that fat can be scary) Confit tastes rich, so a little goes a long way. If you get your duck from a purveyor that raises the ducks traditionally, the dish is healthy as well. I paired the Sautéed Corn with Balsamic and Shallots (last post) with the duck confit and a romaine salad that had pea shoots, dill, and a lemon olive-oil dressing. The whole meal took only half an hour of active time. Start with the plumpest duck legs you can find. At Union Square Greenmarket, Hudsen Valley Duck farm are out on Mondays, so that’s the day I usually buy the legs. I get the Moulard, which is a cross between a Pekin and Muscovy. These are large birds with rich flavor. The duck legs make terrific confit – no need to add any extra fat. http://www.hudsonvalleyduckfarm.com/blog/ for more info about Hudson Valley duck farm. Remove the ducks from the refrigerator about an hour before you want to get them in the oven. They take about two hours in the oven, so plan accordingly. Prick the skin all over with the tip of a sharp knife, making sure just to prick into the fat, not the flesh. This will help the fat render while the legs cook. Sprinkle an even dusting of salt all over the ducks, both skin side and underneath. Place the legs in a baking pan that holds them snugly, and let sit at room temperature for 1 hour.
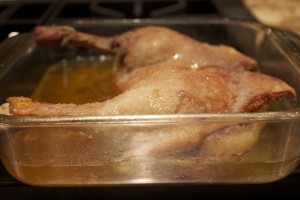
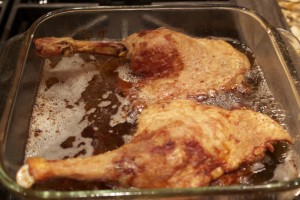
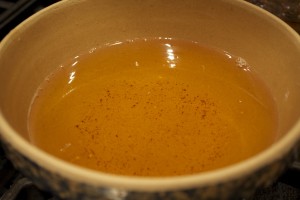
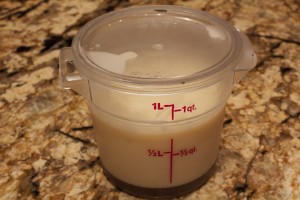
After about 1 ½ hours, the skin will start to color. Turn up the heat to 375˚F. and cook for an additional half hour until the skin is evenly golden and crispy looking. Remove the pan from the oven, lift the legs from the pan with a tongs, and strain the fat. You’ll have quite a bit. Save the fat to use later. Later on, when the fat cools down, add it to a container and refrigerate. Here’s my container of duck fat that I use it when I want to make confit, and I only have small duck legs. I add a layer of fat to the pan under the legs before I place them in the oven to give them a head start. Enjoy the confit hot, room temperature, or chilled. Share on Facebook and Twitter | Dinner, Main course, Recipes | No comments
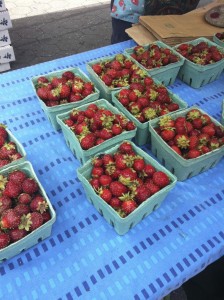
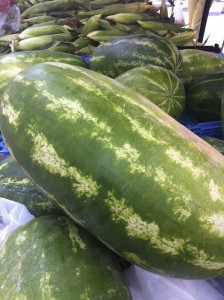
August Report from the Union Square Greenmarket Saturday was my first day back at Union Square greenmarket after a period of traveling. I had to restrain myself from buying everything in sight. Here’s some notes and a record of what I made from my purchases: These late New York season strawberries were irresistible – super sweet, the best strawberries of the year. I was thrilled to see piles of watermelons. It’s melon season, of course. A note to purchasing just the right ripe melon: Please make sure to knock on the melon, as if you were knocking on someone’s door. If it’s ripe and sweet, it will sound hollow. I scored with this one.
The extra went into these popsicle molds.
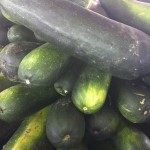
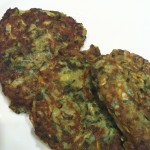
The sight of these elephant-sized zucchini stopped me in my tracks. I was assured that once the seedy middle was cut out, the remaining part would be sweet. While I am intrigued by the thought of stuffing one of these, I refrained from purchasing them . Instead I came home with a large bunch basil, some yellow and green zucchini, a few ears of corn, and a couple of racks of lamb riblets. When I got home, I picked the leaves off of the basil and pureed it with extra virgin olive oil to keep it fresh. I knew I had little time to make dinner today, but nonetheless I wanted a delicious meal. I got home in the late afternoon, and had a lot to do besides make dinner. I decided to construct a meal that would cook slowly (lamb riblets take over 2 hours) but would require minimal active time. I had defrosted the lamb riblets overnight in the refrigerator. I had some barbecue spice rub (from The Healthy Hedonist, which consisted of a mix of salt, maple sugar, cumin, chili powder, black pepper, cayenne, and paprika) in a little container, so rubbing the mix on the riblets and placing them in the oven on a parchment-covered baking sheet took only a matter of minutes. An hour later, I turned down the heat from 325˚to 225˚. An hour after that (by this time it was 6:45) I started the rest of the dinner. I grated the zucchini (one yellow and one green) and mixed it in a bowl with ½ teaspoon salt. I let it sit for fifteen minutes. Meanwhile, I filled a medium pot with water, placed it on the stove, and husked the corn. Fifteen minutes later, I cranked up the heat on the burner under the pot. I squeezed the water out of the zucchini, and placed it back in the bowl, and mixed it with a couple of tablespoons unbleached white flour, a scoop of the basil puree made the day before, and one egg. I dropped the corn in the boiling water and a tablespoon or so of coconut oil to heat in a large non-stick skillet. I dolloped spoonfuls of pancake batter into the skillet (two zucchini yielded 7 medium- sized) and cooked the pancakes for 2 to 3 minutes per side, until golden.
Share on Facebook and Twitter | Dinner, Fruit, Greenmarket Bits, Kitchen Tips, Main course | No comments
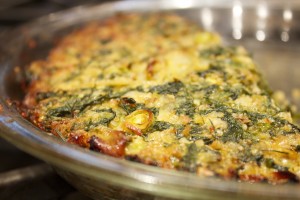
Greens and Quinoa Pie Greens and Quinoa Pie Spring greens combine with quinoa and sheep or goat cheeses for a light yet hearty savory pie that bakes into an appealing deep golden brown. One 9-inch pie (serves 6) 1/2 cup quinoa Salt 1 large bunch chicory (1 to 1 1/4 pound), cut into bite-sized pieces (bottom 11/2 inches of hard stems removed ) 1 head romaine, shredded 3 tablespoons extra viegin olive oil, divided 2 cups thinly sliced onions, (2 medium) 1/4 cup thinly sliced scallions, whites and greens 1/4 cup chopped dill 1/2 cup crumbled feta cheese, preferably goat (about 2 ounces) or sheep’s milk 1/2 cup grated gruyere or aged goat cheese (about 2 ounces) 3 eggs Freshly milled black pepper Preheat the oven to 350˚F. Have ready a 9-inch ovenproof pie pan (pyrex is ideal). Rinse the quinoa in a strainer and dry toast in a small pot until almost dry. Add 1 cup water and a pinch salt. Cover and bring to boil, then lower the heat and simmer covered until the grains have swelled and the water is absorbed, about 15 minutes. Do not disturb the steam vents that will form while the quinoa is cooking. Remove from the heat and pour into a large bowl. Wash the chicory and romaine; no need to dry them. Add the chicory to a large pot and wilt over medium heat, stirring frequently or tossing with tongs to push uncooked leaves to the bottom of the pot. (You don’t have to add additional water since droplets clinging to leaves from washing is enough to start the cooking.) Don’t be daunted by the quantity of greens, as it reduces significantly when wilted. Cook until the leaves have wilted and shrunk, about 5 minutes. Add the romaine, and toss frequently, another minute or 2 until wilted. Remove and place in a strainer, squeezing against the strainer to remove excess water. Transfer to a cutting board and chop into small pieces. You should have 2 1/2 to 3 cups packed greens. Transfer to the bowl with quinoa. Warm 1 tablespoon of the oil in a medium skillet. Add onions and sauté over medium high heat until the onions are browned, about 10 minutes. Transfer to a bowl. Stir in the scallions, dill, feta cheese, and gruyere. Whisk together in a small bowl the eggs, 3/4 teaspoon salt, and a generous sprinkling black pepper. Stir the eggs thoroughly into the quinoa mixture. Pour 1 tablespoon of the oil in a pie pan and place in the oven. Heat the oil for five minutes until hot. Remove the pan and swirl the oil to coat the bottom of the pan, then pour in quinoa mixture, evening it with a spatula. Return to the oven and bake uncovered for 20 minutes. Remove pie and evenly drizzle remaining the 1 tablespoon oil over the pie. Return the dish to the oven and bake 20 to 30 minutes longer, until golden brown on the top and bottom. Serve hot or at room temperature. Share on Facebook and Twitter | Grains, Greens, ingredients, Main course, Recipes | No comments
|
