|
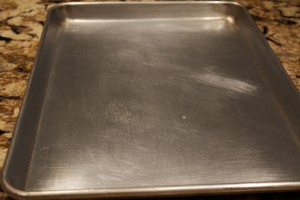
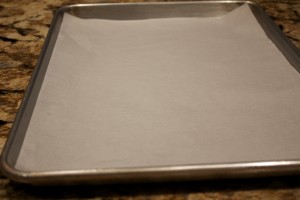
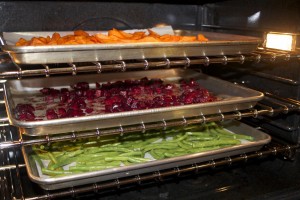
Parchment Paper I consider parchment one of the most indispensible supplies in the kitchen. I line my half sheet (18×13-inch) aluminum baking sheets every time I use them. These industry standard-sized trays are what I became used to working in professional kitchens. I do like the way aluminum distributes heat, but I don’t bake directly on the aluminum trays since I don’t want to run the risk of aluminum leaching out into my food. Aluminum trays, in combination with a protective layer of parchment paper, work exceptionally well.
The type of parchment available in grocery store is sold in rolls, and it is a nuisance: the unwieldly sheets torn from the roll never fit quite right or lie flat on a baking sheet. After getting used to snug, flat, professional parchment paper, I find the rolls nothing less than frustrating. After a bit of fumbling around and testing, I found a few good sources of professional parchment paper.
Some say they prefer silicon for its ability to withstand higher temperatures and longer cooking times than paper coated with quilon. They also maintain that silicon is a safer coating than quilon. Quilon-coated is the industry standard, since it’s substantially less pricey than the silicon-coated. It’s the type used in every establishment that I’ve ever worked in, and it’s the only one most professional cooks even know about. I’ve found it to be more than sufficient for all my culinary needs, from roasting vegetables to rolling pastry crusts. I’ve even cooked pizza on parchment at a temperature of 500˚F. Though the paper turns dark at such high heat, it still does the job perfectly well. You can purchase the sheets in 100 half sheets or 1,000 full sheets (16 x 24). Full sheets fit a large standard-sized baking sheet, which is twice the size of the half sheet pans. (You get a whopping 2,000 sheets when you halve them.) Or course, you save a lot of money buying the 1000 sheets. On the down side, you have to have room to store the box, or enough people to share it with. I purchased both silicon-coated and quilon-coated to compare. I now have enough parchment to last a very long time. The parchment was delivered quickly, within three days. I found it difficult to differentiate between the two varieties of coating. Henceforth, unless I were convinced otherwise, I would probably go with the quilon-coated. Here are good sources for both varieties, in two sizes each: Quilon-coated Parchment: http://www.webstaurantstore.com/16-x-24-quilon-parchment-paper-pan-liner-1000-case/433JR24Q.html http://www.webstaurantstore.com/12-x-16-quilon-parchment-paper-pan-liner-100-pk/99930005.html Silicon-coated parchment: http://www.webstaurantstore.com/16-x-24-silicon-pan-liner-1000-cs/433JR27SIL.html http://www.amazon.com/UltraBake-Parchment-Paper-Sheets-16½/dp/B000E7A6BM
Share on Facebook and Twitter | Kitchen Items/Gadgets, Kitchen Tips, Where To Buy (Sources) | No comments
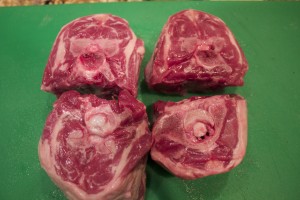
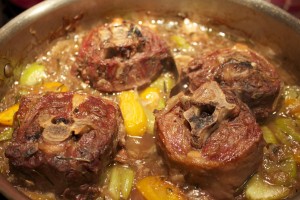
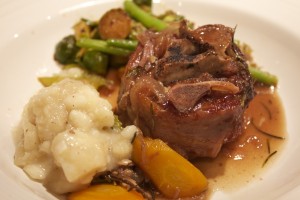
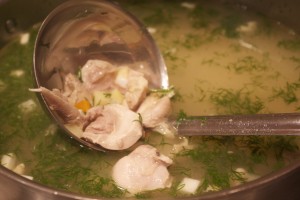
Slow Sunday Cooking Last week I luxuriated in a solitary Sunday, a day devoted to complete hibernation. I stayed up impossibly late the night before, slept well into the day, and turned off my cell phone and computer. I spent the entire day perusing a hard copy of the New York Times, just budging off the couch from time to time to tend to the dishes that I was slow cooking. The day before, from my local lamb farmer I had purchased lamb necks , which looked to me a lot like osso bucco. This cut I had never cooked before; I knew that, like a lamb shank, a long slow cook in the oven would coax out the flavor and cook the meat to falling-off-the-bone tenderness. This dish was perfect for my Sunday state of mind. An added incentive was that I had made some lamb stock from 5 pounds lamb bones a few days before, although chicken stock would have been delicious as well. I sprinkled the necks with salt and pepper, then browned them in a film of oil. I removed the lamb to a plate and added to the skillet 3 cups sliced onions, 6 whole garlic cloves, a few sprigs fresh thyme and rosemary, and a bay leaf. I let the onions cook until softened, about 10 minutes. I added 2 ½ cups lamb broth and ½ cup red wine, and let the liquid come to a boil. I then added back the necks, covered the skillet, and put it in a 325˚F oven for 2 ½ hours. After uncovering the skillet, I raised the heat to 500˚F for half an hour to brown the meat. By this time the necks had beautiful color and were perfectly tender. I removed the pan from the oven, removed the pieces to a plate, set the skillet on a burner, and raised the heat to high. I threw in a handful sliced celery and carrots, and simmered the broth uncovered for 10 minutes, until it was the thickness of gravy; I then returned the lamb to the skillet. I served it accompanied by mashed yucca, Brussels sprouts and green beans. What a soothing and delicious meal for a lazy Sunday. While I was braising the lamb, I also had a big pot of chicken stock bubbling on a back burner. The next day I sautéed a large array of vegetables: onions, carrots. turnips, celery root, parsnips and sweet potatoes until softened. I skinned some chicken thighs and poached them gently in the stock until tender. I added the vegetables along with fresh ginger and dill to the soup and then seasoned it. Three quarts were packed off to a friend who, fresh from surgery, needed good nourishment. Share on Facebook and Twitter | Dinner, ingredients, Kitchen Tips, Lamb, Main course, Recipes | No comments
Maple Sugar and Candied Nuts When I want to use a granulated sugar, I invariably reach for maple sugar as my first choice. This natural sweetener has a subtle maple taste, and works well in many recipes that call for granulated sugar. Maple sugar is simply maple syrup that has been cooked until the water in the syrup has evaporated off. The clumps that are left are ground into smaller pieces, then sifted according to size – powder, granules, or a combination of the two. Nothing is added during the processing.
Maple sugar is relatively expensive. However, when purchased from the source, shipping and all, it is considerably less expensive than purchasing it in a store. I get mine directly from Coombs family farms, a wonderful sugar plant based in Vermont. Their phone number is 888 266-6271 and their website is Coombsfamilyfarms.com. They ship quickly, and you can purchase a choice of maple granules, powdered maple sugar, or a combination or the two. I use the maple powder for all of my maple sugar recipes, since this grind is the most like granulated sugar.
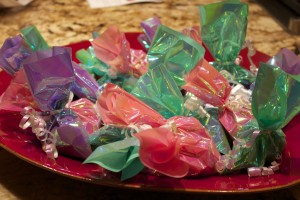
This morning I made a couple batches candied nuts to give away. I love candied nuts. When you make them yourself, you can use just the right amount of high quality sweetener to enhance great nutty flavor. A sprinkling of these crunchy nuts add so much pizzazz to hot breakfast cereals, desserts, salads and soups. They stay fresh in the pantry for two to three months, making them wonderful hostess gifts and edible presents. Bundle them in festive party bags for a treat that everyone will enjoy.
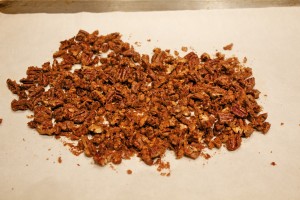
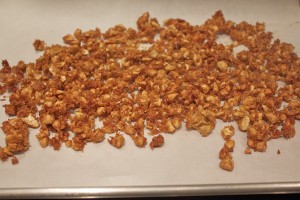
Here are a couple of my favorite combinations. These recipes both take a minimum of prep time and the oven does most of the work. Watch the video on how to make candied nuts. This first recipe is for candied pecans. I toss one cup roughly chopped pecans with 2 tablespoons maple syrup and 2 tablespoons maple sugar. I spread them on a parchment-covered baking dish and place them in the oven for 20 minutes. I stir the pecans one time during the baking, so that they caramelize evenly. The pecans are ready when they are dry all the way through. This technique works well with chopped walnuts, almonds, and blanched hazelnuts as well. When I remove the pecans from the oven, I let them cool before packing them. These pecans keep covered, at room temperature, for two to three months.
The second recipe is for coconut cashews, one of my favorites. The mix is an exciting combination of sweet, spicy, and crunchy, which makes, among other uses, an excellent garnish for a zesty carrot soup. I toss together in a medium bowl one cup of roughly chopped cashews, ½ cup unsweetened coconut, 1/3 cup maple sugar, ¼ teaspoon salt, and ¼ teaspoon cayenne. I then add one egg white to bind the whole mix together. Again, I’m spreading it on a parchment-covered baking sheet and baking it for 15 to 20 minutes at 325˚. I have to stir this mix twice during the baking session to ensure that the more delicate coconut colors evenly. (By the way, I pull out my tray to stir the mix, so I don’t lower the temperature of the oven. Then I return the tray to the oven to finish baking.) When the mix is evenly browned, I remove the tray from the oven and let it cool to room temperature. I break up the clumps into small clusters that are now ready to be stored or packed. Sweet holidays!
Share on Facebook and Twitter | Kitchen Tips, Natural Sweeteners, Recipes, Snacks, Where To Buy (Sources) | No comments
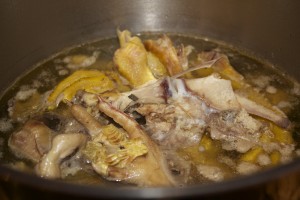
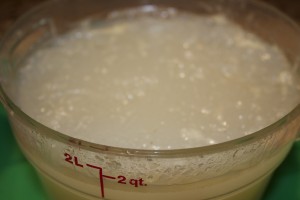
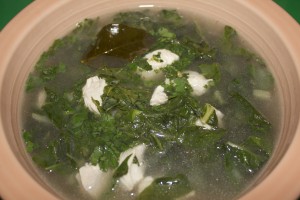
Chicken Soup I’ve been under the weather for the past few days with a full blown cold. This is unusual for me since I rarely get sick. When I feel the slightest bit of an impending sniffle, I have a coterie of preventative measures that I take, which usually work like a charm. I jump on my cellercizer (urban rebounder) to clean out my lymphatic system, I down Immune Response to strengthen my immune system, and I make an effort to get extra rest. This particular cold came on without much warning – it hit the throat first and then traveled to the lungs. I had a couple of energetic events to run, so there was no getting rest for a couple of days. Thus the full-blown cold landed Friday and ordered me to stop. It doesn’t make me feel better to know that colds are rampant this time of year, or that there is a particularly virulent strain going around. I am forced to finally and humbly surrender. I’m actually enjoying the enforced solitude and relaxation. Since my taste buds are depressed with the congestion, all I really feel like ingesting is hot soup. A good bone broth is just the elixir to drive away a fierce bug. So while I have been convalescing, I took out the stock pot, opened the freezer, and took out a big pile of poultry bones. I put up the simplest of stocks – bones, water, a splash of vinegar to draw out the calcium, and a bay leaf. That’s about as much effort as I could muster, and it took all of five minutes. The pot held backbones and wings from two chickens I had recently butchered, a turkey carcass, and a bag of chicken feet. I let this stock simmer about 6 hours, then I strained it, cooled it, and refrigerated it overnight. What made the stock especially gelatin rich was the bag of chicken feet I had purchased at the green market the other day. Chicken feet are hard for a lot of us to get used to, as yes, they are kind of creepy and freaky-looking bobbing around in your stock. Get over being squeamish, and you have a flavorful calcium-rich stock that’s great for your bones. Look at how gelatinous (translate: wobbly) this stock is after cooling. All I did was scrape away the top layer of fat. This is nutrient-dense goodness. For my soup today, I simmered a quart of the stock with some sliced shallots, some chopped ginger, and chopped lemongrass for about 15 minutes. I strained the stock, then added some coconut milk, boneless chicken breast cubes, and a small handful kaffir lime leaves that I had frozen. When the chicken was cooked after five minutes, I added a handful of Swiss chard, a splash of Thai fish sauce, couple of tablespoons lime juice, and a pinch salt. In my soup bowl I sprinkled chopped jalapeños and cilantro. The soup was delicious, and I’m feeling a lot better already. Share on Facebook and Twitter | Dinner, Kitchen Tips, Musings, Pantry Items, Soups | No comments
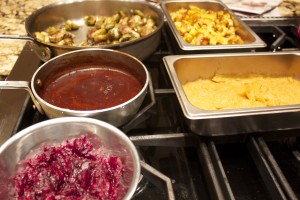
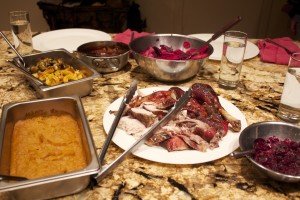
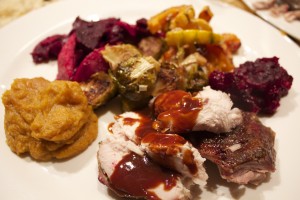
Wednesday Night Thanksgiving Even though the family was going out for the Thursday Thanksgiving meal, I still felt that yearly drive to make a whole turkey with lots of sides. It’s not important to me exactly which day I cook, as long as it’s around the holiday. The local farmer from the food club that I belong to had beautiful pasture-raised turkeys, so a friend and I decided to cook Wednesday, and have a mini celebration one day before the holiday. We split all the dishes we made – she had enough for her family the next day, and we had enough for one full meal of leftovers, which my husband and I enjoyed for lunch today. I had picked what vegetables looked good at the greenmarket, and we improvised a bunch of easy-to-make sides to go along with our beautiful turkey. Our turkey was small, about 10 pounds, perfect for about ten people. Tuesday night I chopped a couple tablespoons sage and mixed it with about a tablespoon of salt. I butterflied the turkey (I set aside the backbone along with the neck for stock), and slipped the sage-salt mixture under the skin. I sprinkled salt and pepper over the outside. I set the turkey on a rack in a roasting pan breast-side-down overnight. I took the bird out of the refrigerator an hour before baking and brushed the back with olive oil and added a couple cups water to the roasting pan. I roasted it at 350 for about an hour, then flipped the bird using wadded up aluminum foil, and cooked the bird another ½ hour. I then brushed it with cranberry glaze (made from 1 cup of cranberries cooked with ½ cup maple syrup and ¼ cup rice syrup until the cranberries burst.The mix was then strained.) I returned the turkey to the oven for 10 minutes, then added more glaze and roasted it another 15 to 20 minutes, until the temperature of the thigh was about 180˚F. I added water to the bottom a couple of times to keep the juiced from burning. The result: a beautiful deep red turkey – juicy and flavorful.
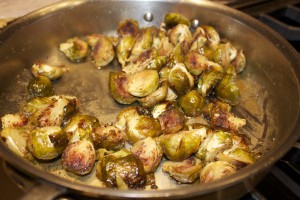
Gravy: I deglazed the pan with turkey stock (the neck and backbone I cooked in about 4 cups water for an hour while the turkey was roasting.) with about ½ cup of red wine. I made a roux of 2 tablespoons butter and 2 tablespoons flour cooked until light brown. I added the liquid and cooked it until thickened. The gravy was delicious – a deep red brown with hints of cranberry flavor. Cranberry sauce: I simmered 2 cups cranberries with the juice of one orange and 1/3 cup maple sugar. I added a splash brown rice vinegar and a teaspoon fresh thyme. I baked sweet potatoes (3 cups flesh), scooped them out and added a jar (1 ½ cups) chestnuts, ¼ cup butter, 1 tablespoon brandy, splash roasted vegetable stock to thin, salt, butter, and sprinkle of nutmeg, and puréed the whole lot. I roasted Brussels sprouts with extra virgin olive oil and salt for twenty minutes at 375˚F. I added a couple tablespoons butter with a small scoop mustard and about a cup roasted vegetable stock to a skillet. The mix was cooked until it reduced to a glaze, then the Brussels sprouts were stirred in.
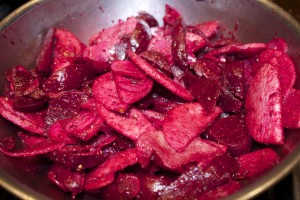
Beets: Beets were roasted in the oven for about 2 hours, then mixed with thinly sliced Asian pears, thinly sliced radishes, 1 teaspoon ground star anise and 1 teaspoon coriander warmed with 2 tablespoons extra virgin olive oil, 2 tablespoons aged balsamic vinegar, salt and black pepper.
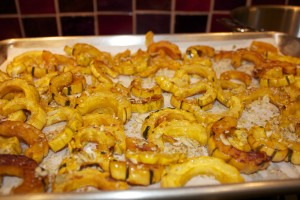
Delicata squash: Half rings were roasted with extra virgin olive oil and salt at 375˚F, then drizzled with pumpkin seed oil, lime juice, cayenne, and crushed pumpkin seeds. It was loads of fun – and good therapy too – hanging with a friend and cooking the day away. You don’t have to have a huge gathering to enjoy a delicious feast! Share on Facebook and Twitter | Dinner, Main course, Sauces, Side Dishes | No comments
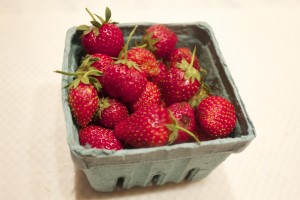
Getting the Seeds out of Berry Sauces Here’s a word on berries, and a video to show how to get the seeds out of berry sauces. Straining the Seeds out of Berry Sauces When you visit a local market in summer, you’ll see containers of colorful berries stacked high. Strawberries are the first to appear in early spring and have all but disappeared by mid summer. Tiny wild varieties, sweet as candy, will make an appearance in late summer. In the meantime, there are blueberries, blackberries, and raspberries of various colors: these nutritional powerhouses, packed with vitamins, antioxidants and fiber, appear in markets in July, and last all the way through September. The late harvest berries are often the most delicious. Combined with early harvested pears, raspberries can be the chief ingredient in tantalizing cobblers and compotes. First-of-the-season apples and blackberries make a succulent combination as well. Treat berries with care. Blueberries are sturdy and last a couple of weeks, but the other “seedier” types last only a couple of days in the refrigerator. It’s best to wash berries right before eating. Raspberries and blackberries are especially delicate; moisture makes them mold quickly. Rinse these berries very carefully and dry them gently on paper towels; you can even roll raspberries on a damp cloth to clean them and dislodge any insects. You can make your berries last longer by freezing or pureeing them. To freeze, lay them on a tray in a single layer and place in the freezer. After a couple of hours, pile the frozen pieces into a freezer bag. I love having a selection of frozen berries available to use when I please. When I don’t have a stash of berries that I have frozen myself, I purchase organic brands (Cascadian Farms, for example) that are readily available at you local store. Fresh sauces, or coulis, are especially delicious when made out of berries. These tasty sauces are wonderful to have on hand even when the temperatures have dropped outside. Once the berries are pureed, however, those little seeds found in strawberries, raspberries, and blackberries can seem quite prominent. There’s no need to put up with those pesky seeds when there’s a nifty little trick for quickly straining them out. Here’s what you do: If the berries are frozen, defrost them first. Blend them (with all the defrosted juice) with a little water, then pour the mix into a strainer set over a bowl. You’ll notice that, at first, the puree just sits in the strainer, not budging at all. With the bottom of a ladle, swirl the fruit in a circular motion against the strainer. The puree goes through the strainer in seconds, leaving the seeds caught in the basket. With a spatula, be sure to scrape all the good pulp that is caught on the underside of the strainer. To turn the pulp into a sauce, add a splash of maple syrup, a bit of vanilla and lemon juice. Now you’re got a berry sauce that is smooth and delicious. Share on Facebook and Twitter | Fruit, ingredients, Kitchen Tips | 5 comments
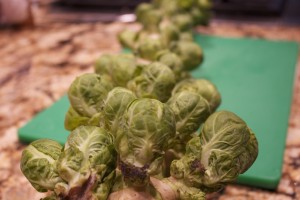
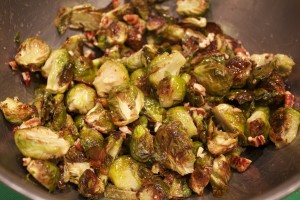
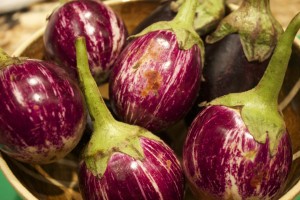
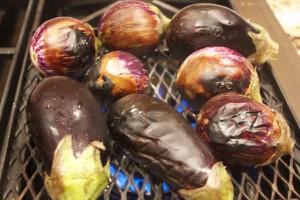
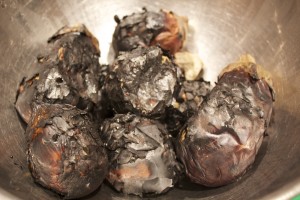
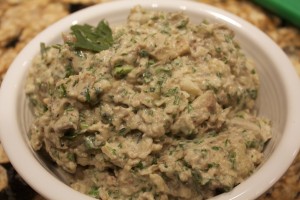
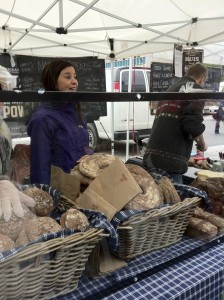
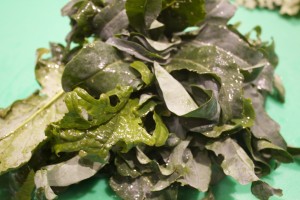
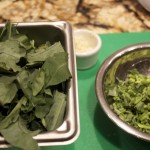
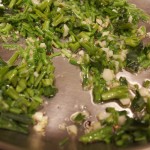
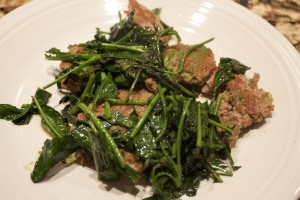
Seasonal Vegetable Dishes from Union Square Greenmarket Last week was beautiful at the Union Square greenmarket. The whole stalks of Brussel Sprouts were too enticing to resist, so I bought a whole stalk. I’m not the only ones enamored with snapping off the the nuggets from the stalk. Over the weekend, the little nephews had a wonderful time snapping off the sprouts as well. I halved the stalks, tossed them with extra virgin olive oil and salt, and roasted them at 375˚ for 20 minutes. Meanwhile, I made a quick glaze of maple syrup, mustard, and butter that I heated on the stove. I tossed the Brussels sprouts with this mix and sprinkled the whole lot with chopped pecans. It’s nearing the end of eggplant season as well, so I purchased these miniature varieties and roasted them on the my chile grate (these grates are wonderful for roasting multiple vegetables at once.) I like the chile grate especially for small chiles and eggplants, since they don’t fall into the open flame. The smokey flavor of eggplants cooked directly over the fire is irresistible. After I covered them and let them cool a bit, I scraped off the skin, chopped the flesh, and mixed them with tahini, lemon juice, garlic, parsley, and pomegranate molasses. I served the chunky dip on rye bread from Rui’s, a fairly new Friday and Saturday Union Square Greenmarket addition. These guys make traditional hearty, delicious Scandinavian (100 per cent) rye bread. I also picked up an interesting vegetable called spigariella. It actually is a kind of broccoli without florettes, and tastes like a sweeter version of broccoli raab. It cooks in just minutes. I cut off the stems and cooked them first with garlic, olive oil, and red pepper flakes.
Share on Facebook and Twitter | Greenmarket Bits, Greens, ingredients, Side Dishes, Vegetables | No comments
Getting the Water out of a Zucchini I’m on a market watch – greenmarket watch that is. Several times a week, I walk through my neighborhood farmer’s market and survey the new arrivals and take notice of what is no longer available. This journey is how I keep up with the changes in seasonal produce, and it’s how I stay inspired in my cooking. In early summer, local markets are brimming with delicious produce; even an average supermarket has a broader than usual selection of colorful vegetables and fruits. It’s still worth going out of your way to a venue where you can speak to the growers. The abundance and variety of eatables, the enthusiasm of the farmers, and the excitement of happy people shopping prompt me to load up my cart with local delights, and pile my dinner plate with a variety of fresh vegetables.
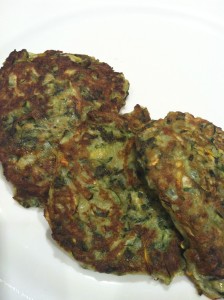
In a farmer’s market from July though October, besides the green zucchini, you can purchase the bright daffodil-yellow ones as well. Summer squash come in a wide variety of shapes and sizes – from round eight balls to yellow- and-green zephyr squashes, ruffle-edged patty pans to ridged romanescos. Even though summer squashes come in a variety of shapes and sizes, you can use them interchangeably in recipes. All varieties tend to be watery. If you want to coax the most flavor out of summer squashes, it’s best to get rid of a lot of that water. After all, few delight in a soggy squash dish. I use salt to extract the excess moisture. To sauté a pound of sliced zucchini, sprinkle about a teaspoon of salt over the pieces and let them rest for 20 minutes to half an hour. You’ll notice the zucchini start to sweat and glisten. Wipe off the surface moisture with a paper towel – which gets rid of the excess salt – and now you’re ready to sauté. Your slices will caramelize beautifully, leaving a golden color and rich flavor. The salting technique is especially effective with grated zucchini. For each pound, mix in 1 teaspoon salt. After about twenty minutes, grab a handful at a time of the grated vegetable and start squeezing – over a bowl, of course. I’m always amazed at just how much water comes pouring out. After you’ve gone through the first round, go back and squeeze the whole lot one more time. Again, any excess salt gets squeezed out with the water, and your grated zucchini is ready to be turned into delicious pancakes, fritatas, or whatever else you’re cooking. Share on Facebook and Twitter | Greenmarket Bits, Kitchen Tips, Vegetables | No comments
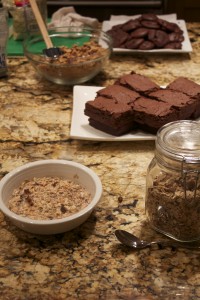
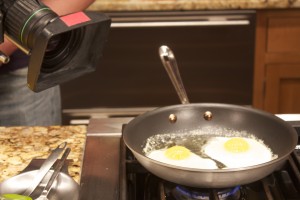
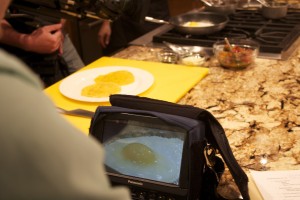
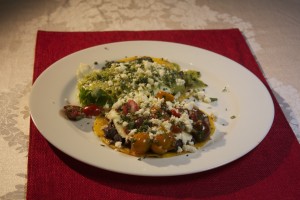
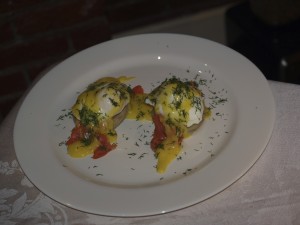
Camera in the Food For nine hours last Tuesday I had a camera crew in my kitchen with a large video camera pointed at food that I was preparing. This was PR for the Natural Gourmet Cooking School. The Sundance Channel is doing a series called Love/Lust and the food that they shot in the kitchen was from the chocolate and the breakfast episodes. They will have people on camera speaking about various aspects of chocolate – history, cultural impact, etc. while they show shots of chocolate melting or baking or being spooned into champagne glasses. On camera I made four chocolate desserts as well as seven breakfasts. Chocolate desserts included chocolate mousse, chocolate lava cakes, brownies, and cloud cookies. Breakfasts included hot cereal with sautéed apples, muesli, granola, frittata, classic eggs benedict, a variation of eggs benedict, and huevos rancheros. Some of these were their choices, some mine. Preparation for the shoot was time-consuming. Mousse, for instance, needs a couple of hours to set, so I had to have a back-up made as well as berry sauce and whip cream so they could film the parfait being layered. I had to have two batches of brownies made in advance, as well as one batch of cloud cookies ready to go, because the cloud cookie batter needs to sit for an hour. The only dessert that was made and completed on camera was the souffle cakes. I did have the raspberry sauce and the whipped cream made beforehand, however. 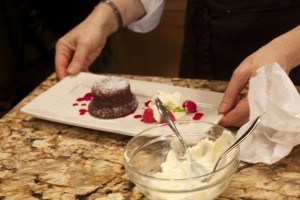 Freshly Made Lava Cake with Raspberry Sauce and Whipped Cream As for the breakfasts, I made in advance a batch of granola, I had muesli all ready to soak, I had salsa and beans prepared for the huevos rancheros, and I had spinach, mushrooms, and cheese ready to mix into the fritatas. I made three hollandaise sauces that day, so I had to have plenty of clarified butter as well. The actual cooking for the camera was not difficult once everything was in order. It was really interesting to look into the monitor and see what the high definition screen saw. Look at this egg compared to what was in the pan! So close; the human eye just doesn’t see food that way. They took many close-ups of chocolate melting, of chocolate oozing out of the cake, of bacon frying, and of eggs cooking. After each dish was completed they brought the dish over to a table and took “beauty shots.” The day was one of slow and painstaking work. It was interesting, however, and we churned out some tasty food. I’m certain that on the shows the food will be presented in quick fragments. I’m now wild for muesli and this variation of eggs benedict that includes smoked salmon and artichokes in lieu of the English muffin and bacon. The variation on the classic eggs benedict was a delicious dinner that night. Share on Facebook and Twitter | Breakfast, Chocolate, Happenings/Events, Musings | No comments
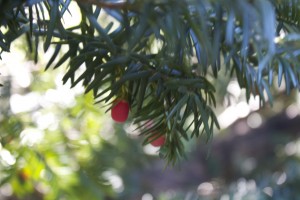
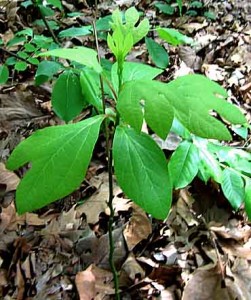
Foraging in Central Park – Part 1 Sunday I spent a couple hours foraging in central park with ‘wildman’ Steve Brill and a group of women and guests from the women’s culinary alliance. Steve has been leading foraging tours for the last thirty years. I have known about these tours for the last fifteen, so when the opportunity presented itself, I eagerly signed on. The day was bright and sunny and perfect for foraging. I thought – mistakenly it turns out – that we would come across at least a few varieties of wild mushrooms. We did not encounter a single mushroom, since they tend to pop out of the earth after a good rain. One woman had brought along a hen-of-the woods mushroom (also known as a maitake) that she had foraged in a park in Mamaroneck. These delicious mushrooms are among the most pricey in Union Square Greenmarket. Steve certainly knows the right spots to find the wild edibles. Although he leads a lot of tours and digs up plants and encourages others to do so, he is careful not to wreck the environment. The same plants have regenerated for years and years. Steve arrived at the tour looking like he was going backpacking for a week. He was equipped with a shovel and case, an ipad to show his drawings and photos, and an enormous backpack of his books and paraphernalia. Every so often, as a break from pointing out and descripting the various edible plants, Steve would stop along the way and start doing his routine of clapping and blowing to make himself into a human instrument. Moreover, he frequently told the kinds of jokes that had everyone groaning. Here’s a few highlights of what we did view: This is the evergreen called a Japanese yew. The trees needles are toxic and the wood is particularly flexible. Longbows were made from the Yew tree in the Middle Ages by the British and used during the Hundred Years War, which had a devastating effect on the French. These longbows were the “machine gun” of the medieval age, since an experienced archer could fire an arrow every five seconds. The arrows could even penetrate plate armor from 100 meters away. The bright orange-red berries are edible, but the seeds are poisonous. We ate one berry each (cautiously, we had all signed consent forms), making sure not to chomp into the seed. The berry has the mouth feel of a persimmon (kind of mucilaginous) and is slightly sweet. We all survived the experience. Sassafras was the next root we examined. It took muscle to dig up the stubborn roots. The plants make so many seedlings (about 4,000 per tree), that you can pull up a couple without causing harm. The plants need sun to survive, but the large number of seedlings ensure survival of a good many. You have to pull slowly (it’s best to get some help), so that the root doesn’t break off from the greenery. Wash the dirt off the root and steep it, chill the brew, add some sparkling water and sweetener, and you have real root beer. Sassafras, as a tea, has long been ingested as a liver detoxifier. In Kentucky, where sassafras is traditionally drunk, the sassafras drinkers have a much lower rate of liver cancer. There’s an FDA ban on sassafras root, but stupidly so, as Steve Brill pointed out. It’s only dangerous if you ingest astronomical amounts over a lifetime and you’re of the rodent family. Sassafras have three kinds of leaves – one oval, one mitten shaped, and one divided into three lobes.The edges are smooth. When dehydraded and made into a powder, the leaves become filé, best known as the thickener used in gumbo. You can gather all the file for a lifetime in central park. Now I just need to remember the spot where we found it, which might be the most difficult part of all. Share on Facebook and Twitter | Happenings/Events | No comments
|
