|
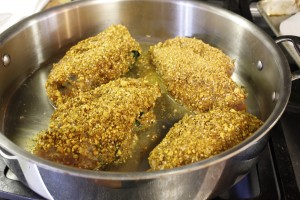
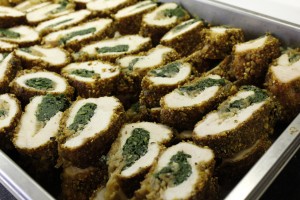
Mediterranean Catering I’ve been cooking a lot of Mediterranean food lately, for all kinds of events. This one featured dukkah-crusted stuffed medallions of chicken. I filled boneless breasts with caramelized onions and garlic-sautéed spinach, then coated the breasts with flour, egg, and dukkah. Dukkah is a combination of toasted pistachios, sesame seeds, cumin, coriander, smoked paprika, thyme, salt and pepper. (It’s a great mix to have on hand to jazz up a meal.) The breasts were sautéed, then finished in the oven for about 15 minutes. I then sliced them with an electric saw to get these beautiful even cuts. Best thing about these breasts is that they stay tender, even when reheated the next day.
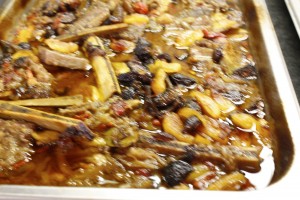
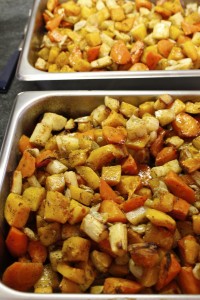
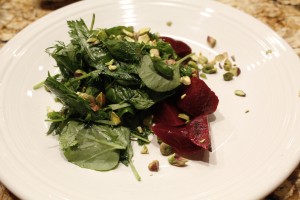
I also made Moroccan-braised short ribs. I had previously been making these with lamb shanks, but the short ribs worked as well. I salted, peppered, and browned the short ribs first, then sautéed sliced red onions until tender. I added some harissa, garlic, ginger, cinnamon sticks, bay leaves, cumin, coriander, and cooked the spices for a couple of minutes. I then added a jar of roasted red peppers and some stock, brought the liquid to a boil, and then transferred the baking pan to the oven. The dish braised at 325˚F. for 2 ½ hours. I pulled the dish out of the oven, added some dried apricots and figs, and returned it to the oven to cook uncovered at 500˚F. for another 30 minutes to brown. The ribs by this time were falling off the bone. I tossed carrots, parsnips, and butternut squash with garlic, extra virgin olive oil, chicken stock (vegetable stock is good as well), cinnamon, nutmeg, salt, and cayenne and place them in the oven to braise at 375˚F. for about 45 minutes. Then I let the vegetables cook another 20 minutes uncovered so that they could color. For dessert, I made the coconut chocolate mousse from The Healthy Hedonist, layered with berry sauce and cashew cream made from cashews blended with coconut milk, maple sugar, and vanilla. I also made the cakes-in-a-jar for gifts, only this time they were topped off with whipped cream. Thank goodness I had done a test run. (See previous post for how to make these.) They were a hit. The salad was an herbed watercress and orange blossom vinaigrette salad with roasted beets and was sprinkled with pistachios. This is how a single serving looked. All of these dishes stored well and could be made in advance, which was, after all, the whole idea. Share on Facebook and Twitter | desserts, Dinner, Main course, Side Dishes | No comments
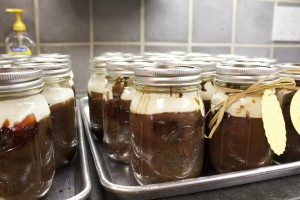
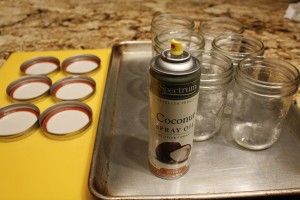
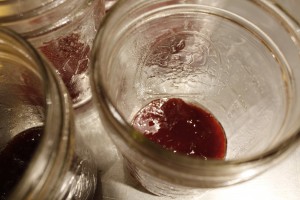
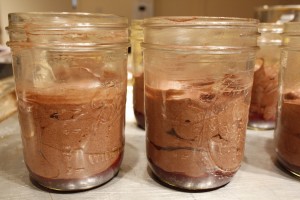
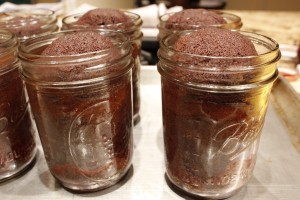
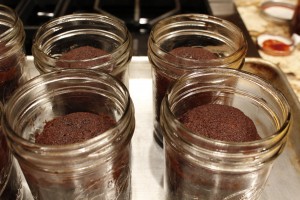
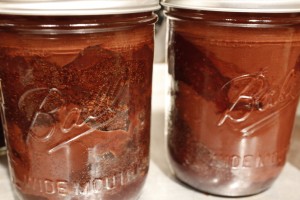
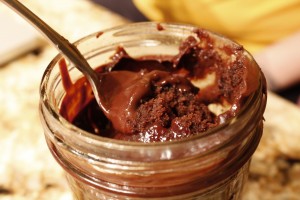
Cake-in-a-Jar Next week I am going to be making about 40 cakes-in-a-jar for a catering job, so I spent some time in the kitchen working out the technical challenges. I’ve been having a blast experimenting. These packed jars are not only adorable, they are delicious as well. My version here has chocolate cake, layers of raspberry or strawberry jam, and a thick layer of ganache. I’ve been using pint ball jars, which serve two, and are a good size for gifts. The smaller 1-cup ball jars are perfect for individual servings. First I coat the jars with spray. I rarely use spray fat, but since I’m about to make over 40 cakes, I’m looking to streamline the process. Plus, I just found a coconut oil spray from Spectrum. Next, I spoon a layer of jam on the bottom. I’ve used strawberry and raspberry jam, for the color as well as the flavor. It’s a treat to dig up with a long spoon the cooked jam under the baked cake. Use any favorite chocolate cake recipe and fill the containers half full. A cake recipe that makes two layer cakes is perfect for 6 pint-sized jars. I baked the cakes at 350˚ for about 25 minutes. Don’t worry, the jars won’t explode or anything — this is like baking in pyrex. The cakes do take a little less time than when they’re in cake pans, so check on them a little earlier than you might otherwise. The cakes emerge from the oven looking like they’ve risen too high, but they settle a lot after a few minutes. I then added a bit more jam around the top dome to fill in the gap (for 6 cakes you will need a 16-ounce jar) as well as a thick layer of ganache on top. (I flavored my ganache with Chambord.) Keep in mind that the weight of the ganache will eventually sink the cake about an inch. That makes the whole cake compress and taste extra fudgey. The whole concoction tastes like a trifle. Screw on the lid and refrigerate. These are tastiest if you refrigerate them for a couple of hours before eating to let the ganache settle. The cakes stay fresh for at least five days. Dig a long spoon in and get all of the layers in each bite. (I feel positively naughty eating these, kind of like I’ve been caught eating out of the jar.) The larger ones are fun to share. Pass the jar around, and dig in. At least it’s not illegal.
Share on Facebook and Twitter | Chocolate, desserts, Kitchen Tips, Musings, Recipes, techniques | No comments
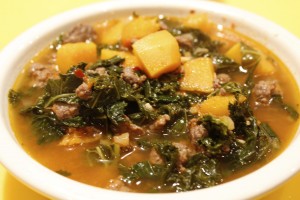
Lamb Merguez Stew I have been making lots of soups and stews this week to give to a friend who is recovering from surgery. The upside is that I’ve had a lot of delicious warming food around as well. This lamb merguez stew was a snap, since I had lamb bone broth in my freezer. Chicken stock, however, would work as well. I purchased the sausage from my favorite lamb farmer, 3-corner-Field farm at the Union Square greenmarket.
I first browned the sausage (about a pound) in a large pot, then removed it and cooked down the liquid. I added ½ cup shallots and sweated those in the small amount of lamb fat left in the pot for about 5 minutes. I then added a 2 ½ pound butternut squash that I had cut into 1-inch cubes, a jar of roasted red peppers, the cooked sausage and about 4 cups stock. I added some salt, covered the pot, and let the stew simmer for about 20 minutes, until the squash was soft. I added a whole head of chopped kale, then cooked the stew another 10 minutes until the kale was tender. Meanwhile, on another burner, in a small skillet, I sautéed some garlic, ginger, and harissa powder for a couple of minutes, then added that to the stew. At the end, I smashed some of the cooked squash against the sides of the pot to thicken the stew. Simple, quick, delicious meal-in-a-pot. Share on Facebook and Twitter | Dinner, Lamb, Lunch, Main course, Soups, Where To Buy (Sources) | No comments
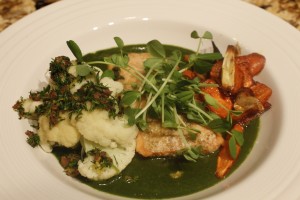
Sunday Night Dinner Sunday night was a night for using up those bits and pieces in the refrigerator and freezer. I had some wild salmon from Alaska ready to use that I had defrosted, as well as some toasted fennel seed vinaigrette. I keep a stash of homemade stocks in my freezer: roasted vegetable stock; chicken, fish, lamb, and beef bone broths, so I had instant flavor available to enliven my meal. I defrosted a small bit of vegetable stock. I added the Swiss chard in a small pot with ½ cup or so of vegetable stock, puréed the whole mix, and finished it with a pat of butter. I tossed the salmon in the fennel seed vinaigrette and then baked it at 375˚F. for about 15 minutes, until just pink in the middle. I mixed the sliced carrots and parsnips with a couple tablespoons stock, a couple tablespoons extra virgin olive oil, a pinch cinnamon, nutmeg, cayenne, salt and pepper. I nestled some garlic slices among the vegetables as well. I baked them covered until tender, about 20 minutes, then uncovered them for another 10 minutes until the carrots and parsnips browned. I steamed the cauliflower then sprinkled it with a mix of lemon zest, parsley, and chopped kalamata olives. I served the salmon, cauliflower, and carrot mix on top of the chard puree and tossed some pea shoots in the middle. Share on Facebook and Twitter | Dinner, Greens, ingredients, Recipes, Vegetables | No comments
Young Coconuts and How to Crack Them Coconut water is the liquid found inside a young coconut. Don’t mistake it for coconut milk, which comes from the meat of a mature coconut. In addition to natural sugars, which make it taste deliciously sweet, the water contains a complex array of vitamins and minerals. The nutritious beverage is high in potassium, chlorides, calcium, and magnesium. As a tree sap, coconut water is essentially the “blood” of the coconut palm. The electrolyte profile of coconut water is somewhat similar to human plasma and has been used by doctors as an intravenous solution and injected directly into the bloodstream to prevent dehydration. When freshly extracted from the coconut, the liquid is free from germs and parasites. Sure, you can buy the water in packs from the grocery store, but it’s great fun to whack open the fruit yourself. Not to mention that there’s no comparison in the flavor between the fresh and the bottled. Young coconuts are large and green off the tree, but come already shaved in this country, so thankfully, you don’t need a machete to open them. It is not difficult to open these neatly, so that you can drink the water and scoop out the soft gel-like meat. I use a serrated knife to shave around the top part of the coconut. Then I take the heel of a heavy knife. I use a cleaver and whack it a few times. I hold the coconut on an angle, which makes it really safe. The key is to whack the coconut with confidence. After three or four whacks, the lid just lifts off. I can put a straw in this and drink the liquid and use a spoon to scoop out the gel. This is the best sports drink, thirst quencher, and cooler around. The best brand of purchased young coconut products is from exoticsuperfoods.com. You can buy packs of the young meat and bottles of fresh coconut water, which is second only to the ones you crack open yourself.
Share on Facebook and Twitter | Fruit, Health Tips, ingredients, Kitchen Tips, Where To Buy (Sources) | No comments
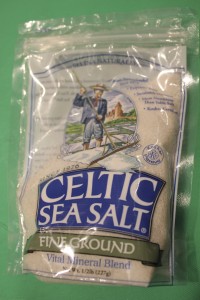
Salt Salt draws out of food the essential flavor that would otherwise remain neutral or latent. Salting properly is what distinguishes a mediocre cook from a very good one. I love to stand around an almost finished dish with my students, adding salt in increments until the magical moment when the flavor bursts forward. After years of cooking, I still find that an exciting moment. Properly seasoned food leaves a rounded flavor on the tongue. Often before a dish is salted properly, the flavor of the food can be dull or might register only on the back receptors of the tongue. In addition, pleasantly spicy foods feel like they are overly spicy. Once the proper amount of salt is added – and that might mean the difference of only a pinch – the constituent flavors are drawn together harmoniously, and the food comes alive. In my recipes, I always indicate an amount of salt that is close to the amount that I think a given dish needs. The recipe usually needs one or two pinches more to draw out the flavors; it is impossible to include that tiny amount in the recipe, and it may vary, depending on the ingredients. I call this extra amount a “grandma pinch,” which means a good fat pinch, not a speck. If you tend to be heavy-handed, however, make your pinch a baby pinch. Many people today are afraid of seasoning their food properly because of the misconception that salt is bad for you. Nonetheless, the body needs sodium to function. It helps carry nutrients into the cells, and is the main component of the body’s extra-cellular fluids. But let’s be clear about one thing: unrefined salt is not the same as refined salt. Salt in its natural form–not altered during manufacturing–is unrefined. It is a naturally occurring complex of sodium chloride (which includes minerals such as calcium and magnesium) as well as a complete complement of essential trace minerals. Refined salt has all of its minerals removed, rendering it an essentially lifeless product. That’s why even though it has large crystals, kosher salt does not have my endorsement. (It’s appropriate for crusting fish or cleaning cast-iron skillets.) I favor the Celtic salt that has been harvested off the coast of Brittany, dried in salt pools by wind and air. I like the finely ground variety which I use in everything, including baking. The coarse ground variety is a wonderful finishing salt for when you large crystal is desirable, such as for boiled edamame. The pristine white layer that forms on the top of the salt beds is know as fleur de sel, my first choice for sprinkling on a chocolate tart. Another high quality mineral-rich salt is Himalayan pink salt. Both Celtic and Himalayan salt are both readily available in stores and online. Both will nourish the body while making your food taste delicious. It’s best to use unrefined salt, season your food until the flavor is maximized; and, to avoid getting too much sodium, stay away from processed food!
Share on Facebook and Twitter | Health Tips, salt | No comments
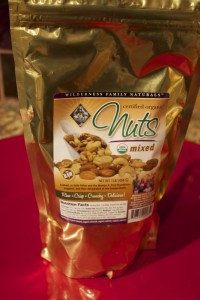
Nuts and Seeds It is undeniable that when nuts and seeds are soaked – and dehydrated if you want them crunchy – they are more readily digestible, and the nutrients within are easier to absorb. Besides, they taste simply delicious. Nuts and seeds contain enzyme inhibitors, which are there as protection until they have what they need to grow, such as sunlight, water, or soil. The soaking water will have the enzyme inhibitors in it, so after you drain the nuts or seeds, make sure to give them a rinse. You can use the plumped nuts as is (perfect for smoothies and nut milks), since soaking makes them softer. You can store the soaked nuts for a few days in the refrigerator to use as needed. Alternatively, dehydrate them in a low oven (or dehydrator) to make crispy nuts. Either way, you can really feel the difference in your body between those nuts that have been properly treated and those that have not. For best results, start with organic and raw. The worst nuts to purchase are packaged varieties that have already been roasted and salted. Poor quality fat and salt are added and the roasting has damaged the fat inherent in the nuts and seeds. Here are appropriate soaking times for each variety: 0 to 2 hours: Brazil, macadamia, and pine nuts 2 to 4 hours: Cashews, pecans, and walnuts (pecans and walnuts can go up to 6 hours) 4 to 6 hours: Sunflower seeds 6 to 8 hours: Pumpkin seeds, sesame seeds, hazelnuts 8 to 12 hours: Almonds If the idea of soaking and dehydrated nuts is going to send you over the edge, consider purchasing from Wilderness family naturals. Wildernessfamilynaturals.com These folk already do all the soaking and dehydrating work for you. I first tasted their exceptional products at the Wise Traditions conference a couple of years ago. The folks from Wilderness Family Naturals had a large booth, and I was able to sample before buying. I was hooked, and returned home from the conference with quite a few bags. I’ve been ordering ever since; the box arrives on my doorstep fast, within just a few days. If you just want to get your feet wet before committing to a big order, try the mixed nuts. I guarantee you’ll be pleased. It’s good to know that there’s high quality choices available. Share on Facebook and Twitter | ingredients, Kitchen Tips, nuts and seeds, Where To Buy (Sources) | No comments
The Healing Properties of Coconut Oil The fact that coconut oil is a highly saturated fat is a good thing. Your body needs saturated fats to most effectively use essential fatty acids (also know as EFA’s, the ones that your body needs to get from foods). Saturation is what keeps coconut oil from destabilizing or going rancid during cooking. All fatty acids are made of lengths of carbon chains. Saturation means that the chain of carbon atoms is fully “saturated” with hydrogen atoms. They have no double bonds between the individual carbon atoms of the fatty acid chain. There are many kinds of naturally occurring saturated fatty acids which differ mainly in the number of carbon atoms, ranging from 3 (extremely short chain), to 36 (extremely long chain). While all fats are made up of a combination of fatty acids, coconut oil is singular in that it is composed predominately of medium chain fatty acids (mcfas). The main mcfa in coconut oil is lauric acid, made up of 12 carbons (it makes up a whopping 47 per cent of the fat content in coconut oil). In your body, these high amounts of lauric acid are converted to monolaurin, and this is what makes coconut oil different from other oils and gives it its healing qualities. It is made only by the mammary gland and not in the liver, like other saturated fats. Coconut oil is found in large quantities only in mother’s milk, coconut oil, and palm kernel oil. Lauric acid has long been used in baby formulas. While longer-chain fatty acids, found in many foods, need to be digested by bile salts (which are secreted by the gallbladder), coconut’s medium-chain fatty acids do not. That’s why if you have trouble digesting fats, or are beginning to reintroduce fat to your diet, it’s best to begin with coconut oil. The medium chain fatty acids in coconut oil boost your metabolism. The body can use coconut oil for energy more rapidly and efficiently than any other fat source. Medium chain fatty acids are not normally stored in your body as fat. They are quickly converted to energy, making coconut oil ideal for weight loss. Many people find that they lose weight just by adding a couple of tablespoons a day of coconut oil to their diets. What a great oil to help prevent obesity. A number of years ago I happened upon an article in a “Women’s World” in a mainstream grocery store, which had an article titled “The Secret of Losing Belly Fat.” I was shocked to see that even this cheesy periodical contained some good information. They were on to the fact that coconut oil is utilized by the body to produce energy instead of being stored in the body fat like other dietary fats. The bad reputation that coconut oil undeservedly had for so many years (due to one study with hydrogenated coconut oil) is slowly crumbling. Nonetheless, the mainstream is still slow to change. Too many people are using copycat information, and too much money is invested in cheap oil production. Coconut oil is especially important to add to your diet if you are restricting calories. It will keep your metabolism humming along efficiently instead of slowing down; that’s what usually happens when calories are restricted. This oil is one of my personal “weapons” for keeping my weight to my desired level. Even though I normally cook with coconut oil; during those instances when I’ve packed on a few extra pounds, (like after a vacation), I bump up the amounts. I simply work a tablespoon coconut oil into each meal. It gets me back to my desired weight quickly and deliciously. Nowadays, coconut oil is even packaged into capsules as a weight-loss aide. Why take it in capsule form when it’s so easy to include in the diet? Coconut oil boosts energy and endurance and stabilizes blood sugar. In the 1940’s farmers attempted to use cheap coconut oil to fatten up their cows. It didn’t work: their cows instead became perky and lean. The famers then turned to soy and corn for more effective fatteners. Medium chain fatty acids found in lauric acid:
It is interesting to note that these oils have long prevented indigenous populations from bacterial and viruses found in the food supply. When populations switch from their traditional oils like coconut oil modern polyunsaturated oils, they have a hugely increased rate of modern illnesses. (I’ve witnessed this phenomena with friends and students from India and the Philippines.) The oil is good applied topically as well. It helps soften skin and relieve dryness and flaking. I used to have a recurring chest rash every year when the weather in New York got hot. Since using coconut oil regularly on my skin, I have not had a rash in almost 12 years! One of my students who had eczema reported that after only three weeks of applying the oil to his dry flaky skin, his condition was improved 70 percent. I lost track of him, so I was not able to discover whether his eczema completely cleared. More healing qualities of coconut oil:
Coconut oil is a traditional fat that has been used for many years in a multitude of cultures. Coconuts grow in the Philippines, Indonesia, India, Sri Lanka, Malaysia, Thailand, Vietnam, the Pacific Islands, in equatorial Africa, Mexico, Brazil, Jamaica, the Dominican Republic, and El Salvador. The trees produce between 50 and 100 nuts per year. They start yielding fruit at age six, and they continue to give off fruit for the next 55 or so years. Coconuts are ecologically sound, as they are able to grow in difficult environments, such as atolls, or under conditions of high salinity, drought, or poor soil. They play an important role in maintaining the fragile ecosystems of island and coastal communities. Moreover, most of the world’s coconut production comes from small farms. For more information on coconut, read Eat Fat, Look Thin, by Bruce Fife and Eat Fat, Loose Fat by Mary Enig and Sally Fallon.
Share on Facebook and Twitter | Fats & Oils | No comments
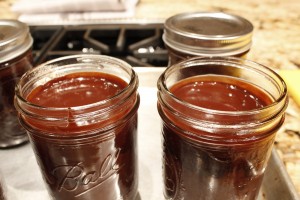
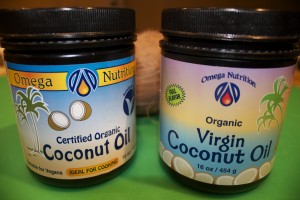
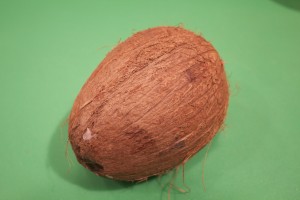
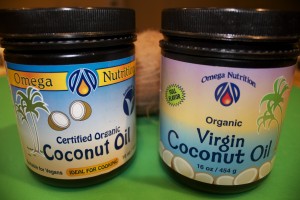
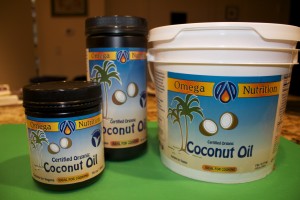
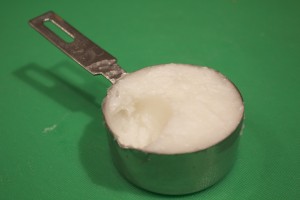
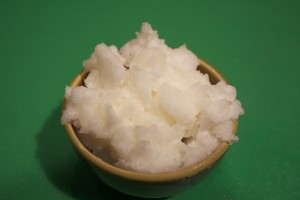
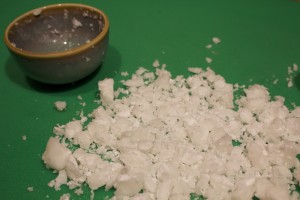
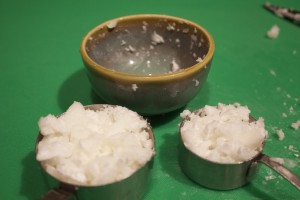
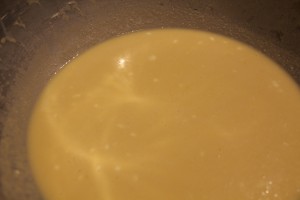
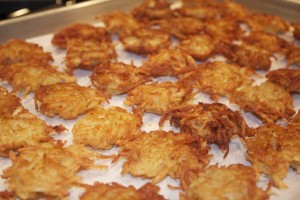
Working with Coconut Oil Young coconuts are large, green, and water-heavy. (Of course, by the time we see them in this country, the outer green shell has been shaved.) As a coconut matures, it becomes wizened, brown and hairy. The gel-like meat within becomes thicker and meatier. Coconut water is the sweet liquid inside the immature coconuts. Coconut milk is made from the pressed juice of grated coconut meat and water; coconut oil is the fatty oil that comes from the coconut meat. The oil, which used to have a bad reputation in this country, is now finally getting the attention it deserves for not only being a nutritional powerhouse but for its versatility in the kitchen. I have used coconut oil consistently for 12 years with great results. Coconut oil comes in two varieties: virgin, which has the flavor of a coconut, and an aroma-free filtered variety which is neutral-tasting. While I love the virgin coconut oil – and I use it frequently – there are many instances when I don’t want what I’m making to taste like a Thai dish. When I want the perfect oil to cook potato pancakes, for instance, I reach for the filtered aroma-free variety. This product still has all of the nutritional benefits of coconut oil without the predominant coconut flavor, which is removed in a vacuum process. Coconut and the oil come from tropical countries where they are exposed to high tropical temperatures. The oil can take the heat necessary to distill it and remove the coconut flavor without affecting the quality. There’s no trans fat byproducts either, so you don’t have to worry that you’re compromising your health. I love the oil from www.omeganutrition.com. I was first introduced to their products 12 years ago; they have the best filtered coconut oil that I’ve ever tasted; this is the brand that got me hooked . Their other products are of the highest quality as well, so you won’t go wrong with whatever you order. They ship fast; you’ll get your products within just a few days. You can order the oil in all different sizes, from a 1-pound canister to a 7-pound pail (my favorite). You don’t have to worry that the coconut oil will go bad; even after you open the jug, it lasts two years at room temperature! At room temperature, coconut oil is semi-solid. It melts at 76 degrees, so if your pantry is warm, you may notice how the consistency changes. Although the oil may have melted, this is not a problem. It can melt and solidify back and forth without damaging the oil in the least. If you’re baking with coconut oil and converting from butter to coconut oil, use 7 tablespoons coconut oil instead of 1 stick butter. Butter contains 20 per cent water, so you need to lessen the oil a bit. The easiest way to measure 7 tablespoons is to scoop ½ cup into a dry measure and then remove 1 tablespoon. Measure coconut oil in the form that you need it in. For example, say you’re making a cookie and you are going to cream the oil with sugar. You will need the oil in its semi-solid state. Measure it right out of the container. If you need it in liquid form, melt some coconut oil (it only takes a minute or two to melt) in a pan over a low flame, and then measure it. If you want to work coconut oil into a pastry crust and you need it super firm, place a glob in the refrigerator to harden it. Chop the hardened coconut oil first on a cutting board, then place the pieces in measuring cups. Pulse the oil into the dry ingredients in a food processor. There’s an easy and delicious coconut oil pastry crust recipe on p. 51 in my book The Healthy Hedonist Holidays. When you need a tablespoon or two to sauté something, it doesn’t matter whether or not the oil is melted or semi-solid. Just scoop some oil out of the container, add it to the skillet, and you’ll find that it will melt quite readily. Be concerned with exactitude only when baking. Furthermore, it’s best to have the other ingredients in your recipe at room temperature before mixing with the coconut oil. In contact with cold ingredients, the oil will start to seize; you’ll then have little clumps of hardened oil in your mix. A quick whirl in the blender will take care of any hardened bits. If your marinade looks like the following picture, just place the pan in the oven. A few seconds in the heat will melt the coconut oil just fine. You can also place your ingredients over a double boiler, and gently heat the mix. It doesn’t take long for everything to get up to 76˚F, the melting point of coconut oil. Coconut oil has a high smoke point, up to 375˚F, which makes it the ideal oil for frying, and your food won’t taste greasy. (Use the filtered variety when frying.) Hands down this is the best oil for making potato pancakes, cutlets, croquettes, falafel, or any recipe that calls for a substantial amount of oil. These are crispy, not greasy. Since you won’t want to waste this gorgeous oil, just put enough oil to go halfway up the side of whatever you are cooking. That’s enough to cook the first side; flip to finish cooking the other side. The virgin oil is the best choice when you want a hint of tropical flavor. It makes buttery-tasting popcorn, stellar roasted vegetables, and creamy root vegetable purées. One of my favorite vegetable combinations at the moment is puréed parsnips mixed with rutabagas or kohlrabi, enriched with virgin coconut oil and butter. Talk about a creamy, satisfying texture! The virgin oil makes a tasty spread on crackers, bread, muffins, and mocha as well. The flavorful virgin oil is also the better choice if you want to utilize the oil as a supplement to stabilize your blood sugar and keep your metabolism humming at high speed. You can use the virgin variety as a moisturizer for your face and body. Try slathering your entire body with the oil before taking a shower. You’ll come out of the shower clean and soft – not greasy – without having to use soap or moisturizer. You can also work coconut oil into a blend. This combination is inspired by Mary Enig’s blend of oils: mix 1/3 part extra virgin olive oil (or macadamia nut oil for a really subtle flavor), 1/3 part unrefined sesame oil (not the toasted variety), and 1/3 part aroma-free coconut oil. The resulting oil is mild-tasting and has a combination of healthful properties from all three oils. You can keep the oil at room temperature, and use it for sautéing and for salad dressings. It also make s a wonderful oil for mayonnaise. Deviled eggs, anyone? We’ll save that for another day. .
Share on Facebook and Twitter | Coconuts, Fats & Oils, Kitchen Tips, Pantry Items | No comments
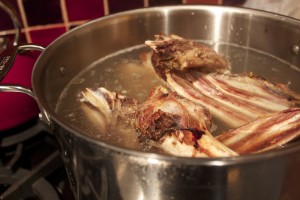
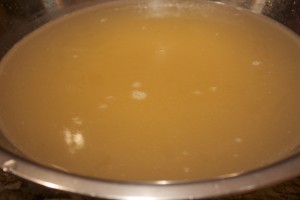
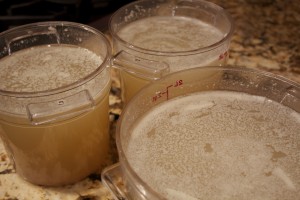
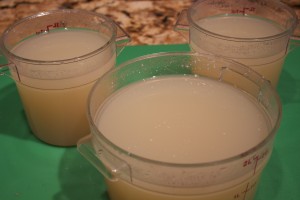
Lamb Bone Broth I purchased 5 pounds of lamb bones the other day at the booth of 3 Corner Field Farm (one of my favorite stalls) at Union square Greenmarket. The large and impressive bag of bones prompted another customer to inquire why I was buying them. What followed was a discussion on how to make lamb broth. I’m detailing the process here since lamb broth is not a stock that many make. After all, you can certainly use chicken stock with great success for any lamb dish that requires a flavorful liquid. A lamb broth, on the other hand, will make your lamb stew or braise incredibly rich and deep-flavored. You can make a stew so satisfying that it tastes as nurturing as a giant hug. (Those are the words a friend of mine used to describe a lamb stew I had recently made for her with lamb broth.) Plus, this dish is seriously easy to put together. It requires about five minutes of active participation to get the stock going, and just a few minutes work straining it when finished. First roast the bones: Arrange them on a parchment-covered baking tray (see the last post if you need a good resource for getting the flat professional type of parchment) and place the trays (you’ll need 2 trays for five pounds bones) in a 375˚ oven for about 45 minutes (actually any temperature from 350˚F to 400˚F is fine) to roast until they are browned. The aroma as the lamb roasts is intoxicating. Transfer the bones to a large stockpot (12 quart is perfect) and fill with water to just about the top of the bones. I used about 6 quarts water. Add ¼ cup vinegar (I used apple cider) to draw calcium from the bones into the stock. Bring the liquid slowly to a boil, then lower the heat to a gentle simmer. A few bubbles breaking the surface now and again is what you want to see. From time to time, skim off the impurities (skum) that form on the surface of the stock when it first starts to bubble. Don’t skip this step; it’s important to a great-tasting stock. Besides, the scum is unappealing! Now just let it go. I left my stock to cook overnight. I put it on the lowest heat so that I wouldn’t have to concern myself that it would reduce too quickly. I had started the stock at 3 p.m. in the afternoon Wednesday, and I strained it at 7 a.m. on Thursday morning – a total of 17 hours in the pot. Let a lamb or beef stock cook for at least 12 hours; they can go much longer, even days! After 17 hours, the stock had reduced by about one third. I let it sit on the countertop until it was cool enough to refrigerate. After it was refrigerated and thoroughly chilled – about three hours later – I removed the fat layer on top with a skimmer. I’ll freeze half and use the rest within the week. The yield was 4 quarts of nourishing bone broth that will be delicious for any lamb dish. Share on Facebook and Twitter | Lamb, Recipes, Soups, Where To Buy (Sources) | No comments
|
