|
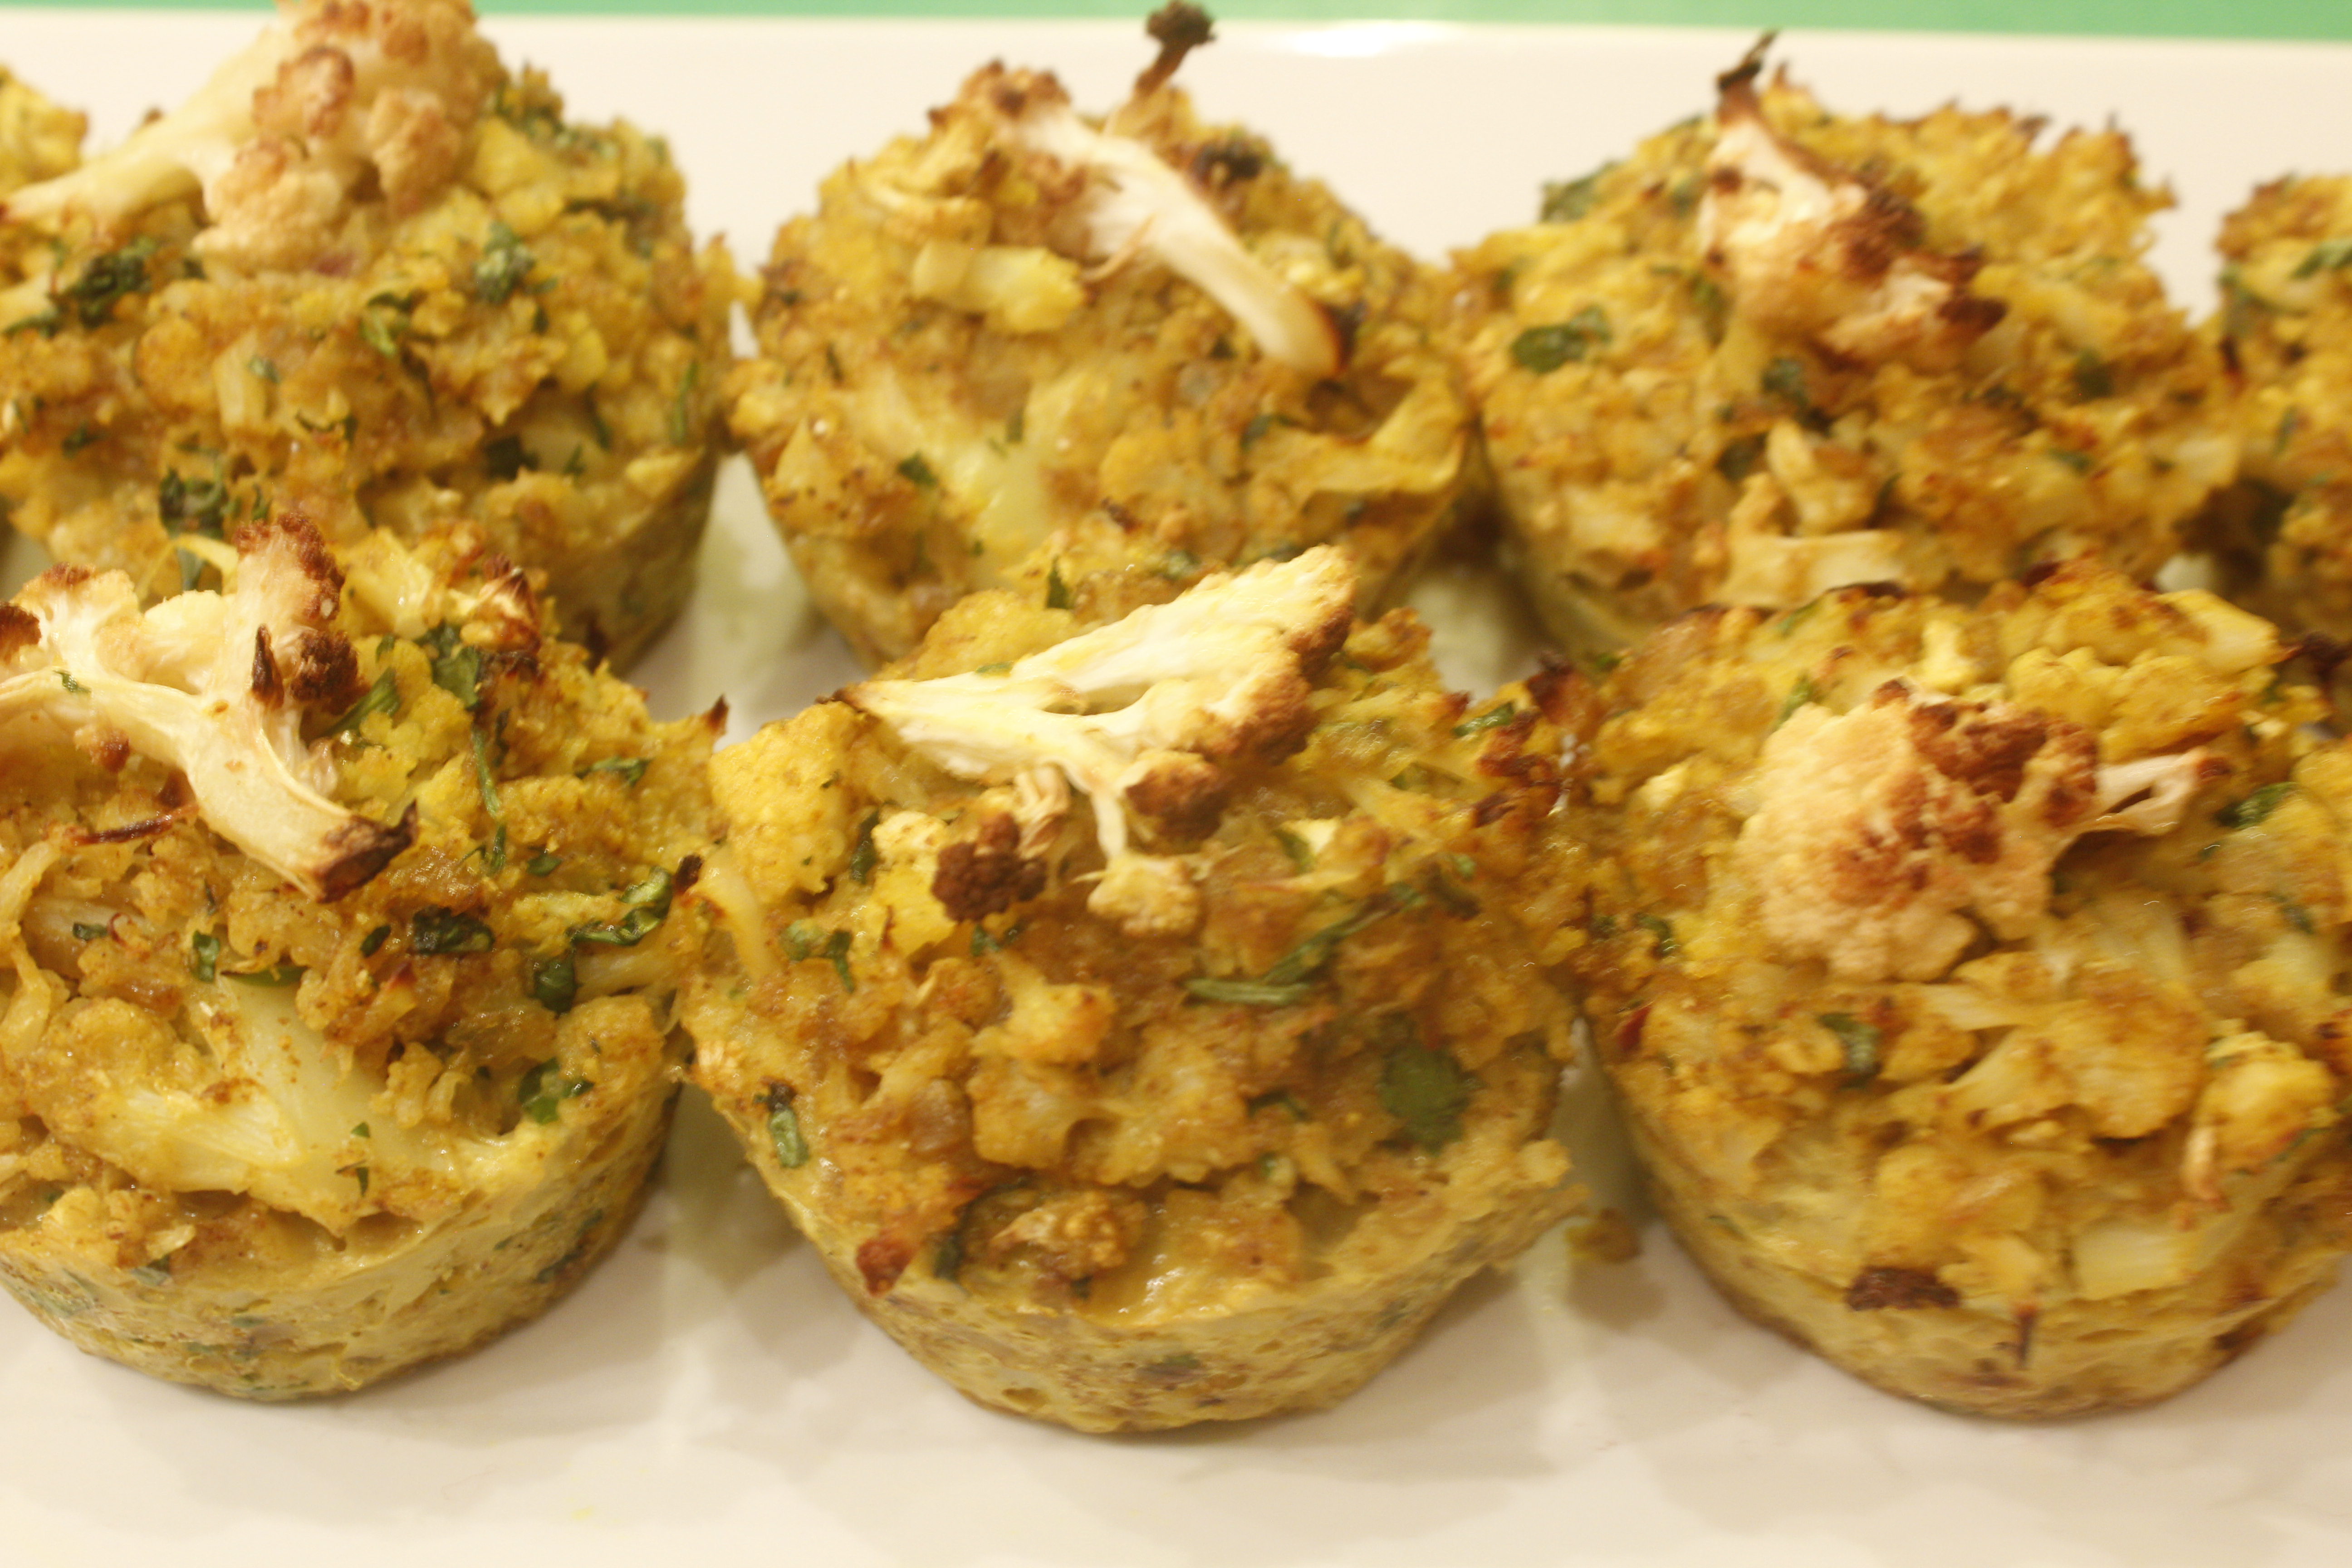
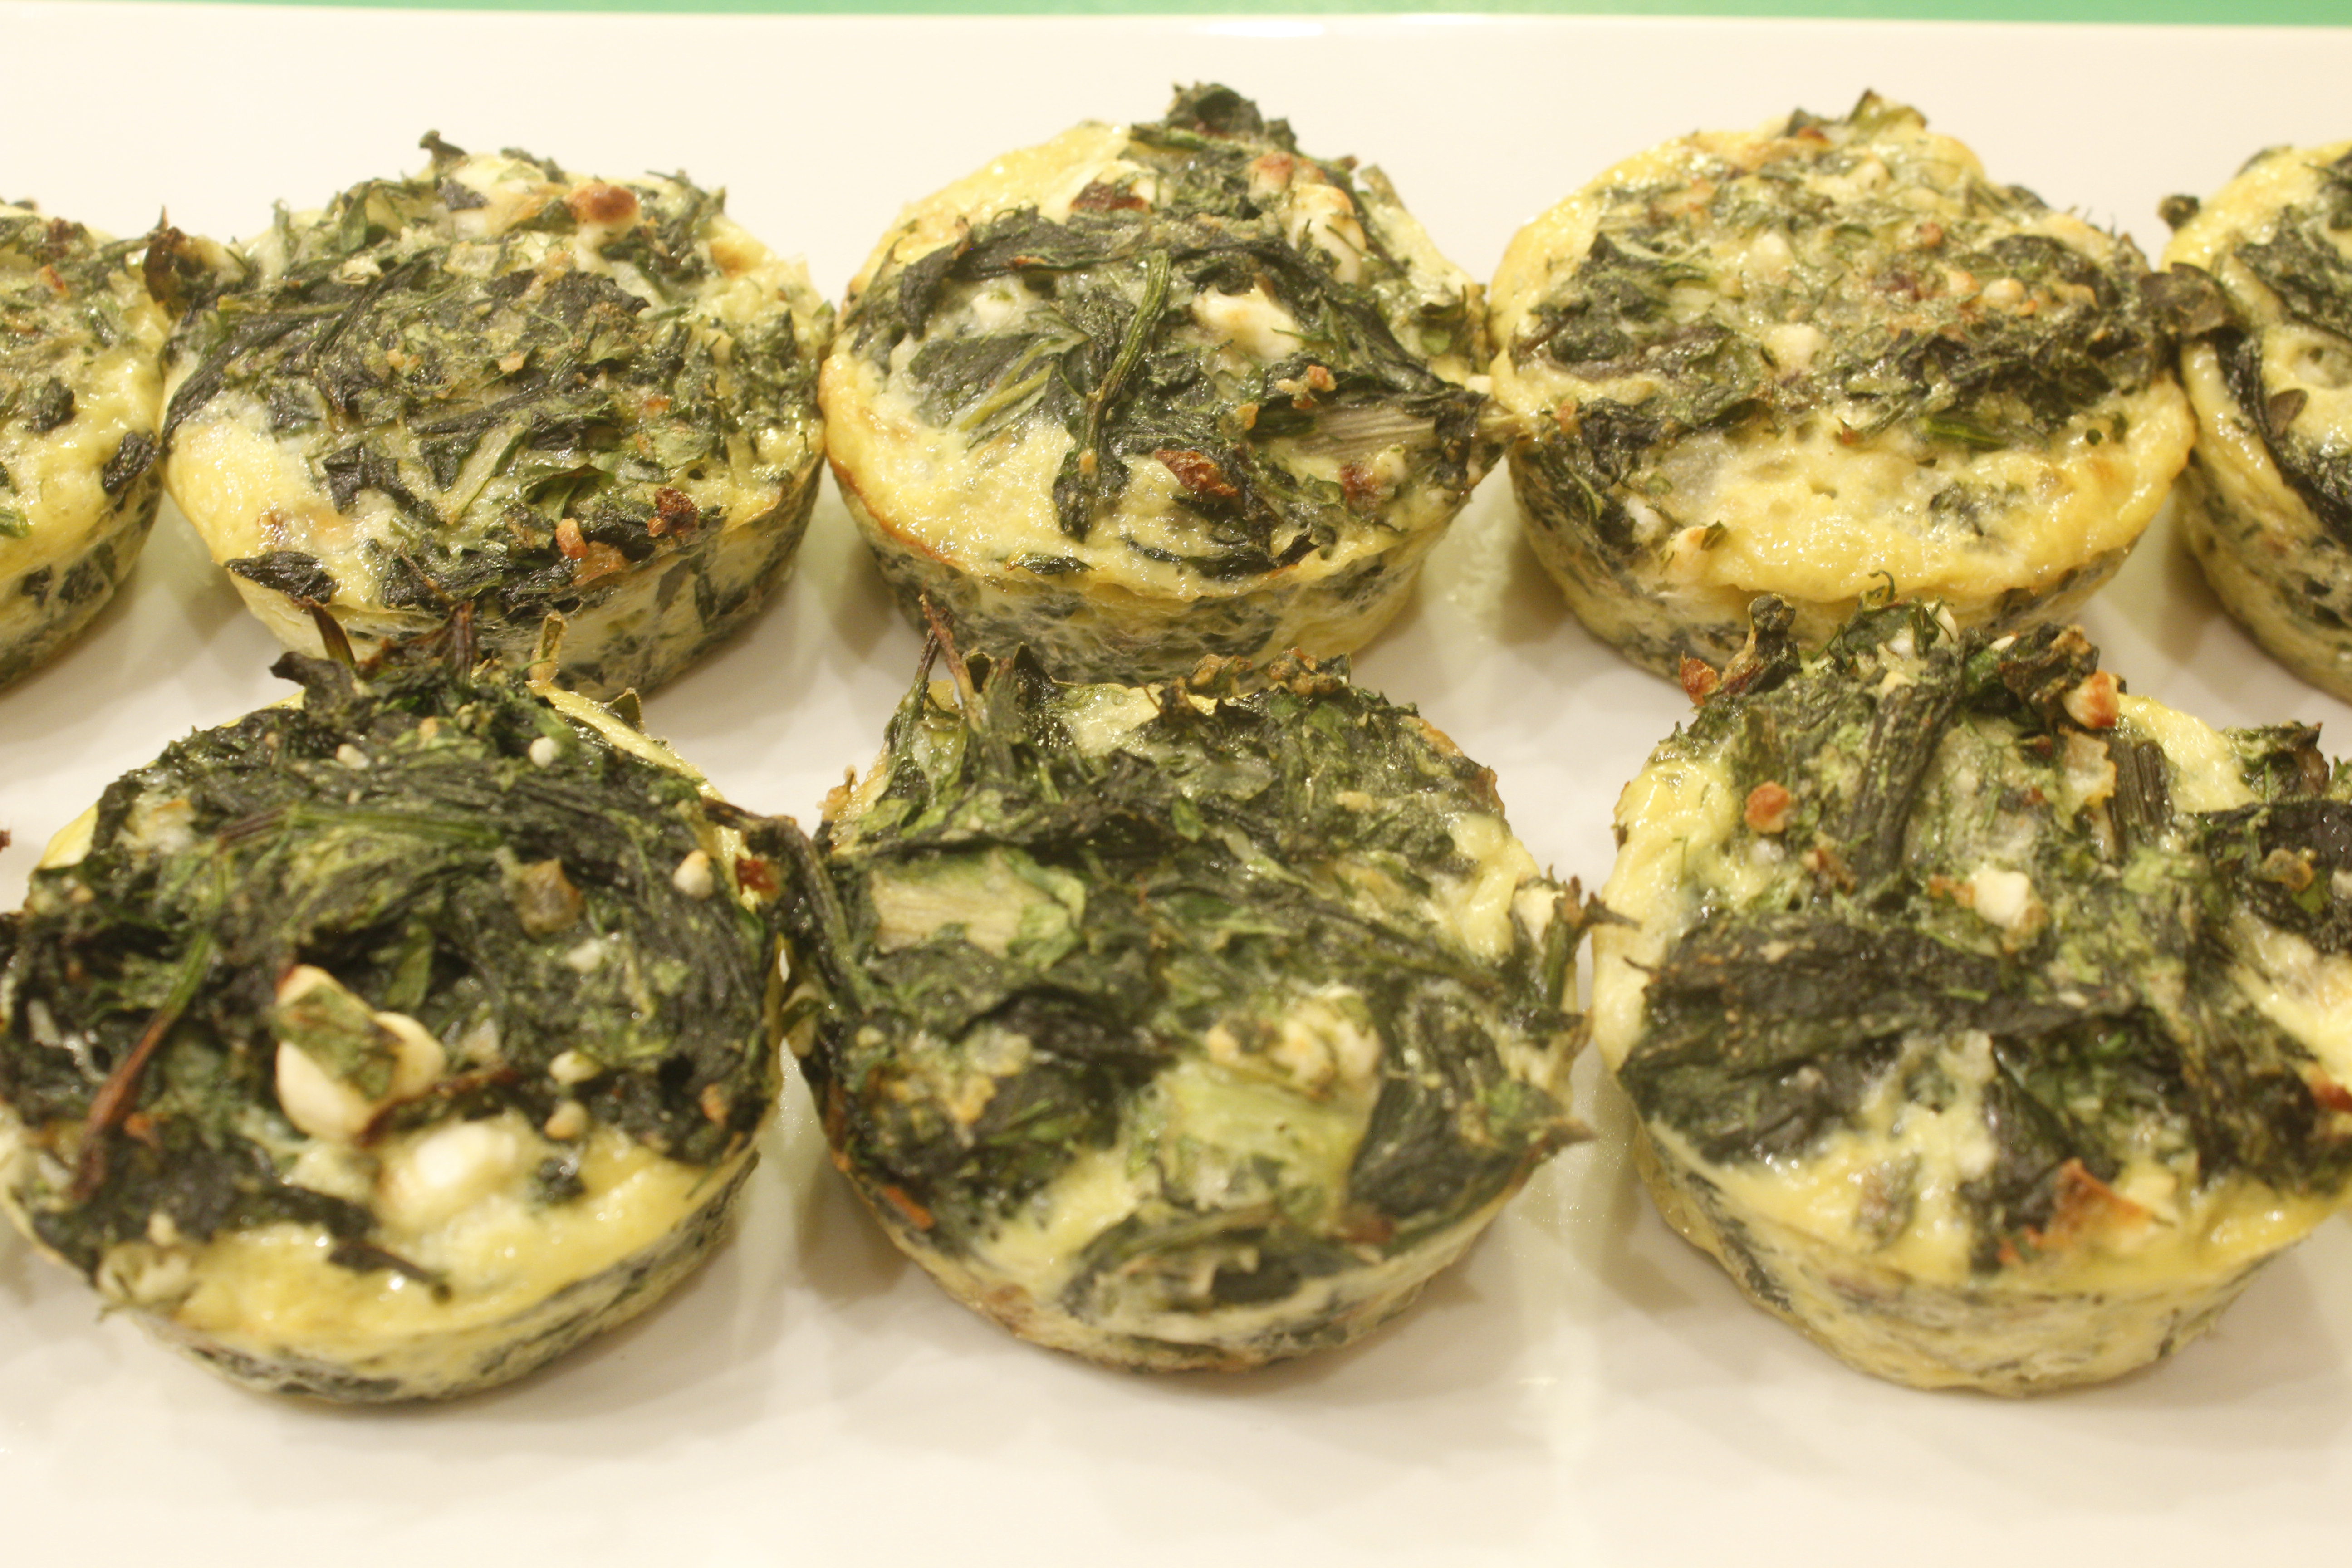
Savory Breakfast Muffins
In today’s Breakfast Muffins Video I demonstrate how to make two different kinds of vegetable muffins. These light, yet substantial morsels make a quick breakfast-on-the-go, or a convenient elegant vegetarian side dish. They last for four or five days in the refrigerator, ready to be reheated and enjoyed at a moment’s notice. The first muffin shown in the video is the curried cauliflower version. Here’s how to make it: Start with a large head of cauliflower, which yields 10 to 12 cups when cut into florets. Take 1/3 of those florets, slice them, toss them in a light coating of olive oil with a bit of salt, and spread them on a parchment-lined baking sheet. Roast in a preheated 400˚ oven for about 20 minutes. Meanwhile, steam the remainder of the cauliflower until very tender, then transfer to a large bowl and mash until crumbly. While the cauliflower is roasting and steaming, sauté 2 cups red onions in 2 tablespoons ghee until softened. Stir in 1 teaspoon cumin, 1/2 teaspoon turmeric, and 2 cloves minced garlic. At this point, you’ll notice that the kitchen smells so enticing! Transfer this aromatic melange to the bowl of steamed, mashed cauliflower. Stir in 3/4 teaspoon salt, a dash of cayenne and black pepper, 1/2 teaspoon baking powder, and a couple tablespoons cornmeal. Bind the vegetables with 3 lightly beaten eggs. By this time, the roasted cauliflower is ready to remove from the oven. Set aside 12 slices to crown the top of the muffins. Chop the remainder of the roasted cauliflower into small pieces, and stir into the bowl with a few tablespoons chopped cilantro. The verdant-flecked yellow cauliflower mix positively glows! Spoon evenly into muffin tins—the silicon kind is my favorite for ease—and bake about 20 minutes until golden and firm. The second muffin presented in the video is a take-off on a spanakopita. To begin, sauté a cup of chopped onions in 2 tablespoons olive oil over medium heat until nice and softened, about 7 minutes. Let the onions cook while you wilt the greens. In the video version, I use a combination of Swiss chard and spinach—a pound and a half all together, but use whatever greens looks freshest and most appealing. Wilt the washed greens in a skillet, using tongs to push the wilted leaves to the bottom. There’s no need to add extra liquid, and there’s no need to use a large skillet; the big pile of greens you started with shrinks down to an astonishingly small amount! You do need to drain the cooking liquid from the wet greens well, however. To do this, let them cool in a strainer and grab handfuls from which to wring out the excess liquid. Alternatively, transfer the greens to a ricer— I show this technique in the video—and squeeze out the liquid while the greens are piping hot. What a great use for a tool designed for potatoes! Next, dump the greens out on a cutting board, chop them into small pieces, and transfer them to a bowl. Now stir in the rest of the ingredients. Fresh herbs enliven the mixture; the combination of 1/4 cup dill and 1/2 cup parsley lends delightful freshness. Sprinkle in some nutmeg and mix in a 1 1/2 cups feta cheese. Goat’s or sheep’s milk are especially delicious and digestible. Add 2 tablespoons of your favorite flour—I use rice in the video—and 1/2 teaspoon baking powder and salt. 4 eggs bind the mixture together; now the batter is ready to be divided into muffin holders and baked to perfection, about 20 minutes at 375˚. Improvise with other vegetables as well, and enjoy these savory treats! Share on Facebook and Twitter | Breakfast | No comments
Fermented Tomato Salsa
In today’s Video, I show how to ferment a tomato salsa; making this lactoferment is a great way to celebrate and enjoy the luscious tomatoes available right now. You may not be familiar fermented salsa: but it is truly delicious and you get to reap the benefits of your labor quickly. Just 24 to 48 hours of fermentation results in a salsa with a delightfully tangy flavor and a long-lasting life. Salt (or a mixture of salt and whey) initiates the fermentation process; it inhibits the growth of undesirable bacteria long enough for the lactobacilli, the delightful microorganisms already present on plants, to be converted to lactic acid. The nutrient content of the salsa is increased; the versatile condiment turns into a healthy probiotic. I demonstrate the two versions in the video: one made with salt, and one made with a combination of salt and whey. Fresh whey is simple to make. You place a cheesecloth-lined strainer over a bowl and add a couple cups of yogurt to the strainer. Within an hour or so, you’ll have a decent amount of liquid in the bowl: that’s the whey. You can transfer it to a covered jar and keep it stored in the refrigerator for up to six months. The longer you strain the yogurt, the more whey you’ll have and the thicker your yogurt will be. You can strain it for a few hours to produce thick, rich Greek-style yogurt, or you can strain it overnight to produce even thicker yogurt cheese. Whey gives the ferment a jumpstart, and the version with whey is usually ready within one day. Alternatively, you can leave out the whey and just add salt; you’ll still get wonderful results within two days. For either version, start with 1 ½ pounds tomatoes, diced small. The salsa is especially vibrant with a mélange of colorful tomatoes; a quart’s worth of quartered cherry tomatoes is also suitable. Next add a couple cloves minced garlic and 1 or 2 minced jalapeños to the tomatoes. It’s also good to add something oniony: I favor a mix of red onion and scallions, about ½ cup of each. No salsa is complete without a mound of chopped cilantro, so add at least ½ cup. To this, add ¼ cup lime juice. Now it’s up to you either to add 2 teaspoons salt or 1 teaspoon salt plus ¼ cup whey. Either way, make sure to push the salsa down into your 1-quart jar so that the liquid covers the top. Cover tightly; then leave the jar out on the counter for 1 to 2 days. Within a day or two, you’ll notice bubbles in the liquid. At that point, transfer your ferment to the refrigerator, where it will stay fresh for a few months. Use it to add zest to your meals and snacks.
Share on Facebook and Twitter | Fruit, Gluten Free, Kitchen Tips, Side Dishes | No comments
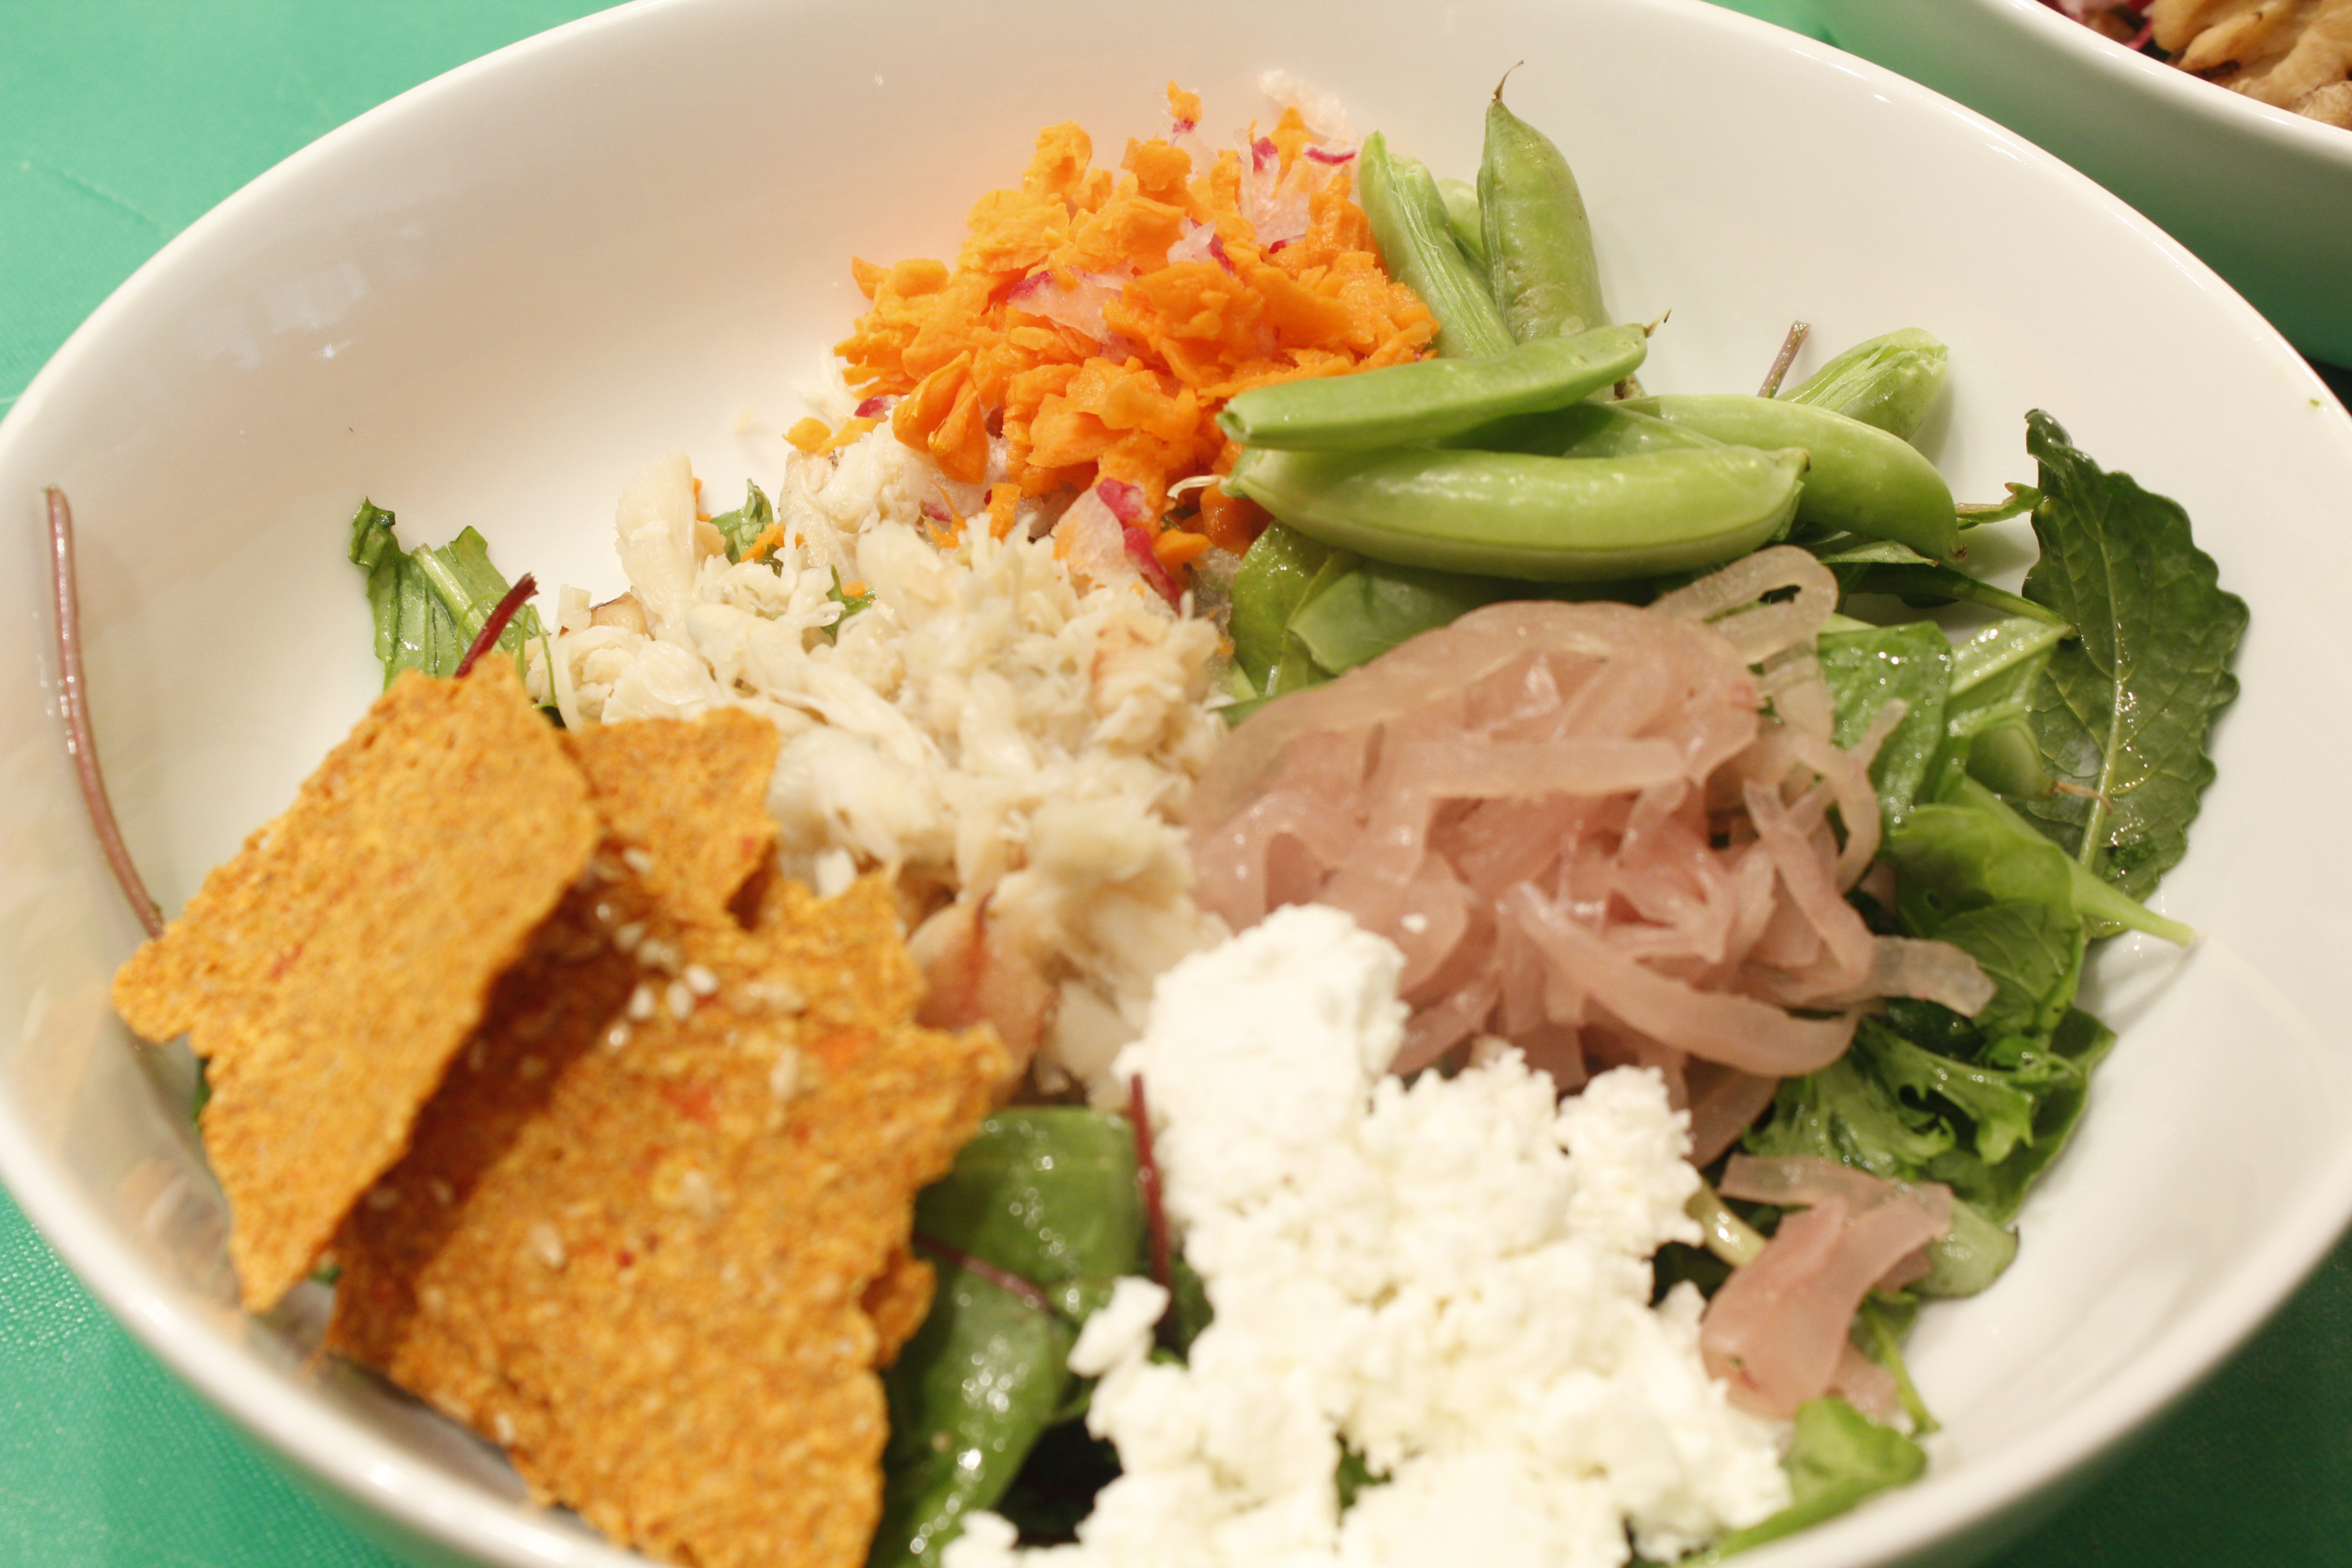
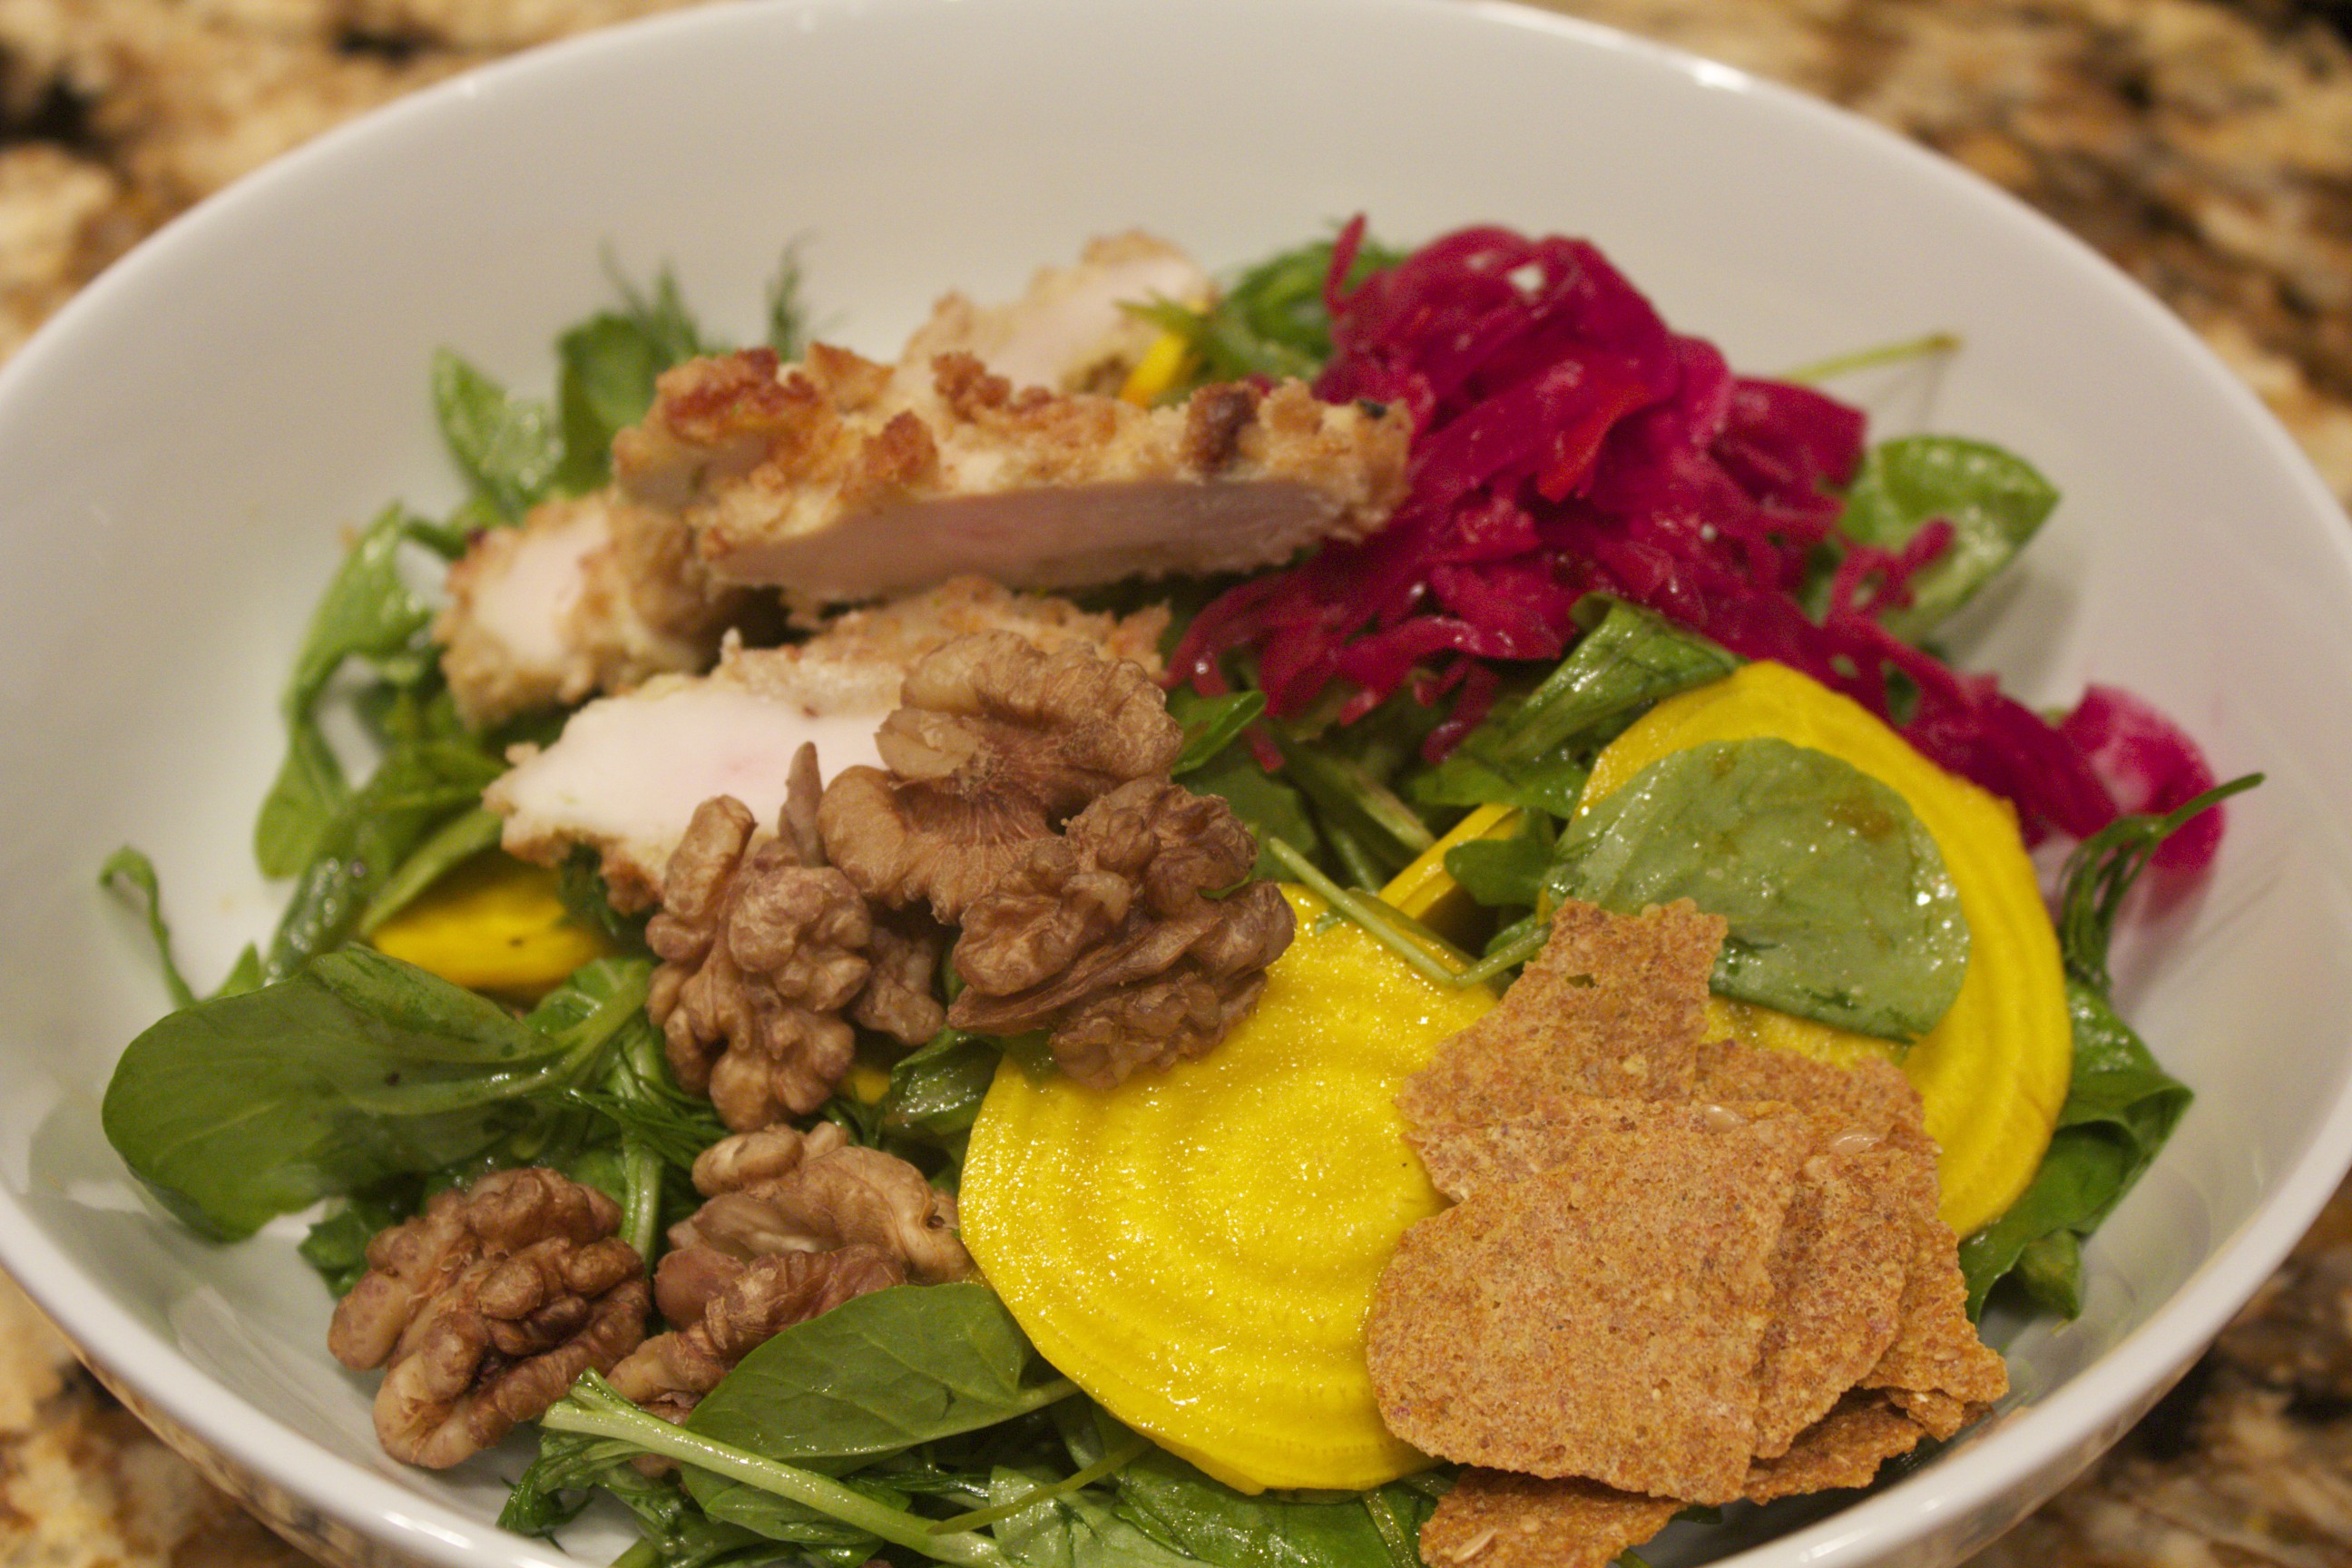
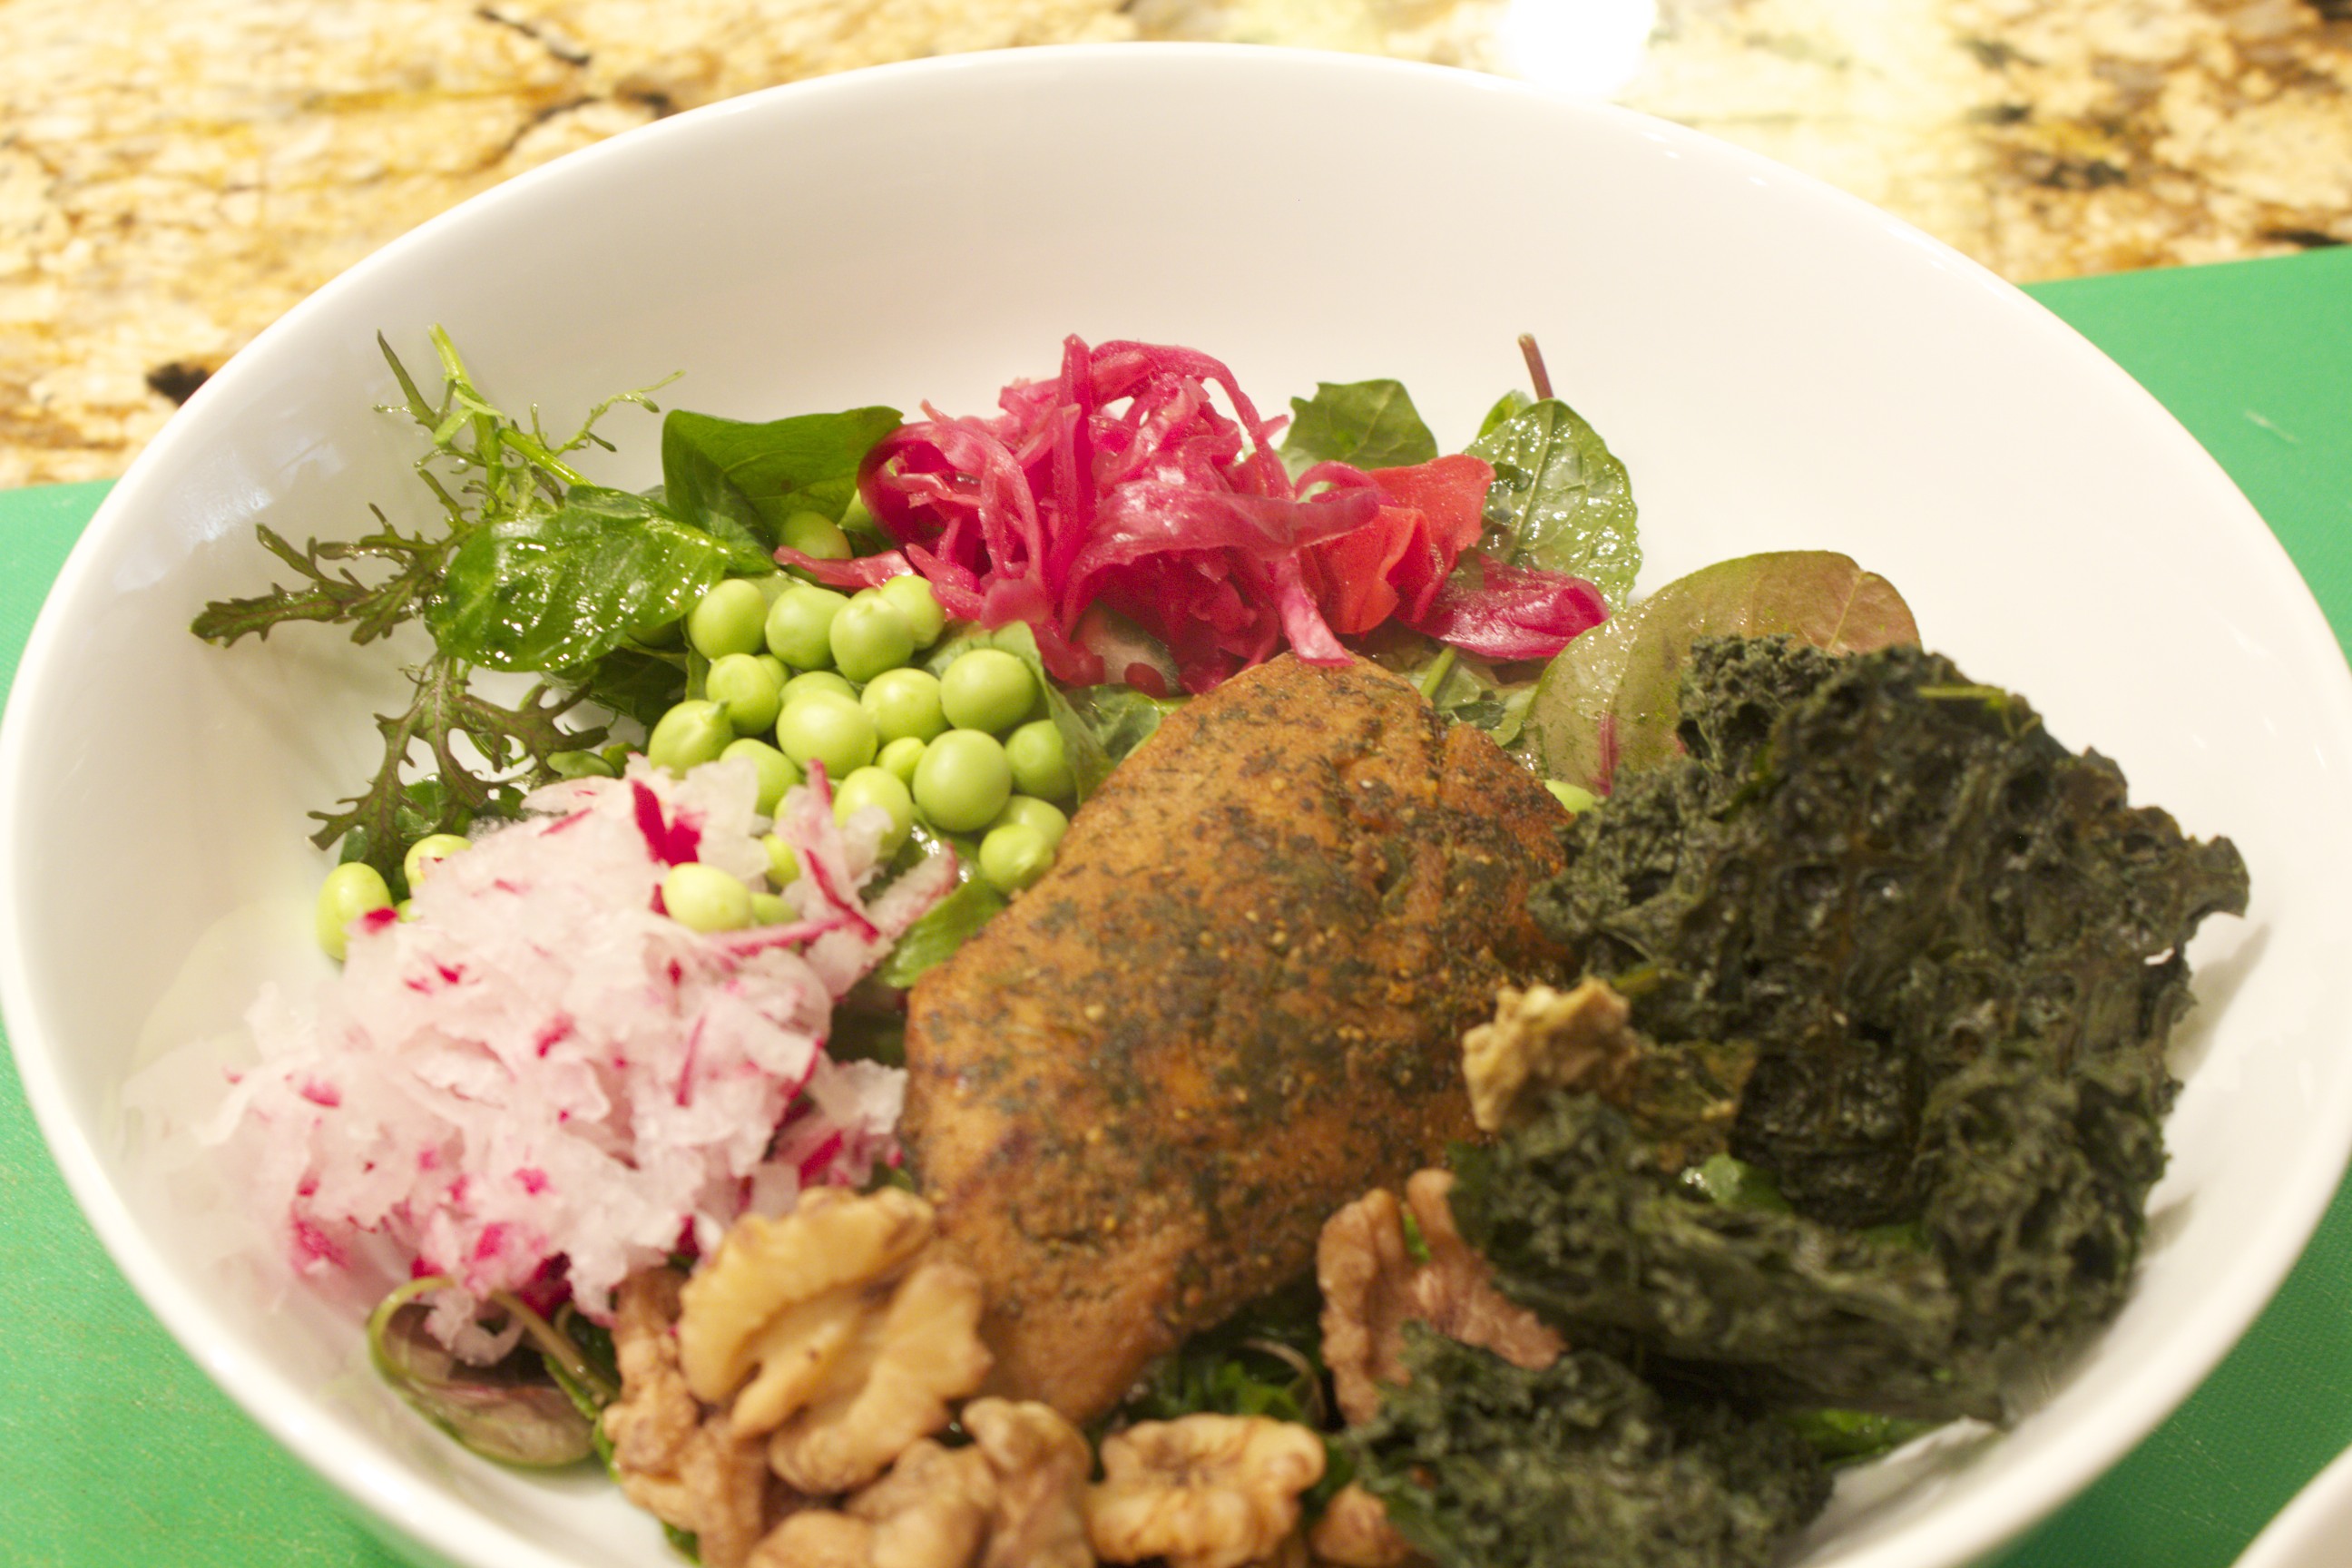
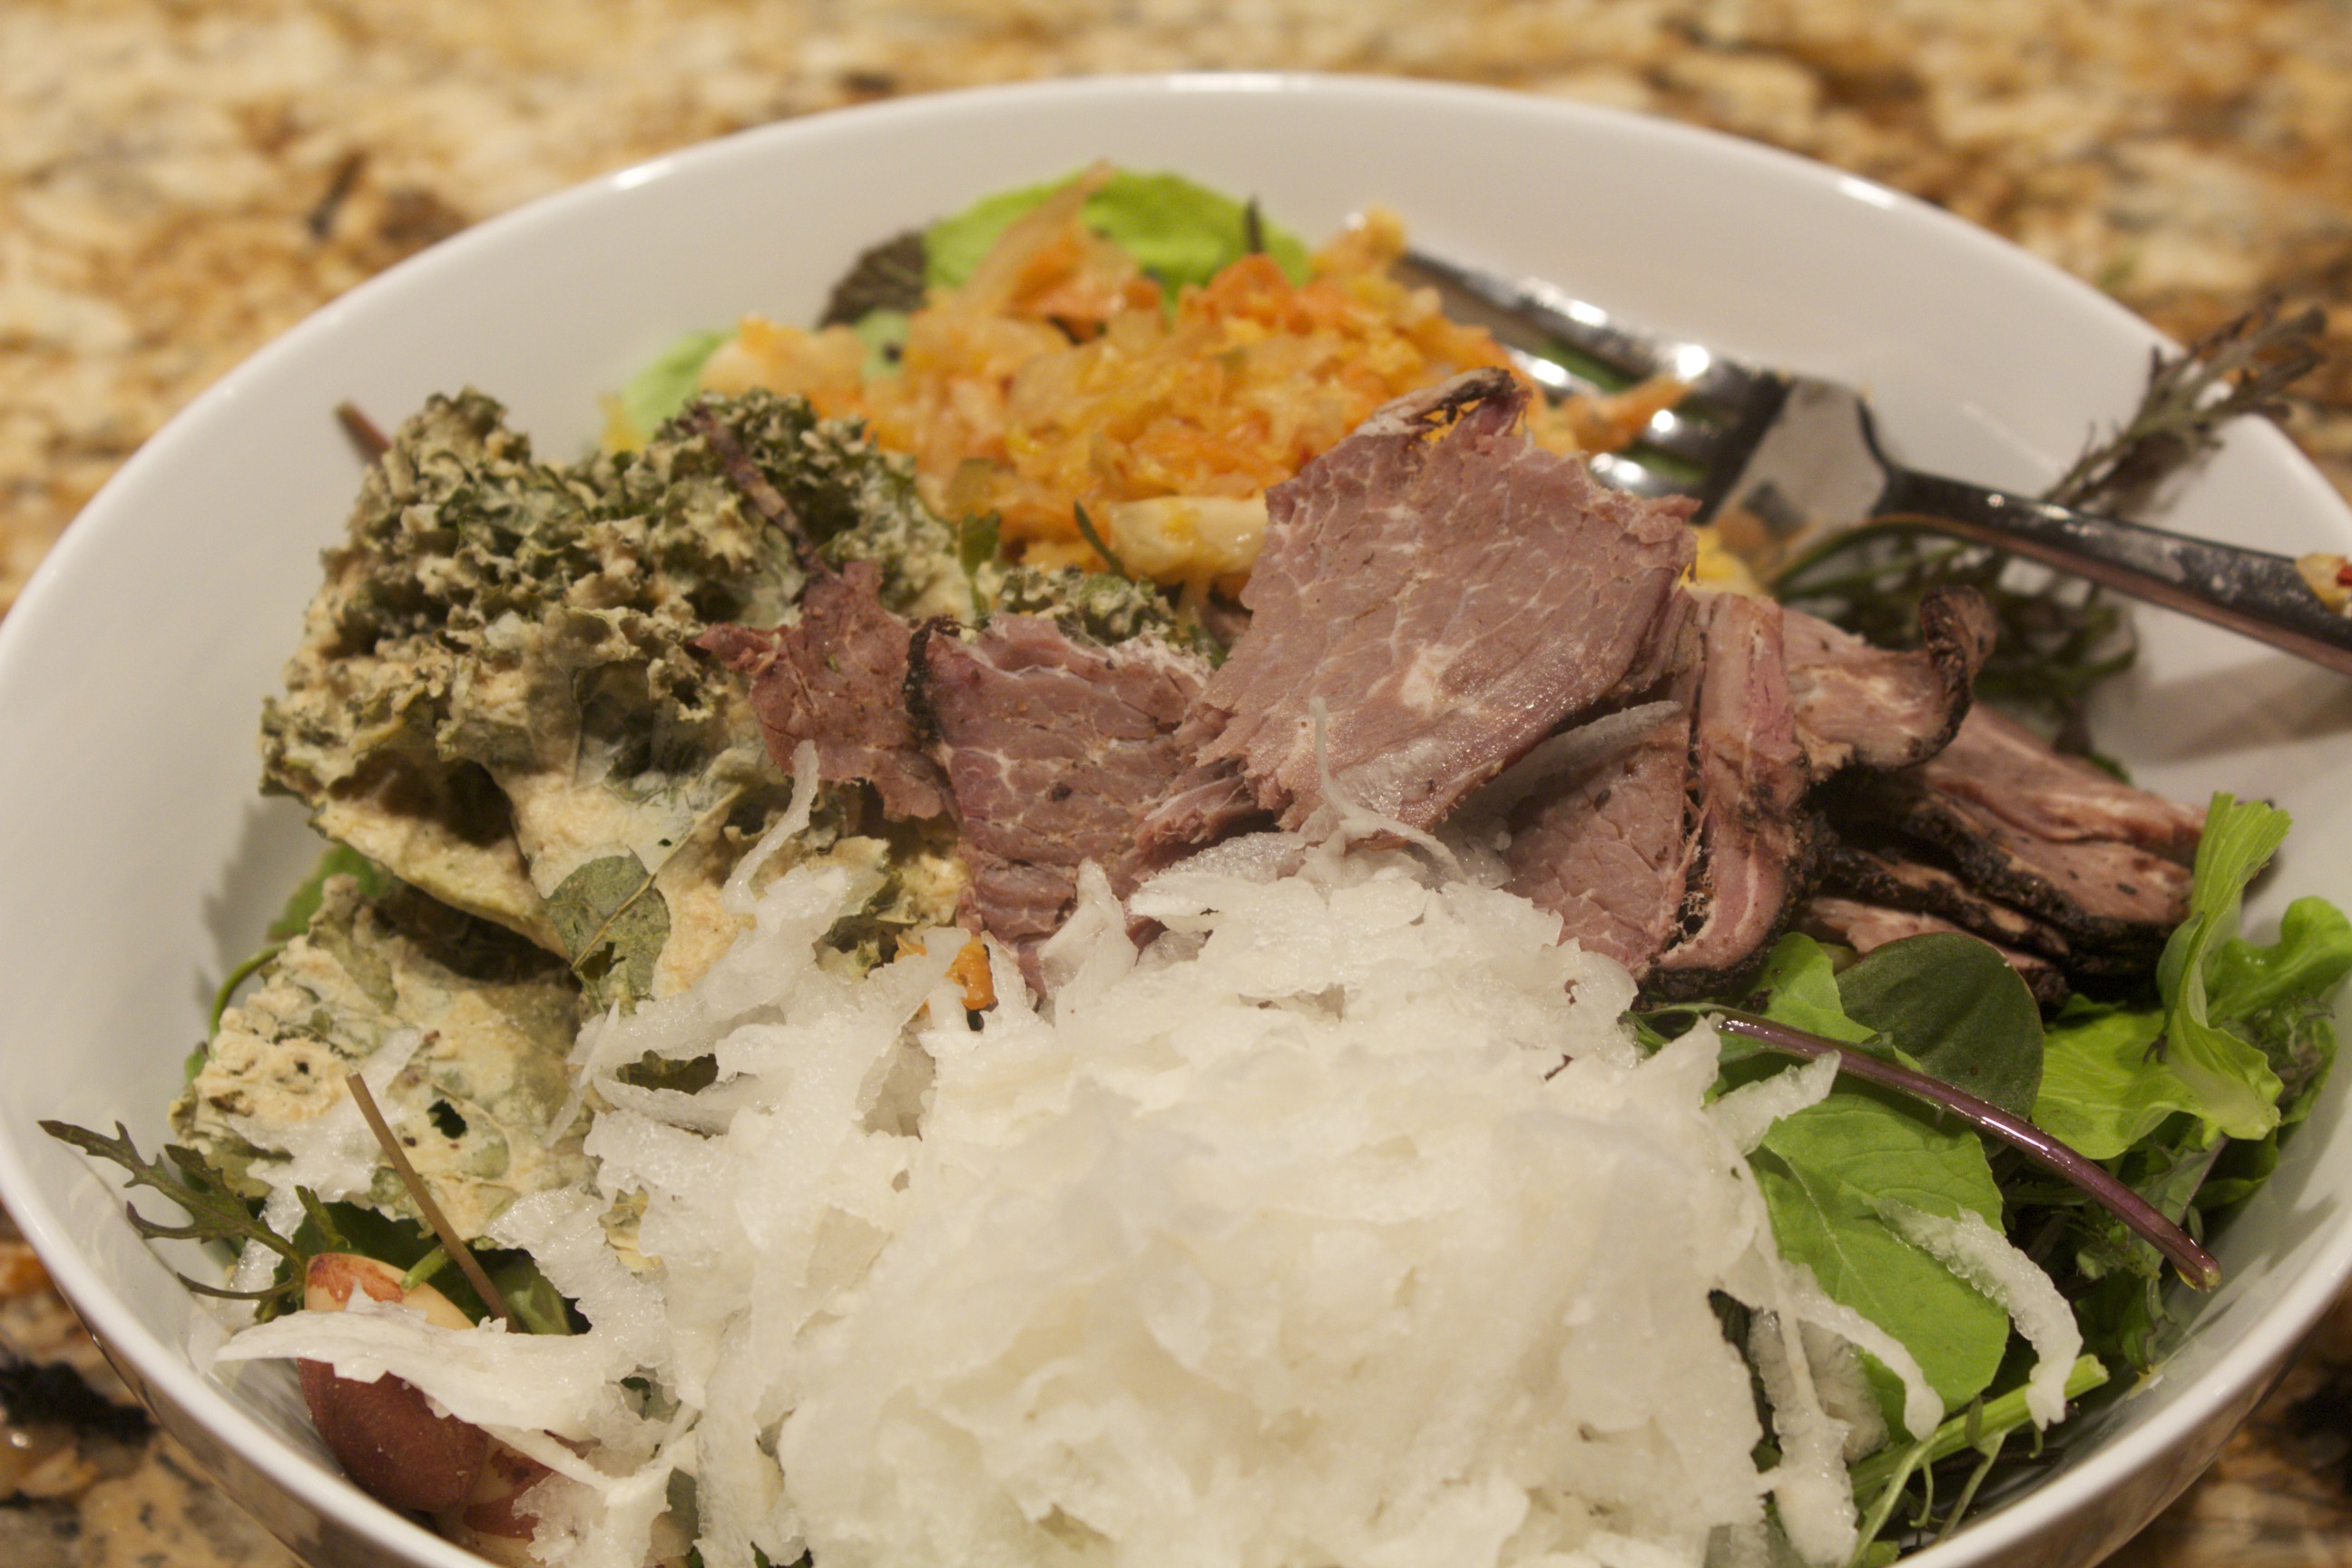
Building a Satisfying Salad In today’s video, I demonstrate one of my favorite summer lunches, a beautiful light yet substantial main course salad. The focus of the video is on the components that make up a satisfying salad. My ideal summer salad has a homemade dressing, a gorgeous mix of greens, a protein, a raw vegetable or two, a fermented vegetable, a sprinkling of something fatty, and some kind of crunchy, dehydrated vegetable or sprouted chip. This composed salad lends itself to infinite variations, and I explore three. Happily, all of these colorful, multi-textured salads take only minutes to assemble, and they are hearty enough to keep you going strong until dinner.
The most important factor in a salutary salad is the dressing. Bottled salad dressings are not healthy; they all contain inflammatory polyunsaturated oils, such as soybean oil, as their primary ingredient. Making your own dressing, however, is quick and cost-effective as well as healthy and delicious. Here’s how to make a basic vinaigrette: First, place a damp dishtowel in a ring shape on your counter to hold your bowl steady. Doing this will free both hands. Place a dab of mustard in the bowl, then add a tablespoon of minced shallots. Next, pour in a couple tablespoons of your favorite vinegar (the dressing used in the video is golden balsamic), then whisk in about 6 tablespoons of extra virgin olive oil. You can also add a splash of flax seed oil to boost the omega-3 content. Stir in a few tablespoons of fresh herbs, and make sure to include a generous sprinkling of salt and black pepper. Transfer the dressing to a jar, and refrigerate it for up to two weeks. You now have a delicious dressing available whenever you want to enjoy a salad.
Next, pick a selection of delectable greens. Bins at your local greenmarket contain the most exciting varieties; but mesclun, arugula, and watercress are readily available in most grocery stores. Toss the greens with just enough dressing to coat, and place in your salad bowl. Now for the composed part: Top the greens with a serving of protein. The three examples in the video feature tinned crab, smoked mackerel, and lamb pastrami. Other delicious pantry staples or ready-to-use proteins include tinned sardines, salmon, tuna, smoked oysters, and shrimp. Cold proteins, such as poached fish, chicken, turkey, or beef from a previous meal can be used as well.
Since so many fine fresh vegetables are available in the summer, be sure to add a fresh raw vegetable or two. In the video, I show grated radishes and carrots, thinly sliced beets, sliced snow peas, shelled English peas, and whole sugar snap peas, which, when fresh, are delicious eaten raw. I recommend also including a fermented vegetable; not only are fermented vegetables refrigerator staples, but they lend a wonderful tangy flavor to the salad, and they make the proteins in the salad easy to digest.
Next, sprinkle over your salad a “fatty” component such as nuts, olives, or crumbled cheese. A little of these go a long way. The last essential ingredient—again, something that keeps well in the pantry—is some kind of a crunchy vegetable chip. There are so many tasty dehydrated vegetable chips on the market now: kale chips, onion chips, arugula chips, and dehydrated vegetable crackers, to name a few. A little mound adds a fun element to the salad. Mix and match and come up with all kinds of salad variations. I hope that you develop your own hot weather favorite combinations and that you turn out to be as excited about these salads as I am!
Share on Facebook and Twitter | Gluten Free, Lunch, Main course, techniques, Uncategorized | No comments
Food for Travel: Bento Box Meal 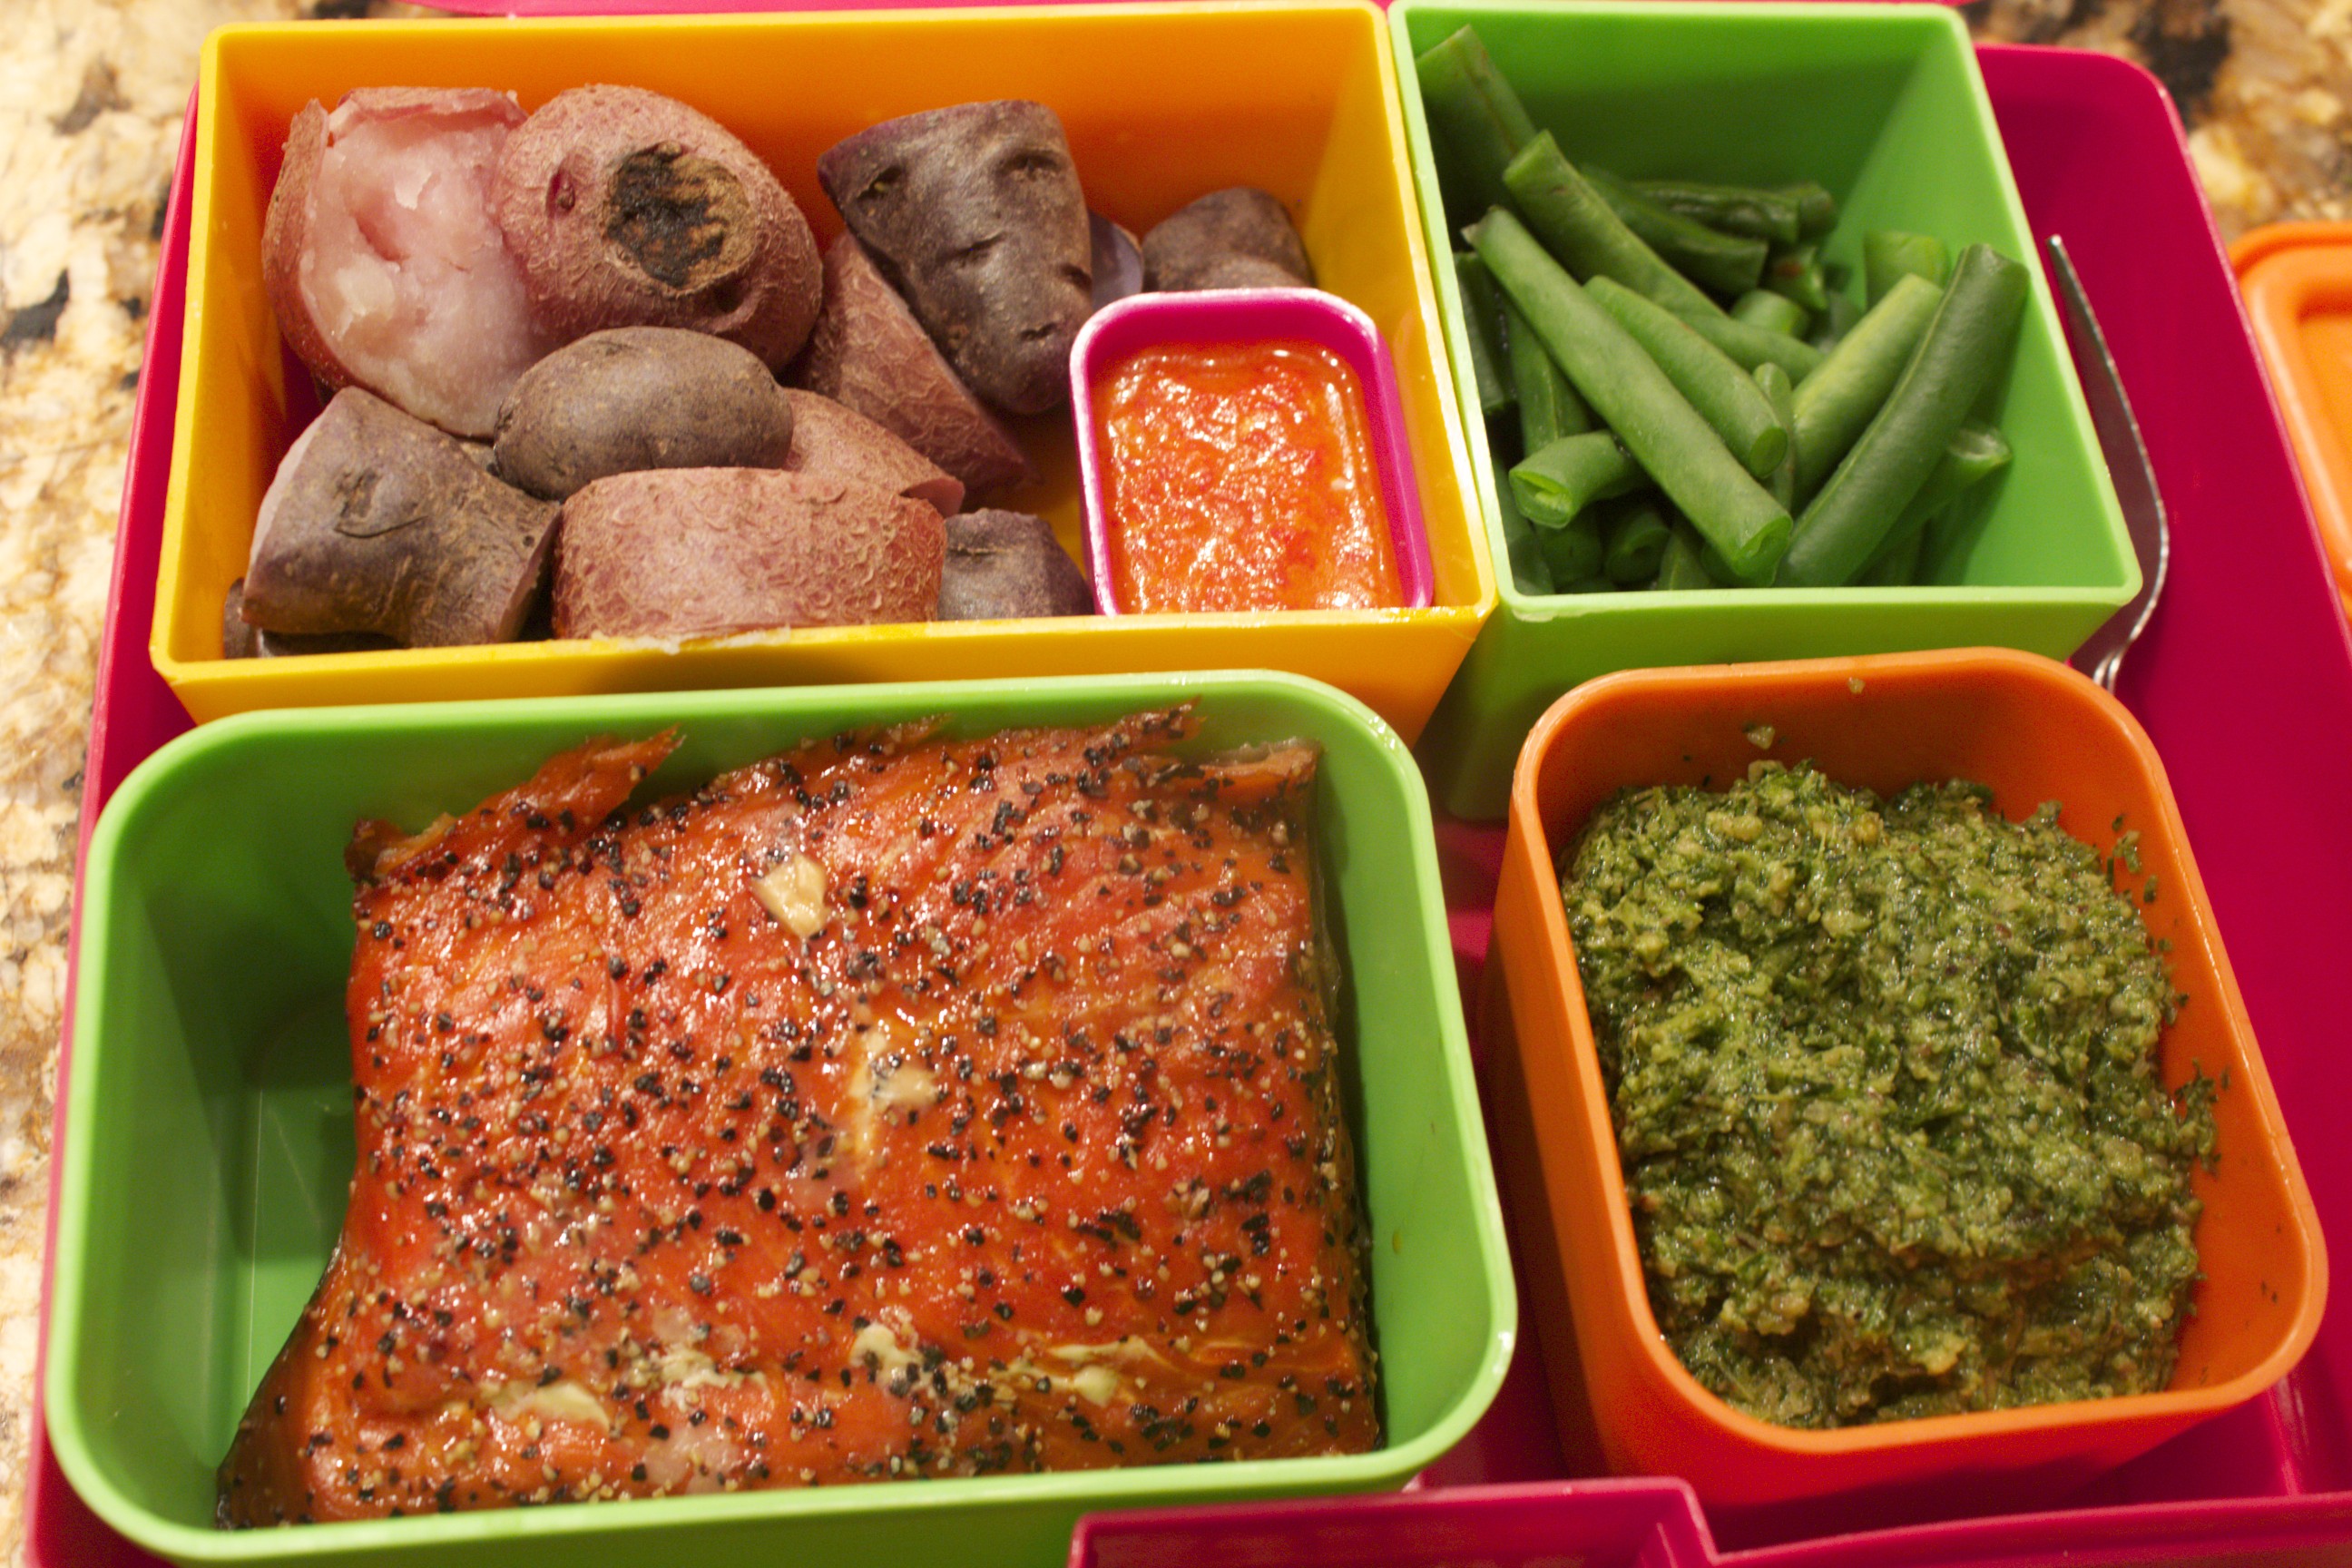 smoked salmon, purple potatoes, green beans, pesto, red pepper sauce Since I travel a lot, I’ve spent a considerable amount of time figuring out how to feed myself well in transit. In today’s video, I demonstrate a meal that is simple, nourishing, and travel-worthy. A bento box makes the ideal travel companion; it holds a single-sized meal in a compact container. Airplanes pose singular challenges. Because of the lack of moisture in the cabin and a flying altitude of 30,000 feet; a dry nose, a cottony mouth, and a subdued set of taste buds are common complaints. That is why, when it comes to packing some travel-worthy food, a little strategic planning is in order. I have developed specific criteria for a tidy bento box meal. The food I pack can’t be goopy or runny: I don’t want a drippy item spilling all over me when I’m in a passenger seat in which I can barely move. Every item also has to be hearty enough to hold up and stay fresh for hours at room temperature. Because of the inevitable last-minute rush before a trip, the meal must be easy to prepare. To minimize waste, I try to make use of the straggler herbs and leaves in my refrigerator. And importantly, I want my on-the-road or in-the-sky meal to be nourishing. In the video, I demo one favorite travel spread that fulfills all of my criteria, with room for variations. The meal is built around a thick slab of smoked salmon, which I keep stored in my freezer. Next come the vegetables: one starchy and one not. I simply blanch the vegetables in salted water until tender; it’s a good method for keeping the vegetables fresh for long periods of time. One of my current favorites is the purple potato, a hearty, antioxidant-rich, colorful vegetable. In the video I use green beans as my second vegetable, but I sometimes substitute sugar snap peas, asparagus, broccoli, cauliflower, and carrots, all robust travelers. The condiments keep the meal lively. To use up perishables left in my refrigerator and to jazz up the simple vegetables and salmon, I typically make a dairy-free pesto. The pesto I demonstrate includes 2 cups of a combination of parsley, dill, scallions, and sorrel to which I add ¾ cup walnuts. Most varieties of nuts and seeds make zesty pestos, so again, I use what I have around. I then add 1 teaspoon of light-colored miso, ½ teaspoon salt, a couple tablespoons lemon juice and 1/3 cup extra virgin olive oil. I give the whole mix a whirl until smooth. Not only do I have a zesty topping for the fish and vegetables, I have extra pesto to freeze. The other condiment demoed here is a roasted red pepper sauce. Taking only a few minutes to whirl together, it tastes delicious on both the vegetables and the salmon; it also is a good fit for the teeny compartment in the bento box. I blend together ½ cup of jarred roasted peppers (in the video I use the flavorful piquillo), 1 clove garlic, ½ teaspoon salt, 1 tablespoon vinegar (apple cider, sherry, or red wine), and ¼ cup extra virgin olive oil. Half a teaspoon honey balances the flavors perfectly. This zingy red dressing lasts refrigerated for over a week. Either one of the sauces is all you need to add spark to the meal, but the two together are exponentially delectable. When you pack a meal as satisfying as this one, traveling becomes a lot more enjoyable. Share on Facebook and Twitter | Uncategorized | No comments
Home Made Nut Butters 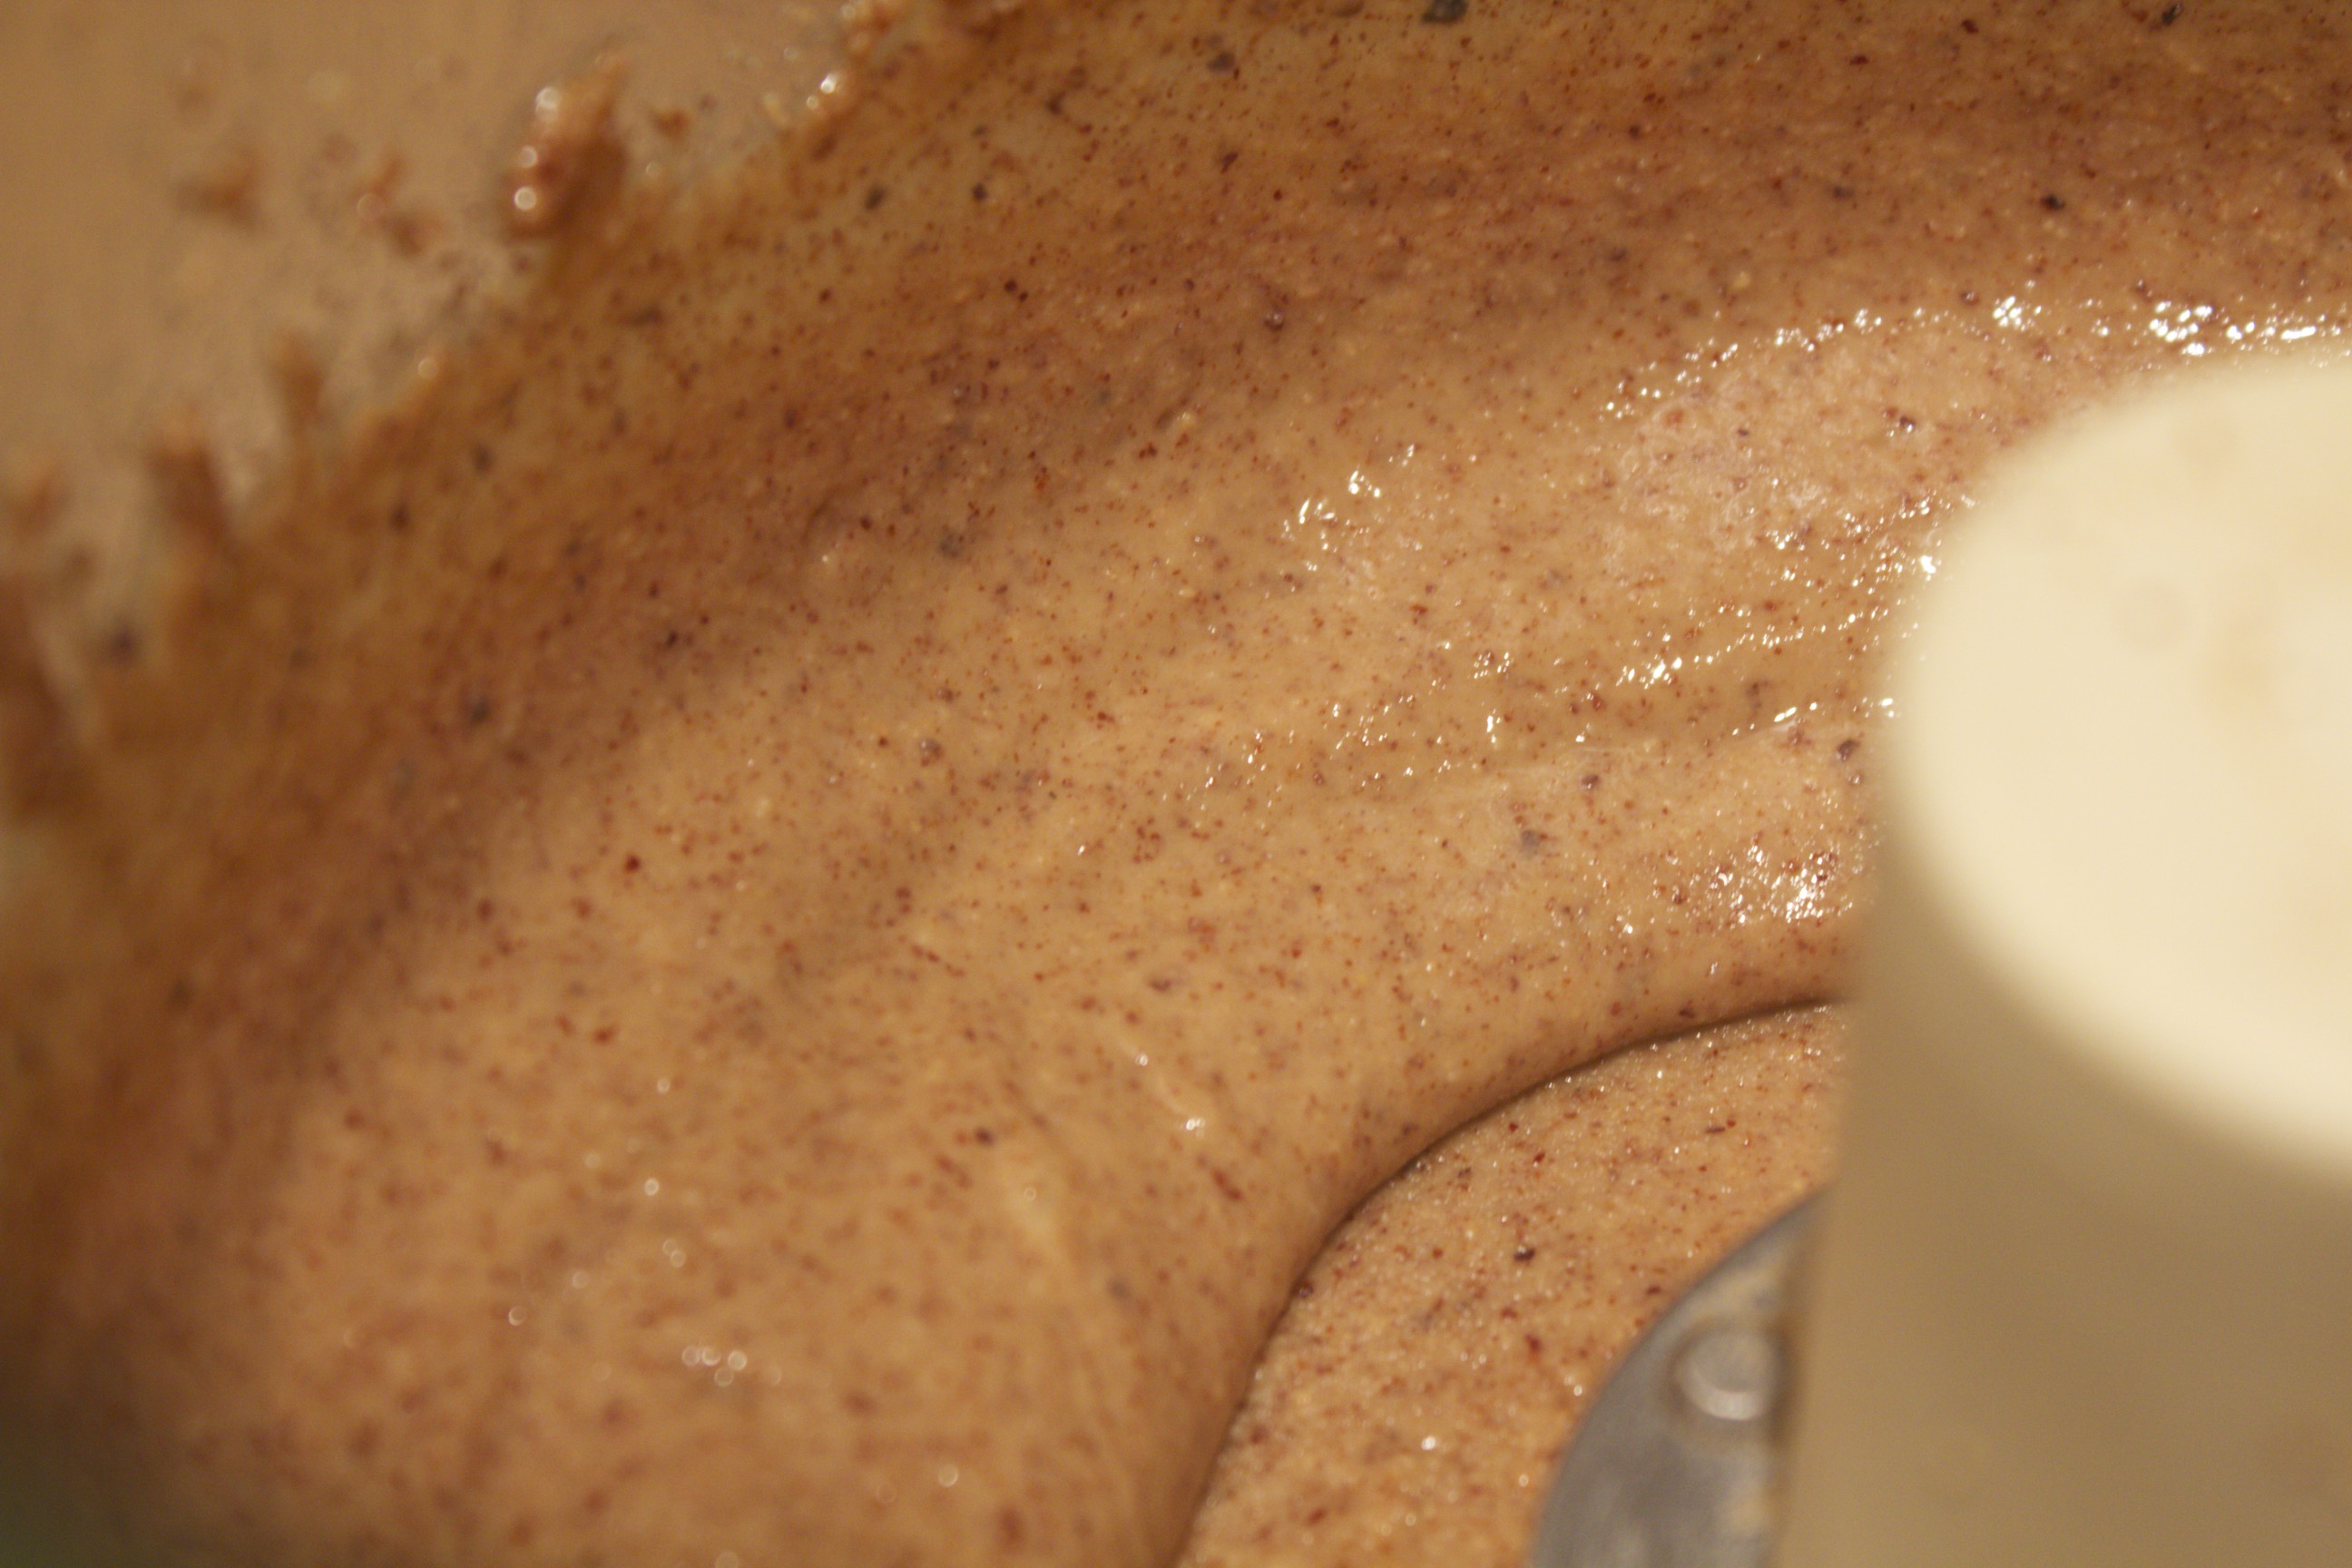 Finished Almond Butter In today’s video, I show how to make nut butters from scratch. Not only is homemade nut butter more delicious and economical than the store-bought variety, it’s a lot more digestible. After you do a small amount of preparation, it’s also quite simple to make. Nuts contain an enzyme inhibitor called phytic acid, which keeps them protected from rancidity and growth. They won’t germinate until the right conditions—moisture and time— are present. You can mimic nature’s process by soaking the nuts overnight in water with a little salt (a tablespoon per pound) for flavor. The next step is to drain and rinse the nuts before spreading them on a parchment-covered baking tray. Bake them in an oven set to 300 degrees for about an hour or so— until dry and toasted —to make nut butter that tastes roasted. You can also dry the nuts slowly at low heat, ranging from 115˚ in a dehydrator to 200˚ in an oven. Just make sure that whatever the heat that you use (the lower the temperature, the longer the nuts take to crisp), you don’t remove the nuts until they are really dry. At this point, you can store the prepared nuts at room temperature for up to a month. In today’s video, I’m starting with 3 cups of almonds, about a pound, which turns into 2 cups of butter. The one piece of equipment needed to make nut butter is a food processor fitted with the metal blade. There’s also one essential little trick: rub the inside of the food processor with oil—coconut oil is especially good—which keeps the butter from sticking to the sides. Add the nuts and whirl, and keep processing until you have what you want. That’s all there is to it. In the first stage, the nuts turn to powder. After a couple of minutes of whirling, the nuts start to stick together and clump. At this point, you’ll be able to appreciate how that preliminary greasing keeps the nuts from sticking to the sides. Don’t stop at this first stage; you’ll have better results if you let the processor go longer. After 6 to 12 minutes, the natural oils in the almonds are released and rise to the top; and you have a creamy, smooth, finished butter. Transfer the finished product to jars, and store in the refrigerator. In the video, the almond butter took only 6 minutes, but sometimes it does take longer: be patient, and keep on whirling. The cashew butter I demo in the video took 9 minutes of processing. Cashews, by the way, should be soaked only 4 to 6 hours or else their texture can be compromised. Almonds, hazelnuts, pecans, and walnuts benefit from an overnight soak. I’ve kept the nut butters here simple, but if you like you can stir or pulse in all kinds of flavorings once the butter is finished: salt, raisins, honey, or preserves are just a few ideas. Embellished or simple, the glistening spreads are truly irresistible, and they really do feel lighter on the belly than any store-bought varieties. Once you make your own, you’re likely to be as excited about these as I am, and you’re not likely to want to return to commercial selections. Share on Facebook and Twitter | nuts and seeds, techniques | No comments
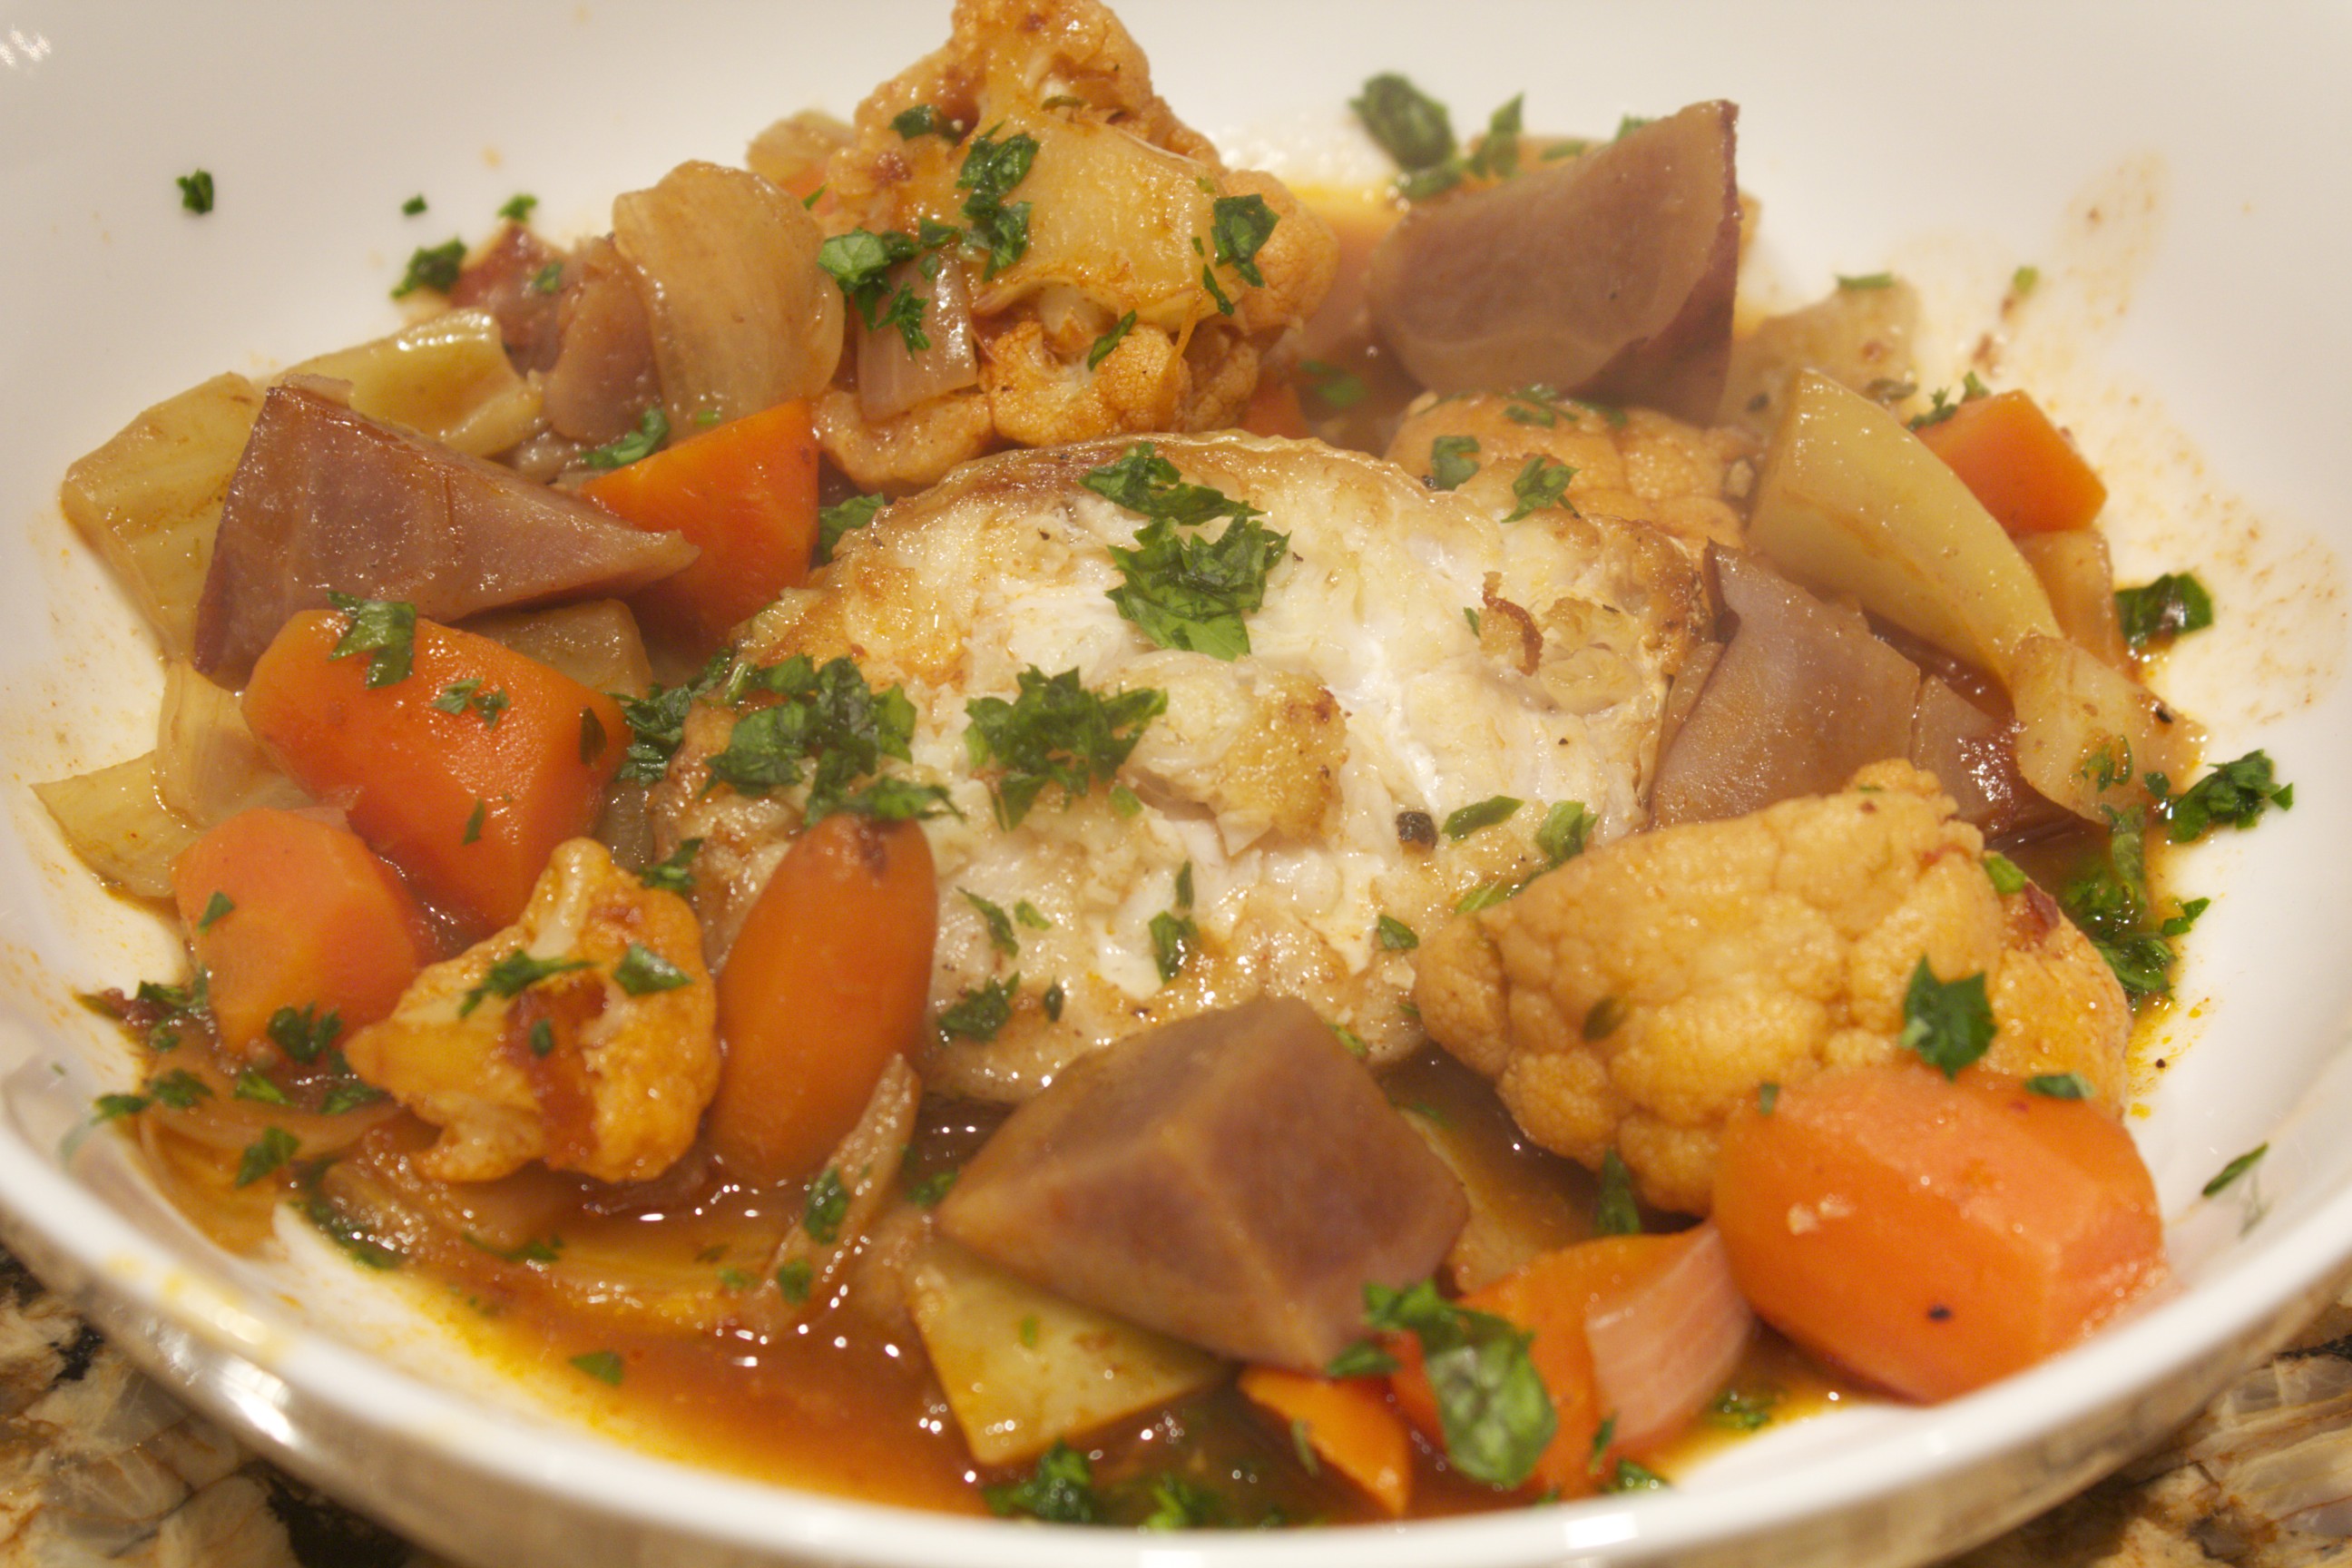
Dinner: Braised Tile Fish Steaks I went to the greenmarket the other day in search of a thick piece of fish which I wished fervently to braise in chicken or beef stock. I couldn’t get the braising bug out of my head since recently reading the Mark Bittman NY times article on that very subject. I was even prepared to purchase a whole fish, fillet it, and keep the carcass frozen until I had two or three, and I could make a broth. What I came home with was a whole tile fish because it just looked too fresh and delectable to pass up. The fishmonger insisted that I cut the flesh into steaks, which sideswiped my plans for a tidy carcass, but I still had the head, tail, and some flesh leftover.  tile fish steaks
I ended up cutting four thick steaks. I first salted and peppered the pieces and seared them for five minutes per side in a large skillet using aroma-free coconut oil as the fat. I then set aside the steaks while sweating in the same skillet –for 10 minutes or so–a bunch of vegetables: onions, fennel, purple potatoes, carrots, and cauliflower. I stirred in some saffron, smoked paprika, and a tad tomato paste before adding a few cups of rich chicken bone broth. The liquid reduced for 10 minutes; then I returned the fish to the pan and covered it. The fish braised until cooked through, about 15 minutes–the vegetables were perfectly tender by that time as well. I served the dish in a shallow bowl so that each bite could be draped in the silky sauce. The side was garlicky sautéed spinach. It turned out to be a quick, delicious meal.
Share on Facebook and Twitter | Dinner, Fish, Main course | No comments
Homemade Nut Milk In today’s video, I show just how easy it is to make your own nut milks. Homemade versions are not only fresher than the store-bought (which contain synthetic vitamins, thickeners, and sweeteners): they are also healthier and more flavorful. You can use these versatile beverages as a base for smoothies, hot chocolate, or cereal, or as an alternative to dairy in your baked goods. Or, add a touch of natural sweetener and a dash of spice to make a simple nut-milk drink. The basic prep technique is the same for most nuts. Step one is to soak the nuts. Almonds require a good overnight soak; it’s even okay to let them go for as long as 12 hours. The reason for the soak is as follows: nuts and seeds are naturally adapted to lie dormant in nature until proper sprouting conditions are present. When it rains, nuts and seeds get wet; then they germinate, and the plants grow. When we soak the almonds, we are mimicking nature’s incubating process. When there is moisture, enzyme inhibitors and toxic substances called phytic acid are washed away naturally. In other words, phytic acid is nature’s padlock, and water is the key. Once the nuts are soaked, all of the enzymes & minerals available in them—almonds have phosphorous, magnesium, manganese, & copper—become available to the body. These soaked nuts become swollen and soft so that they blend easily into a rich nut milk, and they are noticeably easy to digest. Next you rinse and drain the nuts. If you’re not ready to make nut milk right away, leave the drained nuts refrigerated for up to 3 days. When ready, blend them with fresh water at a ratio of 3 parts water to 1 part nuts. A high-speed blender, such as a Vitamix, is convenient for whizzing the nuts into a foamy beverage in a blink; other blenders take a couple of minutes. The last step is to squeeze the frothy liquid through a nylon mesh nut bag, which you can conveniently use over and over again, or a double layer of cheesecloth draped over a strainer. The leftover pulp has all the flavor squeezed out of it; you can simply compost or discard it. Cashew milk is different from the typical nut milk. Cashews blend up so pulverized that the particles squeeze through the fine mesh of the bag, so don’t bother to strain them! Do add an extra cup water for a 4 to 1 ratio of water to cashews; this way your milk won’t be too heavy or too thick. In the last part of the video, I demo a speedy hot chocolate made with only two other ingredients besides the cashew milk. I stir a tablespoon of cocoa powder and 2 tablespoons maple syrup in the bottom of a small pot until bubbling; then I add a couple cups of nut milk and let the liquid come to a boil. That’s it: soothing and delectable, and just one of the many luscious comestibles that you can concoct with homemade nut milk.
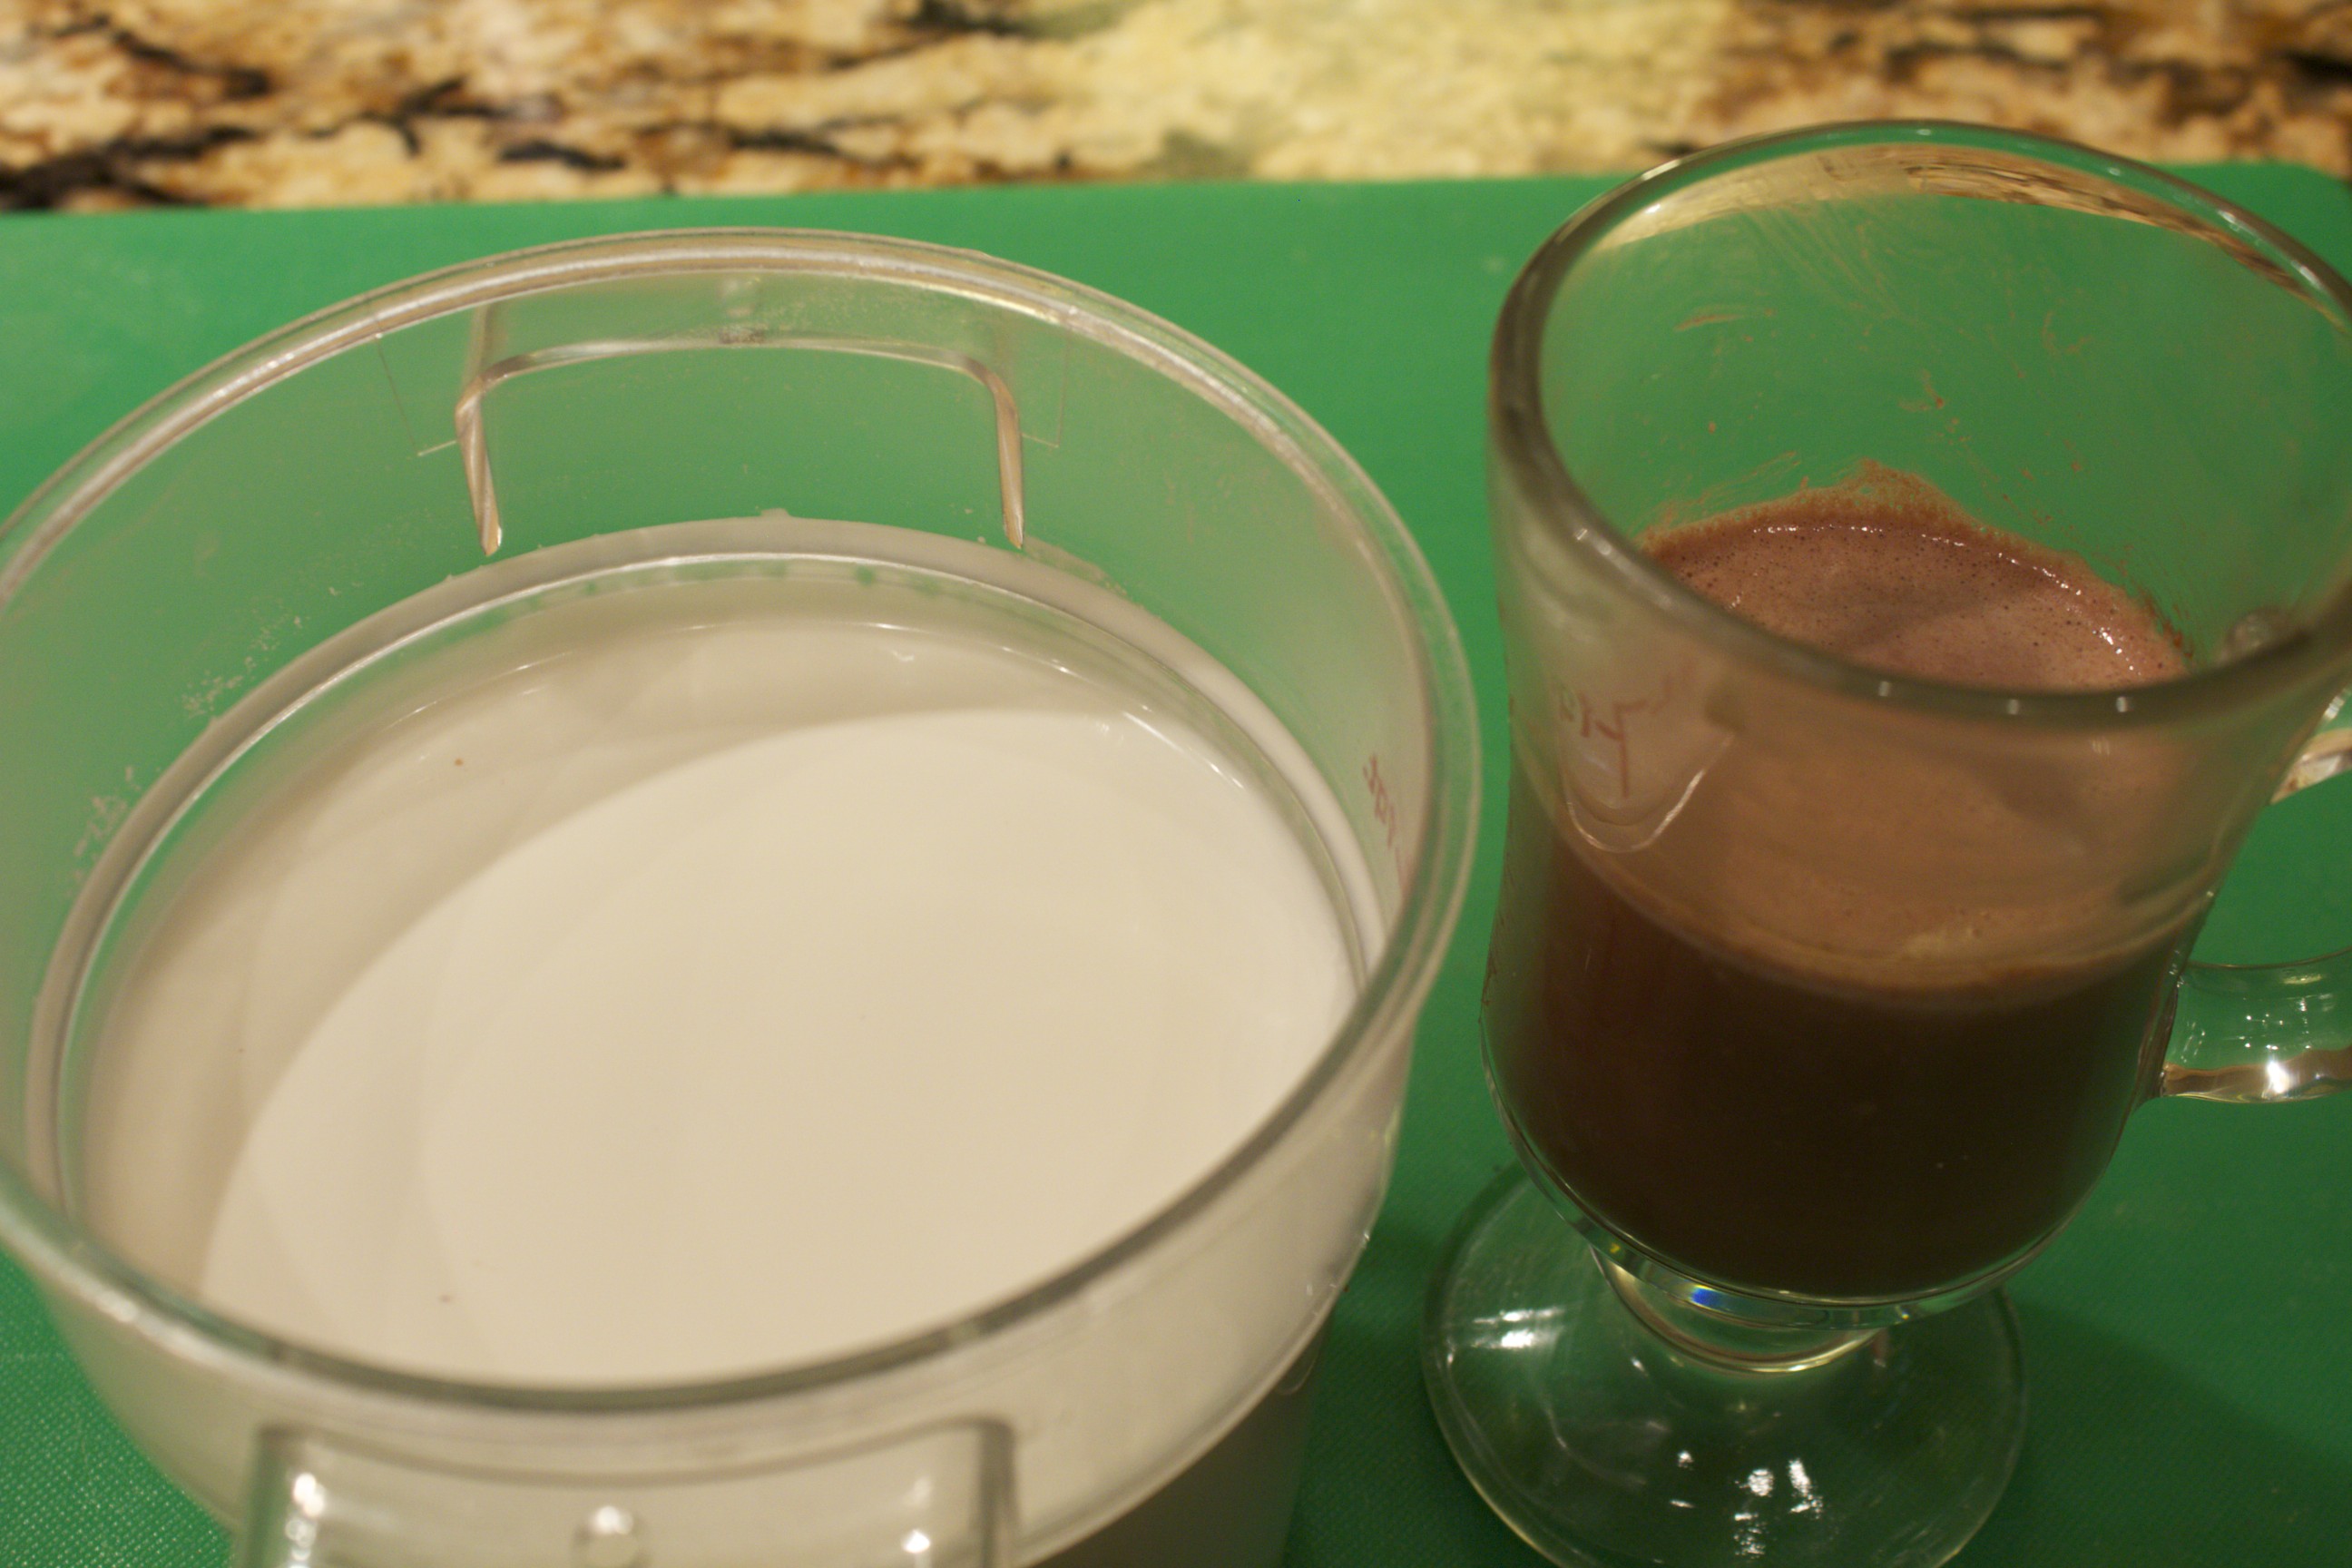 Cashew Milk and Hot Chocolate Share on Facebook and Twitter | Beverages, Chocolate, Gluten Free, Kitchen Tips, Natural Sweeteners, nuts and seeds, Snacks, techniques | No comments
Lacto-fermented Sauerkraut In today’s video, I show how to make traditional sauerkraut, one of the popular dishes that Eastern Europeans of yore would put up in storage in November so that they could have vegetables that would last the entire winter. Cabbage is especially amenable to culturing. While giving it a delightfully tangy flavor, the time-honored fermentation process turns pedestrian cabbage into an uber-raw natural probiotic. Lactobacilli are delightful microorganisms already present on the leaves and roots of plants. With a little encouragement, they convert the starches and sugars in the leaves to lactic acid—thus the term “lacto-fermentation.” Salt initiates the process; it inhibits the growth of undesirable bacteria long enough for the lactic acid to start forming. Enzymes break down the cabbage into more digestible molecules, and the lactic acid preserves it by eliminating unwanted organisms and increases the level of Vitamin C. In the end, “predigested” fermented cabbage also promotes the growth of healthy flora throughout the intestines, making harder-to-digest foods much more digestible. Here’s how you make the ferment: In the video I demonstrate the process with a medium head of green cabbage, shredded finely; you should have 10 cups or so. Stir in a couple of grated carrots and four teaspoons salt, a good amount for a quart-worth of packed kraut. Use a good quality unadulterated salt that has trace minerals, such as celtic sea salt. To help get the juices of the cabbage flowing, massage the cabbage with your hands; get in there and squeeze hard. You can also pound the cabbage with a mallet to help it start to sweat. Once you have a lot of shiny, juicy cabbage in the bowl, stir in the other ingredients. In today’s ferment, I’m adding a tablespoon each of minced ginger and garlic, about ½ cup of sliced scallions, and a minced red Fresno chile, a mild and colorful chile which I found at my local grocer. 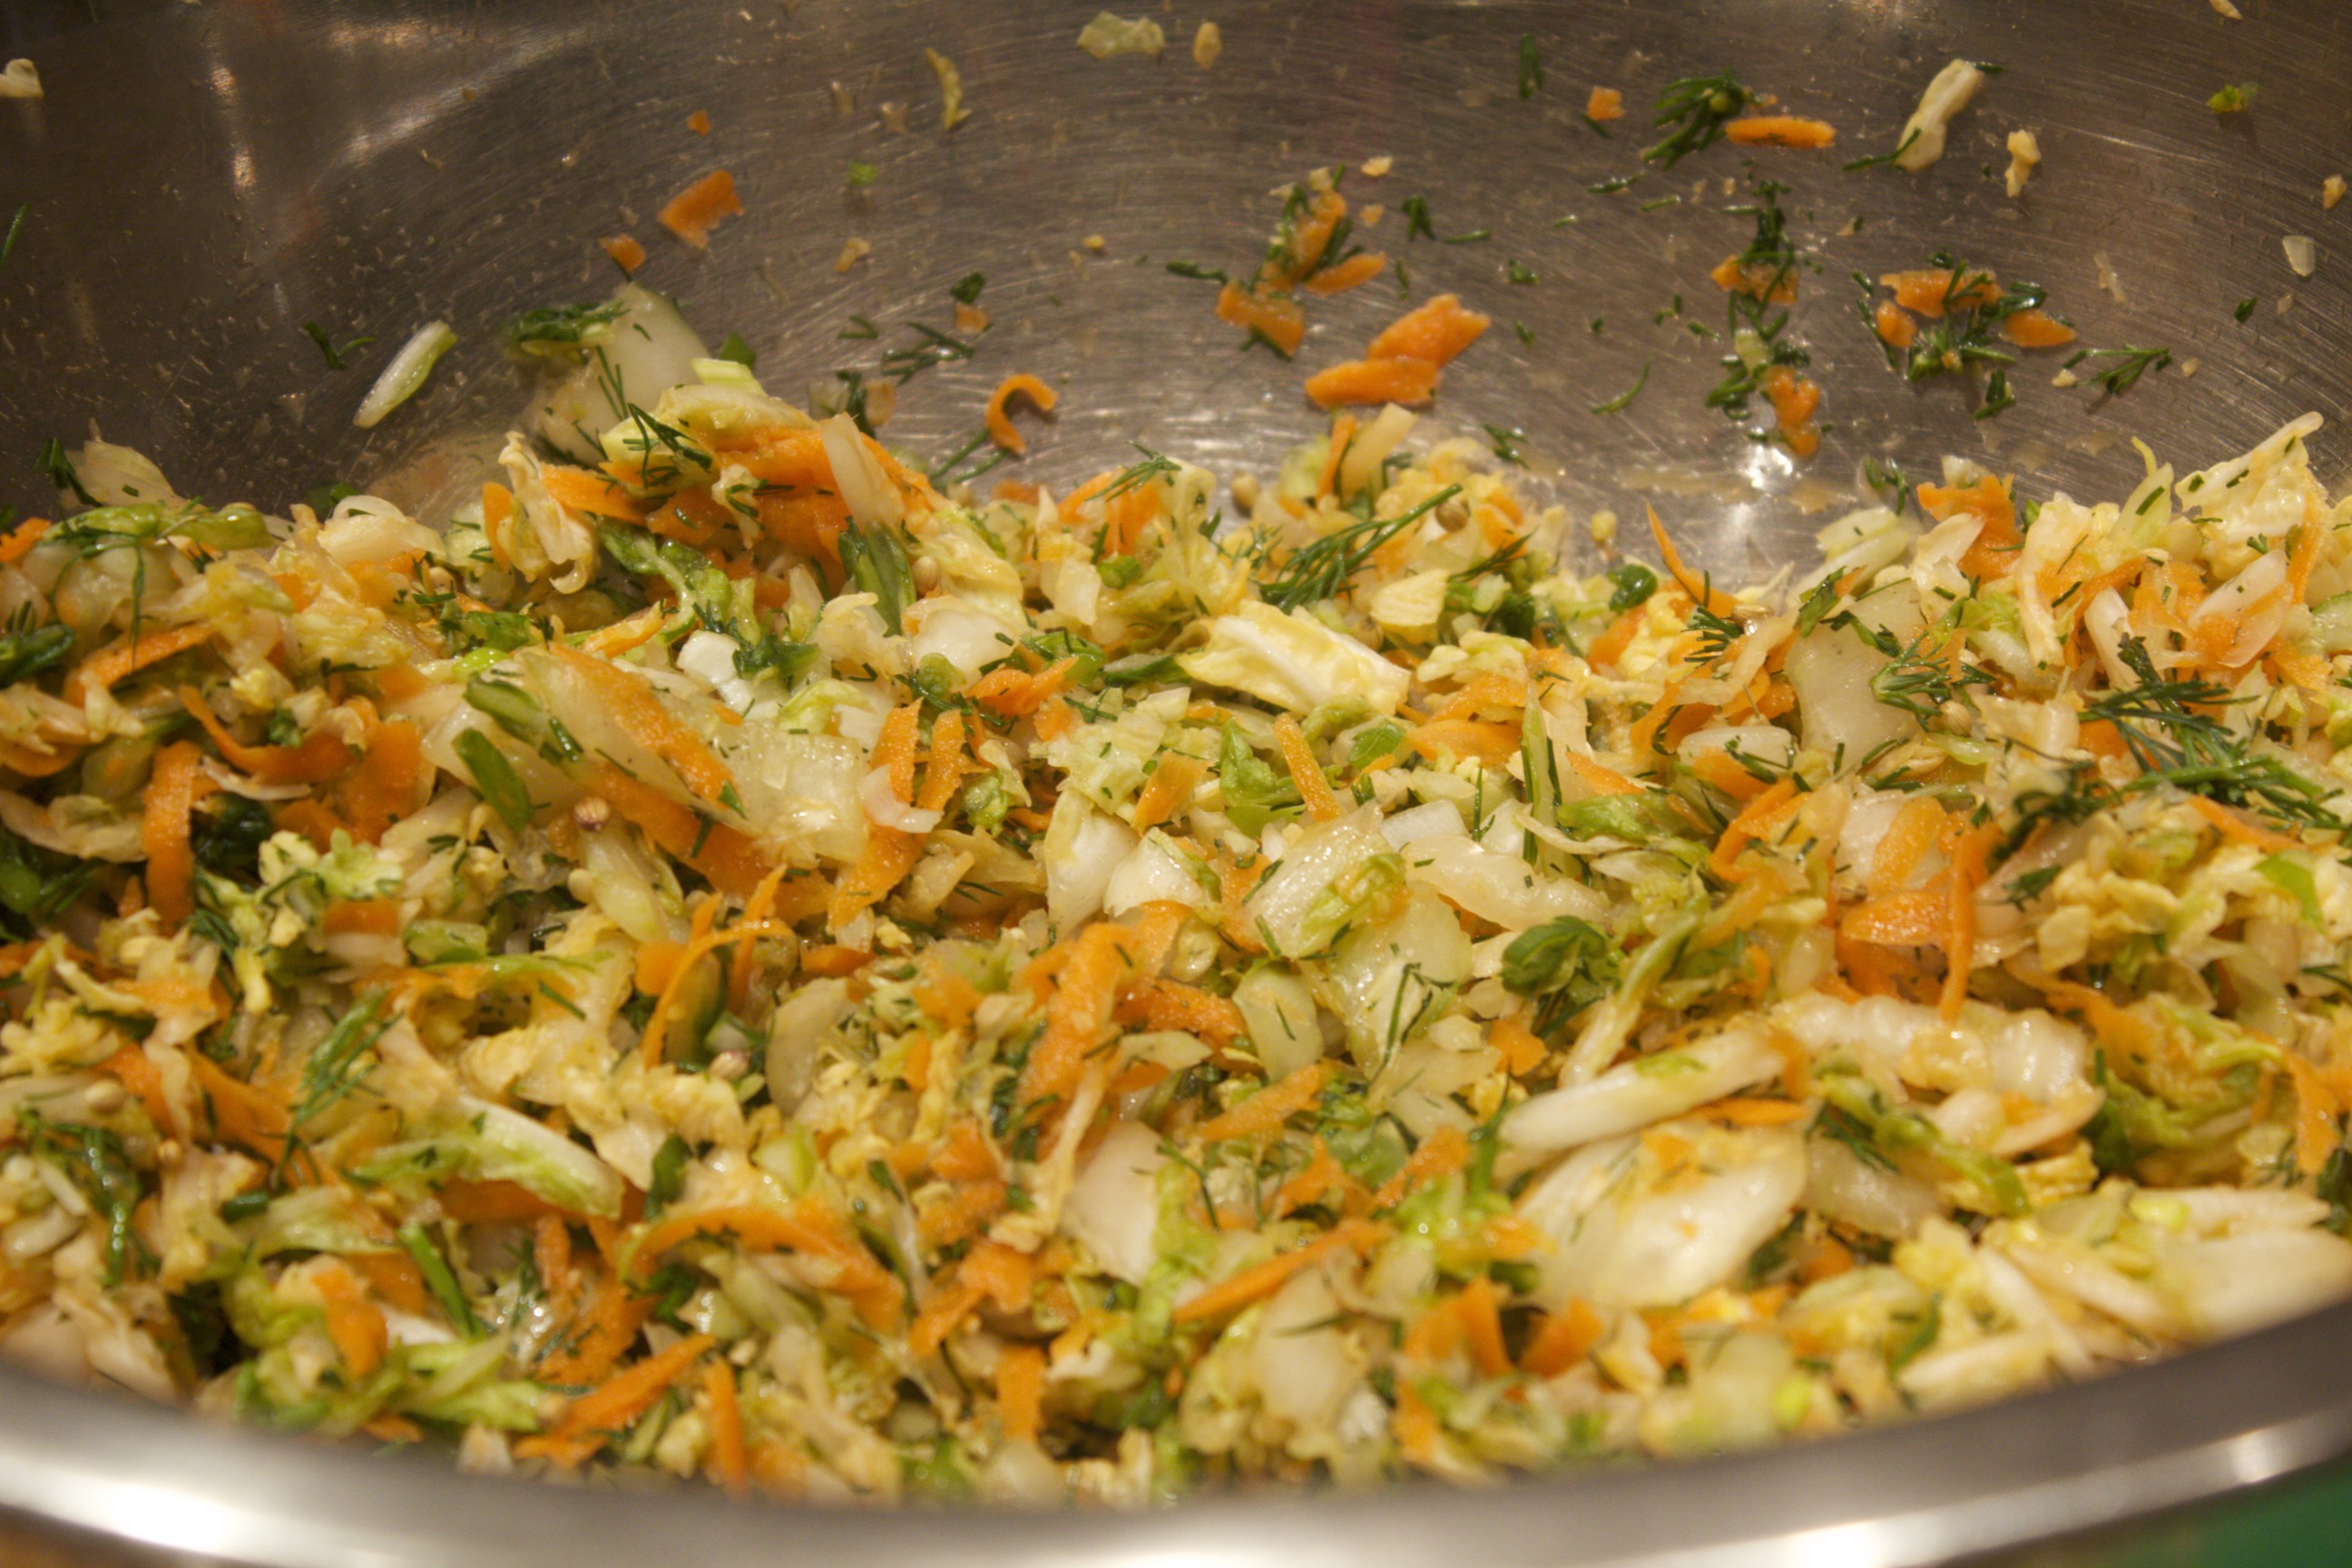 Cabbage ready to be packed Stuff the juicy cabbage mixture into a 1-quart bell jar, pressing down hard to make sure that there is liquid floating on the top. (A blunt, wooden, club-like instrument called a “kraut-pounder” is quite helpful for pressing down the vegetables, but you can improvise with the end of a tapered rolling pin as well.) Leave a generous inch of space at the top of the jar in order to prevent liquid from seeping out the top.  Make sure liquid covers the top. Let your imagination reign when it comes to the variations. Start with a base of cabbage: red, savoy, or nappa. I’ve enjoyed all kinds of additions to my slaws, including onions, fennel, daikon, fennel seed, juniper berries, chiles, and curry powder (but not all in the same slaw, of course). Leave the ferment on the counter from 5 days to 2 weeks. The insert in the middle of the bell jar will be hard to press down once the ferment really gets going. Start tasting the kraut at that point. It will be fermented after a few days; but, if you can leave the kraut for the full two weeks, you’ll have a tangier, richer flavor. (After tasting, make sure that the cabbage is still tightly packed and submerged in liquid.) Transfer the jar to the refrigerator; it’s ready to eat, but it tastes even better if you can leave it for a couple of additional weeks before opening. Once opened, the ferment stays fresh at least a good three months refrigerated. Start off slow; a few tablespoons added to your meals is sufficient. You can increase the amount as your belly becomes acclimated to all the additional probiotic flora. It’s deeply satisfying to make your own krauts; you might just find yourself with a refrigerator full of delicious varieties.
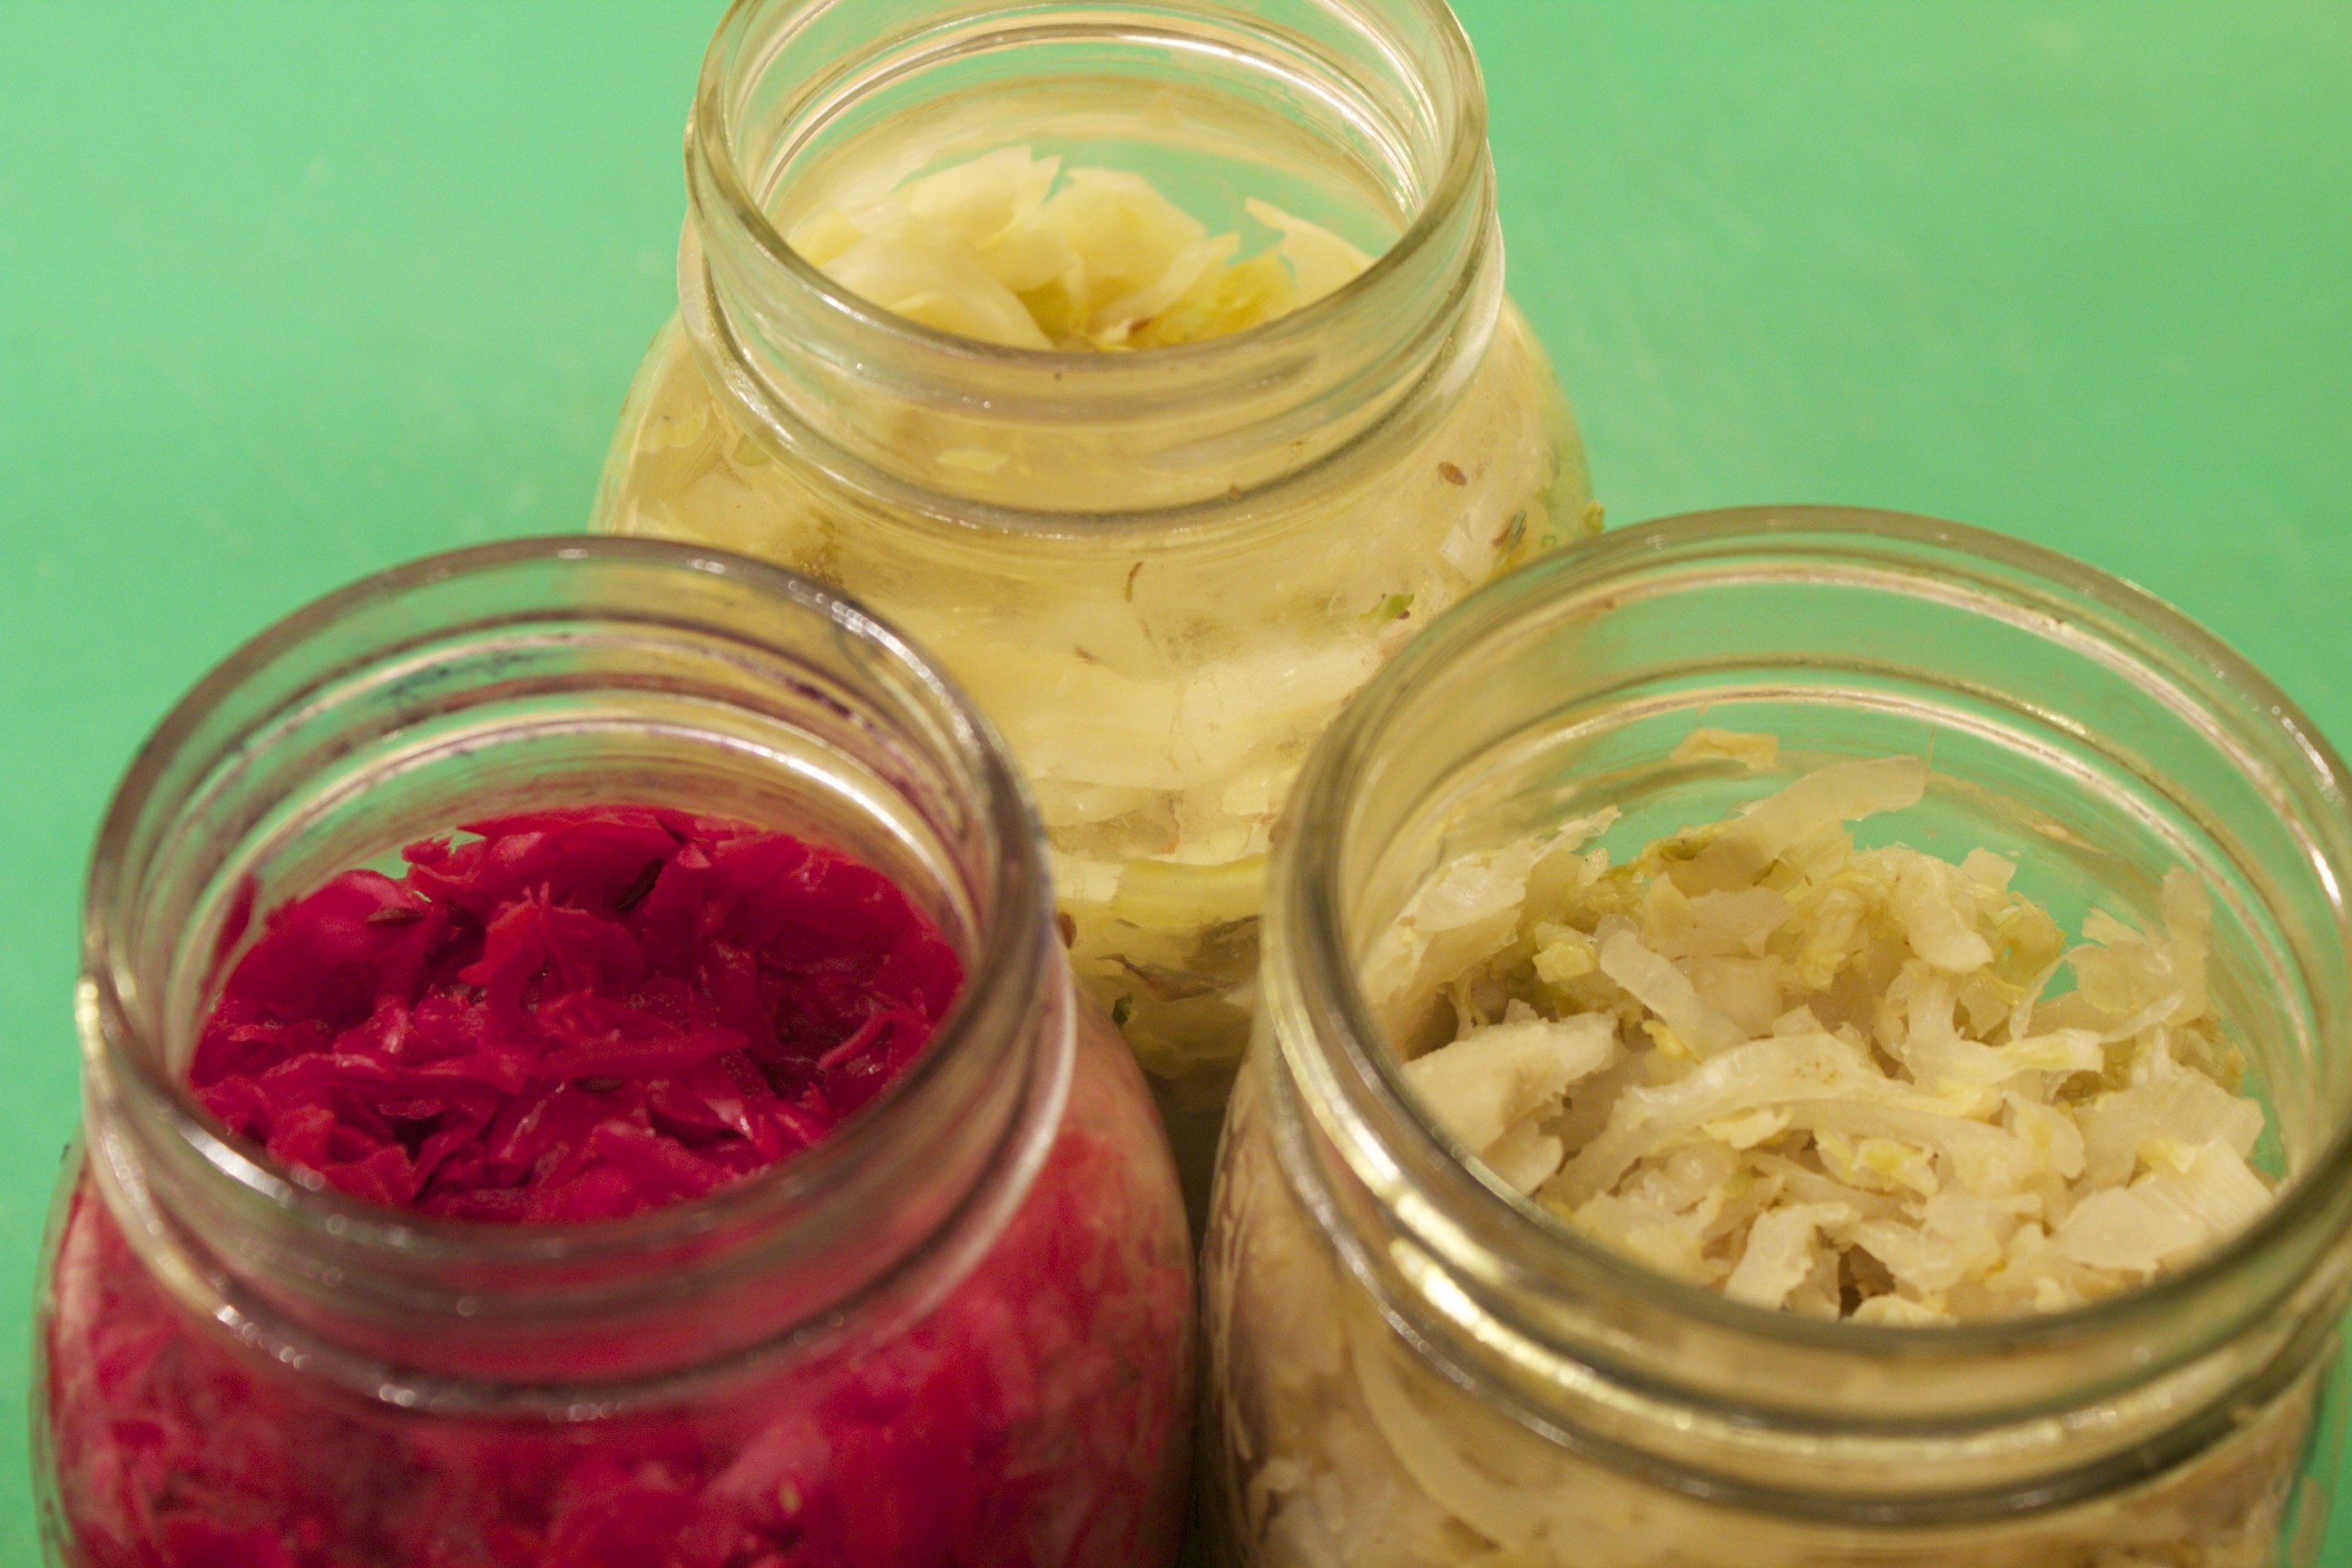 Finished lacto-ferments
Share on Facebook and Twitter | condiments, Health Tips, Kitchen Tips, Side Dishes, Vegetables | No comments
Chicken Bone Broth In the video presented here, I show how to make a nutrient-dense bone broth. There’s a South American proverb that goes “good broth will resurrect the dead.” If only that were true. What is true is that slow-cooked stocks that are made from bones aid in healing the chronically compromised as well as in keeping the healthy robust. What’s more, good broths—something which every chef knows—are the basis for delicious soups and sauces. What distinguishes a nutrient-dense broth from a mediocre stock is the gelatin. Gelatin is what is found in the joints of animal bones. A word first about Dr. Weston A. Price, author of the tome Nutrition and Physical Degeneration. Price was a Cleveland dentist who, in the 1920’s and 30’s, traveled the world to find existing cultures that had not yet been exposed to the processed foods of Western civilization. Over the course of ten years, he visited a dozen isolated healthy peoples around the world. Without fail, all of the people with these isolated food traditions not only had robust health, but straight gorgeous teeth without dental decay—and none of the societies had modern dentistry. Price meticulously recorded his findings and observed that, although each culture’s diet varied tremendously, they had in common ten times higher levels of fat soluble vitamins and four times higher level of minerals than those of the mainstream American diet. All of the peoples he visited consumed soups or stews based on bone broths made from fish, fowl, or meat. In the video shown here, I focus on chicken broth. There are so many ways to make chicken broth; the method can be varied every time, depending on what you have around. I generally use about five pounds of bones. These invariably include a raw carcass, a few feet, a few necks, and any backs or cooked carcasses that I have around. I’ve made chicken bone broth from several raw carcasses or from just necks and feet as well. Chicken feet are perhaps the most important, underrated element in a great broth. Even using two can add so much gelatin to your brew. If you use a bagful, your chilled stock will be so gelatinous that you can stand a spoon straight up in it! Place all of the bones in a tall stockpot and cover them with water. Then add two tablespoons of apple cider vinegar to draw out the minerals. Let the stock sit for half an hour before turning on the flame. You can add an onion, a couple of carrots and celery if you like, but it’s not necessary. The next step is to bring the stock up to a boil. At that point you have to spend a few minutes skimming the scum that rises to the surface. You really do want to get rid of the scum, since it will compromise and muddy your stock. Next, lower the heat until there is barely any movement on the surface of the liquid; let the stock cook anywhere from six to twenty four hours. You can turn off the stock at any point if you need to go out. You can leave it untouched for up to nine hours at a stretch. When you start the broth again, simply bring the liquid to a boil again, skim off the scum, lower the heat, and let it roll. When you’ve cooked the broth for as long as you like, strain the liquid through a sieve, then transfer it to containers. I favor one-quart heavy-duty food-grade plastic. Next, chill the stock, and scrape off the fat that has risen to the top. Notice how wobbly and gelatinous your stock is after it’s been chilled. Now you can keep the stock refrigerated for up to five days, or longer if you reboil it; or, you can freeze it for months, keeping it ready to turn quickly into a delicious dish whenever you like. The gelatin in meat broths has the unusual property of attracting liquid (the term is hydrophilic) even after it has been heated. Gelatin acts as an aid to digestion. Furthermore, it acts as a protein sparer, allowing the body to more fully utilize complete proteins that are ingested. It is useful in the treatment of many chronic disorders, including but not restricted to anemia, diabetes, hyperacidity, colitis, and Crohn’s. Again, to emphasize: in order to make a stock truly nutrient-dense, it’s important to use some joint bones along with some of the other bones that provide minerals. Truly, bone broth is one of the mainstays of my kitchen—a real life saver. Share on Facebook and Twitter | Health Tips, Kitchen Tips, Soups, techniques | No comments
Lemon-Garlic Roasted Cauliflower with Fennel and Gremolata The January issue of Organic Gardening made it to the newsstands on January 1st. The theme for the food central section was garlic; my recipe for this issue is a lemon-garlic roasted cauliflower with fennel and gremolata. Garlic plays two exciting roles in this vibrant winter dish. One whole head is separated into cloves and mellowed as it roasts with the cauliflower and fennel, and a clove of raw garlic in the gremolata adds an enlivening finishing touch. The lemon slices meld into the dish as they roast, contributing a burst of citrus. Make sure to zest the lemon for the gremolata before slicing it. 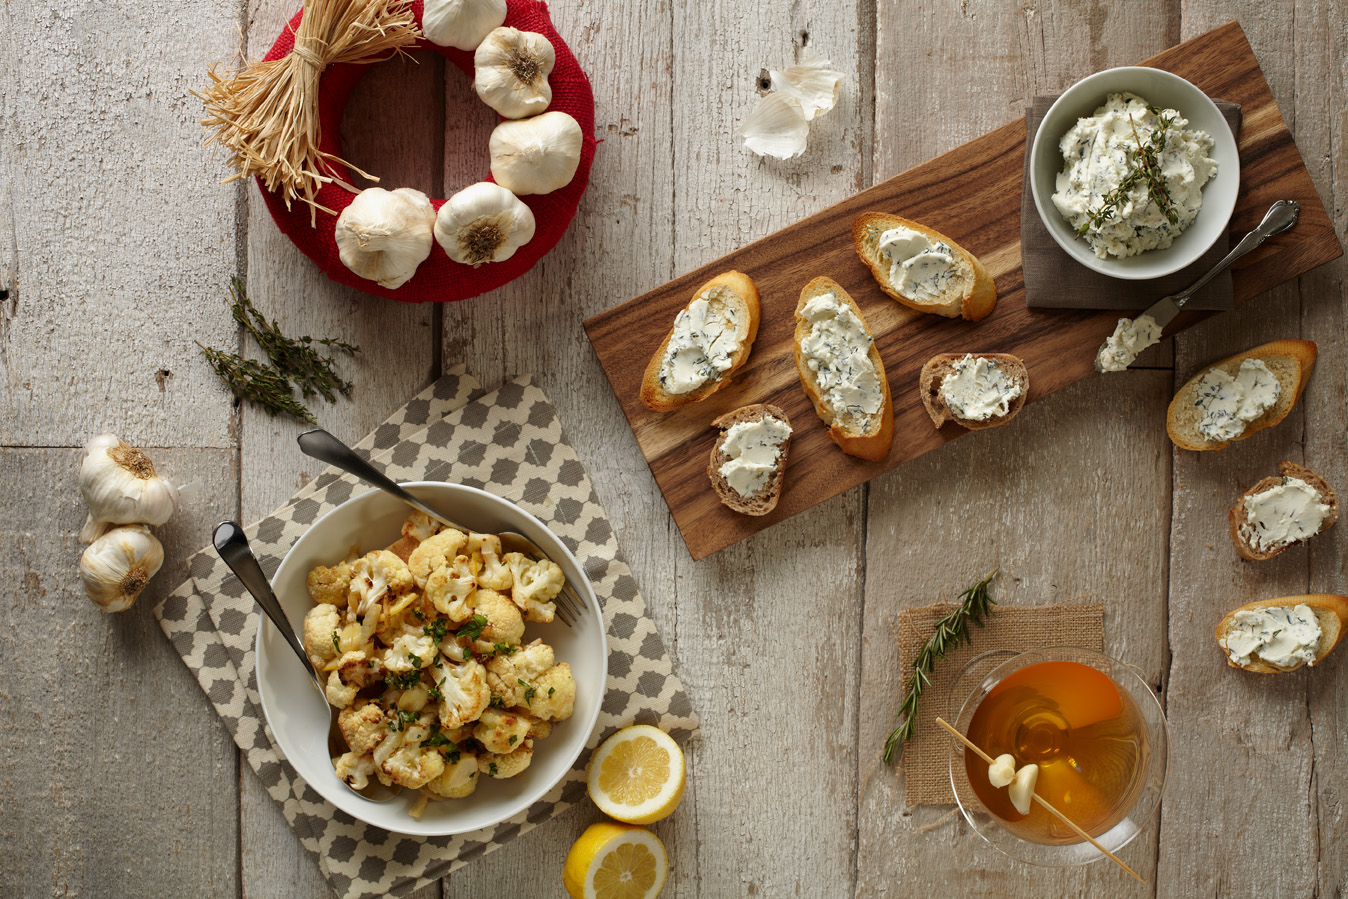 Foodcentral: garlic Lemon-Garlic Roasted Cauliflower with Fennel and Gremolata Serves 4 Gremolata: 1 teaspoon grated lemon zest 1 garlic clove, minced 2 tablespoons chopped flat leaf parsley Cauliflower: 1 lemon 1 medium head cauliflower, cut into medium florets 1 head garlic, cloves peeled and left whole 1 fennel bulb, cored and thinly sliced (2 cups sliced) ¼ cup extra virgin olive oil 1 ¼ teaspoons salt Freshly ground black pepper
Share on Facebook and Twitter | Side Dishes, Vegetables | No comments
|